Leaderboard


2.thumb.jpeg.8c7281e3346e77cfee8498663fa7050e.jpeg)
Popular Content
Showing content with the highest reputation on 11/21/20 in all areas
-
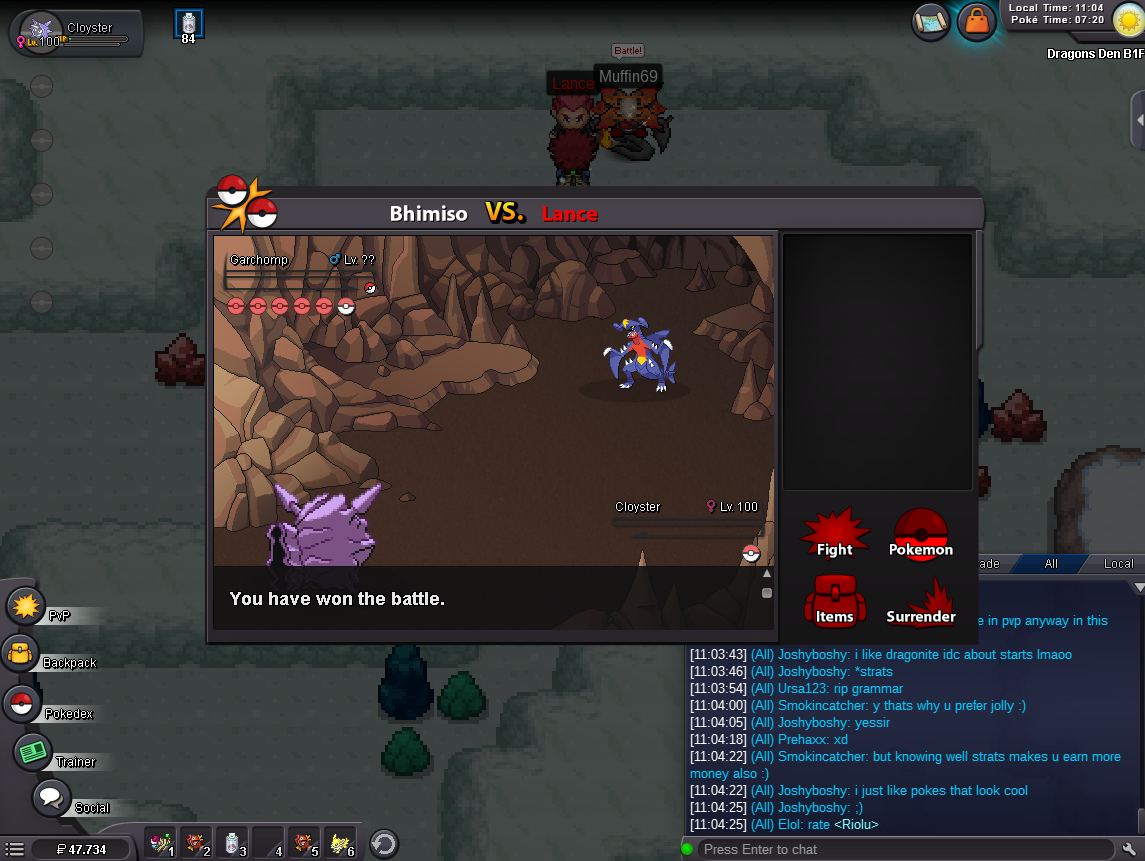
How to access Cerulean Cave easily for newbies: The Guide! Welcome, everyone! This guide came as an idea as everyone seems to spend their first two to three hundred hours exploring the game but don’t find out a way to unlock Cerulean Cave. A lot of people struggle with the requirements: Johto Elite 4 (which is actually pretty hard, considering Johto’s punishing level curve although it was recently fixed, beating the region without external help is pretty insane), 240 Pokemon caught (while realistically acheivable, it’s around a 4th of all Pokemon in existence. It’s a LOT of Pokemon to take into account), 200k Pokedollars (this is the main issue: most people have no idea how to make money and save it without buying something overpriced or being scammed in trade chat) and and a single level 100 (thanks to the newest discovery) We will also have to beat one of the hardest bosses for begginers: Lance, who seems to be fond of critical strikes, which won’t be an easy feat. Unless you use this guide, of course, which teaches you how to cheese it in less than two minutes! In this guide, we will explore, step by step, how to meet each requirement to unlock it. You will be surprised to know that we can unlock Cerulean Cave BEFORE we even visit Hoenn. While we will be somewhat restricted by the amount of catchable pokemon we can find, we will easily solve this with Headbutt, very common spawns and hunting some extra pokemon while we level up our team for the challenge. Obligatory and Unskippable Requirements: -Having beaten the Johto Elite 4 (thus, also having beaten Kanto’s Elite 4) -Paying 200k Pokedollars to purchase a Dragon Membership -Obtaining 240 caught data in your Pokedex for a Dragon Medallion. -Having a full team of level 100 to fight Lance. ^big note here, we are going to CHEESE this last requirement. Full team means that you only need ALL POKEMON IN YOUR PARTY to be level 100. Thus, WE CAN DO THE QUEST WITH ONLY 1 LEVEL 100. Recommended tools: -Macho Brace (to EV train our Lance Sweeper) -Surf Mount (completely optional, but keep in mind one member of your team will have to be level 100 and have learned the move Surf to get to Dragon’s Den. It is impossible to access Lance without Surf and you need 1 level 100s for the fight). -Smoke Ball (to EXP train your pokemon quickly, as this will allow you to escape from any wild pokemon fight you want to avoid and just fight specific pokemon to level up fast) -Membership/EXP Potion active (completely optional too, but it’s a pain to level up a pokemon to 100 otherwise). -Synchronise pokemon (to get the correct nature on the Boss Sweeper we need) -Focus Sashes (we will abuse them and they’re extremely cheap in trade chat. However, it’s not obligatory as we can abuse Dragonite’s low Hurricane chance to beat Lance anyway). -False Swipers / Memento + Leech Seed pokemon to be able to powerlevel your pokemon for the fight quickly (However, it’s not really needed, as long as you’re patient enough). -Rare Candies, Choice items (Can be obtained by recycling gems in the Forest Pit Item Recycler if you’re very lucky after you beat the Johto Elite 4), Life Orb (can be obtained in the Bug Catching Contest). These are used to powerlevel our pokemon faster. -Anything mentioned below, such as HM Slaves (specially for Dig and Headbutt), Tools (like Shovel, etc) and anything you’ll 100% need during your PRO stay (I hope it’s long!) Brightpowder: As a last minute extra addition, you can obtain it hidden in Goldenrod's Underground Basement. Equip this to Cloyster in the Lance Battle to make your Cloyster be more likely to win! Issues: We will first go over the main issues: Johto Elite 4 is the obligatory one we must tackle, which is pretty hard itself. We then will focus on hunting for a Synch, getting our Lance Sweeper (we will actually only need one pokemon for the fight!), hunting for another Synch and farming the required money for the battle, capturing wild pokemon and finally fighting Lance! This guild will assume you get NO external help outside of selling your items. Thus, no one will lend you money, a team, no dex services, nothing. You’re working by yourself now. You’re all alone in this MMO world! You CAN buy and get help from others but, what’s the point of this guide, then? First step: Beating the Johto Elite Four (and Kanto, if you’re somehow still there but you’re curious about how to get Cerulean Cave unlocked) The Johto Elite Four is the painful part in my opinion. It’s not very easy and it’s uncomfortable at best to fight. A single missclick, a single pokemon living with a sliver of HP can already mean you’ve already lost the fight. We will try to go over this quickly: We need Gengar, and some support from your team. If possible, you need Gengar, Mamoswine (this can also be used in Lance as a Support tool) and a Fighting, Bug or Fairy type. These can be filled by Machamp, Clefable and any bug type that you’d like. This is due to the fact that Gengar can pretty much obliterate the first three Elite Four members alone (except for Koga’s Skuntank, but that’s dealt with by Mamoswine), but struggles extremely hard against Karen (I’d like to speak to the manager!) who is a Dark Type trainer. Lance is just fine for him, but we’d rather support him with Mamoswine, who will defeat Lance with a single hit as Ice types completely steamroll through his team. Gengar’s Shadow Ball (level up move) will obliterate the first Johto E4 member, Psychic (Saffron Gym TM, purchasable) obliterates Koga and Bruno. Mamoswine will have to assist against Koga’s Skuntank and against Karen, as Gengar is weak to Dark. Lance will be a mix between Gengar and Mamoswine: Gengar can take out some of his pokemon with Thunderbolt and Shadow Ball, and Mamoswine’s Ice Shard will obliterate the remaining Dragons. We have two options: First, try to repeatedly fight the Johto Elite Four with your team, to a point where you’re gaining experience nonstop and leveling up as you try to beat it more and more. Log out in a battle in the Elite Four when you know you’re going to lose. Try not to use any items to continue fighting unless you reach Lance. There, you should try to heal up and fight him. I suggest you train your Pokemon in Dragon’s Den until 60 or 70, and then start spamming fights against the Elite Four, obtaining absurd amounts of experience. If you want to train Gastly and Swinub (Gengar and Mamoswine when fully evolved), I’ll leave you a chart on how to train them below: Gastly: Capture one in Vermillion Graveyard. Natures should be: Modest, Rash, Mild, Naive, Hasty, Timid. Their Spatk and Speed IV (orange numbers) should be 20 or more. The other IV don’t matter. Any of these 6 will work with 20 IV in Spatk and Speed. Teach it: Thunderbolt TM (Vermillion Gym, purchasable), Psychic TM (Saffron Gym, purchasable), Shadow Ball (level up move) Destiny Bond (level up move). Swinub: Capture one in Ice Path. Natures should be: Adamant, Jolly, Naughty, Lonely, Naive, Hasty. Their important IV should be Atk, Speed, and optionally, HP and Spatk (only Atk and Speed are really relevant though). Any of these natures with 20 IV in Atk and Speed will be good enough. Teach it: Earthquake TM (Viridian Gym, purchasable), Ice Shard (level up move), Ice Beam (Mahogany Gym, purchasable) or Avalanche (should be level up move), and the last move can be anything (I recommend Ancientpower, which you need to evolve Piloswine into Mamoswine). Gastly can be leveled from 15 to 25 surfing in Vermillion City, 25 to 40 in Route 28 surfing, and after that surf in Mt Silver and Thunderbolt everything. Swinub can be leveled easily in Power Plant to 30 by spamming Earthquake, and then to 40 in Route 28, then in any cave spamming Earthquake, Ice Shard, Ice Beam and Ancientpower. Once after level 70 to 80, you can evolve them if you want and try spamming Johto Elite 4 attempts. Your entire story pokemon should be able to tackle it, after multiple attempts. Sooner or later, you’ll get through. This is the most painful way, because you’ll lose nonstop, but it’s the quickest. If you can, log out on purpose whenever your pokemon are 97 or above in the middle of an Elite Four fight, and train the next pokemon, until you have 6 level 95-97+ pokemon. This will be used to fill the requirements for Lance’s battle. By using Elite Four’s infinite experience, we can train anything extremely fast. The other way is to actually think, and start building your lategame equipment now, and not delay it even further. The reason for this is that, if you enter Hoenn and you don’t have good enough pokemon to defeat the Elite Four, you’ll be stuck there forever, as you cannot go to any other region until you beat the Elite Four, and not the 8th badge, unlike in Johto. If you wish to learn how to level your pokemon faster, efficiently and properly, read this guide: https://pokemonrevolution.net/forum/topic/152189-how-to-level-up-any-pokemon-fast-and-easy-for-newbies-the-guide/ Getting the Tools! Let’s start from somewhere. We will need a pokemon that can actually help us hunt whatever we may need. We need pokemon with the ability Synchronise to hunt the necessary tools to beat Lance. We will also want a Macho Brace to train our pokemon’s EV faster, a Smoke Ball to avoid unwanted fights (so we just level up against whatever pokemon we desire), some Leftovers, and optionally, a Choice Band/Specs/Scarf to level our sweeper of choice (unintended pun). The choice items are optional, but they’re extremely helpful when we have to level up, really, really, REALLY weak pokemon. There are multiple pokemon with the ability Synchronise: Natu and Xatu, Abra, Kadabra and Alakazam, Espeon and Umbreon, Ralts, Kirlia and Gardevoir and finally, Gothita, Gothorita and Gothitelle. The issue with these is that the easiest to find are Natus, who are just tier 1 and extremely easy to hunt, but their moveset is kinda underwhelming outside of being a Synchronise pokemon. Still, we will use them for this guide as they’re extremely easy to find. Abra is a pain: Tier 5+, keeps teleporting (thus, we need an Arena Trap pokemon), it also needs to be taught Psychic TM from Saffron’s Gym to level it up. It’s just awful. And we’re not even reaching the extreme points: Espeon and Umbreon evolve from Eevee, tier 9 (the hardest to find by far), having to level it with happiness during daytime or nighttime. Ralts and Gothita are tier 8+, not really accessible before Hoenn either. (Ralts is, but you get the point: Let’s just hunt for Natu, tier 1, extremely easy to find and just does the job). We can obtain a Macho Brace from the Biker in front of Goldenrod Pokecenter. We will trade a Drowzee (we can capture one in Route 34, in the route just below. Open your Pokedex and check!) for a Machop who will be holding the Macho Brace. We can steal a Smoke Ball from wild Koffing and Grimer while surfing in Celadon City. There are two issues here: some Grimers have the ability Sticky Hold, which prevents item theft, and Muk also spawns there but gives no items. Avoid Muks and try to get lucky with Grimer and Koffing! You can purchase the Thief TM from the Thief on Celadon’s Rooftop after you help him out. You can otherwise train a Mankey to a high level and make it relearn Covet (attention: MANKEY, NOT PRIMEAPE! Primeape can’t relearn Covet.) and avoid doing the Thief quest. You can also teach the Thief move to a pokemon with the ability Mold Breaker such as Pinsir, who can be found in Kanto. This will ignore Grimer’s Sticky Hold and allow you to 100% get a Smoke Ball. This is not obligatory, but heavily recommended. We can get a Membership, an Exp Potion or a Surf Mount by donating to the game (which I heavily recommend, supporting this amazing game is the best you could do!). However, if you’re a cheapskater like me and don’t want to spend real money/can’t spend it, we have other options. We can skip this one if you want. We can’t currently obtain a Focus Sash unless we beat a Boss or we trade it for PvE coins… this is kinda out of our scope right now. We can get Life Orbs if we are lucky in the Bug Catching Contest in Johto. We can try our luck daily trying to earn it, but this takes long. Choice Items are completely out of our hand: They’re extremely expensive, and we need to get lucky while recycling. This will be a pain. We’ll avoid them, but I will still suggest you give the Item Recycler and the Bug Catching Contest a try. We'll also be getting a False Swiper (Farfetch'd) which we will be using to make hunting pokemon infinitely easier during or stay in PRO. Starting the journey! Now that we have listed these tools, Macho Brace in hand and Smoke Ball in our bag, we will start our hunting trip! The first step can be two options: we can directly go for Natus, as we need the Synchronise pokemon to build our team against Lance, or we can first get ANY Abra to do something optional: Role Play. Role Play is a move which Kadabra learns upon level up. This move will copy the opponent’s ability. This will also show you if a Natu has the ability Synchronise. If it doesn’t have Synchronise, we will just not capture it and flee. I am going to link bloe a guide that will teach you how to properly hunt for pokemon, if this will help you out! https://pokemonrevolution.net/forum/topic/157347-how-to-start-hunting-any-pokemon-the-newbie-guide/ To capture an Abra, first go to Diglett Tunnel. Find a wild Diglett or Dugtrio and try to escape. If you are not able to escape, capture it and check if it has Arena Trap. If it does, nice! We will now go to Route 25, north of Cerulean. Just next to the small tree maze before Bill’s House you will spot a few bushes where wild pokemon spawn. Place Diglett or Dugtrio with Arena Trap in the first slot of your party. Keep running away from all wild pokemon until you find Abra or Kadabra. When you find it, stay with Diglett in the fight just spamming pokeballs. Abra and Kadabra won’t be able to Teleport and leave. Once you catch it, evolve it into Kadabra (if it’s not evolved yet), teach it the TM Psychic (you can purchase it super cheap in Saffron Gym) and level it to 41 so it learns Role Play. We will use this move a lot and you’d better keep this Kadabra for the future! We can now begin our hunting but monotonous journey: hunting Natu! It’s both fun and boring, sadly. We need these tools if we want to complete everything there is in PRO. We have two options: If we have completed Johto’s Elite Four, we will now head to Route 28. Route 28 can be found in the same place where we would normally enter Kanto’s Victory Road. However. Instead of going up, we’ll now go to the left, where a Guard used to block it. Once we enter it, we’ll be in Route 28! Get to the end of the route (you only need to head west nonstop) until you hit Mt Silver’s entrance. Heal up in the pokecenter, and we’ll start the hunt! If you have not completed Johto’s Elite Four, we have an alternative place. This will a bit longer, as it’s not as comfortable to hunt Natus there as it is in Route 28. We will head to Azalea Town in Johto. We will now head east to Union Cave with a Surf pokemon. Surf inside of the cave to get to the bottom floor through the ladder and then make your way through until you find the exit. There are two exits, one next to each other: one will directly drop you next to some grass tiles. You need to hunt for Natu there. Now, we will capture ALL Natu we see that have the ability Synchronise (following the steps mentioned above, you can use Role Play to know which ones have it. Otherwise, just capture all Natu you see). We are looking for these natures: Adamant, Lonely, Naughty, Hasty, Naive, Jolly natures (these can be used with Cloyster) Bold, Calm, Relaxed, Sassy (these can be used with Slowbro/Slowking/Clefable). If you’re bored, you can also try and get the full list of all useful natures in Pokemon. Basically, this is the list: Adamant, Lonely, Naughty, Brave (physical attackers and mixed attackers benefit from this) Impish, Relaxed, Bold (defensive pokemon appreciate these natures) Calm, Sassy, Careful (same as above) Modest, Rash, Mild, Quiet (special attackers and mixed attackers benefit from this) Timid, Jolly, Naive, Hasty (fast pokemon want these natures). When you obtain an Adamant, Lonely, Naughty, Naive, Jolly, Hasty nature with the ability Synchronise pokemon, travel to Route 13. Capture a Farfetch’d with over 20 IV in ATK and Speed and with any of these three natures. Bring it to Diglett Cave, level it easily to around level 30 to 35, then level it in Cinnabar Mansion until 45-50. Make it learn Cut, False Swipe and any two other moves. He will be used later in this guide, he is extremely important. You can use this False Swiper to hunt other synchs easily, as False Swipe will always leave the opponent with 1 HP. Optional steps here: HM Slaves you SHOULD definitely obtain and train for your adventure, these will help you in the future too. Nidoran Male with Naive/Hasty/Lonely/Naughty/Rash/Mild natures (you can choose). Once it’s a Nidoking (evolve it when you think it’s okay to do so), it will learn: Headbutt (tutor in Viridian Maze, NEEDED FOR THE LAST STEP IN THIS GUIDE), Rock Smash (TM Purchasable in Celadon Department Store), Dig (also purchasable in the same place), Surf (HM03). You can easily level it up with Double Kick (level up move) and Dig (TM, Purchasable in Celadon Department Store) in any cave (specially, in Cinnabar Mansion). Paras with Quiet, Brave, Relaxed or Sassy natures (you can choose) Once it’s a Parasect, it should know Spore (level up move), Cut (HM move), Flash (HM move), False Swipe (TM Purchasable in Johto Safari entrance).. It can level up easily with Absorb, Mega Drain (TM Purchasable in Celadon Gym) and Giga Drain in Caves and Water places while surfing. Tentacool with Bold/Calm/Modest/Timid natures (you can choose) It can level up easily in any cave by teaching it Surf and spamming it against all Ground/Rock pokemon. Once it’s a Tentacruel, it will learn Flash (HM), Surf (HM), Dive (HM, later in Hoenn), Waterfall (HM, later in Hoenn). I HEAVILY suggest you get these three with decent Ivs (15+ in most stats) and natures and you teach them the movesets mentioned above. They will be your HM Slaves during all your stay in Pokemon Revolution Online. You will 100% need them sooner or later. While having all these natures is nice, we’ll focus on the first ones. Once we have one Adamant, Lonely, Naughty, Naive, Hasty, Jolly Synchronise pokemon, we’ll go to Olivine City. There, we’ll surf and hunt for wild Shellder. We want to capture as many Shellder as possible. The Shellder we want must have its orange number (or IV) in ATK and SPEED above 20. The rest of the stats don’t matter. It must also have the ability Skill Link, and the natures must be Adamant, Lonely, Naughty, Naive, Hasty or Jolly. These are obligatory, because if we don’t get these natures, we will not ensure that our strategy works. I will link a guide on how do IV and Natures work. I will also link a guide so you can understand how to hunt for a specific pokemon. However, to keep it simple: place the Synchronise pokemon in the first slot of your party, and on the second slot keep your False Swipe pokemon (Farfetch’d, in this example). Keep running away from all encounters until you find a wild Shellder. Spam False Swipe with your Farfetch’d until it has 1 HP (remember: False Swipe will NEVER faint the wild pokemon, no matter how hard you try), and capture it. Check if it mentions what I said in the paragraph before. Once we have found it: congratulations! It is time to train it. We want to EV train it to its full potential. We want to train its SPEED and ATK (physical attack) EV until they both reach 252. To do this, we can use any of the free EV Zones in all regions or we can make a visit to the Safari EV Wald. You can check here where you can EV train your Pokemon and how does EV training work (I hope I don’t forget to hyperlink this once I finish the guide lol) If you have trouble understanding how Abilities, EVs, IVs, Natures work, and how to EV train your pokemon, I will link some guides below that will 100% help you out! https://pokemonrevolution.net/forum/topic/153453-how-to-hunt-specific-abilities-guide-for-newbies/ < To learn how abilities work! https://pokemonrevolution.net/forum/topic/152671-natures-abilities-ev-iv-and-stats-for-newbies-the-guide/ < To learn the basic stuff about everything related to your Pokemon! https://pokemonrevolution.net/forum/topic/153443-how-to-ev-train-your-pokemon-for-newbies-and-safari-ev-wald-guide/ < Guide on how do EVs work and how to train them! It's Training Time! (yes while I was doing this guide I ended up buying that T-shirt lol) Once it’s trained to its fullest potential (252 ATK EV, 252 Speed EV), we will bring it anywhere to level it up. My recommendation is that you teach it Surf (HM) and Icicle Spear (Level Up move), and if possible, Ice Shard. From level 20 to 40 you can easily level it up in Route 28, by spamming Icicle Spear on wild Grass, Flying, Ground types. Dodrio, Donphan, Natu, Tangela are easy targets for easy experience. You can also Surf to defeat Rapidash and Ponyta. The needed moveset for Lance is: Shell Smash, Icicle Spear, then two optional moves (Ice Shard and Surf are good last options. Specially Ice Shard, as it has priority and it can help you in an emergency). Heal up in the Pokecenter in MT Silver. Above 40, try to start defeating wild Gravelers in Mt Silver (and other Ground Types and Flying Types) spamming Icicle Spear. Since this is a multi-hit move, this will always bypass Sturdy. You can also risk using Surf against Ground types, but if they have Sturdy they will survive. Here you can grind until you reach level 80 or even 90 if needed. Use Surf against Magmar, Icicle Spear against all other pokemon you may encounter. Once your Shellder is at level 90, you can just Rare Candy it to level 100. Purchase a Water Stone in Celadon Department Store. With the moveset mentioned above, you are now ready to evolve it! Cloyster with Icicle Spear and Shell Smash will take out Lance easily. Surf is needed to get to Dragon’s Den. Now that we have our Lance sweeper, we need to tackle the other requirements: 240 Caught Data and 200k pokedollars. My recommendation is that you level up five Hoppip, they are extremely easy to level up and they will be extremely useful later. Hoppips are used for a trick called Leech Seed + Toxic + Flash + Memento, which is used to powerlevel any pokemon in existence, no matter how bad they are. Hoppips are a bit weak pokemon, Grass/Flying, with great access to leveling up moves such as Mega Drain, Giga Drain and Bullet Seed. This will allow you to quickly train other pokemon so you can get Dex Data quickly. For better reference, use my Level Up guide and check the Hoppip Section. If you wish to follow my advice and train the Hoppips, go to the routes below Lavender Town and capture a few Hoppip in Route 13. Preferably, they should have a Calm nature. Once you have 5 Hoppip with a Calm nature (or any nature works, but Calm and Bold are the best ones. You can use the Synchronise pokemon you obtained previously to make this easier) and decent Def, HP and Spdef IV (the rest does not really matter, high Speed and Spatk is nice though), you can start training them. My recommendation is to train them from 20 to 30 in Ruins of Alph when surfing by spamming Bullet Seed, Mega Drain and Absorb (you’ll always face Wooper/Quagsire, they give a decent amount of exp and HP evs), 30 to 40 surfing in Route 28, 40 to 50 surfing inside of Mt Silver and after 50 you can both fight Water types and Ground types by surfing and just running around in Mt Silver. Most pokemon there are extremely weak to Grass type moves, and since Mega Drain and Giga Drain heal you, you will be able to stay there for long periods of time. Once your pokemon are over level 90, you can Rare Candy them easily. If you still need help with leveling your pokemon and want to learn how to use the Hoppip Strategy properly, I will again link this guide below: https://pokemonrevolution.net/forum/topic/152189-how-to-level-up-any-pokemon-fast-and-easy-for-newbies-the-guide/ We’ve finally tackled the level 100 pokemon requirement! Now we only have two requirements to tackle: the 200k Pokedollar fee and the 240 Pokemon caught requirements. Next step: MAKING BANK! STONKSSSS and money. This is the nightmare and bane for some people to get over with. 200 thousand pokedollars looks like a lot (and it is, indeed). Thus, how can we get the money? Well, we will tackle this issue from the beggining point. If you wish to completely skip the entire explanation, you only need to follow my other guides on how to make money. These are the links: https://pokemonrevolution.net/forum/topic/134841-how-to-make-money-in-pro-101-the-guide/ < This lists the main activities you can do so as to obtain as much money as possible, 100% needed to gain access to Cerulean Cave. https://pokemonrevolution.net/forum/topic/132722-location-of-all-monetary-items-in-pro/ < This lists almost all monetary overworld items you can obtain to get rich quickly! However, if what you wish to do is to learn from zero, I will explain what you should do from scratch. For this guide, we will not take into consideration that you can sell your Rare Candies to other players and we will try to eliminate them from that possibility. Thus, don’t count on selling them to anyone (However, you easily can sell them in Trade Chat, but we’re trying to do this entire guide without having external help). To obtain money, there are different ways: fighting wild pokemon and trainers, selling monetary items, completing daily tasks, quests, and missions. My suggestion is that you first tackle all the Quests in Kanto that give money (Officer’s missions), starting from Viridian to Pewter to Cerulean to Celadon to Fuchsia and to Cinnabar. They all give a lot of money which is taken into account in the guides above. This will atleast grant you about 60 to 100k, in pure money value. After reading that, you should also pick up all the obtainable money items in Kanto and Johto which can later be sold in Route 25’s Item Maniac. These will amount to 82.5k pokedollars, so we only need to get around 60k pokedollars now. Now that we’re here, we’re kinda stuck. We still need to do more: we will try and do Dig Spots and Pokestops to get something sellable. We will do dig spots in all Kanto and Johto spots and pray that we get atleast two or three nuggets (or even more) and other sellable items in both regions. If we get some, we’ll have made the 200k pokedollars easily! But this is not over yet. We should also do the Bug Catching Contest in Johto on a daily basis to ensure we get a bit more every day if we’re lucky. In addition to this, Pokestops and Dig Spots will give us Pokeballs which we will invest into the last (and biggest) issue remaining we have in mind. Now that we’ve gone through these, if we don’t want to depend on other players, what we will do is fight all trainers after the fourth badge of each region (thus, visit Kanto and Johto regions and try to refight the trainers as much as you can). The higher their pokemon are, the more money you’ll earn. A bit of money will stack up quickly as you go around battling them. You’ll gain from 500/600 pokedollars to up to 2000 pokedollars per trainer fights, going around routes fighting them. You should also revisit Gyms, as you’ll be able to refight them. You can fight Trainers once every 7 days, so after 7 days you can fight them again! Finally, try to do Dig Spots every three days. The few monetary items you’ll get will help you quite a lot throughout your adventure. You can sell them all in Route 25’s Item Maniac, and you’ll be able to gain a lot from Star Pieces, Stardust, Nuggets, and more. Use the guide above to see what items you can obtain and try to do the Dig Spots in Kanto and Johto nonstop. Recycle the Gems in the Item Recycler in the depths of Mt Mortar (by the way, also defeat the trainers inside, they have high level pokemon and they give good experience and money). I’ll link guides and maps throughout the guide so you can find them (if I don’t forget about it lol). Once you’ve done Dig Spots a few times and obtained around 250 or 300 thousand pokedollars (or even more), it’s time to tackle the last issue: capturing 240 pokemon for the Pokedex! If you still are missing a bit of money, fight wild pokemon in Mt Silver to train your pokemon. Each fight will be 200 to 400 pokedollars (depends on whether you have a Membership active or not). In the long run, you’ll end up making some bank! Second to final step: Capturing the 240 pokemon. Alright, let’s make things clear: you will need a LOT of Pokeballs for this step. A LOT. We will try to reduce it in certain ways, however. With Pokestops and Dig Spots we’ll obtain a lot of Pokeballs for free, but we’ll have to take measures to avoid wasting too many. To make capturing pokemon easier, you can check hunting guides, but I’d rather teach you personally. Check my hunting guide if you need some help regarding how to hunt pokemon easily! https://pokemonrevolution.net/forum/topic/157347-how-to-start-hunting-any-pokemon-the-newbie-guide/ Capturing pokemon is easier when they have a status condition (such as paralysis or sleep) and when they have low HP. This is sometimes not possible because some pokemon have immunities to status or certain moves. For example, Ghost types are immune to False Swipe. Grass types are immune to moves like Stun Spore or Sleep Powder, but can still be affected by Thunder Wave or Yawn. Electric types are completely immune to all paralysis inducing moves, but can still be put to sleep by moves like Spore. You get the point. We’ll have to work a bit around certain pokemon to capture them. Additionally, some use self damaging moves, so if they have moves like Explosion, Take Down and so on, we’ll have to be careful not to accidentally faint them in the process. To begin with, we should go to Celadon’s Department Store. In one of the floors, there is a Smuggler that will sell us 50 pokeballs for 9 thousand pokedollars. We want to atleast have 200 to 300 pokeballs in our inventory, or even more, as you wish. However, DO NOT BUY SUPERBALLS, ULTRABALLS OR ANY OTHER TYPE OF POKEBALLS. They are not worth the money you’d have to spend on them until the very, VERY lategame. Avoid buying them, AT ALL COSTS! ONLY BUY POKEBALLS! I write this in caps because it’s VERY important. When we have 300 or more pokeballs, we’re ready to go! To fill our Pokedex easily, what we must do is to hunt for pokemon which are extremely easy to find and require next to no effort to level up. Using the discord bot AND MY MARVELOUS HUNTING GUIDE (shameless plug by the way) we will look for all pokemon whose tier is extremely low (Tiers range from 1 to 9, the closest to 1 the easier they’ll be to find) and we will capture them all. Using the 5 Hoppip we trained earlier we will powerlevel them in a few minutes. In a single day, you can easily get over a hundred caught pokemon data. It is extremely easy to fulfill, just annoying and time consuming sometimes. My recommendation is that you now go pokemon by pokemon checking their tiers on the Discord Reborn Bot and checking if they’re tier 4 or below, which means they are extremely easy to find almost anywhere. You should capture one of each and quickly train it and evolve it. This will increase your Caught and Evolved data in your Pokedex, which will also allow you to later be able to capture legendaries such as Mew, the legendary dogs, Celebi, Jirachi, Latios and Latias and more. The more data you get, the more access to sidequests you’ll obtain! Use the Hoppip Memento + Leech Seed method if you want to powerlevel a lot of pokemon in succession in just a few minutes, instead of having to train them all one by one (which is extremely painful). If you can, and this is the most important advice: put a pokemon with Headbutt in your team (check the HM Slaves section mentioned above), and go through the ENTIRE Kanto and Johto Regions HEADBUTTING EVERY SINGLE TREE IN EVERY SINGLE AREA. This will make you find VERY rare pokemon from other regions (Unova and Kalos included!) and a lot of the Hoenn pokemon you may still not have access to. Also, most of these pokemon evolve quickly. Go through all the main cities and routes of each region and headbutt and capture all pokemon you’ve yet not caught. Now I will drop a list below with a LOT of pokemon which should be enough to fill your dex quickly as long as you headbutt everywhere and go one by one hunting them down. I will skip over Trade Evolutions and any requirements that demand too much experience and are too hard for a newbie to obtain. You can try doing your daily Headbutts in every route, cave, city and town in Kanto and Johto. A lot of incredibly rare pokemon from different regions will appear. In the list below, I will add some of the pokemon you can easily find through these methods in Kanto and Johto: surfing, headbutting, fishing, and going around all possible places. Keep in mind during your playthrough you will easily find other region pokemon (doing Dig Spots for example) and capture them. Thus, the list is NOT limited to these below. Go around travelling and capture all pokemon you can find! Kanto Dex easy to find pokemon: Caterpie + 2 evolutions Weedle + 2 evolutions Pidgey + 2 evolutions Rattata + evolution Spearow + evolution Ekans + evolution Sandshrew + evolution Nidoran + evolutions (Requires Moon Stone to fully evolve) Nidoran 2 + evolutions (same as above) Zubat + evolutions (Requires happiness) Oddish + evolutions (3 in total, requires Leaf and Sun stones) Paras + evolution Venonat + evolution Diglett + evolution Meowth + evolution Psyduck + evolution Mankey + evolution Poliwag + evolutions (note, one requires Water Stone and the other requires a trade with King’s Rock. Avoid Politoed). Machop + evolutions (note, you need to trade for Machamp. Avoid it). Bellsprout + evolutions (you need Leaf Stone for the final evo) Tentacool + evolution Geodude + evolution (same issue as Machop) Slowpoke + evolution (Slowking requires trading) Magnemite + evolutions Doduo + evolution Seel + evolution Grimer + evolution Gastly + evolution (same issue as Machop) Drowzee + evolution Krabby + evolution Voltorb + evolution Koffing + evolution Horsea + evolution (Kingdra requires trading with a Dragon Scale) Goldeen + evolution Magikarp + evolution The fossils + their evolutions (you can dig them easily since they are in dig spots) Total: around 75+ caught data. Johto Dex easy to find pokemon: Sentret + evolution Hoothoot + evolution Ledyba + evolution Spinarak + evolution Chinchou + evolution Natu + evolution Mareep + evolutions Hoppip + evolutions Sunkern + evolution (requires Sun Stone, diggable) Wooper + evolution Unown Girafarig Snubbull + evolution Teddiursa + evolution Swinub + evolutions Aipom + evolution Corsola + evolution Total: around 30+ pokemon Hoenn Dex easy to find pokemon: Poochyena + evolution Zigzagoon + evolution Wurmple + evolutions Lotad + evolutions Seedot + evolutions Taillow + evolution Wingull + evolution Whismur + evolution Makuhita + evolution Numel + evolution Barboach + evolution Corphish + evolution Fossils and their evolutions (easily diggable) Feebas + evolution (Milotic requires trading) Shuppet + evolution Duskull + evolutions (Dusknoir requires trading with an item) Snorunt + evolutions Clamperl + evolutions (they require trading) Spheal + evolutions Luvdisc Total: around 40+. In addition to these above, you will find Sinnoh, Unova and Kalos pokemon from doing Headbutts and Dig Spots and in some random routes and towns too. Good luck! Final step: THE FINAL BATTLE (you can play some like, epic soundtrack from a random anime while you follow these steps I guess) Now that you’ve completed these steps, you need to talk to the two old guards in Blackthorn's Dragon Tower. Talk to the two old men and pick up the Dragon Membership and the Dragon Medallion from them. Then, talk to the Policeman in front of Cerulean Cave’s entrance. With your Cloyster at level 100, Adamant, Lonely, Naughty, Jolly, Naive or Hasty 20+ IV in Atk and Speed, 252 EV in Atk and Speed, Shell Smash, Icicle Spear, Surf, travel to Blackthorn City and enter Dragon's Den. Surf above the gym and go into the cave. Go downstairs. Surf until you find the ladder to the floor below (southwest in Dragon's Den) and go downstairs again. You’ll now be in the same floor as Lance. Now, there is another issue: There's a Dragonite blocking your way and you have to defeat it. If you lose against this Dragonite, you have to wait 24 hours to try it again. To win against the Dragonite you can use any pokemon, this fight has no restrictions. My recommendation is that you simply use Icicle Spear with a Brightpowder equipped. If you are successful, Dragonite will die to a single hit. You can also try using Ice Shard, which will always go first, and pray that it dies in a single turn. Icicle Spear is the riskier, but 100% rate to win this fight instantly. With an equipped Focus Sash, thi Now, go around the small maze and stand in front of him. We now have to explain how this Boss Battle works, because it’s very unique compared to the other Boss Battles in PRO. This Boss Battle has six pokemon at level 120. These pokemon are approximately a 10 to 20% stronger than a normal pokemon when fully trained at level 100. They have additional defenses, speed, attack… you get the point. They’re extremely overpowered. However, since PRO’s Boss AI runs on a hamster running on a wheel powering up a potato toaster, it can easily be exploited. This boss also functions differently: you can use items while in battle and you have infinite attempts with no cooldown. This is the best possible situation, because we can keep trying the same strategy over and over again without fearing any consequences: there are none! We can keep slamming attempts over and over. We will be using a strategy which requires us to use NO items. However, you can still carry from 10 to 30 revives if you’re willing to be disgusting and beat this in the unfairest, easiest, and noobest possible way. This is the full lineup for Lance: Dragonite, Altaria, Hydreigon, Flygon, Salamance, Garchomp. What do they have in common? 5 out of the 6 are 4 times weak to ice moves. Our Cloyster will literally run over Lance’s team. After a Shell Smash, they’ll be stomped. The way to cheese this boss by using no brain is to simply use Cloyster in the first slot of your party and playing the Jackpot. Yes, that’s it. There’s no more strategy to it. We don’t need to worry about any other pokemon than Dragonite. They will all be outsped and oneshot, with no chance to do anything to us. Let’s begin. Dragonite’s moves are: Outrage, Hyper Beam, Hurricane and Dragon Dance. If you have noticed, he has three issues: Hyper Beam, Hurricane and Dragon Dance will either have a chance to miss (Hyper Beam has a 10% chance, Hurricane has a 30% chance and Dragon Dance will not damage you) or you have a very, VERY small chance to survive a single hit. We won’t rely on you surviving a single hit because Cloyster’s special defense is as low as my real life money savings after having spent it all on my gym memberships. These are all our possible decisions and the outcomes we will get. Outcome 1: We use Shell Smash. Dragonite hits us before and faints our Cloyster instantly. Here we have two choices: A) we cry. B) we log out, we log in, we’ll reappear in Blackthorn City. We just travel back to Lance immediately, talk to him and try the same again. Since there is no cooldown to refight him, we can just try again infinitely! If successfully use Shell Smash because he has missed a move, he has used Dragon Dance or you’re still somehow alive, proceed to Outcome 2. Outcome 2: Congratulations, if you’ve survived a hit (unless Hurricane has confused you, then risk it anyway and if you lose, relog and go back to Outcome 1), you’ve literally won the fight. Yes, that was it. Now, after a single Shell Smash, you’ll now click Icicle Spear six times. All of Lance’s pokemon will instantly faint. Lance’s pokemon have no priority moves and no way to cripple you with Scary Face, Perish Song or anything. Since Icicle Spear has 100% accuracy, you cannot miss. Since Shell Smash boosts your Physical Attack, Special Attack and Speed by two stages (doubled), his pokemon are automatically gone thanks to Icicle Spear. They’re incredibly weak to Ice Type moves, and Skill Link will make Icicle Spear always hit five times. Yes, I know this feels stupidly easy, undeserved, and you just didn’t use any strategy other than “haha look at me I dodged a hit haha I’m so good”, but the point is: you literally just unlocked Cerulean Cave by yourself, no one helped you, and you proved everyone wrong. You didn’t need help at all! (outside of me literally babysitting you with this guide, but whatever). Congratulations, dude! All your efforts have paid off. So many hours working hard just to unlock a place with mediocre spawns with just 10 higher leveled pokemon lol. Well, atleast now you can farm like a madman and level up quickly! Also, unlocking the Daycare is nice. Special credits to: Myself for being so damn handsome and perfect Zaccard (went through the trouble of hunting several Shellder for me to test the strategy, ended up working perfectly) Revelc (discovered that we could do this with just 1 pokemon lol). Other guildmates who were my test subjects and went through the pain of fighting Lance over and over.
 5 points
 -
Nice dragon/ivs Gl3 points
-
1m to start auction for 24 hour insta:3m min raise:200k good luck
2 points
-
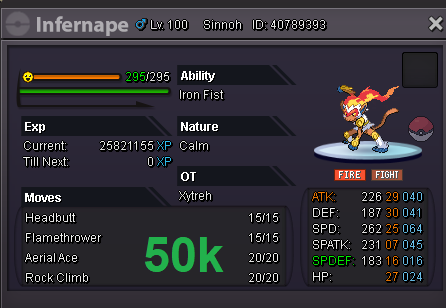
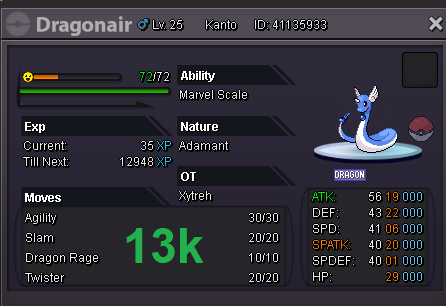
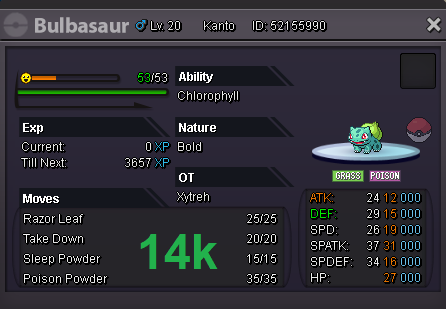
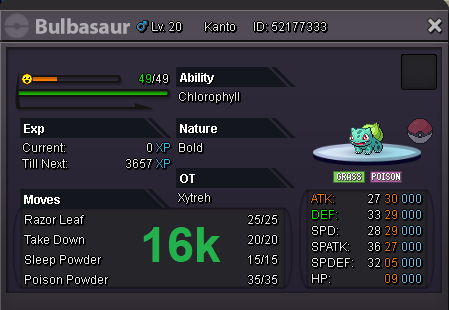
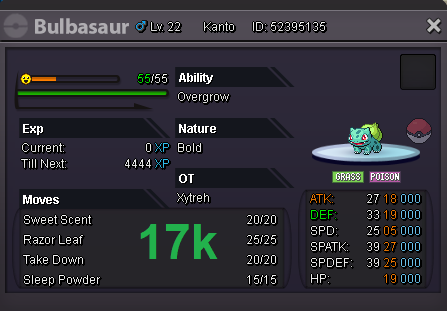
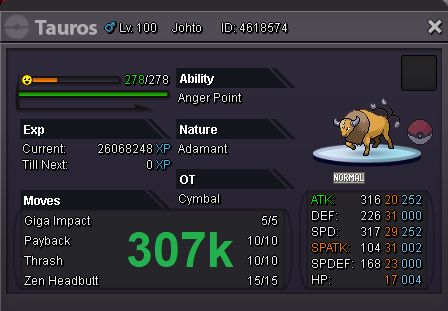
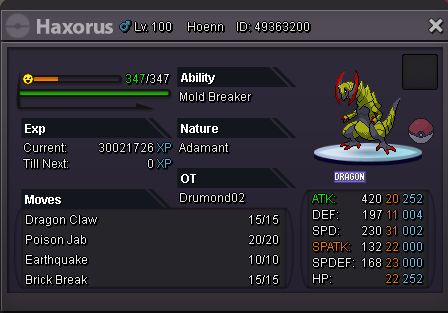
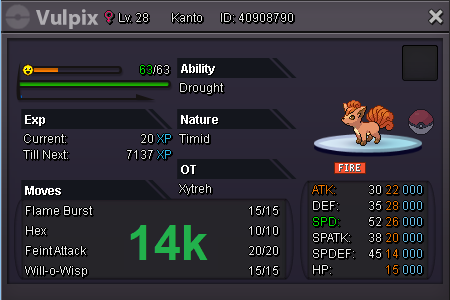
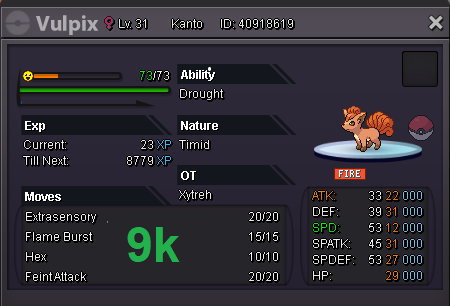
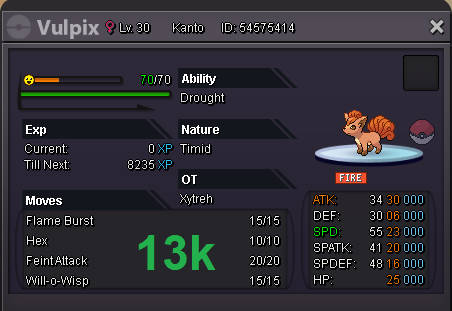
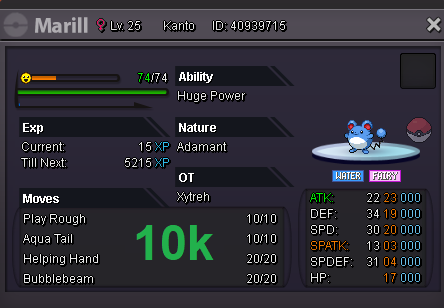
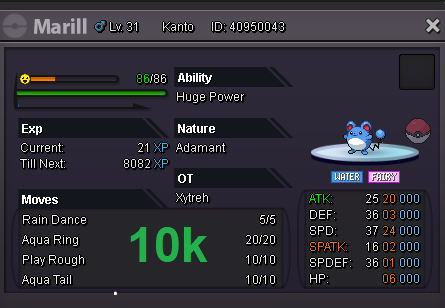
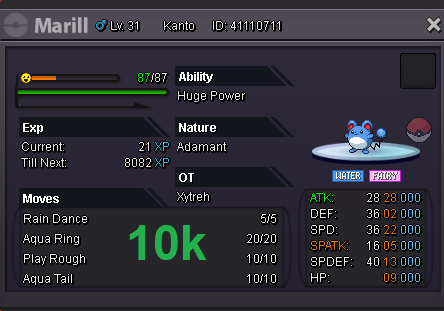
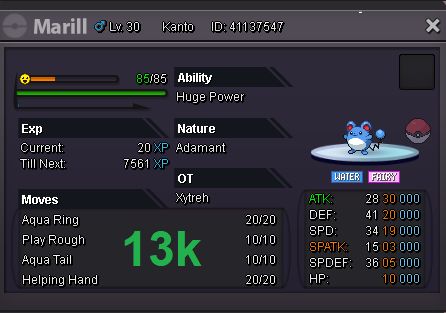
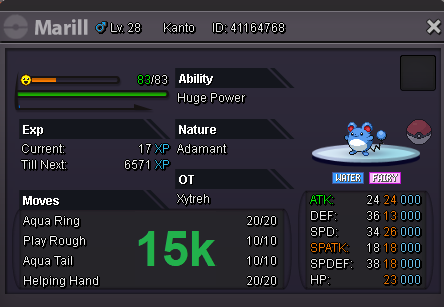
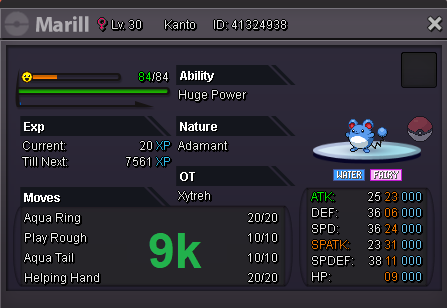
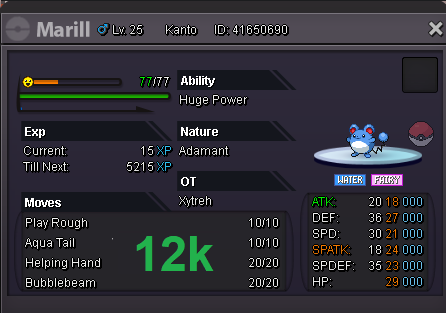
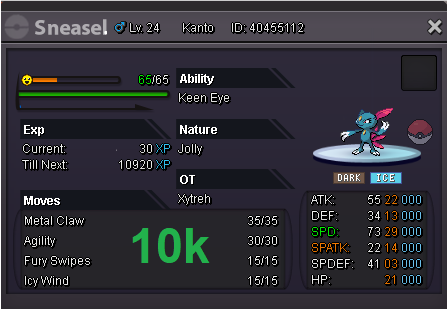
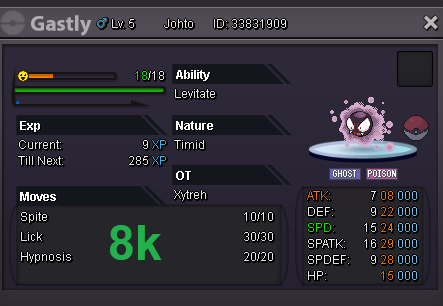
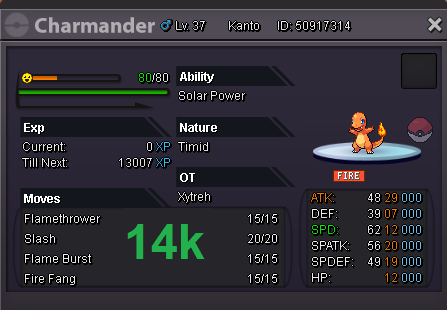
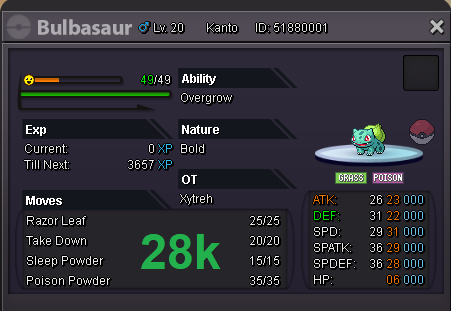
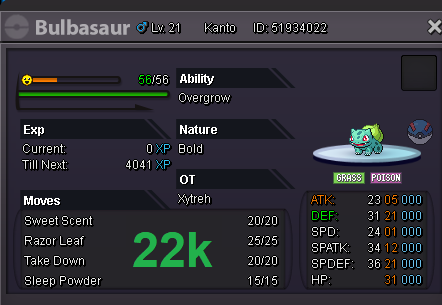
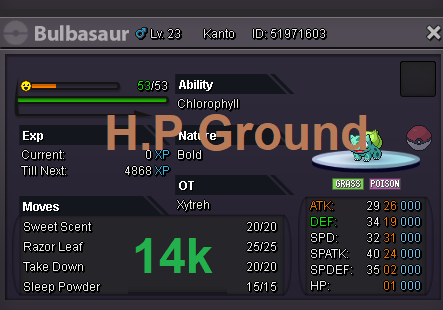
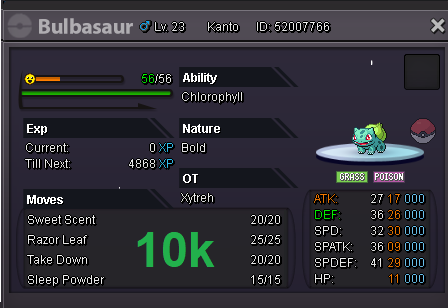
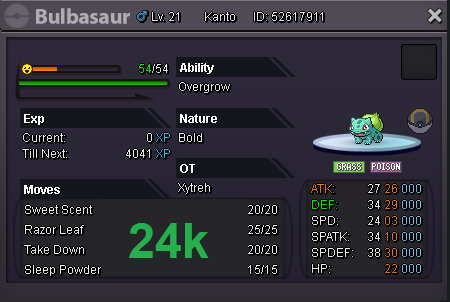
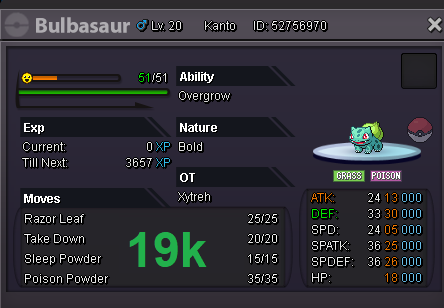
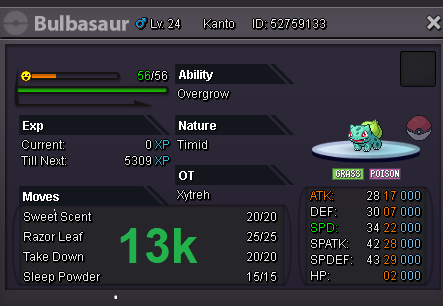
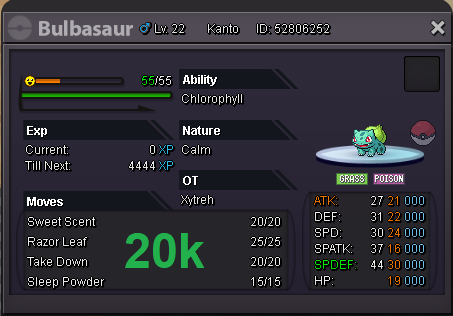
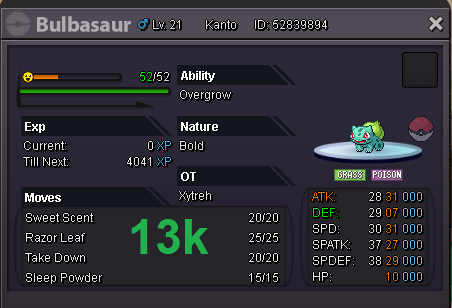
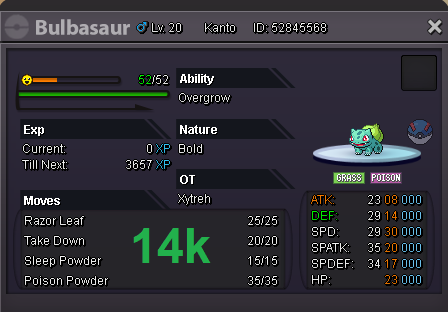
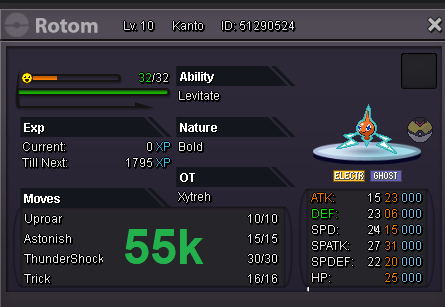
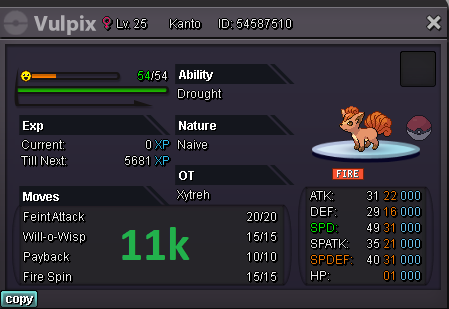
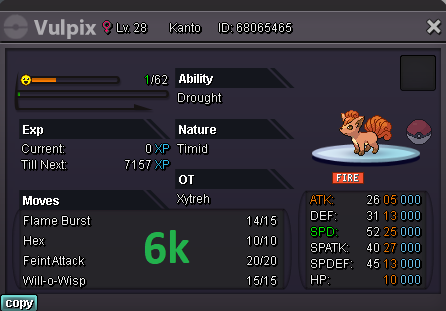
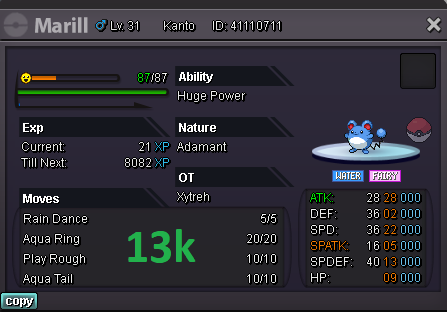
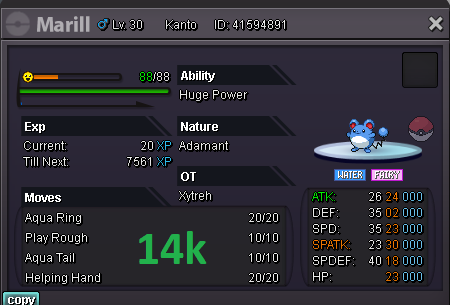
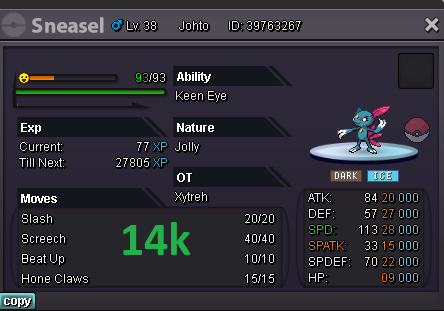
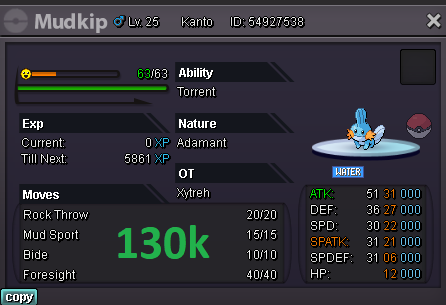
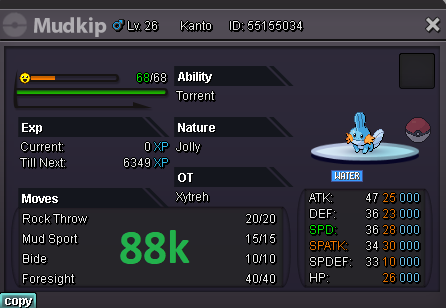
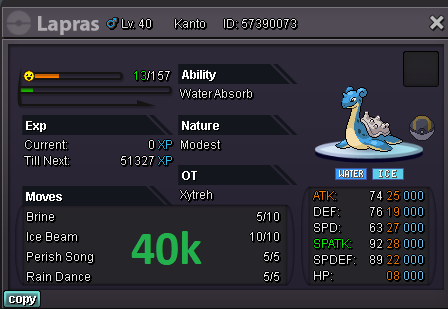
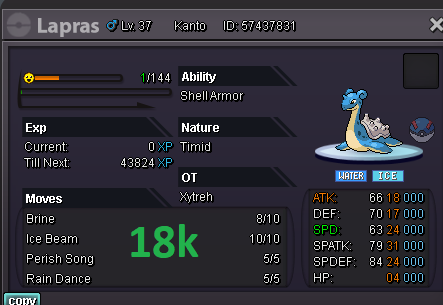
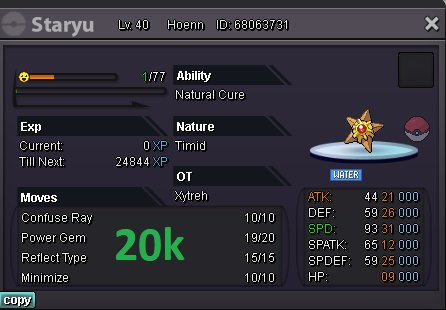
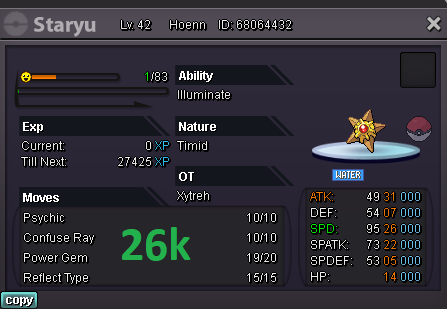
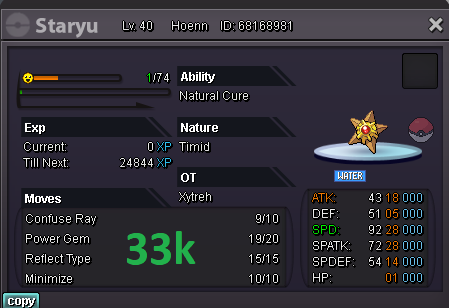
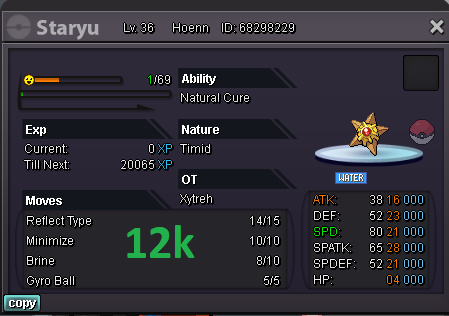
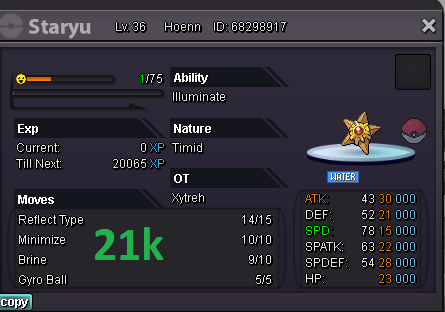
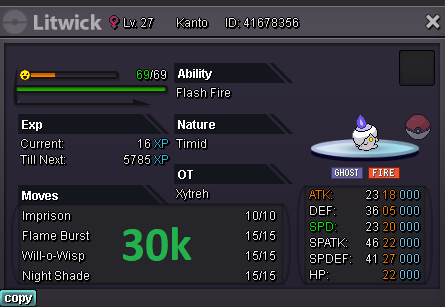
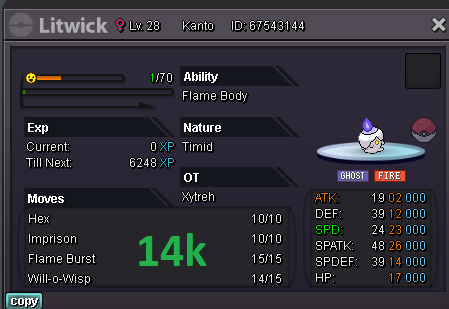
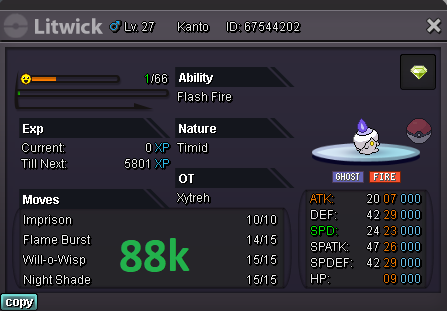
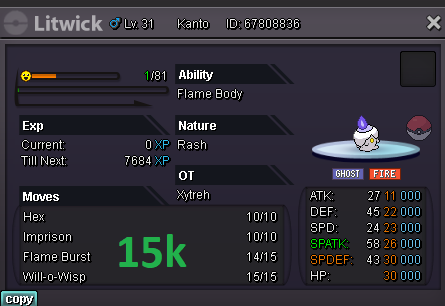
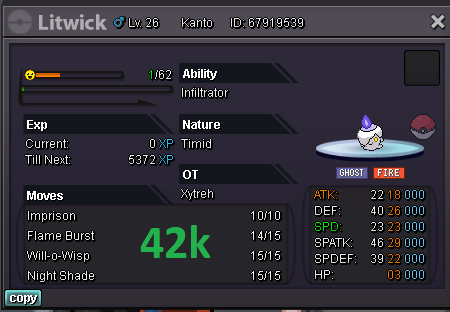
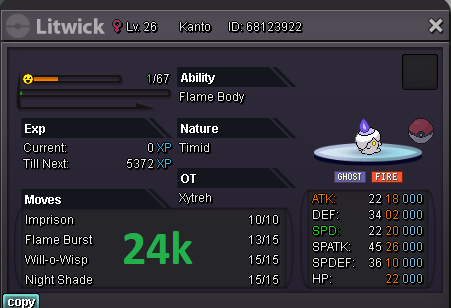
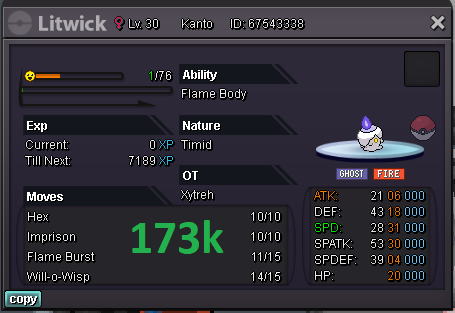
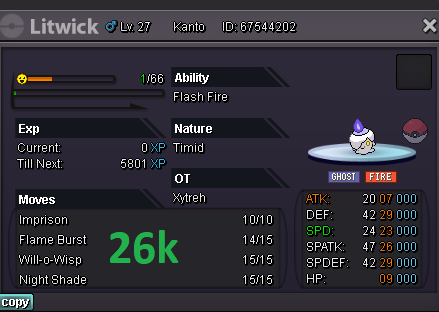
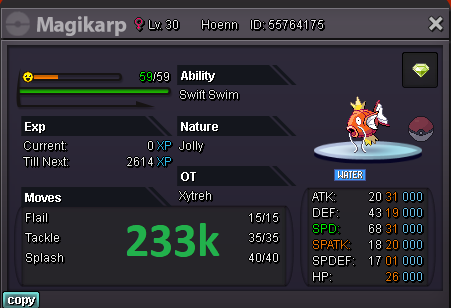
WELCOME BACK TO XYTREH'S GREAT SALE This time we're having a lot of different types of Pokemon! This sale is going to be really big so that everyone can get a Poke for themselves! Some are more expensive and some cheap but I'M PRETTY SURE that you'll find something aswell! Especially NEW PLAYERS are welcome here, because there are a lot of cheap and good Pokes to start your ADVENTURE with! I wish you all SUCCESSFUL shopping! So, please, leave a LIKE and FOLLOW my SHOP! 1 YEAR SHOP Special! Soon New Feature - Auctions! I've decided to add a NEW FEATURE which is AUCTIONING. There will ALWAYS BE ONLY ONE auction AVAILABLE AT A TIME. That means, each auction needs to be finished before next can begin. Auctions Rules: - Start price, bid and instant price will never be changed after auction has begun - There won't be discussing start price, bid or instant price - After you bid, there is no way of going back - I won't cancel any auction whatever the reason would be - Every auction will last for 72 hours (3 days) after it starts Current Auction _______________________________________________________________________________________________________________________ Hidden Ability, Timid Vulpix Huge Power, Adamant Marill High Speed Sneasel Timid Gastly Timid / Jolly Charmander Great Magikarp for PvP/PvE Larvitar Gible Eevee Clefairy for Bosses Bulbasaur (H.P Fire, Ice and Ground will be tagged) Hidden Ability, Adamant Dratini / Dragonair Speed Boost, Adamant Torchic Very Strong Mudkip Tanky&Fast Larvesta Lapras Beautiful Staryu Litwick Event Pokemon Other Pokemon PvE/PvP So much for now! Of course, I will be adding more Pokemon so keep follow my shop and enjoy! Pokemon are sold without held items! Prices are not negotiable. I accept: Coin Capsule - 400k IV Reroll - 700k Nature Reroll - 350k CONTACT: Discord (preferred): Xytreh#4805 Forum: Xytreh Game: Xytreh Thank you.
1 point
-
Back when excavations were released, they were incredibly popular because a lot of the pokemon you could find didn't have spawns such as ferro, bisharp and starly only being a t9 or t8. Nowadays, excavations are a baron wasteland where people only go to get 3k points to get their therian forms. What i'm trying to suggest is change to the spawns and possible to the artifact maniac rewards. A few changes i would like to see would be to add Jangmo-o to draconic, Cutiefly to wonderous and Mimikyu to haunted and maybe to add a reroll as an artifact reward. Leave a like if you agree1 point
-
start1 point
-
wtb modest politoad and calm wingull both for 250k please1 point
-
wow nice shiny goomy , gl all1 point
-
22m1 point
-
21m1 point
-
20m1 point
-
19m1 point
-
18m1 point
-
hi, 17m by me1 point
-
note this is you buy your coins with irl money instead of them off other players. Seems nice till you figure out you would need around 650coins ($32.50 USD, more since 100 coins is $6.19 and not a flat $5 since they moved to euros) That seems costly just for a multi tool that you wouldn't use all the uses of all the time. The tools themselves are a great value by themselves and they cost just the right amount of coins to make having 1 or 2 of them very useful alone. I think Having the ability to choose the ones you want are always going to be the better value than a multitool. -1 i dont think anyone would buy a tool for $35 even if they discounted it to around $30 to make it actually save money to buy it instead of every tool.1 point
-
Buy 600k excadrill and the 60k Calm Flabebe1 point
-
I think nobody would buy the 2-4 week pass for the safari as it would cost around 700k for just the 2week pass unless they discount it a lot. (doing simple math here 50,000k {the 24hr pass} x 7 = 350k) (50,000k x 14 would be 700k and anything over that would be over a mil just for the safari. I do think a 3 day pass would do wonders though. As it would be a sweet spot around 150k (it would prob be discounted some maybe to like 125k-135k) I would think people would use the week pass but not a lot to warrant it. +1 If done well enough, i would love to hunt in the safari 3 days.1 point
-
TRADE RULES NOTE: When trading as part of an auction, be aware that in addition to the rules listed below, all Auction Rules apply. GENERAL TRADE RULES 1. When advertising, be clear and accurate about what you are buying or selling. - When stating a Pokemon is IV+ (25+, 26+, etc), all stats must be equal to, or above the advertised numbers. › Exception: Decreased ATK, SPATK or SPD stats. › e.g. A Timid Pokemon may be advertised as 25+, if all stats except Attack are equal to, or above 25. 2. Announcing a lend, sale, offer or bid with no intention or means to follow through is prohibited. 3. Once a deal is agreed upon, you cannot back out of it. A deal is done in one of these two scenarios: - In-game: Both parties have agreed to a price and location. - Forum & Auction: An Insta or Fixed Price has been met, or auction won. 4. Scamming, Misleading or Deceiving players is prohibited. 5. Reserves (buy now, pay later agreements) are prohibited. Players must have the means to make full payment from the time of committing to a trade agreement (making an offer, bid, or agreeing to a deal) until completion of the trade or outbid. 6. Offers received outside of an auction cannot be: - Claimed or used as current or best offer. - Used as a starting bid without the buyer's permission. 7. Trades outside of official PRO platforms (Forum, In-game, Discord) are not supported, or enforced by PRO Staff. - Reports or evidence regarding trade agreements made on Discord may not be accepted. 8. All goods gained or traded as a result of an Account Hack or Scam will be forcefully corrected, any trade agreements made in such circumstances will be considered void. - In the event that a trade agreement has been made, or a trade has taken place with any third party involving goods gained via an Account Hack, this will be forcefully reversed where possible, regardless of known or direct involvement. 9. When making a service agreement (Level-Up, EV-Training, Lending, PokeDex Data, Story / Quest, etc), players must take full responsibility to ensure that the service is completed as agreed. Any actions not approved by the agreement are prohibited. - This includes: unapproved trades to or from own accounts or third parties, irreversible damage (evolving), payment is made, etc. › Evidence of these agreements must be made and kept, and made available upon Staff request. This is the responsibility of both parties. › Services that involve account sharing (Story, Quest, etc) are permitted, but not recommended. See Rule No.3 of the Game Rules for further details. CROSS SERVER RULES 1. Cross Server sales and auctions must be posted in the Trades - Cross Server sub-forum. 2. When moving an existing Selling thread from Silver or Gold forums to Cross Server, the current thread must first be marked as closed. - Auction: Once started, an auction thread cannot be moved. 3. When a trade agreement is made concerning players from different servers, the responsibility of transferring lies with the thread creator. - This rule does not apply when there is an explicit written agreement between the buyer and seller about who will transfer to honour the deal. Evidence of this agreement must be made and kept, and made available upon Staff request. › When posting in Selling Pokemon - Cross Server, the seller must be prepared to transfer, should the buyer be from the opposite server. › When posting in Buying Pokemon - Cross Server, the buyer must be prepared to transfer, should the seller be from the opposite server. TRADE TERMINOLOGY • WTS, WTB & WTT. - WTS (Want To Sell), WTB (Want To Buy), and WTT (Want to Trade) indicates the user's intention when making their trade post or thread. • LFM. - LFM (Looking For More) is used by a seller to indicate that they are looking for a higher offer. • SO, BO & CO. - SO (Starting Offer) indicates the minimum offer required to begin an auction. BO (Best Offer) & CO (Current Offer) are both used to indicate the current highest offer in an auction. › Auction use only. › Evidence of all offers must be made and kept to be made available upon Staff request. Timestamps are preferred. • Fixed Price. - A set price, specified by seller, that once met will result in an immediate sale, ignoring all other offers. › Applies to standard sales (non-auction sales e.g. In-game & Forum Sales, Forum Shops, etc), and must be treated as Insta. • Instant Price / Insta. - An instant price, specified by the seller, that once met will immediately end the auction, ignoring all other offers and bids. › Auction use only. • Trade Agreement / Deal. - A deal is done one of these two scenarios: › In-game: Both parties have agreed to a price and location. › Forum & Auction: An Insta or Fixed Price has been met. • False Buying / Selling. - Agreeing to buy or sell, but going back on the deal before the trade has taken place. • False Offering / Bidding. - Making an offer or bid with no intent or means to follow through. This also includes retracted or cancelled bids. • Misleading / Deceiving. - Intentionally giving another user false information, hiding or manipulating information before or after the trade has taken place. • Scamming. - Breaking a trade agreement once the trade has taken place. › e.g. Not returning a lend, breaking a Service agreement etc. TYPES OF TRADE FORUMS • Selling Pokemon. - Use this forum to sell non-variant Pokemon only. This includes both standard sales and auctions. › Do not sell Shiny or Special Pokemon, Shop Coins, Items or Services here. - You may sell up to 5 Pokemon per thread. › To sell 6 or more Pokemon in a single thread, use the Pokemon Shops sub-forum. • Buying Pokemon. - Use this forum to advertise that you are looking to buy a Pokemon. › Be specific to help others identify your posts. • Shiny & Special Pokemon. - Use this forum to sell Shiny & Special Pokemon only. This includes both standard sales and auctions. You may also create your own personalised Shiny / Special Shop here. › Do not sell non-variant Pokemon, Shop Coins, Items or Services here. • Pokemon Shops. - Use this forum when selling 6 or more non-variant Pokemon. › Do not sell Shiny or Special Pokemon, Coins, Items or Services here. • Service Shops. - Use this forum to sell a service, or advertise that you are looking for a service provider. This includes Daycare, Lending, PokeDex Data services, etc. You may also create your own personalised Service Shop here. › Do not sell or buy Pokemon, Shop Coins or Items here. • Coins & Items. - Use this forum to sell, or advertise that you are looking to buy Shop Coins or Items. You may also create your own personalised Coin / Item shop here. › Do not sell or buy Pokemon or Services here. • Rate / Price Checks. - Use this forum to request Ratings or Price Checks from other users. This applies to Pokemon, Items and Services. › Do not sell or buy Pokemon, Shop Coins, Items or Services here. CONTACTING A TRADE MODERATOR Before contacting a Trade Moderator for support, please ensure that you have read the Important Information & How To Report Guide. - If you would like to close your thread for any reason, please edit the topic title to make Trade Moderators aware. › This can include "Sold", "Close", "Can be Closed", "Please Lock", etc. › If you would like to re-open a locked shop for any reason, please report the thread using the Report button, or, contact a Trade Moderator via PM with a request to unlock the topic. Please include a direct link to the topic you would like to unlock. - If you do require the support from a Trade Moderator to resolve a trade issue, please do one of the following: › Make a report in the Report Center with the name of the user(s) you are reporting, a brief description of the infraction, and evidence. › To report a specific post or thread, use the "Report" button. This can be located at the bottom of each post here: CREDITS TO: Flik & Rekkuza: Established first Trade Rules thread. Khlover & Arkos: Held threads and updated them while active Moderators. Letrix: Revamped the trade forums, along with Trade Rules & Important Information. Logan, Tigerous, Salt & Hercules: Made several additions, changes and clarifications to Trade Rules. Logan: Created Auction Rules & Guide. Hawluchaa & Ehkoe: Revamped Trade & Auction Rules.
1 point
-
So i dont even know when was the last time i did the annoying quest but, after i talked with watson (something to do with eumi island) my entire subway quest reset itself0 points


.png.b871f66c866eb33502c0d34098d4779d.png)