Search the Community
Showing results for tags 'staff guides'.
The search index is currently processing. Current results may not be complete.
-
Greetings, I had in mind to create a list for you guys to ease your gameplay. Here's what I got: /player or /playertime ~ Displays the date of your accedence and shows the amount of played hours. /online or /on ~ Shows the current player count on the server. /inspect playername ~ Used to inspect players. Note that other players have to be near you in order to make it work. /pm yourname-=-playername ~ Grants the possibility to message players without having them on your friendlist or seeing them ingame or in chat. /cgjoin channelname ~ Joins/creates a private channel. Note that these channels only last until a server crash or a manual reboot took place. /cgleave channelname ~ Leaves a private channel. /ignore playername ~ Nothing much to add. Ignore mode lasts until a server crash or manual reboot took place. /unignore playername ~ Removes ignore mode. /friend playername ~ Sends a query to add the player to your friendlist. You'll receive a notification as soon as an user is online if you added them on your list. Staff cannot add non-staff players to their friendlist and vice versa. /trade playername ~ Sends an invitation to trade to the player. Note that both participating players have to be in the same Pokemon Center. /battle playername ~ Sends a battle request to the player (Unranked PvP!) Note that both players must be anywhere but a Pokemon Center. /pvp ~ Displays your stats in the chat: Total Wins, Losses and Disconnects (Unranked PvP) /happy 1-6 ~ Checks the happiness of your Pokemon. Type 1-6, dependent on the slot of your Pokemon in your party. Also, it can be used to check Pokemon's ID. /pokedex or /dex ~ Displays the amount of caught/seen Pokemon in the chat and shows the evolution count. Guild commands: Commands only available to Guild Leaders: /gcreate ~ Creates a guild. Note that you need 400K Pokedollar and at least 100 hours ingame to do so. /gdisband ~ The guild will be disbanded if you type that command in the chat bar. Be aware that it can't be undone once it was typed. /gmotd ~ Allows you to set/change the message of the day shown at your guild menu. /ginvite playername ~ Sends an invitation to the user to join your guild. Commands available to Guild Members: /gjoin ~ Type that in the chat once you've received an invitation to join a guild. Note that you can be only member of one guild at a time. /gleave ~ Type that command to leave the guild. Credits to Qhinn (Creator), nightjay, JollyolNathan, LeoChaos, Carlito2 for participating.
-
There are many services that you can use to upload your photos, and some may relate to your country only. Be aware that if photos are deleted from their host website they will no longer work in a post, as the image will no longer exist. Some hosts also periodically clear images that receive very few views - so some of your images may be lost over time. These are the homepages of the three most-used services: Imgur ○ Lightshot ○ Gyazo You can find How To's for each of these at the bottom of this post. ○ Uploading to forums. 1 At this point you will have the direct link to the image you want to upload. If you do not know how to find the direct link for an image, scroll down to find the service you are using to find a guide on how to get the direct link. 2 The next step is to integrate it into your post. You can go ahead and copy paste your direct link straight into your post, highlight it, then press the Image button OR press the Image button first, then copy paste your direct link between the brackets (If you know the code, you can also go ahead and type this in manually). The image button is highlighted in red: 3 Simply submit your post, and your image will have been added. A correctly linked image will look like this whilst in the post creation area: An incorrectly linked image will appear like this: If you find this happening, you have given the URL of the image domain - not the Direct Link. ○ How to use Imgur. Imgur is the only one of these services in the guide that doesn't require a download, there are a few more steps and you will need to do them every time you want to upload an image. You will also need an image or a screenshot you have already captured. 1 Visit the Imgur Homepage. At the top of the page you will find an option to upload images: 2 When you click the Upload Images button you will be presented with an upload screen. You can either drag and drop from the file location, or find it manually via browsing your computer. Here you can see I've already begun the process of uploading one image, you can tick the box under "Edit" if you'd like to enter the edit screen before uploading. I'm happy with my image so I won't be editing it. Click "Start Upload" to begin uploading. 3 Now you've uploaded your image you will come to the image page. to progress you need the url of the image (not of the image page). To find the url of the image, drag and drop the image into the browser search bar, or find it to the right of your image - this is highlighted in red. ○ How to use Lightshot. There is already a useful guide on how to use Lightshot so I won't show that in this post. It can be found here: https://pokemonrevolution.net/forum/topic/10699-url/ ○ How to use Gyazo. Gyazo is my personal favourite, since once it's downloaded, I can also use it to capture screenshots and resize them. There is also a handy draw feature which is nice for highlighting certain points. 1 After you've downloaded Gyazo, it's useful to put it in a place with easy access - such as locking it to your dock/taskbar. Simply click the Gyazo Icon and it will allow you to screenshot an area. Just click and drag to size. 2 A few seconds after taking your screenshot with Gyazo, it will automatically open a link in your browser in a new tab. Here you can select options to Delete, Draw, Share and Copy Link. Select Share as shown in red: Another option here is to simply click and drag the image into the browser search bar. 3 Again, like Imgur, we want the direct link for the image to upload properly. So select that here and get it ready for copy & pasting. Contributor: Daeon (Creator), Shaui
-
 System Requirements. Operating Systems: Windows Vista+, Mac OS X 10.7+, Ubuntu 10.10+. Graphics Card: DX9 (shader model 2.0) capabilities; generally everything made since 2004 should work. CPU Speed: 2Ghz+ Processor recommended. Ram: 2GB+ recommended. Download Sources: Homepage Downloads Update Logs Preparing your Download. 1. Clear your device entirely of all clients, previous and current versions. Also empty the Trash to ensure they are no longer accessible at all. 2. Visit System Preferences> Security & Privacy> General. It will look like this: 3. Unlock your Settings by clicking the padlock, this will prompt a password if you use one. After doing this, make sure that "Allow Apps Downloaded From: Anywhere" is selected as shown in the image above. An alternative: Select "Mac App Store and identified developers" instead of "Anywhere". When you reach step 7 you will need to revisit your Security & Privacy Settings and click a button that says "Open Anyway" - however, I have found this a little unpredictable across multiple tests and can test your patience a little. I definitely prefer "Anywhere" for this particular client, but this is definitely a viable option if you'd like to try it. 4. Now download the client from one of the above sources. 5. Once the client has download it should expand (unzip) itself, if not, you will need to do this manually. You can generally do this by double-clicking or Ctrl+clicking the file. You can also do this by unzipping via Archive Utility as you can see here: 6. Now you may need to move the client to Applications. As seen here, I find mine quite easily by searching "PROMAC" (Update: Client is now called PRO_OSX), and simply selecting and dragging the client to the Applications folder on the left hand side. At this point I also drag the client to my dock to lock it there for future use, just makes things easier - completely optional step though. 7. Now you can try open your client. The icon should jump up and down for a moment, then prompt you with the following message: 8. Click Open when prompted with the message above. Your client should now open and run as normal. If you do the above steps and still cannot connect, try the solution offered in the following thread: https://pokemonrevolution.net/forum/topic/28245-url/
 -
staff guides The benefit of Membership + Useful items in Shop
Shamac posted a topic in Outdated Guides
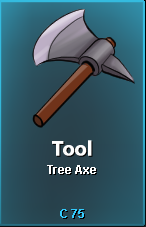
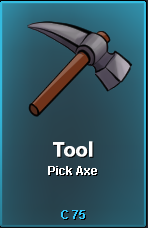
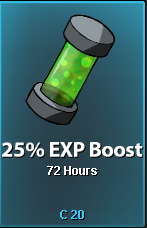
This guide will cover the benefits of the membership perks, as it wasn't written on the forum before. MS Benefits + How to get them How to activate the membership? You need to click on it for manual activation. The benefit is not stacked when you activate more MS medallions (for example you won't get 100% EXP from activating two medallions at the same time) MS exclusive locations Leev Town (After you beat the E4 of Hoenn, you can go there from the docks at Lilicove City, Olivine City or VermilionCity) Safari Exclusive (The most amount of MS pokemon are located there) Sevii Island (Go from Vermilion City dock by talking with the NPC) Amazon Forest (Go from Olivine City docks) Pokemon Tower Underground (Underground of the Pokemon Tower at Lavender Town, Guide Direction here ) More information Membership has only one level and no premium. The green name players mean membership users. Furthermore, you can also have extra spawns in the Excavation Sites. You have also access to the EV train area in Kanto Safari Area, which costs 10k each 20 minutes, with empowered spawns made of pokemons specified to train each Stat you want to train. Useful items in the shop With this item you don't need to have a pokemon with the cut move to get past trees (Requirement: need have HM Cut). Permanent use. It's a substitute item that you can use instead of a pokemon with rock smash. It needed on the sparkling breakables in the excavation sites in Hoenn, but can't be used on Love Island. Permanent use. Recreate your character apparel such as Hair, Skin, Gender, etc (default customize only). One use. Stack to membership bonus. One use. Increases the chance of finding a pokemon with hidden ability from 5% to 25% for 3 days. One use.
-
1. Requirements 1.1. Minimum OS: Mac OS X 10.7 (Lion) RAM memory: 1 Gb GPU memory: 128 Mb 1.2. Recommended OS: Mac OS X 10.11 (El Capitan) RAM memory: 4 Gb + GPU memory: 1 Gb + 2. Allowing unknown sources Click on the Apple menu > System Preferences > Security & Privacy > General tab. Under Allow applications downloaded from select Anywhere. 3. Download latest version Click on the Finder icon for Mac download here: https://pokemonrevolution.net/forum/viewtopic.php?f=14&t=4563 There is no mistery in this tutorial but with recent versions it's needed to make step 2. Hope it helps! :Shy: PD: It seems that right now, official link is dead, feel free to ask for mirrors!
-
This guide will help you pass the E4 easily, it just recommend for all newbie. Good luck! -------------------------------------------------------------------------------------------------------------------------------------- Recommend (can use Kanto Pokemon) Gyarados LV90+ Adamant/Jolly Item: Leftover EV train: 252atk|252spd|6hp Move set: Ice Fang, Dragon Dance, Bounce, Aqua Tail (Bounce teach by move tutor at Lake of Rage by 4000$) Gengar LV 90+ Timid/Modest Item: Black Sludge EV train: 252spatk|252spd|6hp Move set: Thunderbolt, Shadow Ball, Dark Pulse, Psychic (Thunderbolt teach by tm buy at Vermillion City Gym by 3000$) (Psychic teach by tm buy at Saffron City Gym by 3000$) And also don't forget take some backup items Revive x7 (can replace by Revival Herb x 5 with cost more but revive 100% hp), Hyper potion x15 (can replace by Energy roots x15 at Goldenrod Basement with cheaper price), Leppa Berry x10 The more level of your pokemon team, the less buying for backup items Backup team (using for avoiding some unexpected event/tank role with saving slot for revive other pokemon - only using if your core team so poor or you worry about losing) Clefable LV 90+ Bold/Calm/Modest Item: Leftover EV train: 252hp|172def|84spd Move set: Moonblast, Soft-Boiled/Moonlight, Thunder Wave, Ice Beam (Thunder Wave teach by tm buy at Celadon Mart by 2000$) (Soft-Boiled teach by tm buy at Goldenrod Mart by 3000$) (Ice Beam teach by tm buy at Mahogany City Gym by 4000$) E4 Team • Will • Gengar lead with using Shadow Ball for Brozong and Gardevoir, and Dark Pulse for others. Sometimes, Mega Alakazam can outspeed your pokemon, so just give up Gengar for dying and then using Gyarados with Bounce or Clefable with Thunder Wave and then Moonblast for kill • Koga • Gyarados lead with using using Dragon Dance 5-6 times at the beginninng, and then using Bounce for Toxicroak and Mega Beedrill, and using Ice Fang for others. Alternatively, Gengar lead with using Thunderbolt for Skuntank and Mega Beedrill, and Psychic for others • Bruno • Gyarados lead with using using Dragon Dance 5-6 times at the beginninng, and then using Ice Fang/Aqua Tail for Mega Lucario, and using Bounce for others. Alternatively, Gengar lead with using Thunderbolt for Mega Lucario and Psychic for all team • Karen • Gengar lead with using using Thunderbolt for Weavile and Absol. After that, switch to Gyarados with using 5-6 times at the beginning of Spiritomb, and then using Aqua Tail for Mega Houndoom and Ice Fang for others • Lance • Gyarados lead with using 5-6 times at the beginning, and then using Aqua Tail for Charizard, Bounce/whatever moves for Gyarados, and then Ice Fang for others. Alternatively, Gengar lead with using Thunderbolt for Charizard and Gyarados, and Shadow Ball for others. Backup: except Charizard and Gyarados, you can use Ice Beam of Clefable for beat all team dragon Contributors: Windypuff (Creator); Letrix, Shaui
-
Recommend Gengar LV 80+ Timid/Modest Item: Black Sludge EV train: 252spatk|252spd|6hp Move set: Thunderbolt, Shadow Ball/Icy Wind, Psychic (Icy Wind teach by move tutor at Seafoam B4F by 5000$) (Thunderbolt teach by tm buy at Vermillion City Gym by 3000$) (Psychic teach by tm buy at Saffron City Gym by 3000$) Gyarados LV80+ Adamant/Jolly Item: Leftover EV train: 252atk|252spd|6hp Move set: Ice Fang, Dragon Dance, Cruch, Aqua Tail And also don't forget take some backup items Revive x7, Hyper potion x15, Leppa Berry x10 The more level of your pokemon team, the less buying for backup items E4 Team • Lorelei • Gengar lead with using Thunderbolt for beat all team • Bruno • Gengar lead with using Psychic for beat all team • Agatha • Gengar lead with using Thunderbolt for Crobat and Pyschic for all • Lance • Gengar lead with using Thunderbolt for Gyarados and Charizard, while Shadow ball/ Icy Wind for others. Also you can alternatively with Gyarados lead with using Cruch for Gyardos, Aqua tail for Charizard and Ice Fang for others • Blue/Gary • Gyarados lead with using Dragon Dance 2-3 times at the beginning and then using Cruch for Alakazam and Mega Blastoise, Aqua Tail for Arcanine, and then Ice Fang for others
-
Hi as I see players asking about "Where is eevee", "How to find the key", "How to get out hideout" and so on many times. So I will write this guide. Hope it can help you guys. Thanks Talk with Sergeant Rick for starting quest and option 2 for accept. Then you go to Casino as rocket hideout Talk with Greg and you will be moved to underground, after that talk with him again, and pick up item in table After that go down and you will see elevator, select B2F. Prepare for battle with Jackson, he has 4 pokemon with lv from 23-27. Only the last Umbreon Lv27 is trouble. Using Poliwag with fighting move will beat it easy. And don't forget pick up hidden item - Iron in here. Now you will be prison and every time Team Rocket face to you, they will prison you again and again >_< really annoy... So be careful from now. For escape, you can talk with crate for jump out the room - watch out these two guard outside! The best way is waitting for these 2 guys go up and then u can jump out Follow the green arrows and you will be fine, just beware the guard girl on top and don't forget pick up Black Glasses item. Go upstairs for go back PC to heal or downstairs for continue Now you will in B2F, go right ahead. Watch out this guard! You will see the Maze now. Pickup 3 Max Ether and 1 Pokeball in this map, having battle with team rocket in here too. Follow the green arrow for continue and red arrow for exist Now, you are in the place before prison, go upstairs and fight with 3 NPCs for exp. This floors also have hidden item - 2 super potions and 1 hyper potion Now go downstairs and go back the maze by follow red arrow to the downstairs B3F(as below picture) In B3F, before go down for battle girl NPC and then prepare for Greg battle. I recommend you find some exp before, so let skip it now and go left. You will see the small maze now o_0 Battle with team rocket and pick up TM07 - HornDrill. Go downstairs to B4F and continue battle NPCs for exp. In B4F you will also find Card Key and hidden item - 2 Revives in trash bin After clear this floor go back in upstairs and now you can have battle with Greg. His team order: You almost done now. Go heal and then go to Big Maze at the previous in B2F and then go into elevator , select B4F. Fight with 2 NPCs left in there and then go to find hidden gate. Prepare for fighting with Giovanni around lv 30-35, he is not a joke! His team order is: Be carefull with Persian for Power Gem move. A easy way to win this battle would be by: Using water pokemon level 40+ as One backup pokemon lv35+ that have dig as Make sure pick up item in table after you beat Giovanni. After you defeated Giovanni you automaticly have the password for the machines standing in the team rocket base, eevee is in 1 of them (machine around the basement not only in the room). Here is location of them: After you received Eevee go back to Sergeant Rick for completed quest (and you now cannot get back to hideout anymore). Contributors: Windypuff(Creator); Letrix; Shaui
-
⋯⋯⋯⋯⋯⋯⋯⋯⋯⋯⋯⋯⋯⋯⋯⋯⋯⋯⋯⋯⋯⋯⋯⋯⋯⋯⋯⋯⋯⋯⋯⋯⋯⋯⋯⋯⋯⋯⋯⋯⋯⋯⋯⋯⋯⋯⋯⋯⋯⋯⋯⋯⋯ Hey everyone! This guide is to help players unlock the Subway System, as it is PRO's alternative to quick travelling due to the fact that players are not allowed to use Fly outside of battle. The subway system works for Kanto and Johto only; if you wish to unlock fast travelling for Hoenn and Sinnoh, do the Hoenn Teleport Quest. There aren't any requirements to start the quest, however, you'll need to be Kanto Champion in order to use the subway and train. Keep in mind that to fully complete the quest, you'll need $50,000 Pokedollars, a Nocturnal Feather, and a Bicycle to access Route 16. ⋯⋯⋯⋯⋯⋯⋯⋯⋯⋯⋯⋯⋯⋯⋯⋯⋯⋯⋯⋯⋯⋯⋯⋯ To start the quest, talk to the Subway Manager in Saffron City at the Saffron Railway Station. He'll tell you that the system is not working at the moment because their biggest sponsor, Yorkie, has issues with his farm and needs help on Route 16. Upon learning that Yorkie needs help, head to Route 16 and talk to him. He'll ask you to find his brother to retrieve the parcel. Although Yorkie has no idea where his brother is, he lets you know that he can only be in Kanto. There are five spots that Yorkie's brother can be at, and every player has a chance of Yorkie's brother being in one of these locations, so be sure to check them all! After finding Yorkie's brother, he'll ask you for $50,000 Pokedollars in return for the parcel. After that, head back to Route 16 to talk to Yorkie and give him the parcel back. He'll want to reward you but first, he'll ask you to retrieve a Nocturnal Feather to prove how much you love Pidgeys! To obtain a Nocturnal Feather, you can either buy it from other players in Trade Chat, or you can hunt it yourself by using a Pokemon that knows Covet or Thief and using one of those moves on Pidgeotto in Route 16 during the morning or night. More information about hunting them can be found in the Hunting Nocturnal Feather part of this guide. After retrieving a Nocturnal Feather, talk to Yorkie again and give it to him! As a reward, you'll receive HM Fly, and the subway system will start working again. After talking to the Subway Manager in Saffron Railway Station again, all the guards blocking access to the subway will leave, but keep in mind that you will need to be Kanto Champion in order to use them. Well, that's it! Great job on completing the quest. You can now use the subway system! It'll be $2,500 for traveling within the same region, and $5,000 for traveling between Kanto and Johto. ⋯⋯⋯⋯⋯⋯⋯⋯⋯⋯⋯⋯⋯⋯⋯⋯⋯⋯⋯⋯⋯⋯⋯⋯⋯⋯⋯⋯⋯⋯⋯⋯⋯⋯⋯⋯⋯⋯⋯ The Nocturnal Feather is only dropped by Pidgeotto that inhabit Route 16. As of June 23rd, 2018, the drop rate for the Nocturnal Feather has been buffed to 25%. The following techniques can be used to facilitate the hunt for it. Contribution Leotosi, the original owner and creator of this thread. Shary and Nebulas, for the Nocturnal Feather image.