Search the Community
Showing results for tags 'staff guides'.
-
Pro Discord guide The PRO Discord channel is a good tool for all players as well as staff. It allows us to give players information quickly and keep them up to date on disruptions such as maintenance work. There are also a lot of useful tools on the server for players. This guide is to show you how to set up a Discord account, how to join the PRO server and what is available on that server for members. The Discord I have used is the Discord app for windows PC. Downloading Discord and the layout of Discord is different between the PC version and the android version but setting up a Discord account, the pro Discord server and bot commands are the same for both PC and android. To download Discord onto an android device just go into play store, search Discord and download. Index [goto=1]1. Setting up a Discord account[/goto] [goto=2]2. Screen layout[/goto] [goto=3]3. Assigning yourself a server[/goto] [goto=4]4. Discord channel[/goto] [goto=5]5. Events and tournaments[/goto] [goto=6]6. Information[/goto] [goto=7]7. Player zone[/goto] [goto=8]8. Trade[/goto] [goto=9]9. Voice chat[/goto] [goto=10]10. Bot commands[/goto] [anchor=1]1. Setting up a Discord account[/anchor] Go to https://Discordapp.com/ and the screen will look like the image below. Click on the download for windows button, inside the red circle in the picture above and it’ll give you the option to dowload the Discordsetup.exe file shown in the picture below. You select save file and it’ll begin downloading the setup file for Discord. Run the program and follow the instructions in it to download Discord onto your computer. Once Discord is set up and you run the program it will come up with the page in the picture below. You will need to click on the circled register button to create an account. Once that is done you will need to type in your email address and create a username and password before clicking continue as shown below. You will be logged in once that is done and appear at the page in the picture below, you will also need to go into your email account you used and click on the verification link in the email, this step is important as you will not be able to join a server until it is done. Click on join a server and your screen should look like the picture below. You will need to input a instant invite code for the server you wish to join. The invite code for PRO Discord server is: https://discord.gg/TcAdcPx enter it into the box like below and select join. Once you’ve done that you’ll appear on the PRO Discord page in the server rules section. Please read all the rules carefully as they will be enforced by the staff. You will also see a countdown at the bottom of the page, circled in the picture below, this is the amount of time you need to be a member on the server before you can post anything so use that time to read the rules. On the right is a list of the people currently on the server and on the left is a list of the different channels on the server. [anchor=2]2. Screen layout[/anchor] Mute – The button circled in the picture below will mute the channel you are on. It will stop all unread indicators and notifications unless you are specifically tagged. Pinned messages – The button circled in the picture below will open up the pinned message for that channel. These are messages that have been saved so that members can find them easily at a later date. Pinned message often contain either important or helpful information for members. Each channel has different messages pinned and some have no messages pinned at all. It’s recommended that you go through all the channels and read the pinned messages in each. Members list – The button, circled in the picture below, will show/hide the members list side bar Mentions – The circled button in the picture below will show you all posts that you have been tagged in. Help – The help button, circled in the picture below, will open up the help menu. Mute/deafen – These buttons, circled below, are for voice chats. The mute will make it so that everyone else in the chat cannot hear you while deafen make it so that you cannot hear them. Settings – The setting button, circled below, will open up the settings options for you Discord account. [anchor=3]3. Assigning yourself a server[/anchor] The first thing you want to do is to read the server rules page. The top of the server rules page will look like the picture below. Once you read all the rules you want to follow the directions in the red circle in the picture above and connect yourself to the server/s you play on. Scroll down the left hand side until you get to player zone: bot commands, circled yellow. You will need to type into the chat box “?rank your server” as shown in the red circle in the picture below. As you can see, in the yellow circle below, your name will be white before assigning yourself a server to show that you’re not connected to any server. As you can see in the red circle in the picture below, it will come up with a message to tell you that you’ve joined a server. In the yellow circle you will see that the colour of your name has changed. [anchor=4]4. Discord channels[/anchor] There are five sections in the Discord server for general members: events and tournaments, information, player zone, trade and voice chat. All sections are shown in the red circle in the picture below. Each section can be opened and closed also if you have an unread message on one of the channels it is highlighted white as shown in the picture below in the red circle. [anchor=5]5. Events and tournaments[/anchor] The four channels in the events and tournaments section are: Ladder tournament Player hosted events Guess the pokemon event Pokemon trivia event Ladder tournament – this is where the replays for the pro pvp ladder tournaments are posted. The top pvp players on each server at the end of each season are given the option of entering and you can find a link to the table and see how they battled each other in the replays. Player hosted events – this channel is for advertising player hosted events and giveaways. Only staff and Discord mods can post in this section and any requests to post an event needs to be made to one of them. Most of them will be on a specific server and when it is it will be labelled clearly that it is for that server only. Guess the pokemon – This channel was specifically for a guess the pokemon game held on the 24/12/17. Pokemon trivia event – The channel was specifically for a pokemon trivia contest held on the 25/12/17. [anchor=6]6. Information[/anchor] This is probably the most important area on the Discord server and is an area you should always keep an eye on. In the information section is: Announcements Server rules Pro useful links Guilds Announcements – This is where staff keep you up to date on events that are happening behind the scenes. If the servers crash, it is here that they will let you know when they are back up. Maintenance work will be announced in this section as well as events, recruitment and a whole range of other things. Anything pro or Discord related that the staff feel members need to know will be put here and if it’s important they will tag members as well. Server rules – This is where the server rules are. Please read them all as ignorance of the rules is not a valid defence for breaking them. By being on the server you agree to follow these rules so you do need to know them. This is the channel you appear in when you first join the server so you cannot say you didn’t know they were there. Pro useful links – This is the second most useful channel on the server in my opinion. It has a lot of links to different areas on the forum including a lot of guides. It is an excellent resource for any player and even experienced players use them. Story quest guides; game mechanics like repel trick, dig spots, ev and iv explanation thread; game data guides like tm locations and move tutors; and loads more. Guilds – This channel is a list of guild active in game. It has the name of guilds from all three servers and links to their recruitment pages on the forum. If you have a guild and want you guild listed, you need to create a recruitment page and then follow the instructions at the top of the guild channel. [anchor=7]7. Player zone[/anchor] Player zone is the main chat area of the Discord. It is where most players spend their time on the server. Player zone has 7 channels in it: General Support Bot commands Pvp showdown Art Mapping Video streams General – This is the general chatting area on the Discord. You can talk about anything you want here with the other members as long as you stay within the server rules. Support – This is like help chat in game. If you have a problem or game related query post it here and someone will come along and help you. This channel has the same rule as help chat, keep things help related. Bot commands – this is by far the most useful channel on the server for members in my opinion. This is the area where you will type all the bot commands. Dyno bot, reborn bot and all the others. They can all be found and used in this channel. Please see the end of this guide for an abridged list of the bot commands available in the server. Pvp showdown – this channel is for all pvp talk. Talk about teams, moves or tiers, it all goes here. You can also post replays of your battles for others to watch. It’s not just for showdown, video of pro battles can be placed here as well. Art – as the name suggests this channel is for art or art related topics. Show off you work on this channel and advertise art services such as forum signature shop (leave 24 hours between each advertisement). There are some rules to this channel such as no NSFW art and not uploading other people’s art as your own. If you’re going to upload other peoples art make sure you have their permission and that you credit them for it. Mapping – a place to show off you mapping skills. Create your own maps and put them here for scrutiny. Look at the work of the other members as well. There is a mapping program in the pinned messages for you to use. The mapping team may even give you pointers from time to time if asked nicely. Video streams – This channel is used to post your pro videos as well as to advertise your live streams. [anchor=8]8. Trade[/anchor] Please not that you will not be able to write in the trade channel for a server you have not assigned yourself to. There are three channels in the trade section, one for each of the servers and you should only post in the channel for the server you wish to do the trade on. All three channels are the same; the only difference is the server they are for. In the trade section you can: Make a request to buy Put up pokemon & items to sell, please provide a screenshot of the pokemon when you post Advertise or request EV and levelling service advertise you shop on the forum Please note that pro trade rules apply to this channel. Do not spam requests or advertisements and leave at least 24 hours before reposting a previous trade shout. So if you’re selling a Dragonite and a Gyarados you can post both but you can only post each one once in any 24 hour period. [anchor=9]9. Voice chat[/anchor] There are four voice channels in the voice chats section and a text channel to accompany the voice chats. One of the chats is specifically for staff but members can use the other three. To be able to use voice chats you need to reach level 7 on the mee6 bot on the server. [anchor=10]10. Bot commands[/anchor] The two main areas on the server that you will use bot commands are in voice chat for the music bot and in bot commands for the rest. There are a lot of bot commands and some of them will only be available to moderators. Below I have listed the more common used bot commands for members. Dyno bot commands, all the commands in this section need to be prefaced with ? (example ?wiki): Reborn bot commands, all commands in this section need to be prefaced with ^ (example ^spawn route 1): Fredboat bot: This is the bot that is used to play music in the voice chats. All commands for this bot must be prefaced with ;; (example: ;;stop)
-
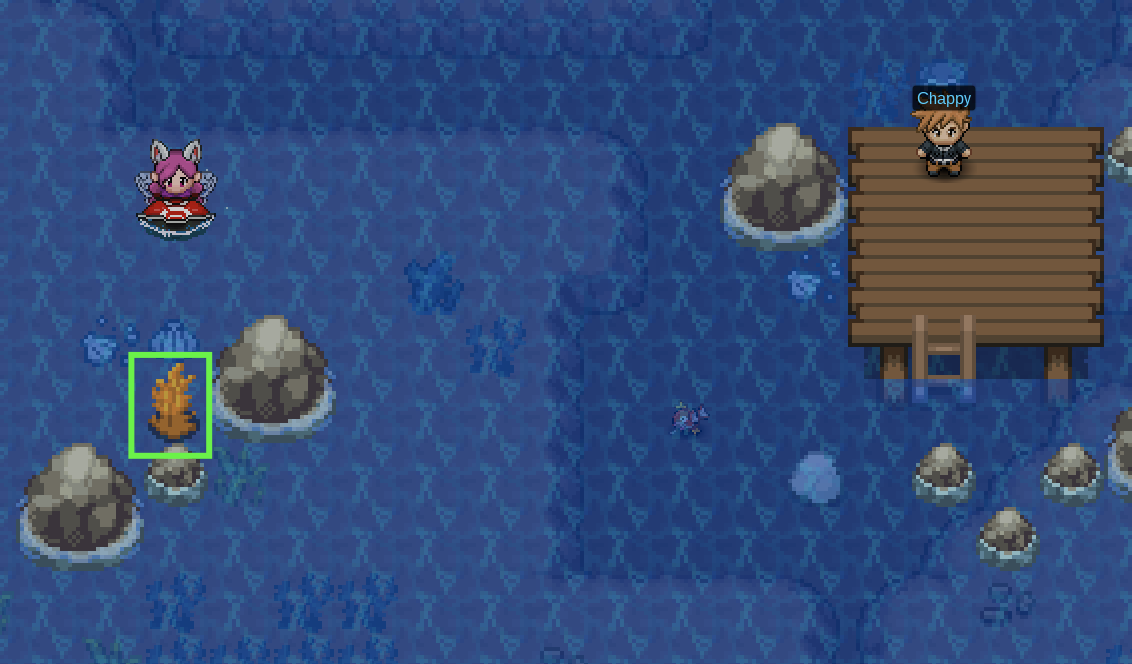
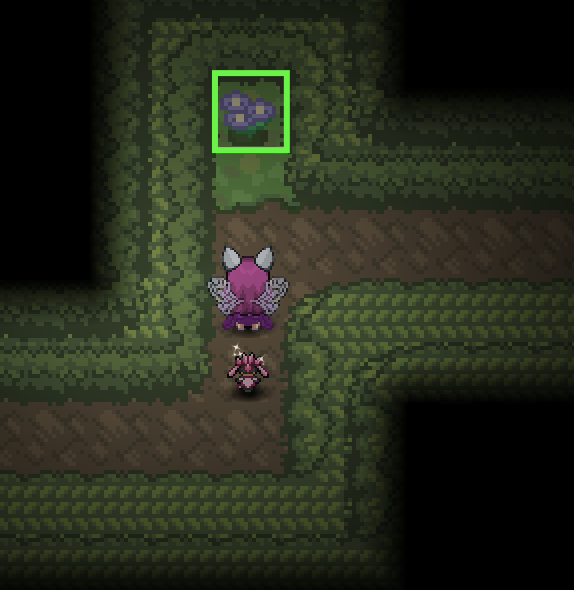
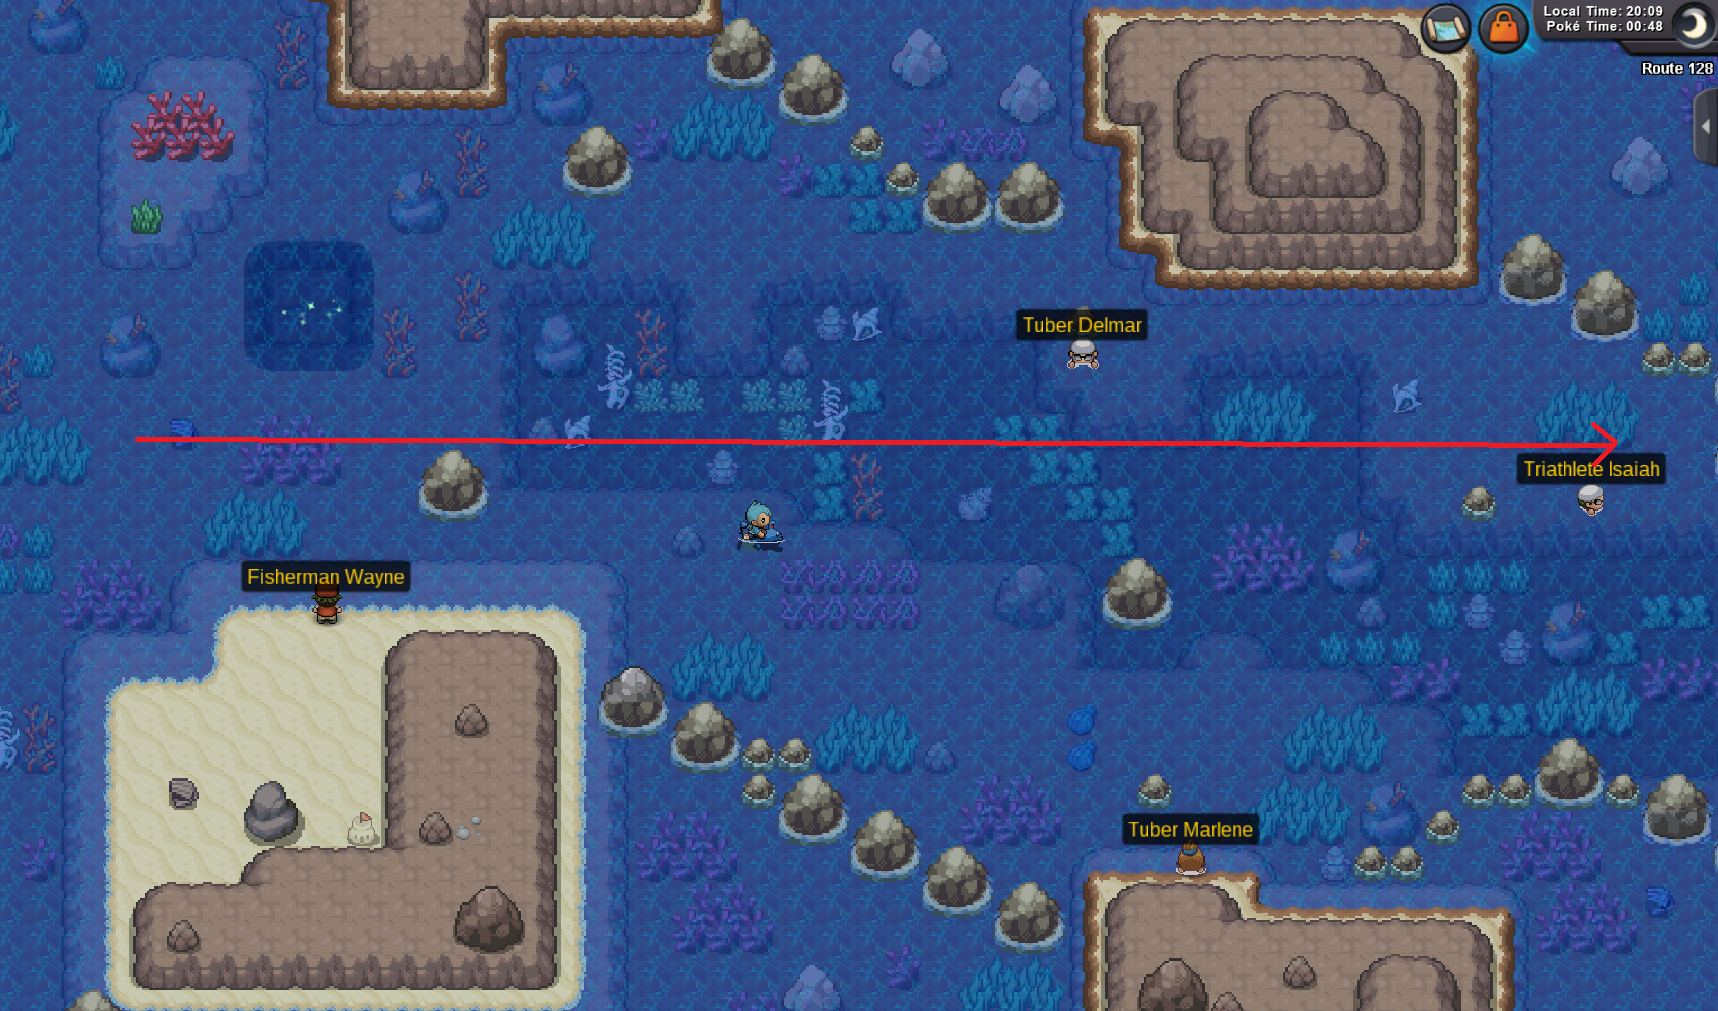
⋯⋯⋯⋯⋯⋯⋯⋯⋯⋯⋯⋯⋯⋯⋯⋯⋯⋯⋯⋯⋯⋯⋯⋯⋯⋯⋯⋯⋯⋯⋯⋯⋯⋯⋯⋯⋯⋯⋯⋯⋯⋯⋯⋯⋯⋯⋯ Hello everyone, I've created this guide to inform users as how to go about obtaining a Shell Bell. You will need to do a mini-quest in Shoal Cave—located in Hoenn—north of Mossdeep City on Route 125. To explain what the item does: a Shell Bell is a type of held item that gradually restores HP. Whenever the Pokémon holding it deals damage with a move, it restores HP equal to 1/8 of the damage dealt. It is made from Shoal Shells and Shoal Salts. In order to start this quest, you need to have either a surf mount or a Pokémon that knows HM Surf. I hope this guide helped in obtaining your new Shell Bell. Kind regards, Astraea.
-
Mt. Silver Walkthrough Hey! I am writing this guide because I noticed there were not any good Mt. Silver guides so I wanted to make one to help out the community ( ). I hope this guide helps! Requirements: Entrance Exploring the Mountain Karate Master Jackson Red And that is the Mt. Silver Questline! After the quest Mt. Silver is a pretty good place to hunt Pokemon, and Ev train them as well :) :Heart: :Heart: :Heart: Thanks for using my guide! I hope it has helped you! :)
-

staff guides How to record your screen and upload a video
Shamac posted a topic in Non-content Guides
Hello everyone and welcome to another guide to help you for the Official Legendary Tournament Round Two. In this guide I will teach you how to record your screen and ingame actions (Using OBS and Fraps) and how to upload a video to Youtube. The programs you will meet below have more tools and settings than what I am showing, I just compiled the basic tools for each program since there is no need to overcomplicate. I advise you to try it out in the meanwhile, so when you actually need to record it will be easy and you will find the perfect settings for your taste. Also if you find any error, you didn't understand what I wrote, or you want something to be added here, post a reply quoting me so I can edit the topic. Without further ado, . Using OBS Step 1: Download OBS Step 2: Install it Step 3: Open the program / Add Settings Click on the "+" on the Sources table and add: - Display Capture - Game Capture (This should make you able to record if you use the Client on Window Mode or Full Screen) Once you do this, the display should start showing like your screen multiple times. Small note if you want to change anything... Click on Settings: Click on Video on your left bar, it should appear a menu with the resolution, this can be usefull, since you can use it in a lower resolution so the video file doesn't become big and taking more time to upload. Click on Output on your left bar, it should appear a menu where you can choose where you want the video file to appear and in which format you want for it, as shown in the picture below. After you made that settings changes remember to click on "Apply" then "Ok" to implement them Step 4: Recording Start recording by clicking on the botton "Start Recording" in the client, once you want to stop recording, instead of "Start Recording", there will be a "Stop Recording". After clicking on "Stop Recording", in some moments, the video file will be in the folder you choose to use. Using Fraps Step 1: Download Fraps Step 2: Install it Step 3: Open the Program / Add Settings It should appear a menu like the one shown in the picture below. Click on the "Movies" botton then choose the where you want the video file to appear and which key you want use to start recording. Step 4: Recording With Fraps open in the background, enter in the Client you are going to use, once you are ready to start recording, press the key you choose to start recording and it will start. Once you are done recording press again in the key you used to start and in short moments a video file will appear in the folder you choose to use. How to Upload to Youtube Step 1: Go to Youtube and do an account. If you have a Gmail Account it can be linked and you will have instantly to Youtube. If you already have, skip this step. Step 2: Do a Youtube Channel In the top left corner click on the page and a small tab will appear, once there click on "My Channel". Step 3: Upload a video Once the channel is created, click on "Upload a video", it will show a new page where you can drag the video file to there or click on the image and choose the file location in your device. Once you are uploading you can edit the information about the video. Remember to press Publish at the end of the upload. Once you press Publish a new page should appear and it will show the link of the video you just upload on youtube. I hope this guide will help someone, once gain I advise you to try it out in the meanwhile so you get familiar to the programs and if you find any error or something you would like to add here post a reply quoting me in this topic so I can edit. Best of luck and have fun :) -
Hello everyone. As the Official Legendary Tournament Round Two registration already began, you will need to submit via PM an Imgur album with the Pokemons you want to use in Battle. With that in mind it was decided to do this guide in order to help you do that Imgur album. If you want to know how to take screenshots with easy tools besides your devices offer, I recomend Gyazo and Lightshot as it will make a image and upload to their site, where you can just use the link or download from there. The guide will consist in 5 steps. If you have any doubt on how to do any of them make sure to leave a post in order to help you. [glow=grey]Step 1: Create an account in Imgur and Log In.[/glow] [glow=grey]Step 2: Adding Pictures[/glow] Click into Add Pictures. You can now post the link of the pictures you want to add or drag the picture from your computer to the the page. You can also skip the first part of this step and just drag to the page, it will automatically work as it is listed in: [glow=grey]Step 3: Creating Albums[/glow] Click where it says All pictures and a menu will appear, then choose + New Album, it will appear a new menu where you can write the Name and the Description (remember to not use the Secret option otherwise no one will be able to see the album besides you). [glow=grey]Step 4: Adding Pictures to the Albums[/glow] Choose the option Add Pictures then a menu will appear showing all the pictures uploaded in your Imgur account. Click once once on every picture you want to add to the album (It will appear a check mark in the top right corner of each picture) and then press save when you are done. [glow=grey]Step 5: Getting the link of the Album[/glow] Click on your account name in the top right corner of your page then a menu will appear, in that menu press Albums as it will list all the albums you have in your Imgur account. After it click on the album you want to share and the whole album will appear, on the right side of your screen you should be able to see a menu where you can see the link of the album and the other settings for that album. Hope the guide was helpful. Best of luck and Merry Christmas.
-
CONTENTS MOUNTS [goto=1]LAND[/goto] [goto=2]SURF[/goto] [goto=3]PvP[/goto] CLOTHING [goto=4]CLOTHING SETS[/goto] [goto=5]HALLOWEEN MYSTERY BOX[/goto] [goto=6]LUNCH MYSTERY BOX[/goto] [goto=7]CHRISTMAS CRACKER[/goto] You may find Ctrl+F or Ctrl+F useful, if you're seeking a specific item. x[/hr] [anchor=1]MOUNTS - LAND[/anchor] x[/hr] Absol S Absol Aerodactyl S Aerodactyl Arcanine S Arcanine Aurorus: S Aurorus: Bicycle Bicycle Blue Bicycle Green Bicycle Yellow Charizard S Charizard Dodrio S Dodrio Fearow S Fearow Glaceon S Glaceon Houndoom S Houndoom Luxray S Luxray Manectric S Manectric Ninetales S Ninetales Rapidash S Rapidash Stantler S Stantler Sylveon S Sylveon Talonflame S Talonflame Togekiss S Togekiss Umbreon S Umbreon Latias Latios Xmas Stantler Zombie Charizard H Rapidash Mount x[/hr] [anchor=2]MOUNTS - SURF[/anchor] x[/hr] Dragonair S Dragonair Gyarados S Gyarados Lapras Shiny Lapras Magikarp S Magikarp Milotic S Milotic Sharpedo S Sharpedo Swampert S Swampert Wailmer Light Blue Jet Ski Light Orange Jet Ski Light Green Jet Ski Light Pink Jet Ski Light Red Jet Ski Light Teal Jet Ski Light Yellow Jet Ski x[/hr] [anchor=3]PvP MOUNTS[/anchor] These mounts are obtained by winning enough PvP coins and buying them from the PvP coin master in the respective regions x[/hr] Articuno Zapdos Moltres Black Absol Pink Ninetales Raikou Entei Suicune Kyogre Black Jet Ski Brown Jet Ski Dark Blue Jet Ski Dark Green Jet Ski x[/hr] [anchor=4]CLOTHING - CLOTHING SETS[/anchor] x[/hr] COSTUMES x[/hr] Basic Clothing (Female): (shows in order of red, yellow, purple, blue, orange, green): Basic Clothing (Male): (shows in order of red purple, green, blue, orange, yellow): Casual Clothing (Female): (shows in the order of black, white, orange, purple, pink, green, red): Casual Clothing (Male): (shows in the order of orange, pink, red, black, purple, white, green) Chikorita: Cyndaquil: Deadpool MALE ONLY: Harley Quinn FEMALE ONLY: Hulk MALE ONLY: Iron Man MALE ONLY: Mudkip: Sailor Moon FEMALE ONLY: Catwoman FEMALE ONLY: Snorlax: Shiny Snorlax: Snowman: Team Aqua: Team Magma: Thor MALE ONLY: Torchic: Totodile: Treecko: Bug Cloak Set: Dragon Cloak Set: Dark Cloak Set: Electric Cloak Set: Fairy Cloak Set: Fighting Cloak Set: Fire Cloak Set: Flying Cloak Set: Ghost Cloak Set: Grass Cloak Set: Ground Cloak Set: Ice Cloak Set: Normal Cloak Set: Poison Cloak Set: Psychic Cloak Set: Rock Cloak Set: Steel Cloak Set: Water Cloak Set: Caterpie Set: Oddish Hat: Mew Hat: S Mew Hat: Goomy Hat: S Goomy Hat: Glalie Mask MALE ONLY: Froslass Set FEMALE ONLY: Ludicolo Clothes: Elf Hat: Santa Set: Stantler Set: x[/hr] HATS These hats are purchasable from the purple topped tent in Lavender Town (Kanto) and Ecruteak Town (Johto) x[/hr] Beanie: (shows in the order of black, blue, green, brown, turquoise, white): Caps: (shows in the order of black, blue, green, pink, yellow, red): Small Caps: (shows in the order of pink, white, blue, green, red, brown): Fedora Style Hats: (shows in the order of black, blue, green, yellow, purple, red): x[/hr] WINGS x[/hr] Beedrill Wings: Butterfree Wings: Beautifly Wings: Dustox Wings: Volcarona Wings: Giratina Wings: Articuno Wings: x[/hr] PVP SETS x[/hr] Season One (Red): Season Two (Green): Season Three (Blue): Season Four (Purple): Season Four (Orange): Pangoro Cloak (And hat): Champion Cloak (And Champion Crown): Aqua Diva Dress FEMALE ONLY: Fuchsia Diva Dress FEMALE ONLY: Silver Diva Dress FEMALE ONLY: Blue Punk Jacket MALE ONLY: Gold Punk Jacket MALE ONLY: Red Punk Jacket MALE ONLY: x[/hr] WINTER SETS x[/hr] Blue Winter Set: Green Winter Set: Grey Winter Set: Pink Winter Set: x[/hr] [anchor=5]CLOTHING - HALLOWEEN MYSTERY BOX[/anchor] x[/hr] Angel Ears: Devil Ears: Flower Anemone: Flower Jasmine: Flower Orchid: Flower Pansy: Ghost Outfit 1: Ghost Outfit 2: Ghost Outfit 3: Ghost Outfit 4: Ghost Outfit 5: Ghost Outfit 6: Ghost Outfit 7: Ghost Outfit 8: Ghost Outfit 9: Ghost Outfit 10: Ghost Outfit 11: Ghost Outfit 12: Ghost Outfit 13: Ghost Outfit 14: Ghost Outfit 15: Ghost Outfit 16: Pacifier Blue: Pacifier Pink: Pirate Eye Patch: Psyduck Hat: Pumpkin Hat: Pumpkin Hat O: Pumpkin Hat S: Skull Hat: Skull Hat G: Frankenstein Mask: Ghost Rider Mask: Mimikyu Outfit: x[/hr] [anchor=6]CLOTHING - LUNCH MYSTERY BOX[/anchor] x[/hr] Bamboo: Bun: Bubblegum (Shows in order of Blue, Green, Pink, Purple, Yellow): Burger: Candy Apple: Cookie: Doughnut: Dumpling: Hotdog: Lollipop (Shows in order of Grape, Kiwi, Mint, Strawberry, Tangerine, Rainbow): Pizza: Riceball: Rollcake: Sushi: Toast: x[/hr] [anchor=7]CLOTHING - CHRISTMAS CRACKER[/anchor] x[/hr] Blue Party Hat: Green Party Hat: Orange Party Hat: Pink Party Hat: Red Party Hat: Yellow Party Hat:
-
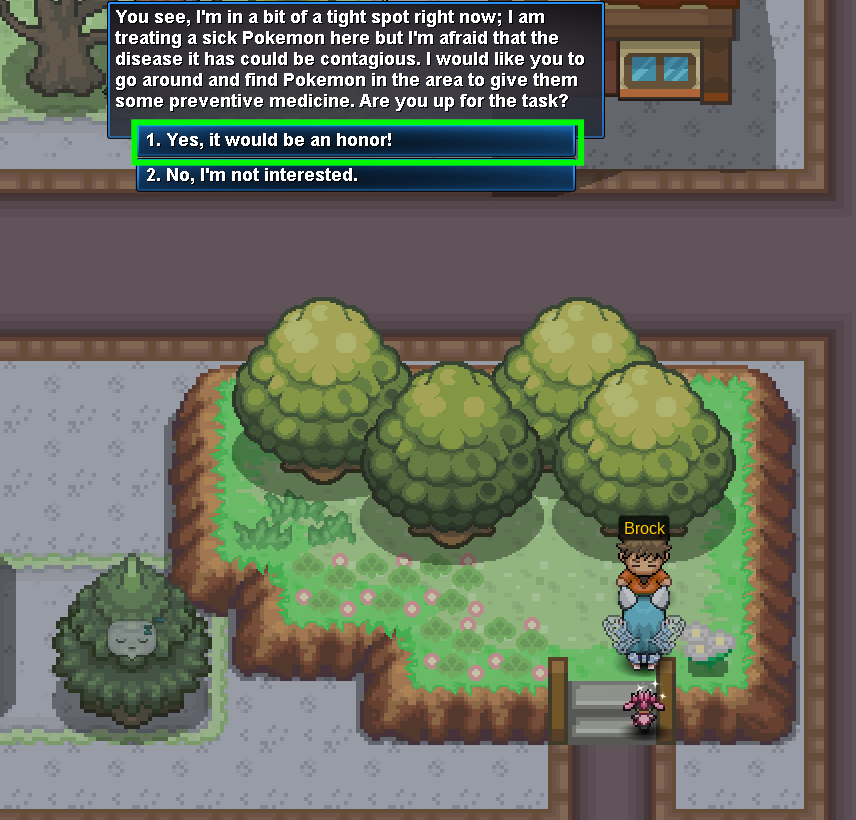
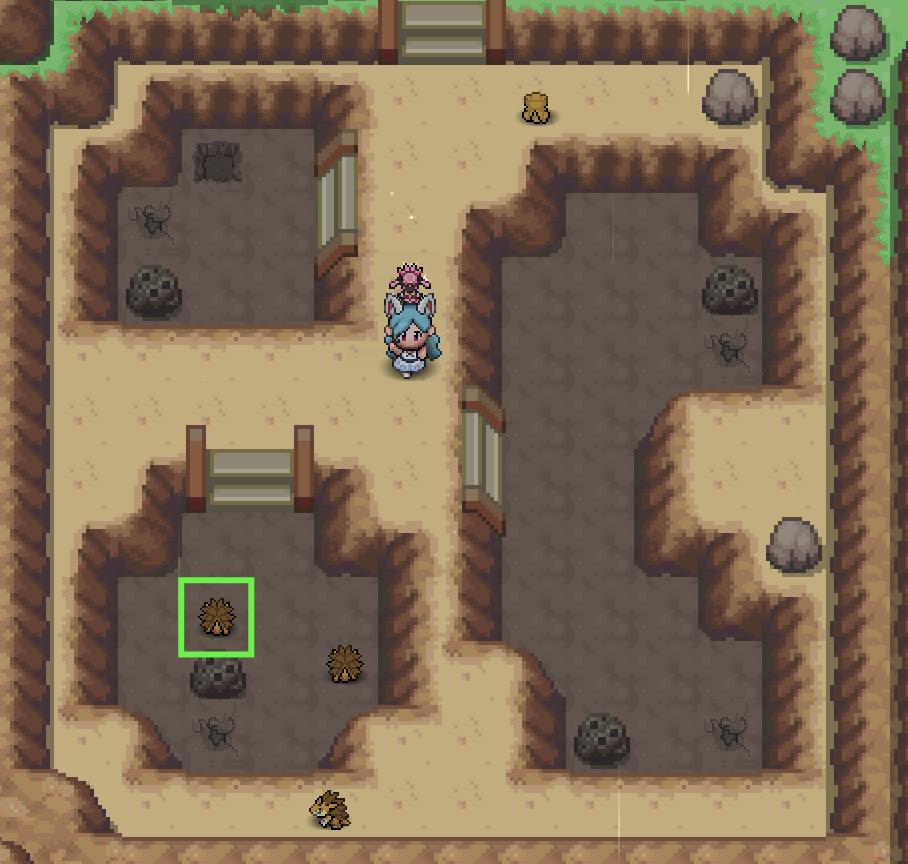
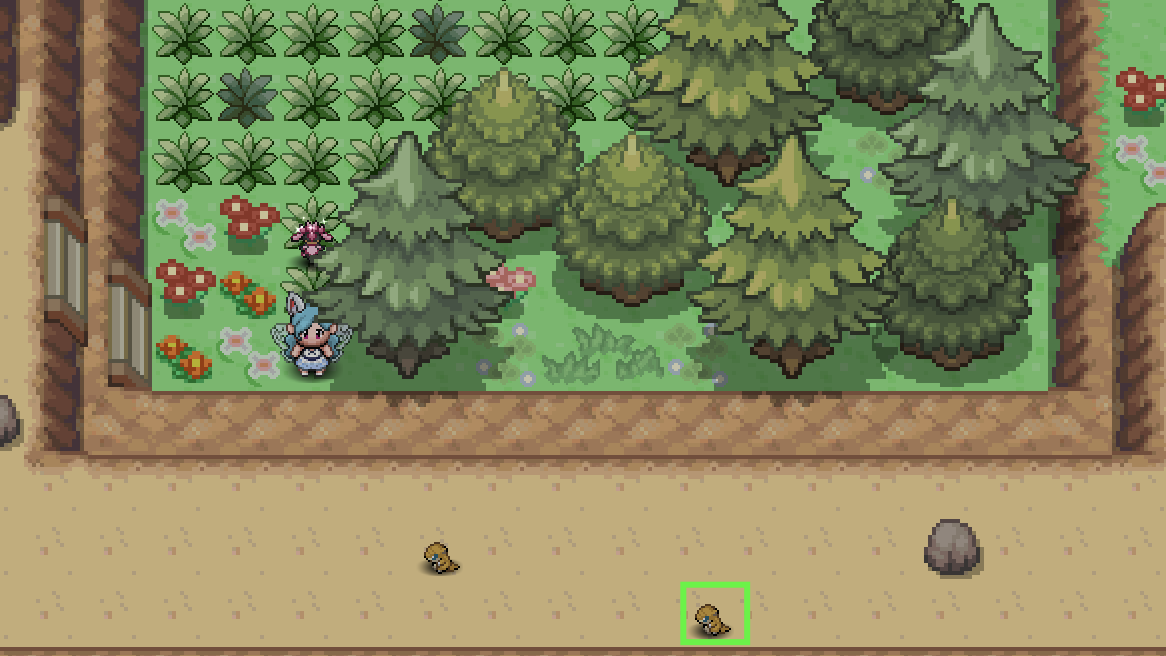
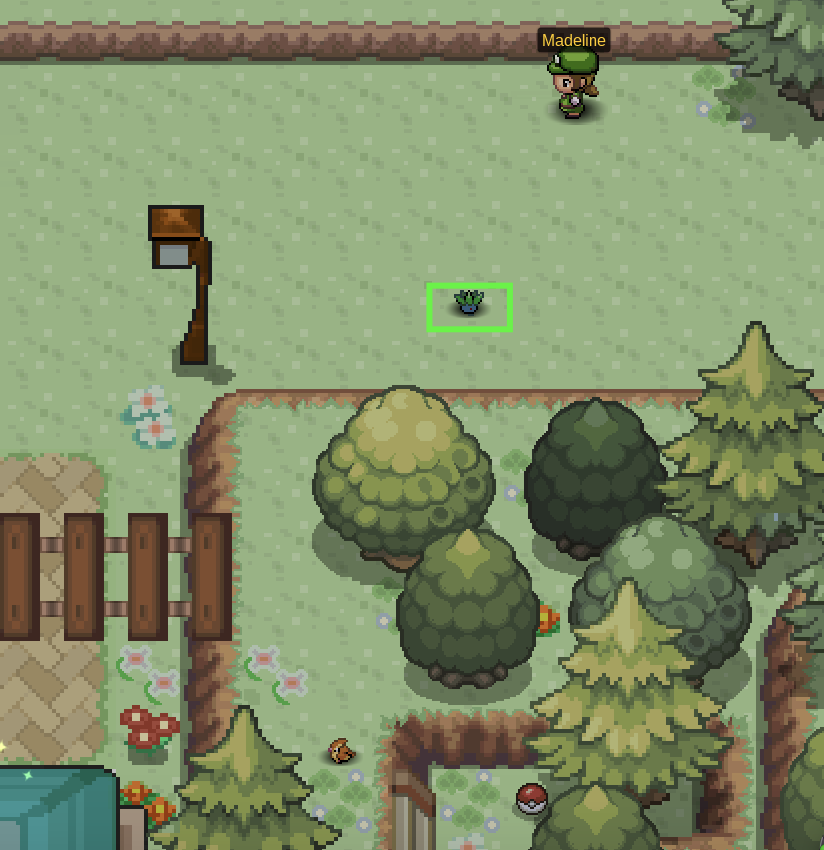
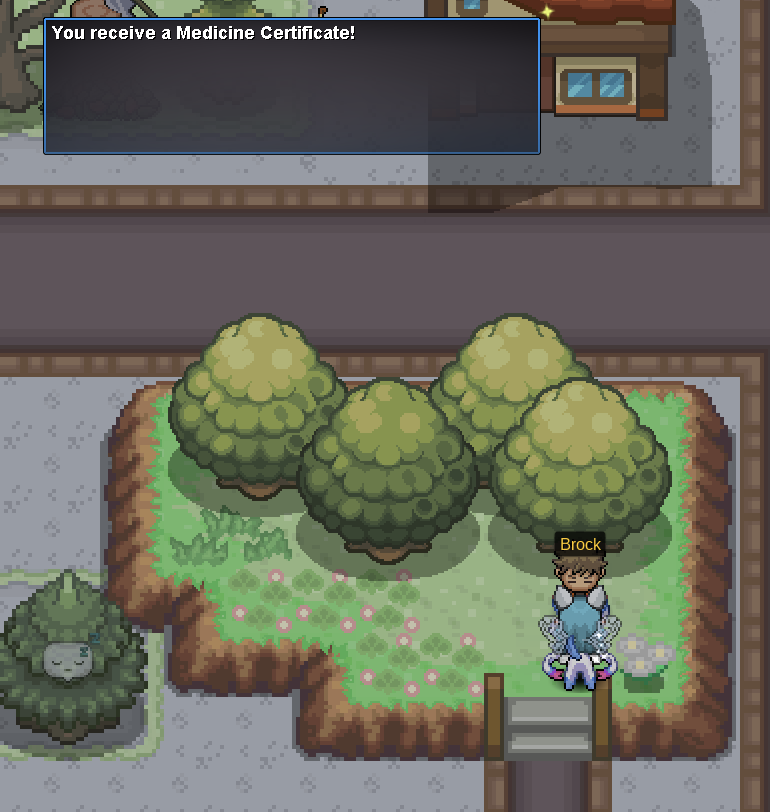
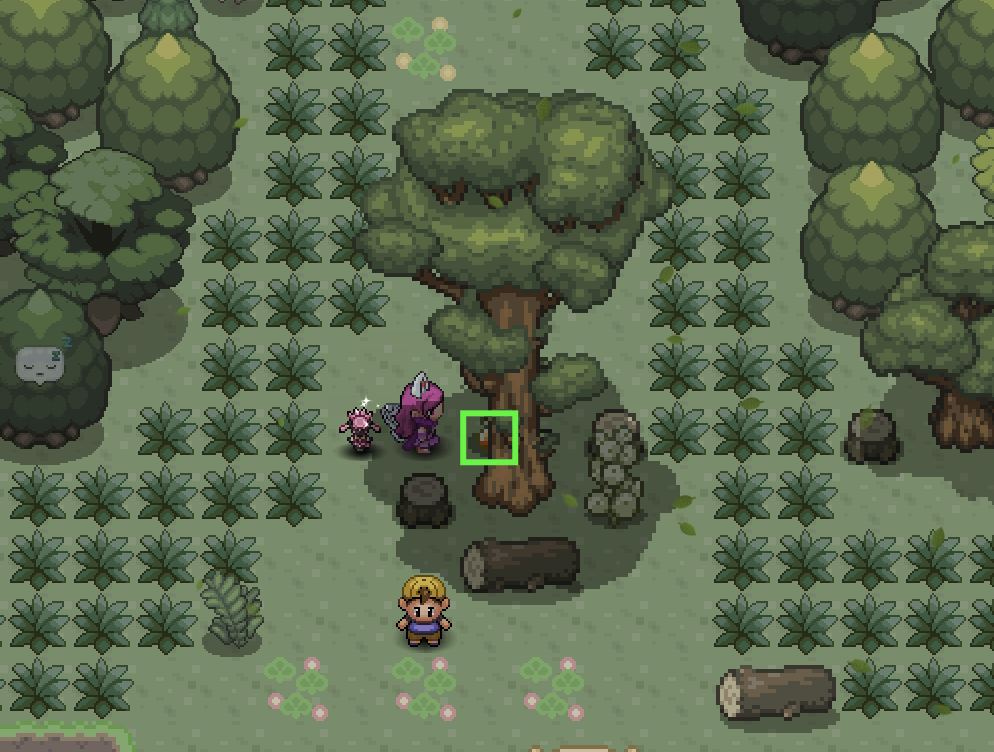
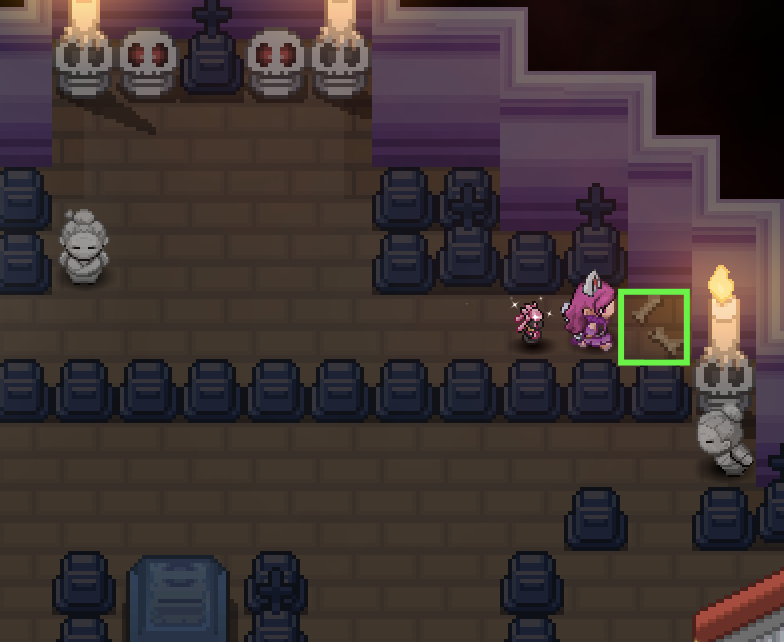
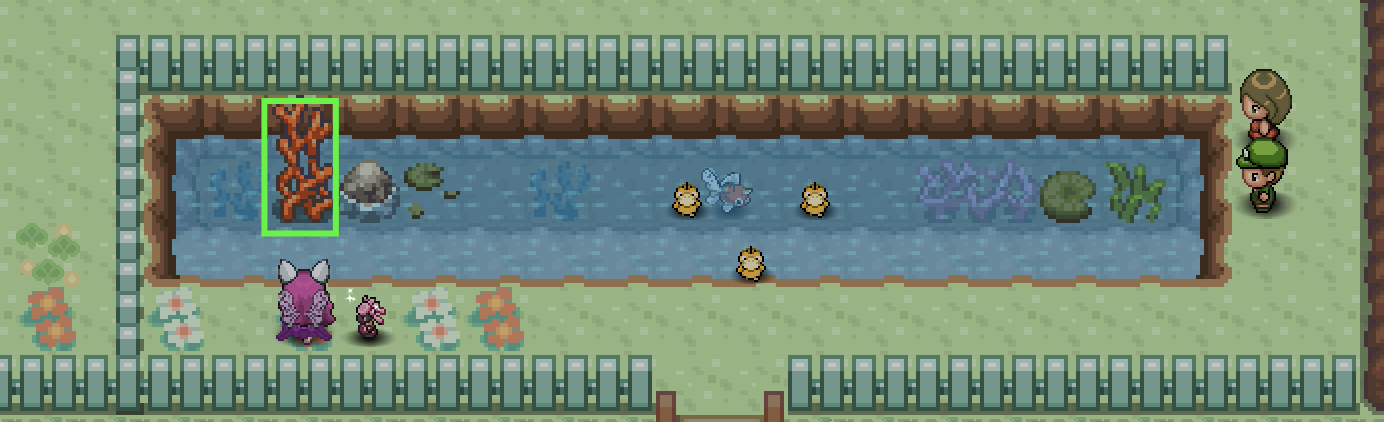
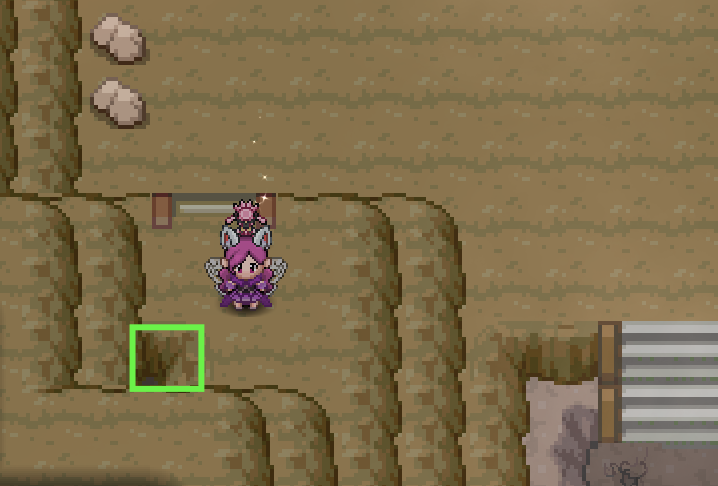
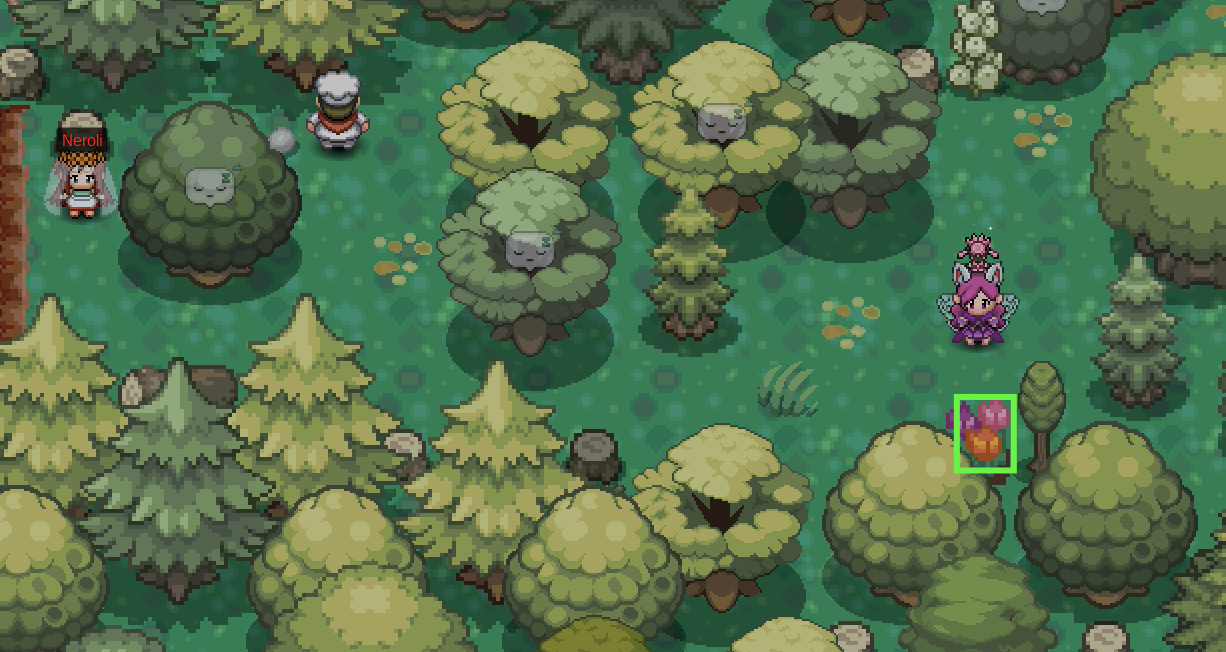
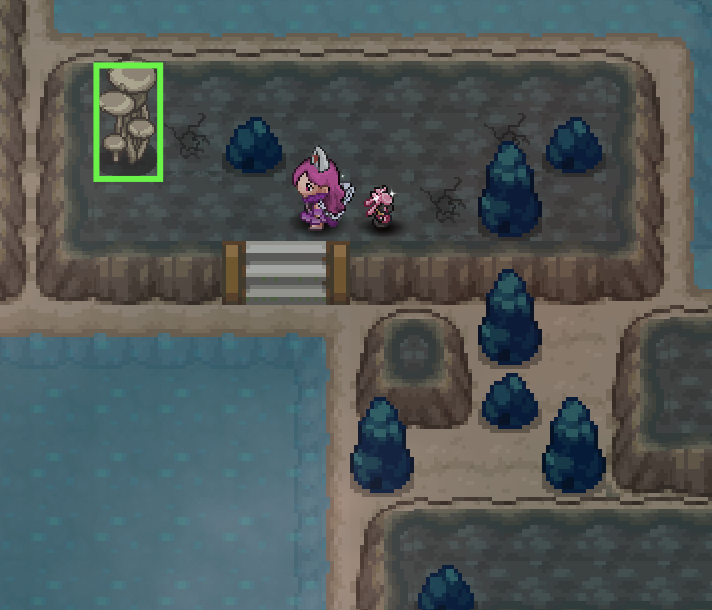
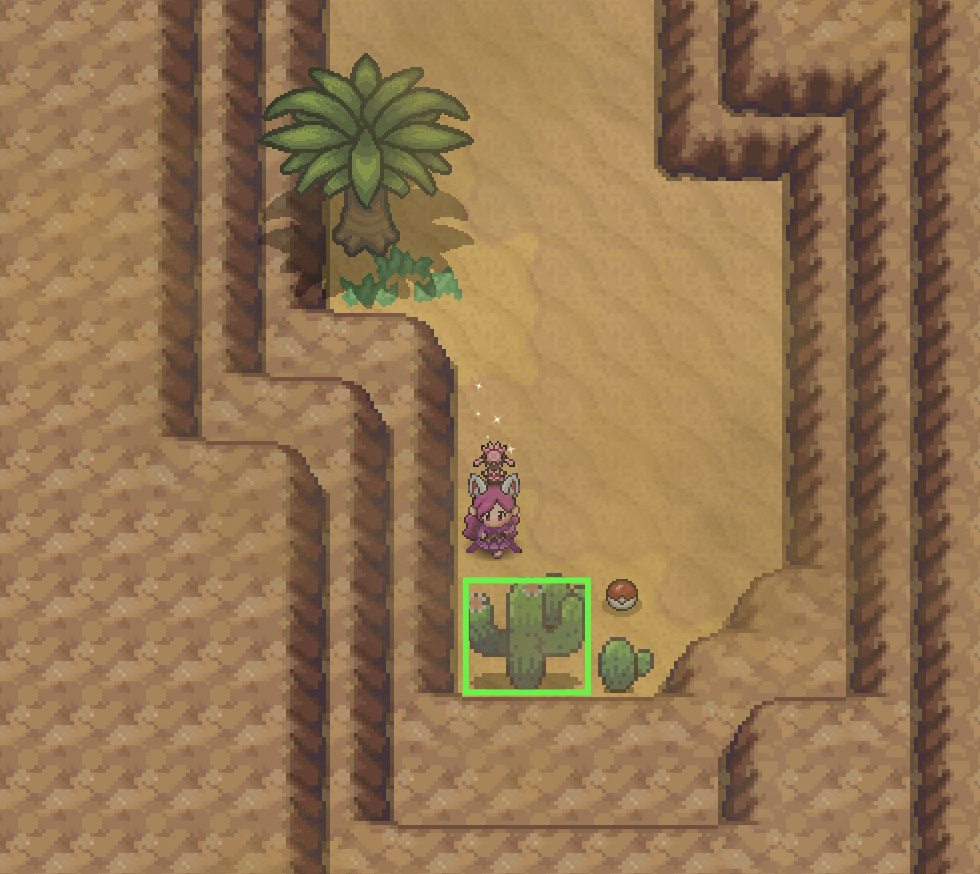
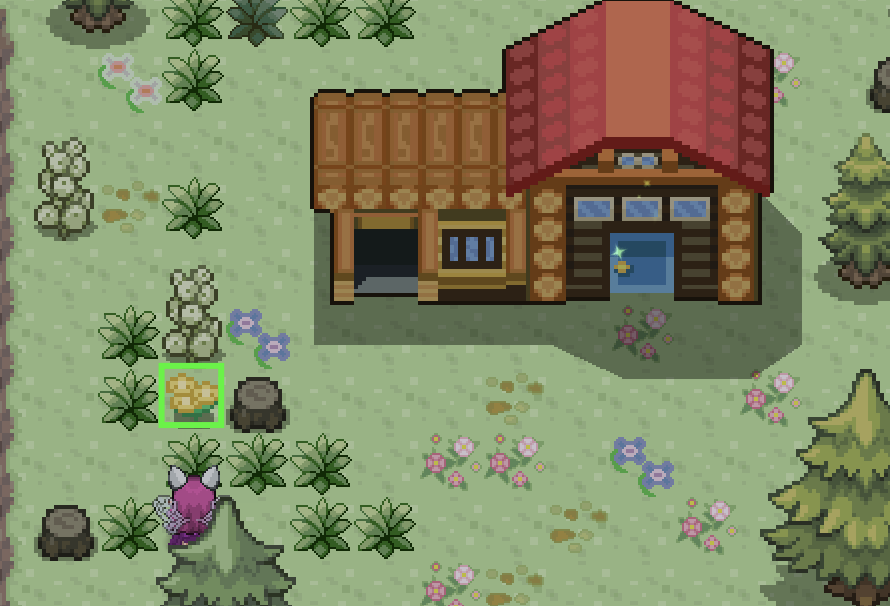
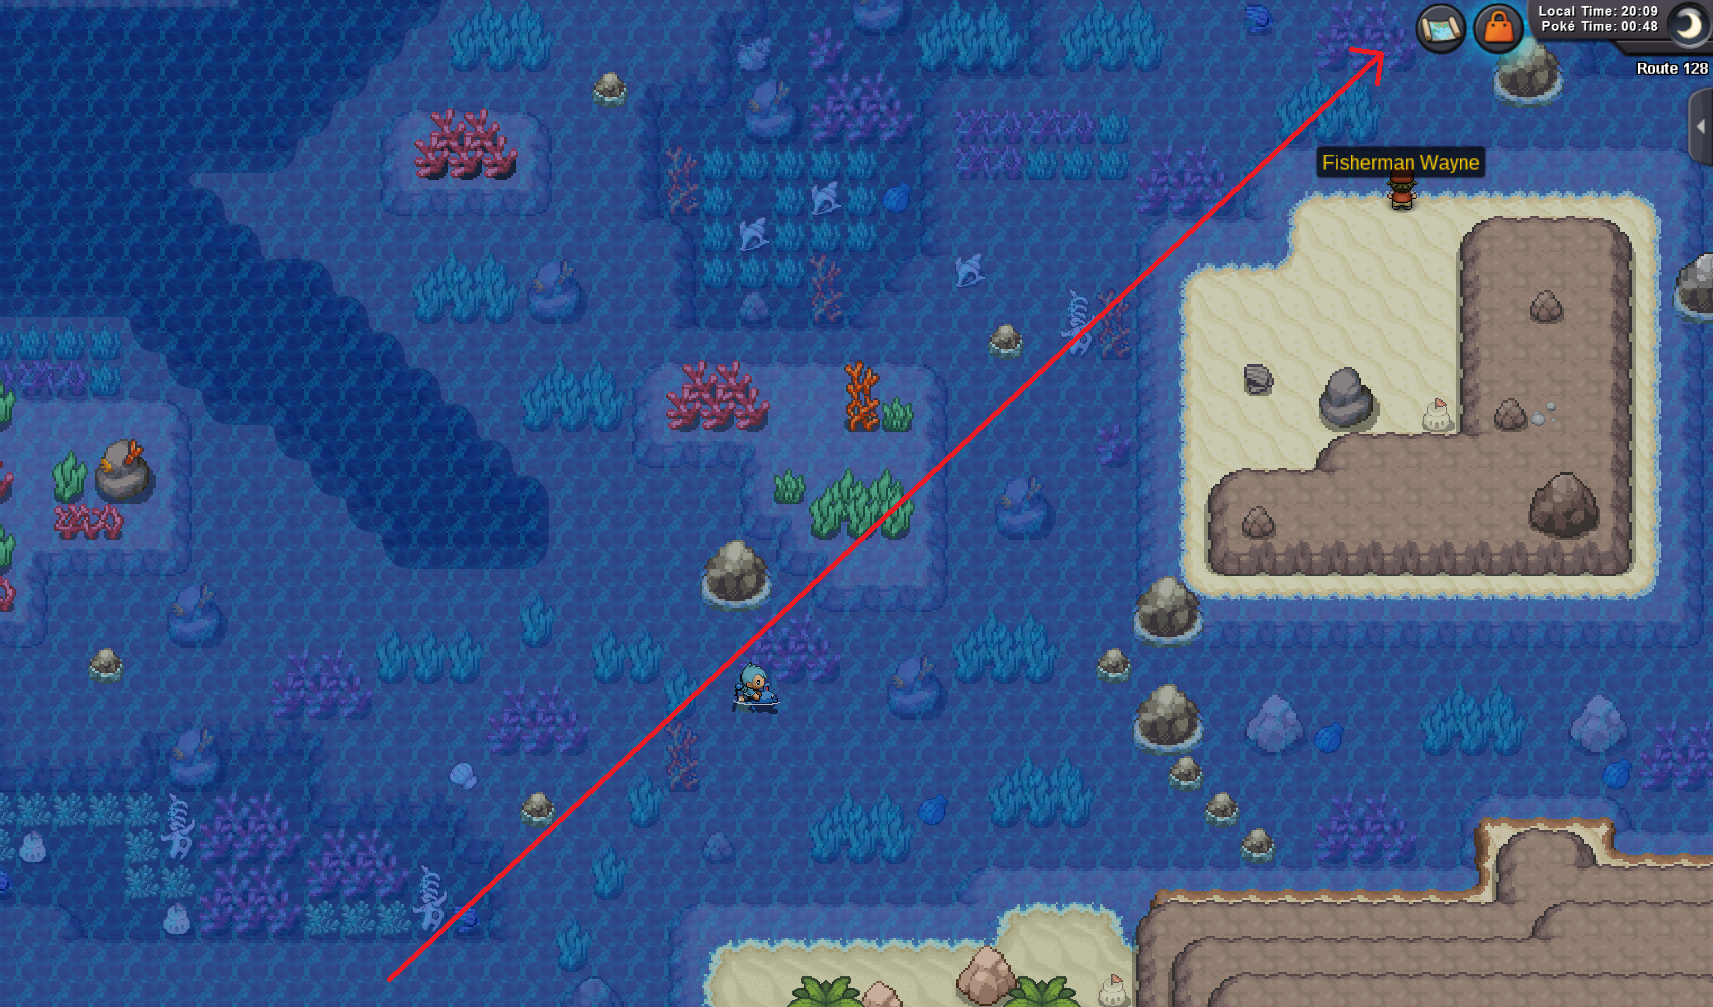
Hi there and welcome to the Doctor Pokemon Quest! This guide will help you understand the mechanics of the Doctor Quest! Furthermore, it'll help you find the materials needed for the quest. ❊ Completed the Egg Moves Quest ❊ Must be Hoenn Champion Kanto Daycare MS: 6 Hours -- Non-MS: 11 Hours Johto, Hoenn, Four Island Daycare MS: 11 Hours -- Non-MS: 20 Hours Kanto: Route 5 Johto: Route 34 Hoenn: Route 117 Sevii Islands: Four Island Sinnoh (Not involved in this quest): Solaceon Town ❊ In order to start curing Pokemon, you'll need a Medical Certificate first. ❊ After, you'll need to present your certificate to the old lady in the Kanto, Johto, Hoenn, and Four Island Daycares. ❊ You will then be asked to help heal a pokemon of a specific tier with different items. ❊ With active membership (MS), you gain double medical experience and gain experience every step of healing. ❊ After healing a pokemon, you'll have a chance to battle it and capture it. These pokemon are syncable. Step 1: Talk to Brock at Pewter City and offer to help him. [spoiler=Med Cert Step 1] Step 2: Use the Medicine to cure the pokemon. Locations are listed below. [spoiler=Med Cert Step 2] Viridian City Pidgey: Next to Ground Gym [spoiler=Pidgey] Oddish: Near the southern stop house [spoiler=Oddish] Route 2 Scyther: Southern Route 2, Right side [spoiler=Scyther] Pewter City Meowth 1: Near Pewter Jail [spoiler=Meowth 1] Meowth 2: Near the Pokecenter [spoiler=Meowth 2] Route 3 Geodude: Upper Route 3 [spoiler=Geodude] Rhyhorn: Upper Route 3 [spoiler=Rhyhorn] Sandshrew 1: Upper Route 3 [spoiler=Sandshrew 1] Sandshrew 2: Upper Route 3 [spoiler=Sandshrew 2] Sandslash: Route 3 Dig Spots [spoiler=Sandslash] Step 3: Report back to Brock and turn in 3 Rare Candies. He will give you the Medical Certificate in return. [spoiler=Med Cert Step 3] ❊ You gain experience by fully curing pokemon. ❊ With active MS, you gain double experience and gain experience from every step in curing a pokemon. ❊ Below is the Tier System for better understanding on the use of Medical Experience. ❊ Unfortunately, there isn't a way to check your Medical Experience as of now. [spoiler=Tier System] Tier 1 Experience Requirement: None Selection Chance: 50% Can only encounter Tier 1 Pokemon Tier 2 Experience Requirement: 20 Medical Experience Selection Chance: 50% Allows you to encounter Tier 2 Pokemon Tier 3 Experience Requirement: 40 Medical Experience Selection Chance: 50% Allows you to encounter Tier 3 Pokemon Tier 4 Experience Requirement: 80 Medical Experience Selection Chance: 40% Allows you to encounter Tier 4 Pokemon Tier 5 Experience Requirement: 160 Medical Experience Selection Chance: 20% Allows you to encounter Tier 5 Pokemon ❊ Each daycare has different Pokemon at different tiers from 1 to 5. ❊ The pokemon chosen for you to cure will be chosen at random. ❊ The higher the tier, the more steps it requires to fully cure. ❊ The higher the tier, the rarer the Pokemon is. ❊ You cannot obtain pokemon of a higher Tier if you do not have the experience for it. [spoiler=Curable Pokemon] [spoiler=Kanto Daycare]Tier 1 Cleffa -- Igglybuff -- Happiny Tier 2 Abra Tier 3 Shellder Tier 4 Munchlax -- Mime Jr. Tier 5 Bulbasaur -- Charmender -- Squirtle [spoiler=Johto Daycare]Tier 1 Snubbull -- Azurill -- Remoraid Tier 2 Pichu Tier 3 Togepi Tier 4 Mantyke -- Bonsly Tier 5 Chikorita -- Cyndaquil -- Totodile [spoiler=Hoenn Daycare] Tier 1 Whismur -- Carvanha -- Seedot Tier 2 Corphish Tier 3 Wynaut Tier 4 Swablu -- Lillipup Tier 5 Treecko -- Torchic -- Mudkip [spoiler=Four Island Daycare] Tier 1 Bidoof -- Cherubi -- Kricketot Tier 2 Shinx Tier 3 Cubchoo Tier 4 Riolu -- Rufflet Tier 5 Bergmite -- Pancham -- Darumaka ❊ In order to cure a Pokemon, you'll have to bring certain items to the old lady. ❊ The items required to cure a pokemon vary per tier and are chosen at random from a list. ❊ For further information on how to obtain each item, feel free to check out our Item Guide, Held Items in the Wild Guide and Berry Guide. Tier 1: Berries Tier 2 and 3: Berries and Vitamins Tier 4 and Tier 5: Berries, Vitamins, and Items [spoiler=Berry, Vitamin, and Item Lists] [spoiler=Berries] ❊ Cheri Berry ❊ Chesto Berry ❊ Pecha Berry ❊ Rawst Berry ❊ Aspear Berry ❊ Leppa Berry ❊ Oran Berry ❊ Persim Berry ❊ Lum Berry ❊ Sitrus Berry ❊ Pomeg Berry ❊ Kelpsy Berry ❊ Qualot Berry ❊ Hondew Berry ❊ Grepa Berry ❊ Tamato Berry ❊ Heal Powder ❊ Energy Powder ❊ Energy Root [spoiler=Vitamins] ❊ Revival Herb ❊ Carbos ❊ Iron ❊ HP Up Protein ❊ Calcium ❊ Zinc ❊ Rare Candy [spoiler=Items] ❊ Charcoal ❊ Hard Stone ❊ Metal Coat ❊ Hard Stone ❊ PP Up ❊ NeverMeltIce ❊ Sharp Beak ❊ Repel ❊ Stardust ❊ Tiny Mushroom ❊ Sometimes, the old lady will ask you to bring a special healing item in order to cure a pokemon. ❊ You can find these items in the locations below. [spoiler=Special Item Locations] [spoiler=Kanto] Bone Moss: Pokemon Tower 3F, East [spoiler=Bone Moss] Cape Coral: Route 25, In front of Bill's house [spoiler=Cape Coral] Deep Clay: Diglett's Cave, Near Dig Spot Allotments [spoiler=Deep Clay] Heart Peach: Viridian Forest, Near Stop House [spoiler=Heart Peach] Sparky Blossom: Kanto Powerplant, Upper Right [spoiler=Sparky Blossom] [spoiler=Johto] Elder Log Coal: Burned Tower Floor 2, Need Rock Smash [spoiler=Elder Log Coal] Golden Olphistle: Lake of Rage, Central Lake [spoiler=Golden Olphistle] Languid Mushroom: Slowpoke Well L1, Left Island [spoiler=Languid Mushroom] Madre Cactus: Ruins of Alph, Left across lake [spoiler=Madre Cactus] Rainbow Tulip: Ilex Forest, Next to Boss Neroli [spoiler=Rainbow Tulip] [spoiler=Hoenn] Cactus Dahlia: Route 111 Desert, South [spoiler=Cactus Dahlia] Chimney Ash: Jagged Pass, Central Area [spoiler=Chimney Ash] Deepblue Shell: Route 129 Underwater, West [spoiler=Deepblue Shell] Moon Bloom: Petalburg Maze *From the entrance, stay next to the left wall. In the last intersection, go right and stay next to the north wall. [spoiler=Moon Bloom] Succulent Leaf: Route 125, West [spoiler=Succulent Leaf] [spoiler=Sevii Islands] Ancient Seed: Six Island, Southeast of Ruin Valley [spoiler=Ancient Seed] Heat Fungus: One Island, Ember Spa [spoiler=Heat Fungus] Lake Knot: Two Island, Cape Brink [spoiler=Lake Knot] Rooster Lily: Five Island Meadow, Next to the House [spoiler=Rooster Lily] Summer Claw: Three Island, Bond Bridge Beach [spoiler=Summer Claw]

- 3 replies
-
- 16
-

-
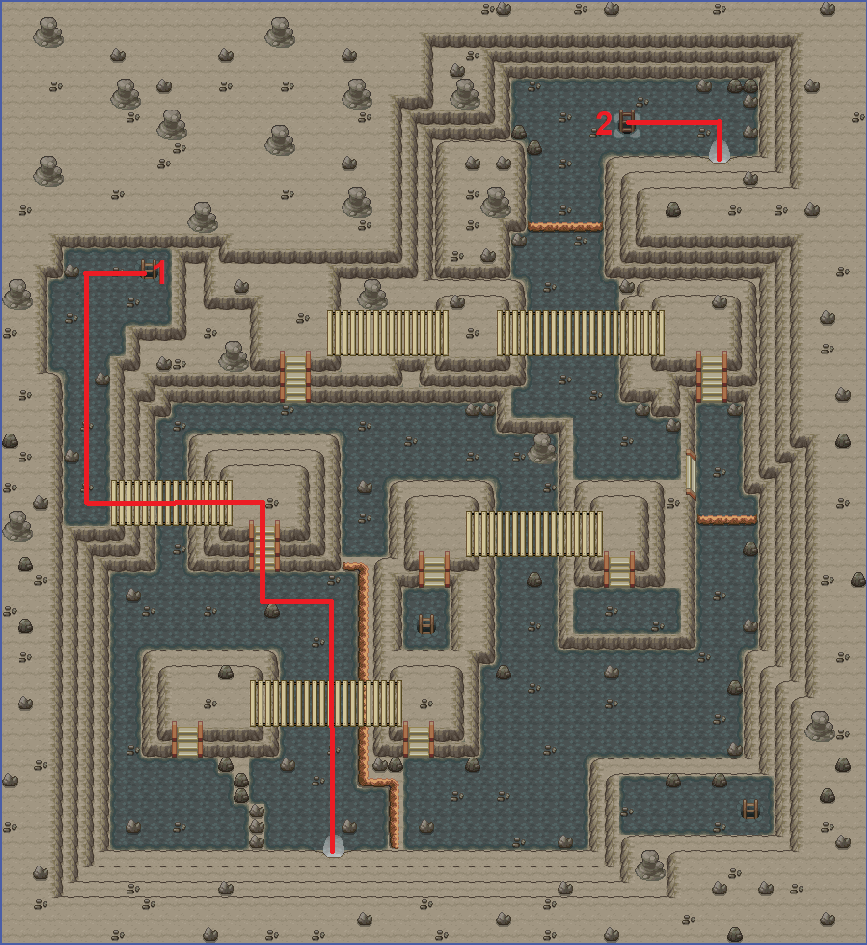
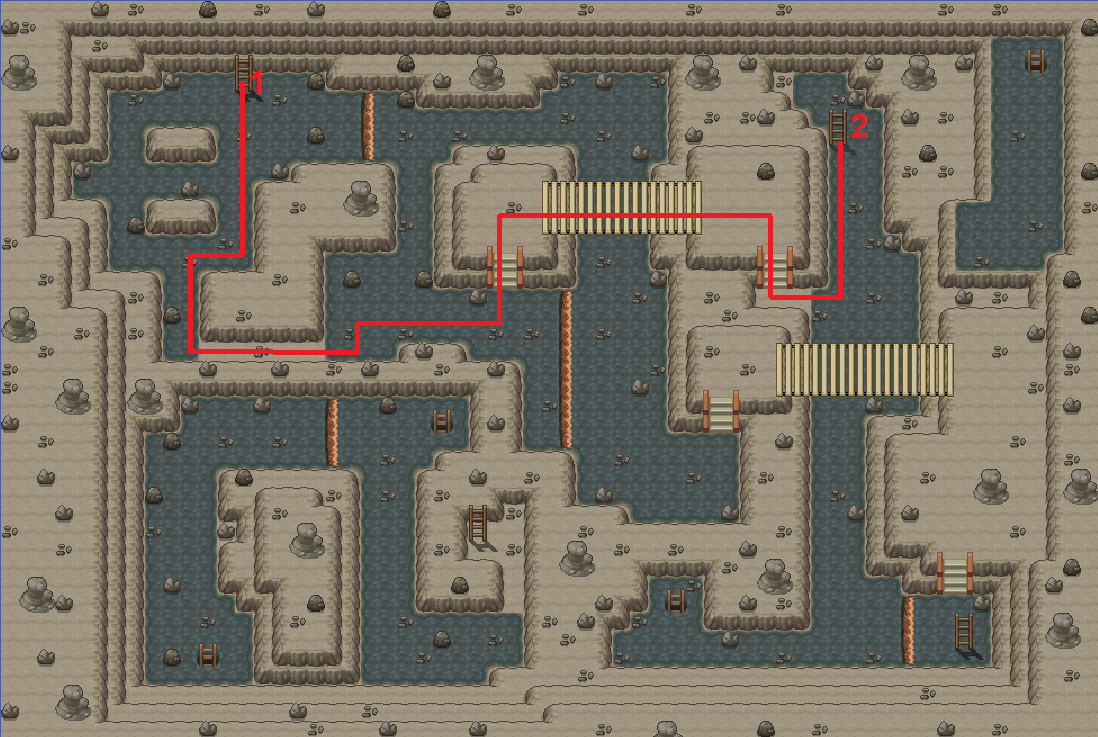
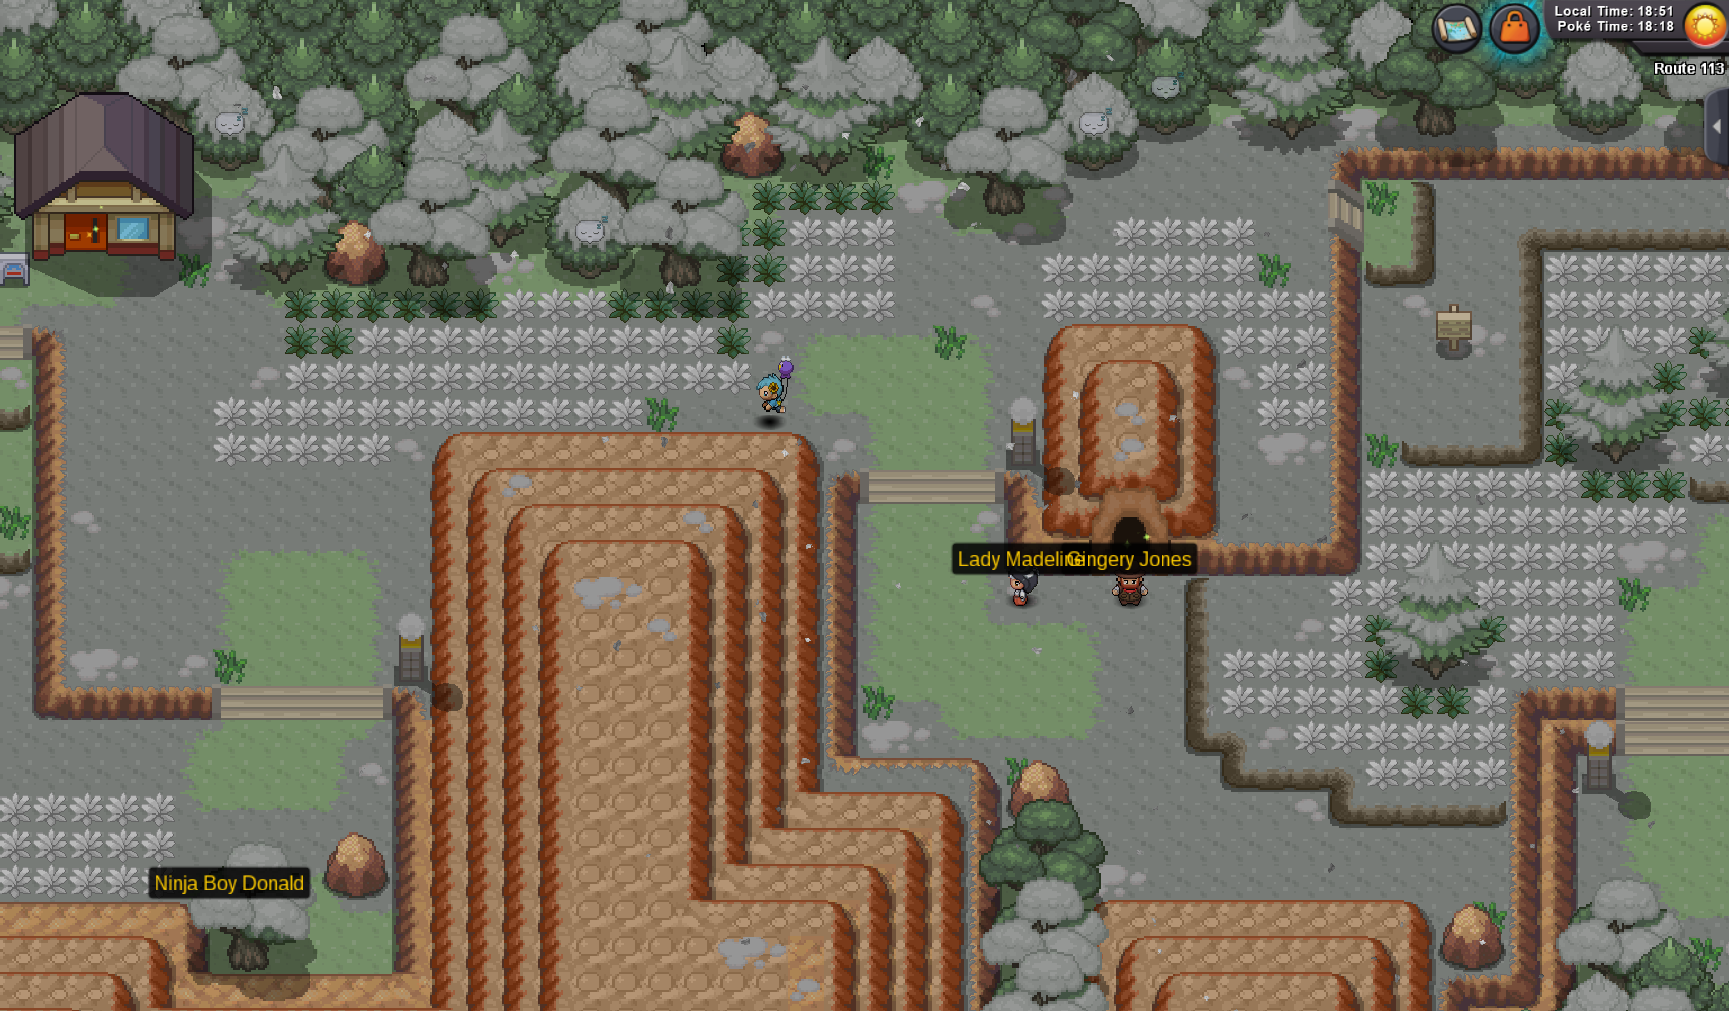
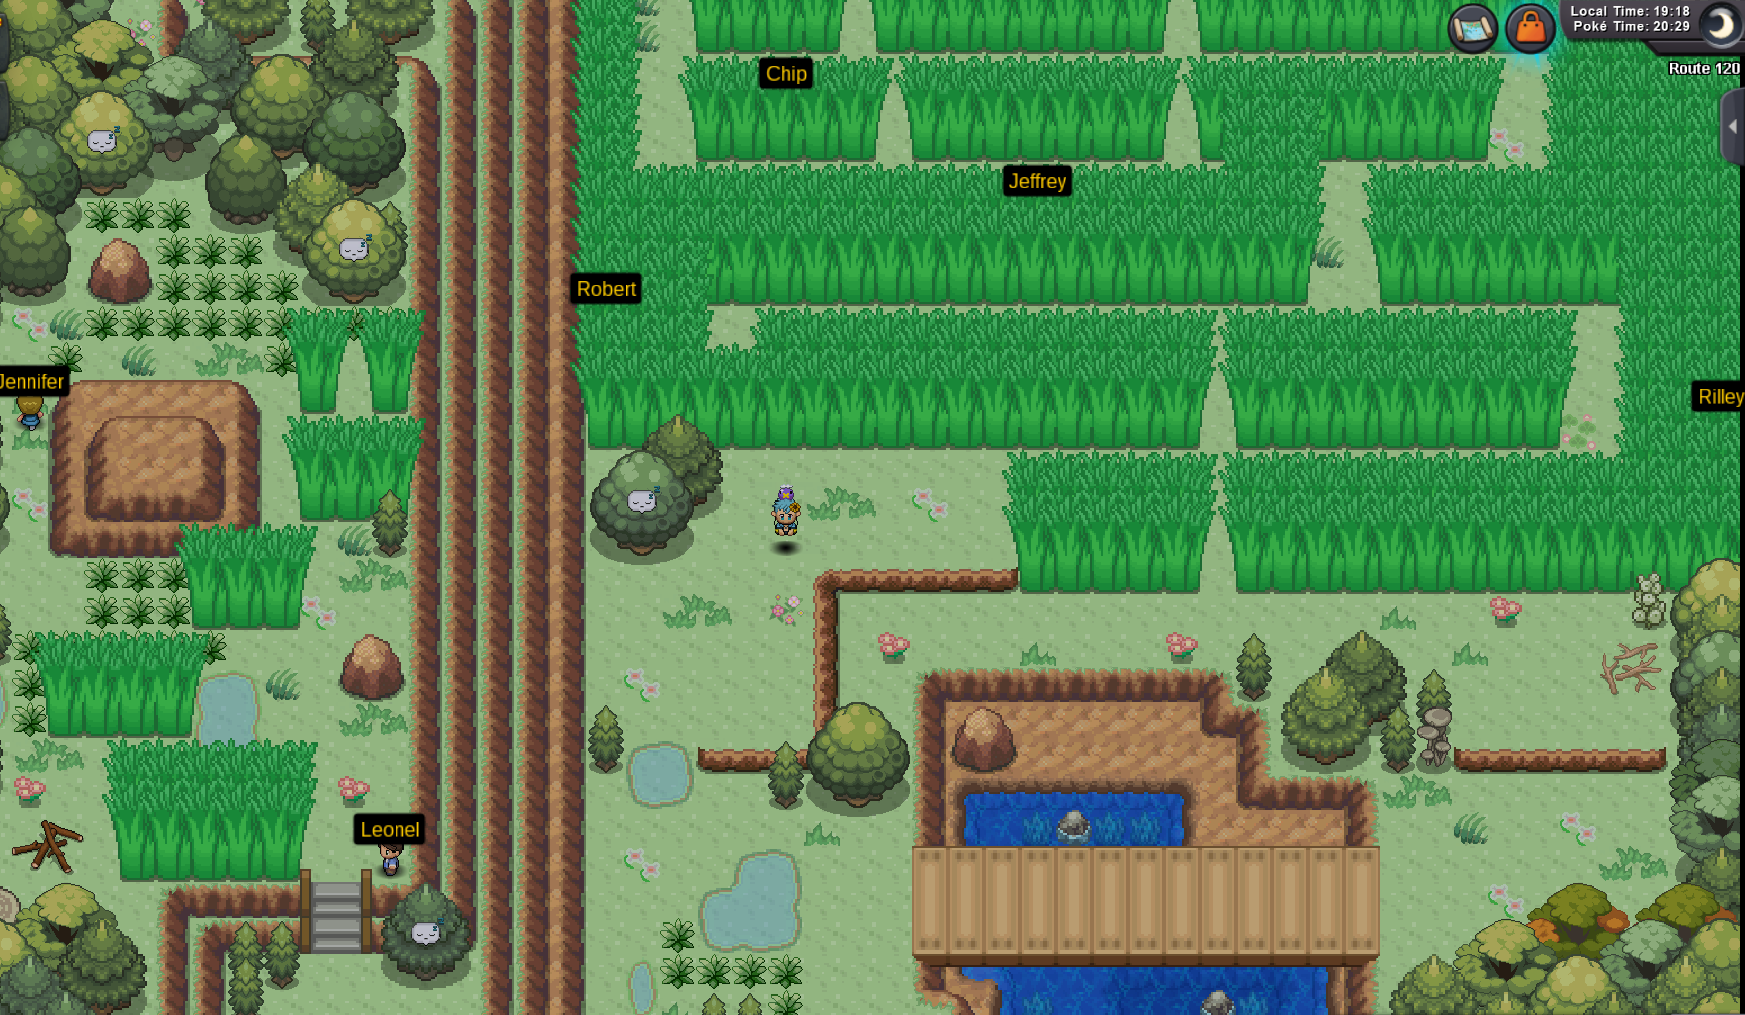
Sevii islands guide For this guide I will first go through the quest to unlock all the islands then I'll go through each island individually to show what you can do on each island. When travelling to the Sevii islands please be aware that when you first get to an island you will not be able to leave the island until you have completed the quest to unlock the next island. You also cannot go to any island right away. At first you can only go to island 1 and once the quest on that island is complete you'll unlock island 2, do the quest on island 2 to unlock island 3 and so forth. There are some high level trainers on the various islands but you should be able to manage them seeing as you will have needed to beat the Kanto E4 to be able to go to the islands. Index Requirements How to get to Sevii islands Island 1 Island 2 Island 3 Island 4 Island 5 Island 6 Island 7 Island 1 extra Island 2 extra Island 3 extra Island 4 extra Island 5 extra Island 6 extra Island 7 extra Requirements To access the Sevii islands you must: Have membership active. Be Kanto champion. A full team of level 70+ pokemon - this is not a requirement but it is recommended. How to get to Sevii islands To access Sevii islands you need to speak to the Sevii Island Transport NPC at Vermilion dock. When you speak to him he will ask you which island you would like to visit. If you select an island you have not unlocked he will tell you that that island is not available yet. Island 1 Island 2 Island 3 Island 4 Island 5 Island 6 Island 7 Island 1 extra Island 2 extra Island 3 extra Island 4 extra Island 5 extras Island 6 extra Island 7 extras That is it for the Sevii island guide. If you know of something that I may have missed then please feel free to reply to the thread and I will edit the guide to include it.
-
Hi there and welcome to the PRO Useful Links Thread. This thread is designed to redirect you to threads which may be of aid. This thread consists of different guides and links that may help you understand and enjoy PRO more. *Clicking on the titles will redirect you to the corresponding thread. Game Rules Forum Rules In-Game Chat Rules Trade Rules PvP Rules Website (Registration, Client Downloads, Forums etc.) Guide to the Discord Update Log Appeals Dashboard Evolution Request Megathread Forum Images Guide Hit by a Rollback How to Make a Report How to Record your Screen and Upload Videos Installing PRO on Android Installing PRO on Linux List of Available Commands List of Broken Moves and Abilities Merge information, General FAQ and Issue FAQ PRO Wiki Restore Pokemon Megathread Troubleshooting Sticky PvP Rules PvP Viability Rankings PRO Discord PRO Twitch How to Stream PRO on Twitch Kanto FAQ, Complete Kanto Walkthrough - SS Anne Quest - How to beat Kanto E4 Johto FAQ, Complete Johto Walkthrough - Goldenrod City Quest - How to train Rattata fast - How to beat Johto E4 Hoenn FAQ, Complete Hoenn Walkthrough - How to access Sootopolis - How to beat Hoenn E4 Sinnoh FAQ, Complete Sinnoh Walkthrough, How to get to Sinnoh(1), How to get to Sinnoh (2) - Missing students. Jubilife City - Vally Windworks Quest - How to reach Route 224 - How to beat Sinnoh E4 How to Access Specific Areas How to access Cerulean Cave Love Island (Video) Mirage Island Mt Silver walkthrough Nap Island Quest, Nap Island Quest (Video) Pinkan Island, Pinkan Island (Video) Petalburg Forest Maze map Sevii Islands Trainers Valley Valley of Steel Viridian Maze map 'More essential' Arcanine Mount Quest Doctor Pokemon Quest Guild Island Hoenn Teleporter Quest How to get access to Egg Moves Mt Silver walkthrough Officer Jenny, Officer Jenny(2) Trading with NPC's 'Less essential' Ash's hat quest (Kanto) Cubchoo Hat Psyduck Hat Teddiursa Hat (Johto) Abandoned Ship Quest Eeveelutionist Devan Quest (Kanto) How to get HM-02 - FLY How to get Shell Bell (Hoenn), How to get Shell Bell (Hoenn) Lilicove Medicinal Herb Quest (Hoenn) Free Rotom (Video) Miltank Farm Quest Pewter City Museum (Free Reroll) Pokemon Tower underground Rustboro Masters Quiz Rachel's friends Quest (Video) Trick House (Hoenn) Legendary Event Moves Legendary Pokémon (Collection Wiki) Legendary Mega thread (Collection Forums, not complete) Newbie stuff Boss guide for newbies How to hunt Free EXP Potion (Pre badge 1) Hidden power on PRO How to trade in PRO Hunting for Abilities Hunting guide Leveling zones for newbies Fast leveling, How to level up fast, Level up fast Pokemon stats explained, Pokemon base stats PRO enconemy (Pricing stuff etc.) (1), PRO enconemy (Pricing stuff etc.) (2) , PRO enconemy (Pricing stuff etc.) (3), Officer Jenny, Officer Jenny(2) Berries Guide Guilds in PRO All information about happiness (Pokemon) Honey Trees PVP Coins PVE Coins Repel trick guide Fishing guide "Important" Guild Island Hoenn Teleporter Quest How to access Cerulean Cave Love Island (Video) Mirage Island Mt Silver walkthrough Nap Island Quest, Nap Island Quest (Video) Pinkan Island, Pinkan Island (Video) Sevii Islands Trainers Valley Valley of Steel Less "important" Ash's hat quest (Kanto) Cubchoo Hat Psyduck Hat Teddiursa Hat (Johto) Abandoned Ship Quest Doctor Pokemon Quest Eeveelutionist Devan Quest (Kanto) How to get HM-02 - FLY How to get access to Egg Moves How to get Shell Bell (Hoenn), How to get Shell Bell (Hoenn) How to get a free Arcanine Mount (Kanto), How to get a free Arcanine Mount (Kanto) (2) Lilicove Medicinal Herb Quest (Hoenn) Free Rotom (Video) Miltank Farm Quest Officer Jenny, Officer Jenny(2) Pewter City Museum (Free Reroll) Pokemon Tower underground Rustboro Masters Quiz Rachel's friends Quest (Video) Trick House (Hoenn) Trading with NPC's Repeatable Bug catching contest BattleTower (Wiki) Celadon Daily Dig Spots (Wiki) Excavation Guide Honey Trees Item recycler World Quest, World Quest (2) Solaceon Daily Quest (News reporter), Solaceon Daily Quest (News reporter) (2) Sinnoh Underground, Sinnoh Underground (2) Benefits of membership Clothing and Mount Showcase Coin Shop Item Maniac Item Recycler TM and Move Tutor Guide Available Pokedex Data in PRO Evolutions Different in PRO Fossil Guide Boss guide, Boss guide (2) Boss guide (Baton pass) Boss guide (Mega Slowbro) Every farmable boss in one run, A boss team, How to defeat each Elite Four Mini Bosses Officer Jenny, Officer Jenny(2)
-
Hello guys! I've created this guide to help players who have trouble going through the Hoenn Region because it can be a bit tricky! Here, you will be guided from the beginning of Hoenn to the Pokemon League! I hope you can get through the Hoenn Region easily with this guide! Here are the guides from the previous regions! ▶︎ KANTO WALKTHROUGH BY JOLLYOLNATHAN ◀︎ ▶︎ JOHTO WALKTHROUGH BY SUGARRED9 ◀︎ This is all for this guide but it is not all of Hoenn as there are quite a few other quests and some unexplored routes. Here is a guide for all the hidden items in Hoenn and the unexplored & explored routes! HIDDEN ITEMS GUIDE! I hope this guide helped you through Hoenn. See you at Sinnoh!
- 47 replies
-
- 22
-