Search the Community
Showing results for tags 'finished'.
-
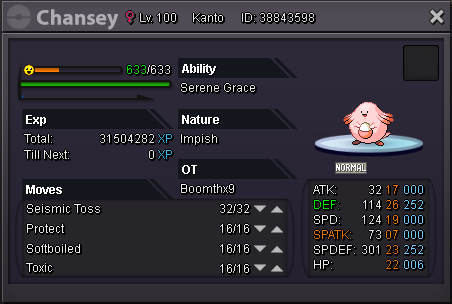
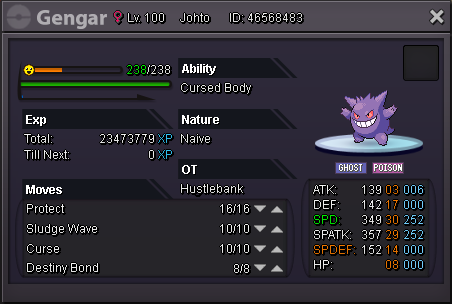
https://www.youtube.com/watch?v=HSin83eeab0 [spoiler=Read After Watching The Video!]So in the video shown above, I hope to convey to you all how broken disable is. Pokemon will continue to use the disabled move despite it being....well disabled. I understand that the rules specify that "6. Abusing glitches, and not reporting them as soon as possible, will result in sanctions. " but I would like to note that I could have easily beat that final gym anyway by using recover and calm mind. Additionally, it should be noted that Gengar's ability, Cursed Body, has a chance to inflict the "disabled" effect on the enemy pokemon. Keep this in mind if you plan to place restrictions on the use of disable. As far as I am aware, the glitch only works in PvE. I have not tested it in PvP but I assume it works as intended since my pokemon has experienced disable from opposing Gengar Sorry for the poor video quality. Anyway, that's all from me.
-
SUMMARY I. Introduction II. What are IVs? III. Method 1 : TOTAL 5 IVs IV. Probability for TOTAL 1 to 6 IVs V. Method 2 : IV Probability VI. References I. Introduction As we can notice, it’s very hard a find an epic PKM: Have the right ability, have the right nature, and have epic IVs. The concept of epic depends of each person, we don’t have the same perception of what PKM is epic or not. We have an idea of the probability to find one PKM with the rarity tiers (it’s not precise sadly), we know the probability for ability (H.A. = 5%), we all use Synchronize to find the right nature with 50% probability, but nobody did a guide about the probability for IVs. So, I decided to post two methods to apprehend the rarity of different PKM based on IVs. It’s not really a guide, there is no method to have better IVs on PKM, and my post will not give the answer to the big question: “Is my PKM epic?”. All my guide is only one indicator of rarity. II. What are IVs? IVs means Individual Value, you can find it on your PKM in orange : IVs are predefined values from 1 to 31, they are random generated when you engage a PKM in the wild. You can’t change it, a PKM born and die with his IVs. With a value from 1 to 31 in the 6 different statistics, there are 31^6 = 887 503 681 combinations of IVs. It means every PKM is almost unique for his IVs. Other interesting fact: the combination 31 in each stats has a probability of 1 / 887 503 681. And the sum of the ID PKM for Red, Blue and Yellow Server is around 50m, so we are not even close to find one perfect PKM in IVs :devil: What is the point to have “good” IVs? The all point to have “good” IVs is to have better stats for fight. You can see the formula to calculate the statistic of a PKM : Formula from https://bulbapedia.bulbagarden.net/wiki/Statistic I will take an example with the statistic ATK for a PKM lv 100 with 80 Base Stat (average of Base Stat), 252 EV and Adamant nature: [/b] ATK = ( ( ( 2 * base + IV + EV/4 )* Lv ) / 100 + 5 ) * Nature ATK = ( ( ( 2 * 80 + IV + 252/4 ) * 100 ) / 100 + 5 ) * 1,1 ATK = ( ( (223 + IV ) + 5 ) * 1,1 ATK = 250,8 + IV *1,1 So, in lv 100, the IVs will add 1 stat for each IV. And for a bonus nature, it will add 1,1 stat for each IV. If my PKM, in the example, has 26 in IVs ATK, he will have 250,8 + 28,6 = 279,4 ATK. To resume, having goods IVs in each stats can help in fight, but the influence is not huge. So, you don’t need the perfect IVs on your PKM, you just need to have correct IVs. III. Method 1: TOTAL 5 IVs. I will base this part of the guide on the majority of PKM : for a lot of PKM, one statistic is useless. An example: For Scyther, the statistic SPATK is useless, he can have 1 or 31 IVs, this statistic will never be use. So, the TOTAL 5 IVs is the sum of his IVs except the useless statistic. In my example, for Scyther : TOTAL 5 IVs = 50 (ATK 15 + DEF 04 + SPD 01 + SPDEF 13 + HP 17) The same method can be use with another TOTAL IVs, depends of the PKM you select. Imagine, I don’t like this Scyther, his ability and nature are perfect, but his IVs seems bad for me. I don’t care about having 31 in ATK and SPD, I just want have a TOTAL 5 IVs = 120 at least. But, before I chase one with this TOTAL 5 IVs, I want to estimate how much time I will take to chase it. So, I need to calculate the probability to have at least a TOTAL 5 IVs = 120. How can I calculate it? The IVs are randomly generate like dices, it’s as if I have 5 dices with 31 sides and I want the number of time I can have the sum 120 for this dices. The probability is determinate by this formula: With : s = sum wanted => 120 n = number of dices => 5 x = number of sides => 31 k = all value undivided 0 to (s – n) / x So, I need to do the sum of probability TOTAL 5 IVs = 120 to 155, and I will have my probability to have a TOTAL 5 IVs = 120 at least. Lucky me, I have Excel. And the answer to the sum of probability TOTAL 5 IVs = 120 to 155 is 2,296%. So, if I want a Scyther with a sum of 120 in his 5 useful stats, I have 2,296% to have it. In average, I need to catch 44 Scyther Technician Adamant before I can have one with TOTAL 5 IVs = 120. What is the point to know this? The TOTAL 5 IVs is one indicator of rarity, it will no help to chase better IVs, you can be lucky and find it in first try or catch 500 before have it. But, it’s a tool for decision-making: Should I buy or chase? The TOTAL 5 IVs gives you a view of how much time you will take for chase a PKM, and help you determinate the price you can pay for buying a PKM. It can be also a tool for chasing a PKM: for a PKM rarity tiers 1, it’s easy to catch a lot, so for a first selective sorting of your catches, you can decide what percentage of PKM you will release before looking in specifics IVs. For example : I will keep only the 10% better PKM in TOTAL 5 IVs, the 10% matches to TOTAL 5 IVs = 107. So, I will release all PKM under this sum and only after I will look in specifics IVs. Because even if a Scyther has 31 in ATK and SPD, with TOTAL 5 IVs = 107, he will have only 45 in the rest of his stats. The TOTAL 5 IVs has a big disadvantage, this method doesn’t take into account specifics stats. Two PKM can have the same TOTAL 5 IVs, but one can have 31 in a vital statistic when the other PKM will have 1. It’s up to you to use your brain after using the method x) IV. Probability for TOTAL 1 to 6 IVs In the previous part, we saw what is the TOTAL 5 IVs, in this part, i publish the probabilities associates to each TOTAL IVs. It's easy to use, you look for the TOTAL IVs you want and go look to the sum to know what is his "rarity". For example: TOTAL 5 IVs = 90 => 32,222%, it means that 32,222% of PKM has same or better TOTAL 5 IVs than him. The red lines delimit the percentages: 1% / 2% / 3% / 5% / 10% / 20% / 30%. TOTAL 1 IVs TOTAL 2 IVs TOTAL 3 IVs TOTAL 4 IVs TOTAL 5 IVs TOTAL 6 IVs I share the Excel i used, so you can use it too. You can download it with this link: https://www.dropbox.com/s/e4dvjolkk5p1b26/PROBABILITY IVS.xlsx?dl=0 In the right top, you can click on download. If something is wrong with the Excel or the uploader, tell me. Or you can use the online calculator i made : T5IVs Calculator by Kaminokage : http://fsogame.free.fr/tools/calct5ivs.php V. Method 2 : IV Probability As we saw previously, the TOTAL 5 IVs doesn’t take into account specifics stats, so another method exist to evaluate one PKM. You can calculate directly the probability for specifics IVs. The formula is : This formula is good if you want to use the 6 IVs to calculate your probability, but if you want only 5 IVs (for example: Scyther again), you can remove the part with the useless stats (SPATK for Scyther). This easy remove is explain because you don’t care about your SPATK, you can have 1 or 31 it’s the same: if IVs SPATK = 1, so (32-1)/31 = 1, and multiply by 1 changes nothing to the probability x) I will take an example of using this method: Same than before, I want a Scyther, but this time I want in IVs: At least 30 in ATK At least 20 in DEF At least 30 in SPD At least 20 in SPDEF At least 20 in HP I calculate his probability: IVs Proba = ((32-ATK)/31)* ((32-DEF)/31)* ((32-SPD)/31)* ((32-SPDEF)/31)* ((32-HP)/31) IVs Proba = ((32-30)/31)* ((32-20)/31)* ((32-30)/31)* ((32-20)/31)* ((32-20)/31) IVs Proba = (2/31)* (12/31)* (2/31)* (12/31)* (12/31) IVs Proba = 0,000241432 = 0,0241% So, it means than 0,0241% of Scyther will have exactly or better than the IVs I want. So I need to farm in average 4142 Scyther to have it. This method seems nice, but it has disadvantage too. You can’t use it for evaluate the value of your PKM. This method is too much selective. I will take another example to explain it: My dear Scyther, again, if I calculate his IVs Proba with this method I obtain: 14,6894% This result seems absurd, it would mean 85,32% of Scyther are worse than him. It’s because, with this method, only better IVs than 17 in HP are selected. A lot of part of Scyther are deleted without taking care of the rest of his IVs. It’s the same for a PKM with 31/1/1/1/1/1 in IVs, the method will only select the PKM with 31 IVs in ATK, so the result will be 3,2258%. Even if the value seems nice, the PKM is trash. So, again, it’s up to you to use your brain after using the method x) You can find in my Excel a Calculator for this IVs Proba. VI. References Formula for statistics : https://bulbapedia.bulbagarden.net/wiki/Statistic Link to my Excel : https://www.dropbox.com/s/e4dvjolkk5p1b26/PROBABILITY IVS.xlsx?dl=0 T5IVs Calculator by Kaminokage : http://fsogame.free.fr/tools/calct5ivs.php Thanks you for reading, if you see some errors or want to add an other method (or something else) to this post, don't hesitate to contact me :) And sorry for my english, it's not my native language :(
-
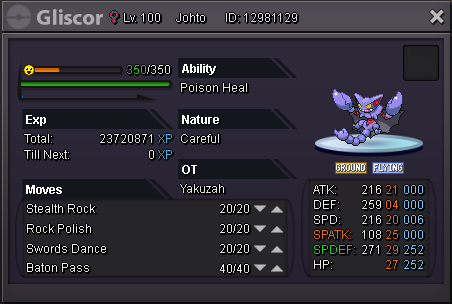
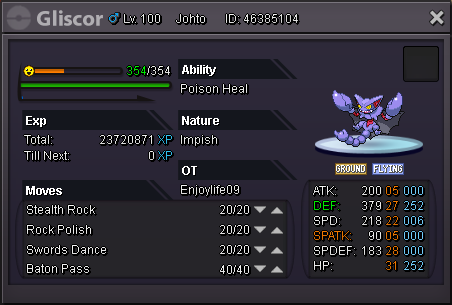
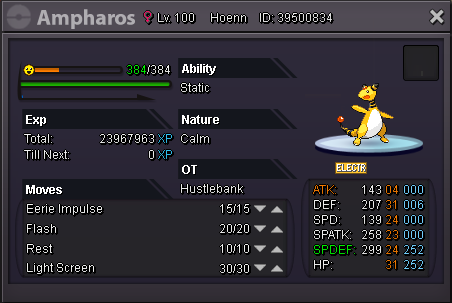
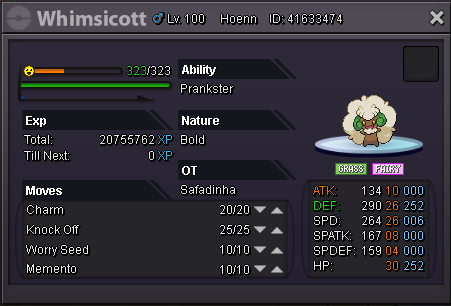
 I think most of you know that infamous 6 Poke vs 48 Ultimate Boss Team by FatManCLT and some people used it probably too. I used it for about a couple of months and had a pretty solid winrate but I wasn't quite satisfied with the outcome after some bosses got reworked. So one day I was farming hidden ability Gligars and got an epic "Sync fail" adamant Gligar and thought, man this pokemon could be a nice Sweeper. So I hopped on Pokewiki and checked some possibilitys to set up a Team around Gliscor to make a faster more reliable boss team. First of all I want to thank FatManCLT for his idea I really like it and the basic framework of the team still overlaps with his team. Some things that bugs me as I was using this team was the long Setup (32-33 turns), because of the long set up's crit or status hax chance was pretty high and if you debuffed your enemies Pokemon and it holds a lifeorb it faints itself and you are facing a much stronger pokemon, Ghost Pokemon were a big problem too as Shadow Ball drops your spdef sometimes, Pokemon with Sturdy or a Focus Sash could land a hit or make some status move. Some bosses were pretty shaky only one crit could take you out like the Wash Rotom of lt. Surge. I wanted to boost faster against certain attacks while Stockpile boosts each defensive stat I personally prefer to boost two stages in one turn against the pokemon I'm facing. Mew has way better defensive stats so even if you get freezed it can easily tank many hits. I made a little PDF for y'all explaining my Team idea and doing some comparisons, you'll find the the PDF in the attached files. The PDF contains every information you need but I will drop some important things here in the Post so you don't have to open the PDF everytime. [spoiler=Team] Gengar and the two Whimsicott's are pretty easy to farm so it won't take long. If you don't know how to get Mew here is the Guide (Guide) As you can see my Mew is really terrible so it doesn't matter how good your mew is just ev train it and it hase enough bulk. Remember the requirements for Mew are lowered I think you only need about 100 or 125h to get it. If you want to use Mew as BCC False Swiper you can drop for example Amnesia it only costs 2k at move relearner you only need this every 12 days anyways. Like a said above I was farming careful Gligars which is a quite useful pokemon pvp and pve. If you decide to farm some careful one you can use one of the medicore ones as Buffer pretty easily. For the Sweeper i'm pretty sure you don't need an epic one, any decent Gliscor will be enough. Speed doesn't matter, you buff your speed 6 stages so even one speed is good enough. I investet some EV's in spdef only for some ice attacks like Blizzard and Ice Beam. I personally prefer Brick Break over Poison Jab because it kills chansey's one hit and if I face a Skarmory or a Aerodactyl I only have not effective moves with Facade and Aerial Ace, Earthquake and Poison Jab has no effect, Brick Break hits at least neutral and Poison Jab only hit's slightly harder than a STAB EQ if you use it against Fairys. You could run Ice Fang for a bit more coverage but it has a 5% chance to miss so I decided to use Brick Break. [spoiler=which lead, what buff and attacks Google Spreadsheet] I made a small Spreadsheet for people using the Team the first time, explaining which lead I recommend and what to buff first with Mew, almost every buff is clear but there are some mixed Attacker like Lucario and Groudon so this could be helpful for you. I included the attacks I'm using with Gliscor to have the best and fastest outcome. Spreadsheet [spoiler=Sample Video against Lance] I made a short Video to show you how to use the Team. You need about 3 minutes for every Boss except two or three Bosses, Letrix and Naero finch hax you sometimes and Brock's Aerodactyl will taunt you sometimes. I use this team since November and have really fast and consistent rounds I'm really happy with the outcome. If you have any questions feel free to ask. Greetings Koreandoo Bosseteam 2.0_english.pdf
- 1 reply
-
- 3
-

-
So as you've probably noticed your Android experience has changed, hopefully this thread will explain the new input mechanism and how it differs from the old one. New dpad Old
-
... why am I doing this guide lol. The idea to make this guide came as a joke/bet from @Frucht to try the game out and teach it to anyone who wants to bet on it. This guide is meant to be both a joke but actually a serious one on how to play the game and try and earn some prizes with the odds against you. Have a laugh and learn at the same time! Note: IT'S VERY ADDICTIVE BUT WILL CONSUME BOTH YOUR MONEY AND YOUR SOUL. Be very wary of how much money you use on this game. I'm a fan of card games, I've played Blackjack 21 for years and many other card games (The Liar, Wolf, and many more in my mother language that I have no idea how to translate). So I kinda wanted to try out how I'd do in the casino. Shall we begin betting our odds? Quack Jack, the Blackjack 21 of Pokemon! To start playing Quack Jack we need to visit the Casino of any of the Pokemon regions. We can visit the casino in Celadon, the one in Goldenrod, the one in Lilycove and the one in Veilstone. To give an example on this guide, I'll start in Veilstone (Mainly, because I'm extremely lazy and I didn't feel like moving to another region). Once inside, we can see there are two floors. We will go to the upper one. Looks nice on the outside. Pro players here gambling with their odds here after having hunted pokemon for 247 hours, trolled by RNG and having gone through a rough divorce. We will walk up slowly, menacingly to Jotaro and his Stand Star Platinum Shiny Psyduck (Quack Jack NPC) and the Casino Coin Seller. They look... shady. I wonder if they're from the Pokemafia from the Detective Pikachu movie. Once we talk to Quack Jack (Psyduck), he'll give us a few options. We can choose Yes! To play straight away. However, if what you want to do is lose all of your money, you should think twice. We'll stop, say no, thanks and turn our backs and leave this place and never come again ask him to explain us the rules, because we've come here to GAMBLE our MONTHLY pokemon salary (unless you're on Dig Spots welfare, basically). I will try and go through all of these. The goal of the game is to try and pick cards until we reach the number 21 or we reach the closest possible to 21. We are given an initial card, and so does Quack Jack get one. After you get your first one and examine it, you have to choose if you want to Hit (pick another card) or Stand (stop drawing cards). We are trying to reach the number 21. However, if we go higher than 21, we lose. If Quack Jack goes over 21, he also loses. So, how do we play? We first need to know the value of all cards. An Ace is worth one or eleven points, up to your choice. The cards with faces (Jack, Queen and King is this a One Piece reference are worth 10 points.). all the other cards are worth 2 to 10, as you will perfectly be able to see. (If it says two, it's worth two, or if it has two items in it, it's worth two. I think it's not hard to learn how to count to 10.) We will first choose how many coins we want to bet. We can buy 50 coins to the casino coin exchanger for 250k pokedollars (as certain famous guy said, it's just a small loan of 250k pokedollars). This is extremely expensive, I'm REALLY going to regret this if I don't win, but we will try our odds. (Frucht why did I agree to trying this out for the love of god how will I feed my pokemon children with no money left from betting) Now, we will bet 1 coin to start and understand how the game plays. I'll give you an example. Quack Jack gives you your starting cards. You get your first card. You can get as a maximum 11 points with a single card (you can get an Ace, which you can use either as one or eleven points, He has a hidden card, could be anything. You can then try to hit and get as close to 21 as possible. I got a 3 in my first hand. I'm very far away from 21. I hit again. I get an 8, now I have 11 points. I decide to hit again and I get a 7, I have 18 points now. Now, I choose to stand ZA WARUDO okay, I should stop with the Jojo references. Now, the dealer shows his cards. Oh, he got 20! I lose this one. However, the next game might go the opposite way and you may win. My personal advice: after 17, stand. It's a safe bet, and most times, Quack Jack would normally lose. 18 or 19 is already a strong enough number and the chances to get 21 are really against you. What happens if you hit exactly 21? Well, you Quack Jack. If you Quack Jack, you instantly win and win a bigger reward. Hitting 21 is the dream. However, it's not optimal, because our goal is to hit atleast 18 to 19, where our mathematical odds will benefit us more. We have to try and win by getting more points than that goddamn blue painted Psyduck, not try to risk it all and end up losing our savings or something else which we will not specify as it would be pretty, pretty terrifying. Before you start playing, I highly recommend you watch this youtube video which also applies to the Quack Jack (without the Psyduck, though). It will probably guide you a lot. Now, I'll start trying it out as an example! (Frucht I swear to god I am going to waste 250k for a forum guide are you kidding me lmao) I start up good, the dealer gets a really bad starting hand (just a 2, while I get a 10). This means he has to take many cards to try and reach 21. I got a 10 and 3, so I get 13, and I feel safe enough to bet and get to 21. I'm going to hit Hit and try my luck! ARE YOU KIDDING ME THIS IS RIGGED, I'M GOING FOR ANOTHER ROUND I AIN'T LETTING THIS BLUE MIDGET GO AWAY WITH MY MONEY. THIS IS BUSTED WHAT IN THE WORLD HE JUST GOT A QUACK JACK IN HIS STARTING HAND HOLY MOLY THIS GUY HAS ARCEUS TIER RNG I start with a 17. This is my time to shine! I try out to Stand and... I get Quack Jacked again. Mother of GOD this guy's luck is insane. Jokes aside, it's perfectly possible to win in this game. You only have to BELIEVE IN THE POWER OF THE CARDS, KAIBA, MY GRANDPA'S DECK HAS NO PATHETIC CARDS, KAIBA! be lucky enough and win a few times through maths and logic and being lucky (I thought the NPC was rigged at first lol). Now, we will try and see what we can buy with our single point we obtained from this (yes, I wasted 250k FOR A SINGLE CASINO POINT. This guide is being expensive.) We will go down and visit the Casino Points Exchanger and check out the options. As you can see, the Pokemon tab has some insanely rare and amazing pokemon to try and obtain them. Your other alternative is to try out and buy some items with these points. I only suggest spending them on Focus Sashes, I do not personally thing the others are worth it enough. I hope you've learned something with this guide. I had a ton of fun wasting 250k pokedollars down the drain because of a discord joke and a stupid bet of a friend to see if I could make an entire guide in less than two hours playing QuackJack and I hope you try it too! And have better luck than me, too. It is a worthwhile addiction and hobby to do if you're so reach that you use 500.000 pokedollar bills as socks or as a pillow to sleep on. There's a daily limit to playing this game because I actually got so good at it that I started winning more than 80% of my games and it would otherwise be incredibly busted. I guess now I have to go back to making serious guides lmaoo
-
This will be a simple guide to aid newbie players who have issues using trade chat and trading with other players without being scammed or finding that the pokemon they got traded was from another region, etc etc etc. It will also link rules for forums and ingame trades. I will not cover auctions on this one, I'll try covering auctions in another guide. I want to make a fast trade guide since I see a lot of newbie players with no clear idea on how to use the trade function ingame. Trading in Pokemon Revolution Online Only requirement: You must have obtained the Rainbow Badge in Kanto (4th badge in Kanto, the first region). From that point onwards, you can ALWAYS trade inside of any pokecenter or Pokemon League building, even if you just entered a new region and have no badges. You'll be able to trade pokemon from that region. However, if you are traded a pokemon from another region, it will remain locked in your PC until you either enter that region for the first time or you ask a Trade Moderator o a Staff Member to trade it back in the appropriate post: https://pokemonrevolution.net/forum/topic/129049-url You will get this pop-up. Be careful! It will remain locked until you complete that region. Both pokemon and items can be traded in the same way. Before you start trading with random people, I suggest you read the Trade rules and the Trade chat rules in case you want to use the Ingame Trade Channel. Also, normal chat rules apply, so don't be rude when asking to buy stuff! Trade chat rules: https://pokemonrevolution.net/forum/topic/29538-url General chat rules: https://pokemonrevolution.net/forum/topic/62159-url You've earned that 4th badge. You are now looking to buy some useful pokemon in Trade Chat. You spot a pokemon that catches your eyesight: Wow, a Bidoof! I really want that! He's a god pokemon! You check that it has the ability you want, the nature, the hidden power (if it's needed), and if it's from the Region you have completed. In this situation, you see Bhimoso has posted a GODLY BIDOOF (just kidding, it's garbage.) and you want to trade with him. You right click on his name and select the message option, and you politely ask him to trade it. After you see each other, you may now rightclick the user and press the trade option. A pop-up window will appear. If you're on phone, you just have to tap their player. A pop-up window to Trade will appear. You may here place your pokemon in your team (thus, put the pokemon you want to sell in your team first) and any items you want to trade. Beware that legendary pokemon and certain key items cannot be traded or it would not allow you to progress through the story, such as trading HM or the Silph Scope. You can also put the money by writing the amount you want to pay and pressing the Set button afterwards. After you have checked everything is right, you may now press Accept in both sides and confirm the trade. You will get a pop-up asking to make everything sure before you do. If you click Accept, the trade will be confirmed and there will be no going back from this point on. If you want to cancel the trade, you can press the X button in the rop right corner of your screen. This time, however, you notice something. That is not a GOD bidoof, that is a GOD bibarel! You're being scammed! That is not the pokemon you wanted! You bring it up to the seller. You give him a second chance to try and trade again. The trade might've been successful now. However, what happens if he was actually trying to scam you again? These situations may arise sometimes. In this situation, we have to take screenshots of the trade and the conversation and post them in the report section of the forums with the correct form. dramatisation king btw, not even Shakespeare could match my skills We will now open the Report Center section in forums and report this scammer. https://pokemonrevolution.net/forum/index.php?forums/report-center.39/ We will also choose the server we play in (I play both, but this is happening in Gold Server, so we will post it there. As suggested by Ehkoe (Trade Moderator), you should take a look at the rules as written by Logan to file a report: https://pokemonrevolution.net/forum/topic/39923-url We will now file our report and make sure everything is right. Do not worry, we can edit the report later if our evidence is not posted properly the first time! Now we can select the "Post Thread" option and wait for a response! You can bump your post there every 24 hours if you don't receive a response. Beware that Trade Moderators are also real people like you and me who also play this game, we all have a life and we all make mistakes. Respect the rules! If you are unsure and want to contact a Trade Moderator to buy a pokemon from forums in the same way as you did using this guide, you can find them here in forums and you can send them a private message to answer your doubts: I hope this guide has been useful for you to understand how to trade your pokemon and what to do, and if you feel you have been scammed or a rule has been broken, you can file a report! Read the Trade rules properly, since there are many infractions you may accidentally (or not) find when you sell or buy pokemon! If you ever need advice, help or need to ask questions, you should probably ask them in the Help chat ingame so another user helps you out, a Guild member or someone on the official discord. https://discord.gg/98pMNxq I wish you good luck when trading and this guide will only be edited to fix any mistakes, add extra information and cover Lend Trading when it is fixed. For now, this guide is complete
-
Fast and Efficient Boss Run Route Good day and welcome to the Fast and Efficient Boss Run Route! This guide will give you a Fast and Efficient route to do Boss Run! Additionally, this is tailored for non transit pass holders to maximize time and reduce spending on travel. Disclaimer: This is not a boss guide but i will give suggestion as to what i use. Required Pokemons ➺ Your Boss Team ➺ Pikachu ➺ 1 x Fire type ➺ 1 x Ghost type ➺ 2 x Steel type ➺ Iron Defense Note: Boss requirements may change over time. Suggested Team This suggested team will satisfy all the requirements previously mentioned with additional purposes. Reserves Klefki ➺ Steel + Switcheroo || Empoleon ➺ Steel + Stealth Rock + Feather Dance + Iron Defense || Ampharos ➺ Eerie Impulse Gengar ➺ Ghost + Destiny Bond || Gyarados ➺ Sweeper || Haxorus ➺ Sweeper Pikachu ➺ Everyone loves Pikachu || Delphox ➺ Fire type + Skill Swap + Switcheroo Kanto Route [spoiler=Start: Cinnabar Island ➺ End: Vermilion City] ➺ Cinnabar Island Professor Oak ➺ Cinnabar Island Lab Room 2 ➺ Mt Silver Terminator ➺ Mt Silver Moltres Chamber ➺ Viridian Forest Erika ➺ Viridian Maze ➺ Pewter City Officer Shamac ➺ Pewter Jail George ➺ Pewter Jail ➺ Cerulean City Naero ➺ Cerulean Cave B1F ➺ Route 25 Entei Guardian ➺ Route 25 Cave ➺ Saffron City Chuck ➺ Saffron Gold's Gym Koichi ➺ Saffron Dojo Nikola ➺ Unknown Place ➺ Lavender City Urahara ➺ Pokemon Tower 3F ➺ Celadon City Jessie & James ➺ Celadon City ➺ Vermilion City The Pumpkin King ➺ Vermilion City Graveyard Xylos ➺ Vermilion Pokemon Club Brock ➺ Diglett's Cave ➺ Vermilion Docks Officer Jenny ➺ Pinkan Lighthouse 2F Klohver ➺ Pinkan Island Meadow Prehax ➺ Munchlax Resort Shary & Shaui ➺ Love Island House 1 Jhoto Route [spoiler=Start: Olivine City ➺ End: Ilex Forest] ➺ Olivine Docks Suspicious Bot ➺ Dock Island House 1 Battle Bot ➺ Dock Island House 2 Bugsy ➺ Amazon Forest ➺ Route 41 Misty ➺ Route 41 Thor ➺ Whirl Island B4F ➺ Route 42 Bruno ➺ Mt. Mortar Lower Cave ➺ Lake of Rage Suicune Guardian ➺ Secluded Lake ➺ Ice Path Lorelei ➺ Ice Path B2F ➺ Blackthorn City Lance ➺ Dragons Shrine ➺ Violet City Sage ➺ Sprout Tower 3F ➺ Ruins of Alph Proffesor Elm ➺ Research Center ➺ Goldenrod City Pewdie & Diepy ➺ Goldenrod Gaming Corner ➺ Ilex Forest Neroli ➺ Ilex Forest Hoenn Route [spoiler=Start: Lilycove City ➺ End: Valley of Steel] ➺ Eumi Island Tigerous ➺ Eumi Island Theme Park 2 ➺ Route 122 Morty ➺ Mt Pyre 4F ➺ Slateport City / Route 108 Toothless ➺ Abandoned Ship B1F Room 1 ➺ Route 110 Raikou Guardian ➺ Secret Base Alpha Lt Surge ➺ New Mauville ➺ Verdanturf Town Professor Brich ➺ Verdanturf Town House 2 ➺ Route 111 Naruto Fanboy ➺ Desert Ruins ➺ Route 112 Gingery Jones ➺ Feral Site ➺ Lavaridge Town Steven ➺ Valley Of Steel Sinnoh Route [spoiler=Start: Canalave City ➺ End: Cave of Justice] ➺ Survival Area / Route 227 Saphirr ➺ Route 227 ➺ Jubilife City Professor Rowan ➺ Jubilife City School ➺ Sandgem Town Spectify ➺ Sandgem Town House ➺ Twinleaf Town Link ➺ Twinleaf Town ➺ Route 203 Medusa & Eldir ➺ Legends Cave ➺ Valley Windworks Letrix ➺ Valley Windworks ➺ Floraroma Meadow Maribela ➺ Floraroma Meadow ➺ Mt Coronet Ash Westbrook ➺ Ash Westbrook ➺ Route 210 North Logan ➺ Cave Of Justice [spoiler=Total Spending] Trainers Valley ➺ 10k Pinkan Island ➺ 5k Love Island ➺ 5k Kanto - Jhoto ➺ 5k Jhoto - Hoenn ➺ 5k Lilycove City - Slateport City ➺ 2.5k Valley of Steel ➺ 5k Lavaridge Town - Lilycove City ➺ 2.5k Hoenn - Sinnoh ➺ 5k Canalave City - Survival Area ➺ 2.5k Survival Area - Jubilife City ➺ 2.5k ------------------------------------------------------- Total Spending = $50,000
- 4 replies
-
- 13
-
-
I actually made myself the bet to actually do this guide for newbies and get it done before tomorrow. I wanted to cover this topic because it feels dumb, but there's actually a lot of ways to make the process easier. I'm going to post most of the information borrowed from my other guide: Welcome to hunting abilities and how to make your life easier avoiding capturing any unnecessary pokemon! There are hundreds of abilities in Pokemon, almost thousands. A lot of pokemon share abilities: Metagross, Registeel and Tentacruel share Clear Body. This ability prevents them from having their stats lowered by an opponent move or ability. Sentret and Rattata share Run Away which allows them to always run away from battles, Nidoking and Feraligatr share Sheer Force... you get the point. There's a lot of abilities in pokemon, all pokemon come with atleast one ability, some with two, some with three. But, what is an ability? An Ability is an inherent power all pokemon have. All pokemon have an ability. Some of them only have one (Gastly with Levitate), others only have two (Bulbasaur with Overgrow and Chlorophyll) and sometimes they have three (Bronzong with Heatproof, Levitate and Heavy Metal). All pokemon come with an ability when captured. If a pokemon only has one ability, it will always have that one. There's no going around it. If a pokemon has two abilities, it will have these two, and if a pokemon has three, then three. Some abilities are more useful than others. The ability Levitate, for example, makes a pokemon immune to Ground Type attacks. Lightningrod does the same to Electric moves, but also increases your Spatk by one stage after being hit by one. Flash Fire does the same but for Fire Types. Volt Absorb and Water Absorb make a pokemon immune to Electric, Motor Drive does the same... you see the point. Some abilities are insanely good because they help out a lot of pokemon to defend against their weakness. Some abilities make them immune to certain status (Limber, Immunity, Own Tempo, Insomnia). However, there are also some abilities that are completely useless. Truant is an ability that makes you only be able to attack once every two turns (you attack, you do nothing, you attack, you do nothing, you attack, you do nothing), Illuminate literally does NOTHING in battle, and so on. There are really broken abilities like Sturdy or Mold Breaker, and there are stupid abilities that you wonder how they even exist. So, how are we going to hunt for the right ability for our pokemon? Well, we need to study which of the abilities can our pokemon have, and which one helps it better. For example, Guts in Rattata is way better than Run Away, Levitate is way better in Bronzong than Heatproof, Lightningrod is way better than Static in Pikachu. Search and look at what each ability in your pokemon can do and choose which one you want to use. So, how do we hunt for abilities? The first thing we have to do is investigate what abilities the pokemon has. It can be either simple and perfectly easy (Gastly, for example, only has one ability. Thus, we don't need to worry. It will always have the same ability), a bit hard (one ability and one ha) and a nightmare (two abilities + ha). If a pokemon only has one ability, it will always have it (it can change when it evolves though, Gastly's Levitate becomes Cursed Body on Gengar.) However, if we're trying to hunt anything else, we will have to check if it's a normal ability or a hidden ability. If it's a normal ability, we have to check if the pokemon has two, or just one. One single ability. 100% chance! One ability and a hidden ability. 95% chance and 5% chance! Two abilities and a hidden ability. 47.5% chance for both and 5% chance for the last one. Then, we factor in the chances. The normal chances of finding a Hidden Ability pokemon are just a measly 5% of the times you'll encounter the pokemon. Thus, if the pokemon has just one more normal ability, it will have a 95 % of having the normal ability and a 5% of having its hidden one. If it has two normal abilities and a hidden one, each normal ability will have a 47.5% chance, and the hidden one will still have a 5% chance of appearing. You can check the abilities of each pokemon in the pokedex. The normal abilities will be found in the first two slots in a blue font, while their hidden ability is found on an orange font. Then, how do we increase our chances? Well, we can purchase a Black Medallion (or BMS) from the Coin Shop for just 40 Coins so that for the next 72 hours we use the item, we will have a 25% chance of finding a hidden ability on any wild pokemon we find. However, this is bad if we actually want to hunt the normal ability of a pokemon, since we will decrease the normal abilities' chance to get a higher chance of hunting a hidden ability. We can buy a Coin Capsule from other players to purchase a Black Medallion or we can also donate to the game to keep it going Premium Coin Shop. Black Medallion: consumable item, lasts 72 hours. Icon to show Black Medallion's effects are active. It's time to hunt pokemon! So, where do we start? We first check what pokemon we want to hunt. I'm going to check for Spearow, for example. I want to hunt a Sniper Spearow. Since Spearow only has two abilities (a normal one and his hidden ability), we have a 95% chance of finding a Keen Eye Spearow and a 5% chance of finding a Sniper Spearow. That's a bit low! If we had a Black Medallion active, we could use it to have a better chance of finding one. We can find out if a pokemon has a certain ability using the Role Play move. Role Play is a move learned by Kadabra upon level-up that, when used, will show what ability the opposing pokemon has. We can use this move to know what ability the pokemon has. If the wild pokemon does not have the ability we want, we can simply flee and find another one. Kadabra with the move Role Play. After using Role Play, we find out that Rattata's ability was Guts. The other easy option to use is to get a pokemon with the Trace ability. Ralts and his evolutionary line have this ability. Once a Trace pokemon is switched into battle, he will copy the opponent's ability. Ralts is really hard to find and this ability is his HA. Thus, I suggest you just get any Abra, evolve it into Kadabra and learn this move. (Thanks to Atdhe, Trickypork, 700ruoham and Dorota for showing their Trace pokemon since my client was bugged) What if we're so poor we can't even capture these? We'll use our brain with no resources! How do we know if Spearow has the Keen Eye ability? If we study both abilities, we only have one way to discern one from the other: if he has Keen Eye, he will not have his precision lowered when we use Flash or a precision lowering move against him. Thus, we just have to use Flash against him to know he has Keen Eye. This Spearow has Keen Eye, as you can see in the picture. Thus, we can't lower its accuracy with Flash. We instantly know that he does not have the ability Sniper. Mmm... I feel like capturing a Diglett with Arena Trap. How can I find out what ability it has? Well, we know that Arena Trap will prevent us from fleeing. Thus, we just need to know that if we try to escape, he won't let us. Thus, it will be Arena Trap! We can flee from this one. Thus, it doesn't have Arena Trap. We can't* run away from this one. Thus, this Diglett has Arena Trap. Man... I really want a Sturdy Geodude. I guess I should try and get one. We know Sturdy protects him from being KO'd in a single move. Thus, we know that, if we are able to KO it with a single move, it didn't have Sturdy. Thus, we didn't want it anyway. I hit him extremely hard and he did not faint. We also get the pop up message. Mmm... I feel like getting a Clear Body Tentacool. That ability prevents stat lowering by the opponent. Thus, I'll use an Intimidate pokemon to know if it has Clear Body! Clear Body will prevent Intimidate from working. This one doesn't have it. No pop up message appears after this. This means Tentacool DOES have Clear Body. Same happens with Krabby Hyper Cutter. I hope with this guide you've understood how to calculate the probabilities of each ability, how to check a pokemon's abilities (or use bulbapedia for it), how to find out what ability they have, what tools can you use, and how to find them out without any tools: just using intelligence. I hope it helps you newbies too! (Ignore the part below, it's bugged and I can't fix it) Potato.
-
 Welcome, everyone! I was asked a few times on how to exactly train a Pokemon and fix their EVs, how does EV training work and how much do EVs work to improve a pokemon. Everyone always wants to have their pokemon as strong as possible. EV training will max the capabilities of a pokemon: whether it's a tank, a fast pokemon, a sweeper, or just a garbage pokemon you want to train for fun (why, though?), EV training is a requirement for the PRO lategame. However, EV training can be done anywhere, as soon as you start the game, from any point. Even if you're a newbie and you're in the third badge, you can still EV train that Gastly you always wanted to use for the story because that random dude in help chat told you to do so. Why should we EV train? We EV train to improve our pokemon to their full capabilities. Pokemon's stats severely increase when they're EV trained, to points where fights go from being impossible (Giovanni's Mewtwo) to being an easy oneshot from Gastly. For example, imagine we have a Gastly at level 90, with a Modest Nature, that has 200 Speed and 200 Special Attack. It's slower than the Mewtwo and, even if he manages to Shadow Ball it somehow, Mewtwo still survives. However, if we EV train that Gastly, it will gain atleast 50 Speed and 50 Special Attack. Now, it will outspeed Mewtwo and oneshot it before he can react. A legendary pokemon powered by a machine fainted in a single hit by a ghostly poisonous fart. Imagine! What are EVs and how do they work? How do we train them? What can we do with them? How do we modify them? What can I do if I trained EVs wrong? How can I fix this mess of a pokemon? To understand how EVs work, we can read the other forum guide I did covering this topic, or we can copy paste it here. However, I'll do both: https://pokemonrevolution.net/forum/topic/152671-natures-abilities-ev-iv-and-stats-for-newbies-the-guide/?tab=comments#comment-840375 In this guide, we cover the topic of EVs and how do they work and how do we train them. However, I didn't go in depth into it, since I wanted to make a guide on how to train them as I train one of my pokemon so you can see the progress and the ways we can use it. You can check the theory there, but I will copy the basic definitions we need to understand here. EVs or Effort Values are the blue numbers in any pokemon you see. These values can be modified, increased, reset, reduced, fixed, changed... they're amazing. They work as a modifier for all of your pokemon in order to improve them as much as you want. You gain EVs for defeating wild pokemon, trainer pokemon, using proteins or vitamins in your pokemons. Every 4 EV in one stat, your stat will get increased by 1 at level 100. You can have a max of 510 EV between all stats of your pokemon. In a single stat, the maximum amount of EV you can allocate is 252. Thus, at level 100, if you allocate 252 EV in that stat, it will increase by 63. (252 divided by 4). You can decide how to change these whenever you want. You can modify them as you wish by using EV Reducing berries. These can be found in any route, in Viridian Maze and in the Safari EV Zone. These are: Pomeg Berry, which will reduce your HP EV by 10. Qualot Berry, which will reduce your Defense EV by 10. Kelpsy Berry, which will reduce your Atk EV by 10. Grepa Berry, which will reduce your Spdef EV by 10. Hondew Berry, which will reduce your Spatk EV by 10. Tamato Berry, which will reduce your Speed EV by 10. All wild Pokemon, once defeated, will grant you 1, 2 or 3 EV in one stat. Some grant 1 EV in 1 stat and another one in another. There are really weird combinations. They always give an EV of their highest overall Base Stat. For example, Snorlax gives HP EVs, while Gengar gives Spatk EVs. Evolved forms usually give more EVs than unevolved forms. As I said, these 2 give 3 HP EVs and 3 Spatk EVs, respectively. If you hold a Macho Brace, the EVs you gain will be doubled. If the EV in one stat is 99 or below, you can use a vitamin to increase that stat's EVs by 10. However, if you try to use a vitamin once that stat's EV are atleast 100, or the Pokemon already has the maximum amount of EVs (510), you will not be able to. They can be purchased in department stores. These vitamins are: HP UP, which will increase your HP EV by 10. Protein, which will increase your Atk EV by 10. Iron, which will increase your Def EV by 10. Zinc, which will increase your Spdef EV by 10. Calcium, which will increase your Spatk EV by 10. Carbos, which will increase your Speed EV by 10. First of all, we have to find a suitable pokemon to EV train. My personal recommendation is that you do not EV train anything that cannot be used in Bosses, low rating PVP (friendly pvp with friends, basically), or serious ranked PVP. Do not waste time, resources or money into training something that you will literally never use again, because it will mentally burn you out. For this guide, I'll train a pokemon that I believe is useless unless you equip it with a certain item. Pikachu with the Light Ball. This is one of the Pikachus I hunted for a newbie who lost his, so I decided to use it as an example. As you can see, this Pikachu has some decent Spatk, Speed and a good nature. Its ability might not be the best, but I wanted to train this little guy for fun and he has good enough stats to be trained. We want to level our pokemon first from a low level to atleast 40-50 to do the EV training properly. So, since we see he has EVs under 100, we will try and using some leftover vitamins we have in our bag. It does not increase its base Speed stat, but its Speed EVs. Pokemon's base stats cannot be changed, ever. Just to clear misunderstandings We want to train this Pikachu with 252 Spatk EVs, and 252 Speed EVs. I will first check for vitamins in my bag. I see I have some, and the Speed EV of this pokemon is 0 (check the blue number next to Speed). Thus, I can use all of the 10 Carbos to increase it to 102. We can train it however we want: we could train 102 EV into each stat, but that's stupid. Pikachu does not need defenses, only offensive stats. Pokemon like Bronzong can be trained by splitting EVs into each defensive stat. Now that we increased its Speed, we will use some Calcium to increase its Spatk stat. Since I have a lot of them, I'll use 10 of them to increase his Spatk EVs to 100. Voilá! Now our pokemon has 100 EV in Spatk and Speed. However, we can't increase it with vitamins anymore, so we have to manually train them both. Now, we have to fight wild pokemon to gain EVs. Each pokemon gives a specific EV. We can check each pokemon in a website like bulbapedia to know what EV it gives once we defeat them. For example, I will train this Pikachu in Cerulean Cave. I will only fight Golbat because it gives 2 Speed EV and I will fight Golduck because it gives 2 Spatk EV. I will avoid everything else because Gravelers give Defense EVs, which I do not want (Because Pikachu is a sweeper that does not care about being tanky). As you can see here, each Golduck will give us 2 Spatk EV once we defeat them. Let's get some! We found a Golbat. Let's get some nice Speed EVs! As expected, we got 2 EVs into Speed. Nice! We can keep fainting pokemon until we get some more levels. We will now fix the Def and HP EVs, since we do not want them. We can obtain these berries in the EV Wald in Fuchsia Safari or inside the gigantic Viridian Maze. These respawn from every 24 to every 96 hours. Pick them up every single time you find them! We will now use a Pomeg Berry and a Qualot Berry to remove the Defense and HP EVs Pikachu has. Berries in Viridian Maze. Now it is cleared of all unwanted EVs. Since we want to train it 252 in Speed, 252 in Spatk and 6 in Atk, we are ready to now fully train it. We will avoid fighting any wild pokemon that gives undesired EVs so as to avoid training him in the wrong way. We can look up in the website mentioned above which pokemon gives each EV. If you do not have money to use the Safari EV Wald, you can use the EV Zones spread around the regions. These are placed in specific routes and are amazing zones to EV train your pokemon for free. You'd only have to pay 5k to travel to each region or just use your legs and walk there! Since I want to make the process faster and I can afford it, I will go and train him in the EV Wald in Fuchsia. Remember you can train EV anywhere, doesn't matter when, how or where. All pokemon you fight (including trainers) will give you EVs. Just remember to avoid fighting unneeded or unwanted pokemon or you'll have to fix the wrong EVs later using berries. Safari EV Wald inside. You can obtain a Macho Brace by trading a Drowzee for a Machop holding this item in Goldenrod. The NPC is in front of the Pokecenter. It's the Motorbiker dude. This Macho Brace will double all EV gains, but will make you slower in battle. However, this will make us gain EVs incredibly fast. This dude will give us Macho Brace. I will now choose EV Training Area. I will use the next 20 minutes before I'm forced to leave wisely and I will EV train it to its fullest potential. You can pick up a Kelpsy Berry which reduces ATK EVs by 10 each time you use it. They're all in the Wald, in both zones. Here we'll find fully evolved forms at very low levels. In this exact part, I fight wild Pidgeots which give me 3 Speed EVs per pokemon. Since I've equipped Macho Brace, I will gain 6 Speed EVs per pokemon. Speed is now done. Now we're going for Spatk! Here we find the Spatk berries in the Spatk training zone. Vileplumes give each 3 Spatk EV, so we get 6 Spatk EV with Macho Brace equipped. Our Pikachu is now fully trained and ready to be leveled up to 100. We've successfully EV trained our pokemon and now we only have to level it to 100. Yey! If you want to make your training process faster, you should disable battle animations and increase Text Speed to the fastest so that you gain a few seconds each fight, which will add up quickly and allow you to fully train a pokemon in exactly 18 to 19 minutes, just shy of the 20 limit from Safari. As you can see, I have animations toggled off and Dialogue Speed at the max. I hope you have all enjoyed this quick guide on how to train any pokemon. I hope all doubts are cleared and you can check my other guide linked above to understand the theory better!
- 14 replies
-
- 10
-
-
Welcome to the leveling guide made for newbies! Are you tired of reading forum guides that tell you "bro you only need a Toxic Orb Pokemon with a False Swiper" yet you can't obtain it because you're still stuck against Giovanni, Sabrina or still struggling to survive against the Elite Four? You can't afford buying one because you're poor and the Pokemon they ask you to use IS A HOENN POKEMON? Or they ask you to buy half a million Focus Sashes, get Cerulean Cave access or impossible requirements for you poor fella who is still stuck in Kanto? Pro Newbie having a rage attack after being oneshot by Giovanni's Mewtwo for the 20th consecutive time (circa 2018, colorised) Are you headbutting your head against the wall (without the happiness requirement) because you have no idea how to find a False Swipe pokemon, you just started playing the game two days ago because that buddy told you HEY DUDE PLAY THIS GAME IT'S SO BIG AND FUN AND IT'S HARD but you actually now hate your friend because Sabrina keeps oneshotting your pokemon with Alakazam? I'm going to try and put some humour into an ACTUALLY EASY AND RELIABLE AND UNDERSTANDABLE GUIDE that ACTUALLY gives you FACTUAL information and DETAIL on how to REALISTICALLY level up your pokemon if you're a newbie and you have LITERALLY NO RESOURCES to start with. It doesn't matter if you're poor or just began playing 4 hours ago. You can start this method as soon as HAVING BEATEN THE 2ND KANTO BADGE. Yes, you heard me right, you can start it JUST WITH TWO BADGES. But Bhimoso, why are you making this guide? Well, I'm making this guide because a lot of guides are either half made or incomplete and tell you methods of leveling up your pokemon, but they have absurdly hard requirements for a newbie or literally put NO effort into teaching you how to level up your pokemon. I am going to treat you like children in this guide, so you can follow this better. Introduction This guide will aim to teach you MANY, MANY methods of leveling up ANY pokemon (attackers, tanks, utility pokemon, pokemon that cannot fight by themselves (Metapod, Ditto, me after eating too many pizzas), and other nearly useless pokemon you struggle with leveling up. I will try to indicate which minimum requirements you need for each method to be performed and why and when should you do it. Generally, the idea is to level up your pokemon using ANY of these methods below until it can fight by itself in high level areas. The idea is to bring it to around level 60 to 70, then let it level by itself. This, however, is not always possible. Newbies might be unable to level up Fire Types until they unlock more regions because Kanto is VERY restrictive in regards to Fire Type leveling spots. The main idea is to NOT evolve your pokemon so as to level them up incredibly faster for anything you might want to use them. With the methods we will use, you shouldn't take even one hour to level up something from level 10 to level 80. If you evolved your pokemon because you wanted to have fun in PRO blasting everything with your Charizard, you will still be able to follow this guide and enjoy the game. DO NOT FEEL RESTRICTED JUST BECAUSE YOU EVOLVED YOUR POKEMON TOO EARLY. DO NOT FEEL BAD, USE YOUR FAVOURITES AND ENJOY IT. This is A GAME, after all. You're supposed to have fun. This guide will be updated constantly, because there are MANY methods we will use and more that we can add in. However, I will keep this Kanto obtainable pokemon only for now, because I want to help out newbies specifically. If I make an exception, I'll notify it. Recommended mechanics that will help you out! Guilds Guilds give you an inherent EXP bonus JUST FOR BEING IN THEM. Depending on the size of the guild, this bonus goes from 2.5% to 10%. While at first this bonus may seem minimal, keep in mind 10% means that, one every ten fights you will basically get an extra fight worth of experience. Every ten fights, you will basically have fought eleven instead. It QUICKLY adds up while you faint hundreds of pokemon. If you join a LADDER Guild (a Guild that in the last season ended in the Top 10 spots in the Guild Ranked Ladder), you will additionally gain a 25% bonus EXP. Thus, this bonus can reach a 35% EXP bonus. Now you realise that, once every three fights, you've gained enough EXP for a fourth fight. That's an amazing amount of experience. Thus, if you're a newbie, no matter if your Guild is filled with newbies, JOIN A GUILD! There are NO penalties for joining and leaving one. Membership and EXP Potions If you want to go the Premium way and support this amazing game, there's also another extra help you can take. You can always donate to purchase a Coin Capsule, and then you have two amazing options. You can purchase the Membership Medallion, there is the 15 day, 30 day and 60 day version. Having a Membership active gives you a 50% exp bonus, which is the one we're interested in. No matter the duration, the bonuses are the same, but it lasts longer the bigger the Medallion is. A 50% EXP boost is INSANE. Once every 2 fights you get an extra fight worth of EXP. Not only that, did you know that an entire MONTH (yes, MONTH) of Membership is only FIVE euros? It's so cheap it's not even a joke. Instead of getting a pizza one night, you just go and donate the five euros you would've spent. For the ENTIRE month, you get 50% extra EXP, 100% bonus money (this is the best part, do you know that money you get from fights? Well, NOW YOU GET DOUBLE THE MONEY), access to exclusive very rare pokemon, rare bosses AND rare Membership Only areas. Memberships are incredible and I ALWAYS recommend dumping FIVE dollars a month. If you are unable to donate, there's no issue! Coin Capsules and MS Medallions are tradable, so you can purchase them with Pokedollars from other players (or trade other in-game items for them). EXP Potions are also another option. If you are going to train many, MANY pokemon, you can purchase an EXP potion that gives you a 25% EXP bonus for 72 hours. This is a very good option if you are a Service Provider and train pokemon for Pokedollars. I only suggest purchasing these if you are stacking the Guild Boost, an Active Membership and you must train 10 or more pokemon for someone (or for yourself). Held Items and Consumables Held items are a very, VERY important of Pokemon. Held items range from Berries that activate under specific conditions (a move runs out of PP, your health goes below 50% HP, etc etc and so on), PvP items that boost a stat but enable a secondary condition (Assault Vest boosts your SPDEF by 50% but does not let you use status moves), PvP/PvE (in reality they are PVP, however, these are more suited for PvE too) items that do something similar (Choice Items), type enhancing items (Miracle Seed, Hard Stone and so on, the Type Tables), and other items. Some of these items are consumable and some are not! Some are very recommended while others are only recommended in specific circumstances. I will list the types of items that are normally used in EXP training that you should (OR SHOULDN'T) use while leveling up. They will be classified in different sections. Recommended: Berries Berries are so overlooked that I'm even surprised people don't use them. Berries are obtainable ANYWHERE. You can farm them up extremely quickly, pick them up and equip them onto your pokemon. What I often recommend with your berry usage is that you equip Leppa Berry onto your pokemon if your pokemon is strong enough to fight constantly without stopping so that, when one of its moves reaches 0 PP, Leppa Berry will automatically restore 10 PP. This makes menuing faster in long periods. Additionally, you can also equip berries such as Lum Berry or other status berries (Persim, for example) to heal up any status you may find. While these are situational, Lum and Cheri berries are nice to have in Cerulean Cave if you keep fighting Electrode and Raichu, for example. In Stark Mountain, you want anti-Burn berries and anti-Poison berries too. Sitrus berries can also be an okay option to heal up some of your pokemon's HP if it goes down slowly fight by fight. Do not be afraid to use berries since they respawn! Healing Items When you get further into the game you'll realise you'll be stocking up on hundreds of Potions, Leppa Berries, Super Potions and other healing items you'll barely use in the Endgame because you just travel to the Pokecenter every time you train pokemon. Don't be afraid to use these items if your healing point is far away from where you are leveling up your pokemon. Choice Items The Choice Items are often overlooked at how good they are at leveling up in PvP. These items, more often than not restricted to PvPing as they provide great bonuses but leave you locked into a single move, are amazing features in PvE. Are you at level 30 fighting a level 50 and you're a bit slower than them but if you hit them you would oneshot them? Equip a Choice Scarf, now you outspeed, oneshot and faint the wild pokemon! You're now able to level up in high level zones. Choice Band will help your ATK increase a LOT and Choice Specs will also power up your SPATK moves. These are great items you can have your pokemon hold while leveling up. The 50% boost is massive as you'll be able to faint way higher level pokemon you normally would be unable to. Keep in mind these items will lock you into a single move unable to switch until the fight is over or until you switch to another pokemon. These items are easily obtainable in the Item Recycler. Assault Vest and Rocky Helmet The Assault Vest is one of the best items to powerlevel slow but tanky pokemon such as Tangela. This will power up your SPDEF stat by 1.5 stages while as a restriction it will not allow you to use status moves. This item can easily be used by offensive slow tanks that can benefit from Drain Punch or Giga Drain or Leech Life or other life draining and recovering moves while they level up. While it's way more restrictive than Choice Items, they allow you to switch between moves! The Rocky Helmet will deal a 12.5% of the opponent's max HP on every physical hit you are hit by if it makes contact. Contact: Tackle Not contact: Earthquake. The move MUST HAVE PHYSICAL CONTACT for this item to work. This item is heavily recommended for tanks like Ferroseed who can combo Iron Barbs + Leech Seed + this item + Giga Drain to level up. Eviolite Possibly one of the most broken items introduced in Gen 5 (if not the most), this item multiplies your DEF and SPDEF by 50% if your pokemon is not fully evolved. Thus, any slow or tanky pokemon that has not fully evolved into its final stage can equip this item to be disgustingly powerful. The prime example is Chansey, who abuses this to reach absurd extents. However, ANY unevolved form can use this item, so you can stick into ANY pokemon! Leftovers/Black Sludge Leftovers is probably the best PvE item in the game. This item heals a bit every single turn (as long as you don't get fainted, of course) while you are in battle. It's very easy to find in Dig Spots, wild Munchlax and Snorlax and it's a stick-to-anything item. Healing nonstop without restrictions? Why wouldn't you want this? Stick this onto any pokemon! And yeah, Black Sludge does the same but damages non-Poison Types and only heals Poison Types. A bit restrictive but eh, you can also try it! Wise Glasses and Muscle Band Probably some of the worst, most memeable items ever, Wise Glasses and Muscle Band power up... a 10%. Yes, only a 10%. Wise Glasses powers up any SPATK move by 10%, Muscle Band any ATK move by 10%. There is quite literally no reason to use this over Choice Band and Specs massive 50%, even if they restrict you into a single move, because you will normally avoid fighting any wild pokemon you can't beat anyway. Type Enhancing Items + Expert Belt Type enhancing items are REALLY easy to find. These items are the Plates of each type + held items such as Sharp Beak, Hard Stone or Soft Sand. These are easily found in Dig Spots and held by wild pokemon. I REALLY recommend you use them as a newbie because they are an easy to obtain 20% boost to the specific type's attack. Expert Belt also powers up any move by 20%, but it's not restricted to a specific type, but it must be a supereffective attack (for example, Water against Rock). Brightpowder This item provides you an extra 10% evasion boost. You can use this item as a gimmick 10% chance to dodge a hit. Imagine your opponent is a level 60 Gyarados with 1 HP left and your Caterpie is at level 3 with Brightpowder equipped. If you get lucky you'll dodge the hit, Tackle it and level up over 30 levels in a single fight. This is a gimmick we will often combine with Hoppip! King's Rock/Razor Fang Mostly pure gimmick items, these give you a 10% chance to flinch on most attacking moves. This can be easily abused with Skill Link pokemon or pokemon that use multi-hit moves such as Bullet Seed, Arm Thrust, Pin Missile, Bone Rush and so on, as the chance to flinch applies to every single hit. There's more moves: Fury Attack, Double Slap, Tail Slap (?), Rock Blast and more. Razor Claw/Scope Lens Another gimmick item, these two items increase your chances to critically strike opponents. These are mostly combined with abilities such as Super Luck or Sniper + Focus Energy or high critical chance moves such as Karate Shop, Night Slash, Leaf Blade, Slash and more. Quick Claw A fun gimmick item, this can be your solution to level up pokemon at extremely low levels after you have false swiped an opponent to 1 HP. Equip it to your pokemon and pray that you get lucky and manage to attack. You will get many levels in a single fight. This can be done until you think the pokemon can level up by itself! Smoke Ball/Logging Out The Smoke Ball has no effect in battle. However, it allows you to escape any unwanted fights. You can equip this item to a pokemon if you want to avoid fighting specific pokemon. For example, a Dark Type in Cerulean Cave can fight any Slowpoke or Slowbro because they only know Psychic type moves. However, it will have to put a fight against Golduck and Psyduck, who know Hydro Pump. TMs and HMs Fun and not so known fact: if you replace a learned HM move with another one, your PP will automatically be restored. Very useful to level up Water types that can learn Surf, Dive and Waterfall. You can teach them substituting the HM previously known without having to go back to a pokecenter to heal! Teach your pokemon useful TMs they may use to cheese high level pokemon! Shell Bell (not coded currently) This item heals you for 1/4 of the HP damage dealt to your opponent. However, this item is currently not coded (it would be too easy to abuse in PvE against bosses). Not recommended: Focus Sashes Before you begin reading: LET ME PERSONALLY SHOUT THAT I'M EXTREMELY AGAINST WASTING FOCUS SASHES TO LEVEL UP YOUR POKEMON. There's MANY methods you can use that avoid wasting Focus Sashes when you could instead spend them in PvP or farming Bosses. However, it is true that Focus Sashes will always give you a 100% chance to live a hit (as long as you're at FULL HP AND you don't get hit by a multi-hit move). For newbies, it is an optional choice to spend PvE coins into leveling up a few of their best elite pokemon from level 10 to level 50-60. However, THIS IS AN EXTREME WASTE OF RESOURCES. PvE coins can be better spent buying other rare items (such as Rerolls) that can be sold in the market for way, WAY better profit. And if you're not looking at profit and just leveling up your pokemon, there's MANY ways to avoid using Focus Sashes. Please, DON'T waste PvE coins on Sashes as a newbie. Use Sashes for PvP or to cheese PvE bosses. They are expensive to find and purchase. Gems Gems are truly, truly, truly outrageous. But you know what else they are? Expensive and rare. These can only be obtained from Excavation Artifact Pieces and from Dig Spots, which all run on temporary cooldowns. You know what this means? You're wasting consumable items that can be rather used in PvP instead. Don't waste them to level up your pokemon, there's way better methods. Abuse the Type Chart Immunities! While it may look basic as hell and you only think about the type chart as "haha Geodude get surfed go brrrrrrr", the type chart has a lot of in-depth potential. What's the basic concept of abusing the Type Chart? Well, we will always try to focus on leveling our pokemon in specific areas where it may be a good idea to level up our pokemon. For example, Flying and Fire types are more often than not leveled up in Pinkan Island because it's infested by Bug and Grass types. Grass and Water types are often leveled up in caves as they are infested by Ground and Rock type pokemon. We will always abuse the type weaknesses of our opponents. However, there's more to this. Do you also realise there's a few types that are immune to each other? This mechanic is borderline broken and can be exploited to very absurd levels. Let me explain. When you find a wild pokemon in the wild, check its Pokedex data. If it is a Quagsire at level 50, check the 4 moves it would learn before that level. At level 48 it learns Haze and Mist. At level 41 it learns Rain Dance. At level 36 it learns Earthquake. Thus, it will be its moveset, ALWAYS. So, how can we exploit this? Well, the consumable item Air Balloon gives us an immunity to Ground Type attacks. Now, let's pair this with any pokemon. Congratulations, you're now immune to everything 99% of Quagsire in the wild can attack you with. How do we make this better? Well, when you realise that the TM for Toxic is cheap, accessible in Fuchsia Gym for a low price, and can be learned by 95%+ of all pokemon in existence, which allows level 3 Rattatas and basically ANY low level pokemon to faint level 50 pokemon while being invincible... You get the point. We can exploit this by training 95% of all pokemon in PRO against specific pokemon in the wild, until they are at a high enough level to fight by themselves. And this is not the only trick there exists! For example, Golett and its evo, Sandyghast and its evo are immune to all attacks Raichu has in Cerulean Cave (it only has Quick Attack, Thunderbolt and Thundershock). Even Ground types (while not immune to Quick Attack) can level up against Raichu there. Slowbro and Slowpoke in Cerulean Cave only have Psychic type attacks, so you can Toxic them with a low level Dark Type pokemon and win 1 v 1s against them, even at level 5. Golduck and Psyduck there only have Water Type attacks, so you can use a Storm Drain, Water Absorb or Dry Skin pokemon at level 5 and still win against them. Need to train a Ghost Type? Fight level 57 or above Weezing in Stark Mountain! Want to level up a Flying Type or Levitate pokemon? Fight level 52 or below Quagsire in Mt Silver! And any pokemon holding Air Balloon too. There's also abilities that will grant you extra immunities. For example, you can level up Fire Type immune pokemon with Flash Fire if you also equip them with an Air Balloon by fighting high level Magcargo in Stark Mountain! Specific NPCs you should target, Copycat Lamsie, Trainer Refights, Elite Four, Gym Leaders If you have paid attention, check near each Gym in each city where you can find one. You will find an NPC named Copycat Lamsie. This NPC copies the last team a player used to beat that gym. Thus, they are an amazing source of experience: most players will beat the gyms with very high leveled pokemon. This is a small fun challenge, you'll be fighting real player's teams! You might find a level 90 unevolved starter and then 5 low level pokemon, a full high level evolved team... you can find anything. The important fact is that all of these teams will bring you a lot of experience and you'll be able to beat this NPC every time someone beats the gym. Thus, fight them whenever you can! They're an amazing EXP source. Aside from that, normal trainer NPCs allow you to refight them every 7 days. You should always refight NPC Trainers for two main reasons: they give you pokedollars AND each time you refight them, they will be a bit stronger than before and give you a lot of EXP. I recommend you fight all NPC trainers from the 4th to the 8th badge whenever you need to level up some low level pokemon. Carry your False Swipers with you! Gym Leaders can be refought once every week and they have very high level pokemon you can easily use to level up your pokemon against them. They also reward you with Gems! (wow, such amazing reward, note the sarcasm). Go around each region and refight high level trainers whenever you want to level up something in your team! As a small extra, remember that you can refight the Elite Four infinitely as long as you don't beat it. Thus, if you're stuck there, you might as well repeat the fights nonstop and slowly level up until you're able to beat them! Using Synchs to our advantage! You're now going to be like "Bhim wtf are you saying, THIS IS A LEVELING GUIDE, NOT A HUNTING ONE". Credits to DERWINS for this idea. Remember your Synch collection you use to hunt wild pokemon? Good. What does Synchronise do? It will make 50% of all wild pokemon have the same nature as your synch. Now, what happens if we use specific Synchs on purpose to make leveling easier? Let's observe some examples. I have a Gastly at level 50. I am fighting a Slowpoke at level 65. My Gastly with Shadow Ball deals around 90-95% of the Slowpoke's max HP. Now, the Slowpoke uses Psychic and my Gastly faints. How could we have prevented this? Well, let's remember the natures in the game. Adamant Brave Lonely Naughty Modest Quiet Mild Rash Jolly Timid Naive Hasty Relaxed Impish Bold Careful Calm Sassy. Lax, Gentle, Hardy, Quirky, Bashful, Serious, Docile (ignore these 7). Now, think a bit. What do these highlighted natures do? They reduce a defensive stat and increase an offensive stat. If the Slowpoke had a Naughty, Rash or Naive nature, it would've had less SPDEF. That 10% less SPDEF would've let my Gastly faint the Slowpoke in one hit. Do you understand now? If we strategically put a FAINTED Synchronise pokemon in the first slot of the party with the appropriate nature we want the wild pokemon to have, we will have an easier time when leveling up. If I want to level up a Magnemite in Cerulean Cave, I will surf there. When I surf there, only Psyduck, Golduck, Slowpoke and Slowbro spawn. These only use SPATK moves. Here I have a few options: -Carry an Impish Synch (reduces their SPATK, which makes them less dangerous, and gives them more DEF, which is irrelevant because Magnemite attacks with SPATK moves) -Carry a Relaxed Sync (reduces SPEED, if we want to outspeed Psyduck and Golduck, and gives them DEF, which is irrelevant). -Carry a Naughty Sync (reduces SPDEF, makes them more vulnerable to attacks, and increases their ATK, which is irrelevant). Now you understand how to exploit the Synchronise mechanic! Do you want to exploit it to the fullest? Do something like this: The first slot of your party is now a Naughty Sync. The slots two to six are all SPATK users. You'll now have an easier time! DO NOT SWITCH TRAIN YOUR POKEMON! I will not get tired of saying this: DO NOT SWITCH YOUR POKEMON MID BATTLE SO THAT THEY SHARE EXPERIENCE. Due to PRO's stupid formula, instead of each pokemon getting 50% of the total experience, most of the time you won't even get 10% per pokemon. Let me explain. Imagine a level 5 hoothoot and a level 5 pidgey share the experience of fainting a wild level 50 Quagsire. Individually you would gain 150000 experience. However, sharing experience would result in each pokemon only gaining 10k each. Not even a 15th of the total experience. How the level difference affects the experience you get. You earn more experience the less levels you have compared to your opponent. For example, a level 5 will gain an absurd amount of experience if you fight a level 60 pokemon compared to a level 50 pokemon fighting a level 60 pokemon. The difference is so absurd that a level 5 pokemon can gain up to 50 levels if you fight a level 60 pokemon and win (the best example is Magikarp). Use this strategically and take calculated risks to level up way faster! List of methods I recommend to level up your pokemon + requirements Method 1: Sturdy + Revengekill (priority or not) For this method, we will find a wild pokemon that has the ability Sturdy. We will attack it with a strong attack so we leave it with 1 HP. Then, we will spam moves until it faints. Afterwards, we will use a priority move with a low level pokemon, any attack while equipping a Focus Sash, or equip a Quick Claw and pray we are lucky! The low level pokemon will get all the experience. Example on how this method works. This method is possible as early as after the 1st badge, when Geodude and Graveler and Onix Spawn in Mt Moon. Method 1b: Sturdy + Endeavor + Revengekill (priority or not) For this method, we will use a low level Donphan, Aron or any of its evolutions with the ability Sturdy and the move Endeavor. We will fight any very high level pokemon while we use a low level Donphan or Aron. It is preferable that you do this trick against Water Type pokemon (surfing in Mt Silver, Dragon's Den or Cerulean Cave is the best idea here) because they will activate your Sturdy ability immediately. When you use Endeavor, the opponent's HP will be reduced to the same HP number you have. Thus, you will leave the opponent at 1 HP, ready to be fainted anytime. Example on how this method works. This method is only accessible if you have unlocked the daycare or a friend teaches your Donphan and Aron or evolutions the move Endeavor. Method 2: False Swipe + Toxic Orb + Revengekill (priority or not) For this method, we will find any wild pokemon while we navigate through maps with our False Swiper. We will have a Toxic Orb equipped so that Toxic Poison faints us in around five to six turns. After we have fainted we will be able to revengekill and get all the experience! Example on how this method works. This method is only accessible if you obtain a Toxic Orb (from PvE, PvP coins or the Bug Catching Contest prizes, also in other quests). Note that you can actually do this method by fighting wild Weedle in Route 2, letting yourself be poisoned on purpose, then traveling to the specific place you want to pull this trick. Thus, it's available as early as after the third badge (when you can capture Cubone, who learns False Swipe at level 27, or after the fourth, with Farfetch'd at level 45). Method 2b: False Swipe + Memento + Revengekill (priority or not) For this method, we will False Swipe an opponent until 1 HP, then we will Memento and immediately attack with the next pokemon. We normally only do this if the pokemon has a priority move or Focus Sash, Brightpowder, Focus Band or Quick Claw. Example on how this method works. Method 2c: False Swipe + Trick Room + Memento + Revengekill (priority or not) For this method, we will False Swipe an enemy pokemon until they are at 1 HP. then, we will Trick Room so that the slowest pokemon will move faster for the next five turns. We will Memento. Now, with the low level pokemon we're free to attack first and get all the experience! Example on how this method works. This method is unfortunately only available to Gallade, who needs the Daycare for Memento + the TM Trick Room from Hoenn + the TM False Swipe from Johto. Method 2d: False Swipe + Future Sight + Memento For this method, we will False Swipe until the wild pokemon is at 1 HP. Then, we will Future Sight, immediately afterwards we Memento. The pokemon we switch into will obtain all the experience. The method requires exactly the same as the one mentioned just above unfortunately. Example on how this method works. Method 2e: False Swipe + Life Orb + Revengekill For this method, we will False Swipe with any pokemon until the wild pokemon is at 1 HP. Life Orb will recoil and slowly kill us. Then, we'll revengekill with a lower level pokemon. I normally do this method with Shedinja because it will faint in a single hit with Life Orb Recoil. Example on how this method works. You can use any false swiper. As a final note, keep in mind you can just do this method but letting your opponent slowly kill you anyway. Method 2f: False Swipe + Toxic Orb + Trick Room + Revengekill (priority or not) For this method, we will False Swipe the opponent until 1 HP. Then, we will wait a few turns and Trick Room when we are about to faint. We will revengekill with the slower pokemon and take all the EXP. Example on how this method works. Method 3: Toxic + Memento + Air Balloon (or Flying type pokemon / Ground immune) This method utilises a pokemon with the move Memento, the move Toxic and an Air Balloon. The best example is to use a Hoppip, as it's already immune to Ground Type moves + it learns Toxic via TM + Memento via level up. We will Toxic a Quagsire, then Memento, then wait a few turns for the pokemon to faint as it cannot hit us while we hold the Air Balloon. Example on how this method works. This method is as early available as after the 5th Kanto Badge. Method 3b: Toxic + Flash + Memento This method is a bit rng reliant. We will use Toxic on the first turn, Flash for a few more turns and then finally Memento. We will need to be lucky and dodge the last hit. For this, we can use the item Brightpowder. We can also use a priority or strong move if we believe we'll be faster than the opponent (or just waste a Focus Sash if we think we need it). Example on how this method works. Method 3d: Toxic + Memento + Protect Exactly the same as the method mentioned just above. However, this method uses Protect, so it's 100% failproof. Example on how this method works. Method 3e: Toxic + Leech Seed + Flash + Memento If we want to make the method 3b faster. Example on how this method works. Method 3f: Toxic + Leech Seed + Flash + Memento + Protect If we want to make the method 3e safer. Example on how this method works. Method 4: Perish Song + Yawn + Healing Wish This is the most used method currently. If you have access to the daycare you can teach Chingling and its evos Perish Song and Memento. You can combine both with Protect to level up ANY pokemon. VIDEO HAS TO BE RERECORDED FOR THIS METHOD. Method 4c: Perish Song + Memento + Air Balloon If method 4b does not work because your pokemon cannot learn Protect, we'll do this in Mt Silver against Quagsire. Example on how this method works. Note that I don't repeat Method 4 because Method 4 does not require your pokemon to learn any specific moves. It's just in case there's a bugfix for the method. Method 5: Flying Types/Levitate/Air Balloon (mentioned above already) This method works for ANY pokemon that is immune to Ground Type attacks. Simply go to Mt Silver 1F, 2F or 3F and fight ANY Quagsire at level 52 or below. It only has Ground Type damaging moves until level 53. Thus, if you have an Air Balloon or are immune to Ground Type attacks, they are free experience. Note that this trick also works in Diglett Cave against level 18 to 22 Diglett and level 25+ Dugtrio. It is less reliable there though and gives less experience. Example on how this method works. To access Mt Silver, you must have beaten the Johto Elite Four. Method 6: Dark Types Dark Types are completely immune to Slowpoke and Slowbro's attacks in Cerulean Cave. Teach your Dark Type the TM Toxic and take care of them! Method 7: Water Immune Abilities Pokemon with abilities that grant them an immunity to the Water Type are invincible against Golduck and Psyduck in Cerulean Cave. Teach them the TM Toxic and beat them! Note: Dry Skin, Water Absorb and Storm Drain are these abilities. Same as above but you do this against Quagsire if your pokemon cannot learn Protect. Example on how this method works. Method 8: Steel Types Steel Types are completely immune to all attacks Arbok has in Cerulean Cave. Fight them for free experience! You can combine the Curse methods by Cursing and fainting on purpose against Arbok and switching in your Steel Type to get all the EXP. This is done here because Arbok is immune to Toxic. Method 9: Gastly Curse spam for newbies! If you are stuck against any Elite 4 (Kanto or Johto), there is a method you can use to level up any pokemon. Capture five Gastly at any level whose HP ends in 0, 2, 4, 6 or 8. You can also EV train its HP stat until its HP ends in this number. Find a wild pokemon who only has Ground, Fighting or Normal attacks (or a combination of both). To do this, open the Pokedex and check the wild pokemon's level up moves. For example: Quagsire before level 53 and around 40+ only has Ground type attacks. Ursaring, Marowak and Donphan only have Normal and Ground type attacks at 50+. Against these pokemon, use Curse once to lower your HP to half. The enemy pokemon will lose 25% of its max HP per turn. Wait until the enemy's HP is 25%. Use Curse. Switch to a new pokemon after Gastly and use Protect. You get all the EXP! This can be easily performed in Victory Road Kanto B3F. REQUIRES VIDEO RECORDING.
- 36 replies
-
- 18
-
-

-
Boss Guide Main Strategy :- ⦁ Start With Klefki , Do Light Screen (for Spatkers) and Reflect (for Atkers) according to the opponent . Then Paralyze the Foe with Thunder Wave and after that set Spikes until Klefki dies or switch out if all spikes are set up and Klefki is still alive. ⦁ If attacker then after klefki go to Pidgeot , Lower its atk using Feather Dance thrice , then lower its accuracy by Sand Attack 6 times (Use Roost in Between if Pidgeot's life is half or lower) , then switch out . ⦁ If Special attacker then after klefki go to Electrode , Lower its Spatk using Eerie Impulse thrice , then lower its accuracy by Flash 6 times , then switch out . ⦁ After Pidgeot or Electrode , go to Furret and maximize its stats by using Coil (x6) , Agility (x3) and Amnesia (x3) , after that use Baton Pass and switch to Haxorus . ⦁ Now Sweep with Haxorus according to opponents type weaknesses , remember if all move are normal on a poke always use Dragon Claw because of its STAB , except on Steel and Fairy types. Here are Set Details of all 12 Pokemon :- [spoiler=MAIN BOSS TEAM] [spoiler=EXTRA POKEMON] Note - For Shedinja and Magcargo set details doesnt matter much , you can use any type of set just they should have the first 2 moves , other 2 moves also doent matter . For Breloom and Arbok set matters but moves doesnt , you only need Worry seed on Breloom and Glare , Haze on Arbok . Note - For Bosses Erika , George , Entei Guardian , Officer Jenny , Thor use Lum Berry on Garchomp Instead of Focus Sash . Exception Pokemons :- ⦁ Arbok - Bosses like Bruno , Raikou Guardian (See its Article to clear about Zekrom) , Shamac , Toothless , Link , Naruto Fanboy , Pofessor Rowan use Ground type pokemon as starters which cannot be Paralyzed by Thunder Wave . To Paralyze them you have to set up with Klefki first and then switch to Arbok and paralyze them using Glare and then go on to Pidgeot or Electrode . ⦁ Shedinja - Many bosses like Erika , Suicune Guardian , Lt. Surge , Professor Oak , Terminator , Urahara and Lorelei use pokemon as Starters which cannot do anything to Shedinja because of its ability Wonder Guard . So taking advantage of that just start with Shedinja and do Flash 6 times and then switch on to Klefki and follow the main steps . (Erika , Terminator , Lt. Surge and Urahara can also be defeated with Normal Strategy) ⦁ Breloom - Chuck - Machamp (No Guard) - Attack never misses Misty - Milotic (Competitive) - Spatk is raised if any stat is lowered The Pumpkin King - Bisharp (Defiant) - Atk is raised if stat is lowered James - Malamar (Contrary) - Every stat changes is reversed Steven - Metagross (Clear Body) - Stats cannot be lowered So for all the above bosses use Breloom having the move Worry Seed . Start with Breloom and just do Worry Seed and let him die , and then go on with the main strategy . (You can use any poke with Worry Seed but i prefer breloom because everyone use it as an false swiper ) ⦁ Pikachu - Lance (Dragons Shrine) , Pewdie , Koichi and Nikola bosses use their Starter with life orb which gets killed due to recoil before u can set up and Tigerous uses Salamence with Lum berry which could also be a problem . So start with Pikachu holding Choice Scarf and use Knock Off to remove their Life Orb (Use Nuzzle for Tigerous Boss) and then go on with the main straegy . Note - Pikachu needs at least 12 spd ivs to outspeed nikola's Mewtwo while holding choice scarf . Some Bosses Which Need Different Strategies :- ⦁ Bugsy - For Bugsy , Start With Impish Garchomp and set up Stealth Rock and then use Dragon Tail on Scyther because Scyther uses Brick Break which Breaks Reflect , that could be a problem for Pidgeot to lower its atk cause it also knows Swords Dance . ⦁ Shary and Shaui - This is One of the Hardest Boss in Game , so to defeat this you have to bring Shedinja , Garchomp , Electrode , Furret , Klefki and Haxorus (No PIdgeot) . For Shary , start with Garchomp and use Earthquake on Flareaon (Life Orb) and kill her . Now comes Mienshao , he will use High Jump Kick on Garchomp , switch to Shedinja and Mienshao will get hurt because of crash damage . Then he will use Stone Edge so switch to Garchomp again . Then repeat this process until Mienshao dies , then comes Meleotta . Let shedinja die and then go to klefki and follow the main strategy using electrode. For Shaui , Start With Klefki , set up light screen , paralyze Shaymin , then go to electrode and lower its Spatk and Accuracy and then switch to Garchomp and set Stealth Rock cause Azelf have Focus Sash and we have to break it . Then just setup with Furret and Baton Pass to Haxorus and sweep . Note - Shaui have 2 pokes with focus sash , Azelf and Alakazam , azelf's sash will get broken by stealth rock but alakazam's wont because of its ability Magic Guard. So Remember to put Focus Sash on Haxorus Before Battling Shaui , so that he can survive a critical hit from HP Ice . ⦁ Raikou Guardian - Start with Shedinja and Kill it's Zekrom (Life Orb) and then let Shedinja die , set up with Klefki and then switch out to Arbok because its second Pokemon is Excadrill (Ground Type) , paralyze him and then continue the main strategy using Pidgeot . Team :- Shedinja , Arbok , Klefki , Pidgeot , Furret , Haxorus (No ELectrode) . ⦁ Xylos - Xylos starts with Victini which OHKO's Klefki and Electrode and Pidgeot too , if reflect is not up . So , for that u have to start with Klefki , use Reflect and then go to Pidgeot and use Feather Dance and then Roost twice and then Feather Dance , use Roost time to time whenever pidgeot's life is half or less . After lowering its stats , switch to electrode paralyze her and then Set up with Furret . ⦁ Saphirr - Start with Magcargo and use Memento and then go to klefki use Light Screen and then Reflect and set up spikes if he still survives . Now just follow main strategy using Pidgeot . If you are using absiel rope then you can use Arbok in 6th slot to paralyze Groudon after klefki . Note - You need a Fire Type pokemon in team and a pokemon with Rock Climb or an Abseil Rope to reach Saphirr . So team will be Magcargo , Klefki , Pidgeot , Furret , Haxorus and Rock Climb Pokemon / Arbok (If using Abseil Rope). ⦁ Professor Birch - Birch uses Medicham which gets Killed From High Jump Kick's Crash Damage before Furret can set up and it knows Fire Punch too so we cant kill him using Shedinja . So use Pikachu holding Focus Sash this time . Start with Pikachu , use Protect he will use High Jump KIck and will get Damaged then Attack him using Quick Attack or Knock Off , Pikachu will survive bcoz of sash , now again use Protect and Medicham will die bcoz of Crash Damage . Now go to Klefki and Follow the main Strategy . Team :- Pikcahu (Focus Sash) , Klefki , Pidgeot , Electrode , Furret , Haxorus ⦁ Ash Westbrook - (There is a glitch with Ash Westbroook for now , Knock Off Doesnt Remove Arceus's Life Orb . Hope it gets fixed soon , for now there is a different strategy) Ash starts with Dialga which Knows Roar , and will eventually use it when u set up with furret , so use Chansey . Start with her and Kill Dialga with Seismic Toss and also set up Stealth Rock with Chansey , then comes Reshiram which has Life Orb and also Knows Roar . So Kill Reshiram Too Using Toxic and Seismic Toss . (Dont forget to do Softboiled to recover chansey's HP) . Then Comes Arceus , do the same with arceus too and if chansey dies just go Garchomp and Kill Arceus . Now , let Garchomp die in front of Infernape . Infernape knows Fire Blast and sometimes kills Klefki even if u set up Light screen , So U have to paralyze Infernape . Then go to Pidgeot and use Reflect first , now follow the main strategy . Team :- Garchomp , Chansey , Klefki , Pidgeot , Furret , Haxorus ⦁ Thor - For Thor , you just ave to put Garchomp in 6th Place because it's easy to set up and sweep with haxorus but his last pokemon is Lugia which could survive a Dragon Claw from Adamant Haxorus depending on your Atk IV's and lugia will survive a Jolly Haxorus's Dragon Claw Definitely and will kill Haxorus in a Critic from Aeroblast . So Before setting up with Furret you have to Set Stealth Rock using Garchomp . (Sometimes Klefki is not able to set Spikes becuase of which Mamoswine survives due to its focus sash and damages Haxorus and then lugia kills it in an aeroblast without a crit becuase u will take damage from Zapdos's Rocky Helmet too . So it is mandatory to set Rocks up and also Use Lum Berry on Haxorus instead of Focus Sash to cure the paralysis from Zapdos's Static Ability) After Limit is put on Bosses many people asked me to make a list of top 20 bosses to do . So i compared rewrads of every bosses and came up with this list . Hope U like it . :- [spoiler=TOP 20 BOSSES] The 20 Most Viable Bosses for Older and Newer Players :- 0. Battle Bot - If you have active membership (Not for newer players) (All Dual Bosses give higher money than single bosses) 1. Shary & Shaui - High Tier Pokemon Rewards (Need 120 Gen 1 caught dex and 38 evolved ex to access the area) 2. Medussa & Eldir - Alolan Grimer and Alolan Vulpix + Mini MS 3. Pewdie & Diepy - High Tier Pokemon 4. Thor - Tier 9 Pokemon 5. Tigerous - Gives Eumi Tokens which give good rewards 6. Urahara - Tier 9 Pokemon + PvP items 7. Brock - Fossil Pokemon + Nugget and Big Nugget 8. Morty - Gives Rotom (The best pokemon to sell) 9. Professor Oak - Gives Starters 10. Professor Elm - Gives Starters 11. Professor Birch - Gives Starters 12. Professor Rowan - Gives Starters 13. Spectify - Gives Nugget and Big Pearl + Good Pokemon 14. Lt. Surge - Gives Rotom 15. Terminator - Gives Rotom , Alolan Grimer + Good items 16. Entei Guardian - Chance to give Choice Band (Not for newer players) 17. Raikou Guardian - Chance to give Choice Scarf (Not for newer players) 18. Suicune Guardian - Chance to give Choice Specs (Not for newer players) 19. Erika - Gives Larvesta , Ferrothorn 20. Logan - Gives 2x Life Orb + Logan Mask + Good Pokemon Others 4 Bosses for Newer Players (If not able to fight Shary and Shaui) :- 21. Chuck - Gives Timburr , Mienfoo 22. Naruto Fanboy - Gives Big Pearl + Sash + Rare Candy 23. Link - Good Pokemon + Good Items 24. Misty - Pearl + Good Pokemon ⦁ Some Frequently Asked Questions :- Q. Can we use different pokemon instead of These who learns the same moves ? A. You can but i recommend to use these pokemon only . Why ? Because Firstly i used Pokemon Like Pidgeot , Electrode , Furret , Pikachu and Arbok which are easier to find for New Players . Secondly Using These Pokemon Satisfy the Type Requirements of many Bosses like Klefki for Steven , Electrode for Lt. Surge , Haxorus for Lance , Shedinja for Morty . Q. I use Staraptor , Ampharos , Gorebyss and Conkeldurr in Place of Your pokes , is it OK ? A. Gorebyss is Good , Staraptor is even better than Pidgeot because of Intimidate but i'd say using electrode is better then Ampharos because Electrode can outspeed many pokemon Only with +nature and helps in Paralyzing pokes which Klefki is not able to , like Entei Guardian's Entei . Ampharos have a very low Spd which can pose a Problem if Entei Crits Klefki and then Him too . (Anything Can Happen , Its RNG , so its good to play safe) I highly recommend Don't Use any Attacker other Than Haxorus becuase Haxorus have the Second Highest attacking Stat and he have a high Speed and He learns great Variety of Moves to Counter Different Types . Most Importantly , He has the Ability Mold Breaker which Ingores the ability of Oppssing Pokemons which is very Useful to OHKO Dragonite (Multiscale) , Lugia (Multiscale) , Sturdy Pokemons like Donphan and Unaware Clefable and Quagsire which are the greatest threat because Unaware ability ingores the Stat changes . Q. Do i need Epics IV'S on all pokes ? A. No u dont need epic IV'S , Just 20+ in their required stats . Like 20+def and HP for Pidgeot and 20+ Spdef and HP for Electrode , etc. Feel Free to ask any question in comments below . If you want know more about mechanisms of this team , you can check out my youtube channel . Here is the Link - https://www.youtube.com/channel/UCzdwC5N6AuK3ZXjPwG9ARTw?view_as=subscriber You can join my discord - https://discord.gg/RReR9Xa Thanks for Visiting !! :) You can visit my shop in forum (Silver server) :-
-
Since the most recent change just a few days ago (hours, even), the quest to access Sinnoh has been completely replaced. If you were in the middle of the quest, about to start it or had beaten Hannah but not talked to her and teleported to Sinnoh, you'll have to start the new one from scratch. Good luck, trainer! VERY BIG WARNING: ONCE YOU ENTER ROUTE 101 TO FIGHT THE GRUNTS, DO NOT, I REPEAT, DO NOT GO BACK TO LITTLEROOT TOWN. IF THE NPCS DISAPPEAR AND YOU CANNOT PROGRESS, POST HERE: https://pokemonrevolution.net/forum/topic/871-url . THERE SEEMS TO BE A BUG WHERE, IF YOU GO BACK TO THE TOWN AND THEN REENTER ROUTE 101, THE GRUNTS COMPLETELY DISAPPEAR AND YOU CANNOT CONTINUE THE QUEST UNTIL YOU ARE HELPED BY PRO STAFF. WELCOME TO THE SINNOH ACCESS QUEST GUIDE! The quest will start once you speak to the NPC Paul in Lilycove City (Hoenn). You need to have 6 pokemon in your team that are at the very least level 80 or above. This can be acheived by training them in Mount Silver or in Cerulean Cave as the NPC says. However, getting access to Cerulean Cave is painful, so we can also borrow a friend's team. The pokemon do not have to be ours to be valid for the quest, so we can borrow 6 pokemon at level 80 from a friend or train them ourselves. He will then teleport us back to Littleroot Town. Once you exit your house, you'll find unwanted visitors: Team Galaxy Grunts! The villagers need help! You will then approach Stan, who stares at you, menacingly (yes, this is a Jojo's reference). He will fight you with strong pokemon. He has a level 70 Exploud, Hariyama, Crobat and Purugly. They will then Teleport and escape. Go north to route 101. More grunts will appear. The next one has a level 70 Mightyena, Dustox, Masquerain and Luxray. Grunt Bernie is next. He has a level 70 Mawile, Aggron, Electrode and Skuntank. Grunt Jack comes afterwards. this will take long... He has a level 70 Cacturne, Altaria, Whiscash and Bronzong. Grunt Mario has a level 70 Whiscash, Claydol, Banette, and Drapion. There's still more! Grunt Karina has a level 70 Medicham, Dusclops, Glalie and Toxicroak. The last Grunt, Vincent, has a level 70 Absol, Tropius, Flygon and Weavile. You will then reach Oldale Town. Heal up and try to go to Route 102. Stan will block the way and fight you with his level 100 Alakazam. When he's defeated, he will teleport you to Route 103. You'll see Mars, Saturn, Pluton and Birch. However, you'll hear a mysterious voice: Maxie and Archie will take care of two of them, while you'll fight Pluton. He is a tough one. Pluton has a level 100 Slowking who will spam Scald, a Rotom-Wash, a Porygon-Z, a Blaziken, a Sceptile and Swampert (the pokemon they forced to evolve, it seems). Since many people asked for help on this step, I will give you an example strategy of how you can beat this boss easily: 1.- Geodude with Sturdy + Stealth Rock (or any evolution, you can capture one in Mt Silver with the moveset ready as Graveler) 2.- Electrode with Eerie Impulse (you can get one at a high level already in Cerulean Cave) 3.- 1 Pokemon with a good setup move. Examples: Gyarados with Dragon Dance, Clefable with Cosmic Power, Slowbro with Calm Mind and Iron Defense, etc. For this boss, I recommend you either unlock the Mega Slowbro Stone or you use a Clefable, easy to farm and use. You begin by using Stealth Rock with Graveler and letting it faint. Then you Eerie Impulse multiple times against the Slowking and faint your Electrode. After this, switch in your pokemon with a setup move equipped with leftovers, set up until your stats are maxed and you will be able to sweep. Example: Clefable - Cosmic Power, Toxic, Softboiled, Moonblast Gyarados - Dragon Dance, Earthquake, Waterfall, Ice Fang Slowbro - Iron Defense, Calm Mind, Slack Off, Surf However, they will escape after you defeat him. You will talk to Birch and he'll actually tell you that the three Hoenn starters are lost in Route 101 and 102. Mudkip can be found just below Birch in the Route 103. You need Surf to pick him up here. Torchic will be hiding in the spot in front of me in Route 101. Interact with it to rescue the lost pokémon. Treecko will be hidden in front of me in this spot in Route 102. Interact with it as you did before. Once you have picked up the three Pokemon, talk with Birch. He will tell you to go and talk to Alakazam. He can be found in the Docks in Lilycove City (same place you can go and get the boat to go back to Vermillion and Olivine. Congratulations, you've now completed the new Sinnoh Quest! VERY BIG WARNING: ONCE YOU ENTER SINNOH, THERE IS NO GOING BACK. YOU MUST DEFEAT THE ELITE FOUR IF YOU WANT TO GO BACK TO THE PREVIOUS REGIONS. Special thanks to: @WhiteBaron (mr corsi handsome french boy) for helping me out and fixing the variables that bugged while I was doing the quest. @Donuts02 for lending me his level 100s so I could rush Hoenn to do a guide of the quest for forums. @jimmicha for rushing my account story in Silver so I could do more guides for forums.
- 43 replies
-
- 19
-
-

finished Boss tier list and rewards - Updated on 21/08/2020
Ichibann posted a topic in NPC Battle Guides
Post is currently broken after some forum changes - Will most likely have to do a new one when I have the time Welcome to my Unofficial tier list for bosses! This isn't a guide on how to beat bosses but an attempt to classify them by rankings. Due to the new changes, it was decided to make a thread based on the one by idkup. The top 15-20 spot of a boss list should be consistent for everyone. Choosing the last remaining bosses can be an entangled task if you're hesitating or confused. It especially becomes harsh when you're new to the variable PvE content of PRO. This is mostly to help people who are confused and want to weight and compare the multiple rewards Every changelog is posted at the bottom of the thread. Ranking S tier - The best of the best. Those are bosses that have an insane or very good pool of pokemon along with excellent items and money rewards. Do not skip those. A tier - Generally the most common bosses, which are worth doing as well. B tier - Suboptimal bosses compared to the other tiers; fighting them is not recommended, unless the goal is to fetch a certain reward. It could also be worth fighting them if you don't have access to enough bosses from the other tiers. The rankings were chosen based on 3 principal criteria, in that order; 1. Pokemon pool available (3rd reward and random reward) 2. Item's reward available 3. Money reward A good pokemon pool is better than a good money reward in my opinion. This could be showcased in certain situations. Tier List S+ Medusa and Eldir Lance Battle bot Urahara Entei Guardian S Shary and Shaui Terminator Tigerous Spectify Logan Saphirr Pewdie and Diepy Professor Oak Koichi Steven Bruno Professor birch Link A+ Officer Shamac Morty Letrix Neroli Maribela Chuck Lt.Surge A Brock Brock - Located in Diglett's Cave Notable rewards: Aerodactyl, Kabuto, Omanyte Rare candy, Stardust, Star piece, Dome/Helix Fossil, Old Amber, Nugget, Big nugget Decent money pool (20-40k) Professor Elm Toothless Officer Jenny Ash Westbrook Klohver Suicune Guardian Raikou Guardian Gingery Jones Erika Jessie & James Naruto Fanboy A- Misty Naero B+ Lorelei Xylos B Sage Pumpkin king MISSING DATA (FOR NOW) Professor Birch. Missing Item and pokemon rewards. Maribela. Missing Item and pokemon rewards. Officer Jenny. Missing Item and pokemon rewards. Please note that the reasoning behind the ranking is currently partly subjective due to the lack of different points of view. It will be updated following balances and changes that are made. Feel free to comment on your disagreement towards a ranking and I will thoroughly explore your suggestion(s). Changelogs Credits to waleed1301, Splittie for the help with some information. Credits to the wiki workers who worked their sweat to ensure that most of the information is correct. Credit to idkup for the overall inspiration for the guide.
- 12 replies
-
- 11
-
-
Welcome, everyone! This will be an extremely quick guide on how to get a Rattata to level up quickly to 80 to travel to Hoenn. Let's begin! This is going to be a really mini guide so as to get your Rattata ready for Hoenn, to be able to fight Youngster Joey. If you want to go to Hoenn, you need to capture any Rattata (it has to be yours) and you have to train it to 80 (or ask a friend to do it). However, I'll assume you have no friends you want to train it yourself without having to pay anyone else. If you want to level up Rattata safely, I will leave you a few steps that will be very useful for you. 1.- Capture a Rattata with the ability Run Away. This isn't obligatory but it will ensure 100% success rate when you want to flee a wild pokemon battle. You can hunt one in Route 1 as in a single fight it will ALWAYS level up to level 38 or so. 2.- Visit the Bug Catching Contest in Johto and participate in it. Try to finish in the first 3 spots. You will obtain some PvE Coins. 3.- Visit the PvE Coin Exchanger in Saffron or Goldenrod City. Purchase an Air Balloon. 4.- Visit Fuchsia Gym. Purchase a TM Toxic. 5.- Travel to Mt Silver 1F, 2F or 3F. Equip Air Balloon to Rattata and teach it TM Toxic. Mt Silver 2F requires fighting some trainers but it's the easiest place to train it. Mt Silver 1F is also fine. 6.- Flee from all wild pokemon using Run Away and when you find a Quagsire which is level 52 or below, use Toxic on them. Then, keep attacking until they die. If you have Air Balloon equipped, you will be immune to Earthquake, which is their only attacking move. Free and easy experience! Before the method. After only two fights. We will repeat this process until our little Rat is at level 80 and we can fight Youngster Joey! All his Rattata are level 120. Job is done! (keep in mind I used a different Rattata for this screenshot) If you need a Video Guide on this method, please use this link. We can easily destroy him by using a low level Geodude with Sturdy and Stealth Rocks (to ensure we can use it once), and then a Machamp with No Guard can oneshot his entire team with a single Dynamicpunch per Rattata. Unleash your STAND Dynamic Punches to defeat Joey! He will be waiting there, between the two Elite Four buildings. After you defeat Joey, you can now talk to the Hoenn Traveler and travel to Hoenn! Big warning: Once you go inside, THERE'S NO GOING BACK UNTIL YOU BEAT HOENN'S ELITE FOUR. Good luck! Pack up your things , get ready, purchase anything you may need and go there! I hope you enjoyed the guide and I hope you newbies are successful in your Hoenn Adventure!
-
Welcome to the mini-guide on how to create your private room for you and your friends! This small guide will try to teach you how to make a small chat room for you and your friends to talk privately ingame without needing to message them individually in private and having to close and open your conversations twenty times a minute. What many PRO players don’t know is that there are custom secret chats like the French channel where you can join them and find people from different nationalities, or you can make a private chat with you and your friends to talk ingame! Have you ever wanted to talk to your friends about how your hunting luck sucks and show them your pokemon without having random people in chat rating them as garbage? Have you ever wanted to speak your emotions open to your friends and tell them how much did you love the pizza or kebab you just ate but you don’t like All chat’s opinions on pizza because they like pineapple pizza which tastes so damn disgustingly bad? Well, fear not then, you’ll be able talk to your friends in private with this guide! I will be teaching you how to fix and modify your ingame chat, how to order it around and how to make private chat groups with your friends. There is an old guide from Seibuza from December of 2015, so I’m making an updated version, as it has no pictures and it’s kinda hard to follow. Basic rules and understanding each chat's function. First of all, we will look at the ingame chat. When we open our chat, we will see the Battle, Other, Help, All, Trade and Local chats. This is if we don’t have a guild or if we have modified it, of course. We first should analyse what each chat does: Battle chat is commonly used to trashtalk your opponents in PvP (which is kinda against the rules, but whatever), to talk about PvP stuff and to ask for rates on your pokemon. Other chat is commonly used to talk in other languages than English (Si si son muy grandes jaja) like Spanish, Philipino, French, or whatever weird language is spoken in your area. Help chat (it’s where I live in Gold Server answering questions basically) is the chat where you can ask for help (but not beg, for the love of god), ask any needed questions, doubts, anything you may ever need. Just ask for help! Help chat is there to help you out. All chat is basically the global chat where everyone can speak about whatever they want (as long as it’s within the rules) and it’s everyone’s room, the place where almost all players speak to each other. Trade chat is the chat where you can sell, buy and trade your stuff and Local chat is a chat that functions like All chat but only works within the same area you are in, it’s not global. Guild chat is the extra chat that will only appear if you’re in a Guild, where you’ll be able to speak to your guildmates. First of all, you should read the rules on the ingame chats before you try to use them or create a custom chat for you and your friends. Remember that making a private chat DOES NOT EXEMPT YOU FROM FOLLOWING THE RULES. If you break rules in a private chat and there’s a moderator there, you’ll get slapped in the wrist for it (by slapped I mean muted). Don’t be stupid and try to be funny hiding and saying really messed stuff in private chats. https://pokemonrevolution.net/forum/forum/161-pro-rules/ https://pokemonrevolution.net/forum/topic/62159-in-game-chat-rules/ https://pokemonrevolution.net/forum/topic/119859-how-to-use-our-in-game-chats-according-to-our-chat-rules/ Here are all the In-game chat rules. Private chat rules are the same as Other Chat: Thus, General Chat rules apply. No deplorable behaviour, you can speak in other languages than English, don’t discuss Report related things in private chats, don’t spam your 5 subscriber youtube channels (whose subscribers are your parents’ gmail accounts and your multiaccounts because your content is so bad that no one wants to subscribe), don’t spam, don’t talk about sensitive topics, no mini-modding. Everything else is allowed. Not mocking my hair loss or me being fat, though. That’s bad Creating our custom chat! First, we’ll take a look at the chat below. You will see there are six chats below. If you haven’t modified any chats, you can press the wrench on the bottom right. Here, we can modify which chats we want to see and which chats we want to remove. Remember we can have as many open chats as we want, but we can only see up to six different chats at the same time. If we have any more, we won’t be able to see the messages being sent in them. We will now remove any chats we’re not interested in to make space for our custom chat. Since I am not interested in PvP Talks nor am I interested in trashtalking other players for playing stall and Togekiss all day, I will remove Battle Chat. Since I don’t speak Philipino or other languages than English (I do, but it’s an example), I’ll also remove Other chat. Now I have 4 chats: Help, All, Local and Trade Now, we’ll start creating our custom chat! We will enter the command /cgcreate channelname, password. We will substitute channelname for the channelname we want to make, and the password for any password. As an example, I’ll create a channel named potato and the password will be noob. Thus, I’ll enter: /cgcreate potato, noob Now, the chat will have appeared in your screen. You can now message in it. You’re a moderator too! (Only in that chat, and only to kick and remove players, not to do anything else lol). Remember you have to press the ENTER key after each command so you can activate these commands. If you’re a normal user and you want to join a channel, you can do so by using the command /cgjoin channelname, password. For example: /cgjoin potato, noob If you want to leave, you can do it by using the command /cgjoin channelname. For example: /cgleave potato If you want to make someone else a moderator so that they can invite and kick people, you will have to enter the command /cgmod channelname, username. For example, I’ll give my other account privileges. /cgmod potato, Bhimaso If I ever want to remove his powers, I just have to reenter the same command and it will remove them. You can also kick them from the channel to remove them. If you want to change the channel name, you can do so by using the command /cgname channelname, newname. For example: /cgname potato, noobs The chat will become noobs. If you want to change the password from the channel, you can use /cgpassword channelname, newpassword, newpassword You have to repeat the new password to change the channel’s password. For example: /cgpassword potato, noobmaster, noobmaster Now, if you’re a moderator, you can also kick someone from the channel and invite new people. You can invite with the command /cginvite channelname, username. For example: /cginvite bhim, Bhimaso You can also kick people with the command /cgkick channelname, username. For example: /cgkick potato, Bhimaso I hope this guide has helped you guys and you can now create a custom channel with your friends to enjoy your stay!
-
An introduction to Bosses in PRO for Newbies: The Guide! Welcome to the basic Boss Guide adapted for Newbies! This guide will aim to explain what Bosses in PRO are, how do they work, what kind of rewards can you expect, and some examples of Boss Pokemon and teams you can use to defeat these Bosses. This guide will also try to keep in mind that most people who will read this guide are newbies and thus, we will try to keep it simple, obtainable by them, but also encompass the entire playerbase as a whole. I will provide budget teams, budget options, and high budget ones too. Special quick thanks to: MoltenM3tal, who helped me with bosses, gave me teamcomps to try, gave some theorycrafting and recorded videos for this guide. Same goes for Jimmicha, who also worked hard to develop this monster of a guide by recording videos and finding possible bugs that interfered with our strategies! (Although I had to write this entire thing myself). Also, special mini thanks to Meruem, always helping me out with ideas regarding guides and on forums The aim of this guide is to just teach and help out theorycraft teams, compositions, what each role should fulfill, possible additions, and teach newbies the basics needed for the PvE farm in the lategame. As a disclaimer: I’ve only named a few options for each role in the guide. If we went through all options, considering there’s more than 800 or 900 pokemon, I’d probably die before I finished this guide. I’ve tried to only mention the easiest to farm or the most effective that will work for any boss fight in the game. There are other guides like HustleBank’s which focus more on the practical side. However, the point of this big wall of text is to teach you and learn how to work on Bosses from 0, when you have NO idea of what Bosses are. Imagine you don’t know anything about competitive pokemon, or what team compositions you should use for bosses. We will start from there, as the other boss guides all assume that you already know the basics and the advanced stuff. Thus, I’ll try to guide you around from the beggining! Fun facts: This guide took a month. It is bigger than most thesis as a final project in universities, it took a lot of testing, and I loved doing it. In the future, this guide will be edited with pictures, memes and videos displaying these strategies. For now, I solely want to focus on it as a textbook for you to learn how to do bosses from 0. It’s a monster of a project, but I’m so damn proud of it. Ready? Let’s get into it! Big note here: if you are either an experienced player and want to directly test out teams that are 100% safe in Easy & Medium and 95% safe in Hard, properly tested teams by me and other experienced players, or you are a newbie and want to directly search up the teams I have been using, press the F3 key in your Keyboard and search the words Newbie Section to reach the teambuilding part of this guide. If you are a complete newbie to PRO/Pokemon in general, PLEASE FIRST READ THE INTRODUCTION AND THEORY PART OF THIS GUIDE. Then, you can start teambuilding. If you believe you know the basics or have read enough of this guide, please check the bottom part on how to teambuild. Then, read the sample teams I have on Baton Pass and Mega Slowbro teams for bossing. Click on the two highlighted guides below to check them out! Baton Pass Mega Slowbro Introduction What are bosses? Bosses in PRO are NPCs available to fight once you meet specific requirements to battle them. These NPCs will ask you to fulfill different missions: some will ask you to train a level 100 Pikachu you caught, some will ask you to obtain the dex data of other pokemon, some will ask you to unlock a specific place after having defeated another boss (for example, to battle Naero we need to previously beat Lance), some require you to not use specific pokemon types and so on. They simply ask you for high level pokemon to fight them and each one may have extra requirements. The rewards from bosses vary: some give a lot of berries, some give PVP items, some give Coin Shop stuff such as medallions, mounts, accessories… these are just some of the rewards. We mainly do Bosses due to the money we get from them. The money reward from some of the bosses is incredibly high and will help us sustain through our stay in PRO, as the MMO’s economy demands we engage in C A P I T A L I S M. However, we can also obtain really rare pokemon and shinies from them, too! You can find these NPCs in the overworld, in any region, in different places. Some of them are super easy to find and are placed in really common locations, whereas others will be hidden more secretly than the possible cure for my evolving baldness. They will have a red coloured name over them and will ask you if you’re menacingly approaching them and want to fight them or not. They’ll also ask what difficulty you want to choose. How do Bosses Work? Bosses have 6 pokemon at level 100 divided into three difficulties. In these three difficulties, you may choose to fight the Easy difficulty version of the boss with 6 pokemon at level 100 with no EV investments, no held items and no good movesets (these are basically a joke and can be defeated by any player without too much strategy). They will reward almost nothing after you defeat them and you will have to wait some time before you’re able to refight them. They’re a good difficulty setting to practice bosses with, but… wasting a 12 day cooldown for these is just bad. Just ask a friend to practise on showdown with you using the same team as the boss and simulating a boss encounter under the same circumstances if you want to practice boss teams. The easy difficulty should only be chosen in bosses that unlock other areas or quests so that you can easily beat them. For example, we should only fight Naero in the Easy difficulty so that we gain access to daycare quickly and we don’t have to bother with him anymore. We can also fight Pumpkin Boss in Easy Difficulty to unlock the Goldenrod Berry Shop. The Medium difficulty setting starts making bosses hard to pretty high levels. This is the standard difficulty setting, where you realise things actually are hard. Pretty hard. And they hit hard. And they tank attacks they normally shouldn’t be able to. The pokemon will have 252 EV in each stat (yes, you read that right, 252 in EACH STAT. That means they have a total of 6x252 EV. Which means they are pretty illegal and extremely overpowered). If you mess up here, you might get your butt kicked. Medium is the difficulty I recommend starting bosses in because it introduces you into an unfair disadvantage fight where you still have opportunities to learn and win. Not only that, but the pokemon will also have hold items such as Choice Specs, Band, Scarf, Life Orb, Expert Belt and so on. This also means they hit like trucks, they are tanky, and they’re fast. You can more or less calculate what stats they have by using an online calculator. It’s a good idea since they literally have illegaly high stats. These start giving out good rewards and it’s the recommended difficulty if you’re still afraid of doing hard bosses and you want to practise more against them. And then there’s the Hard difficulty setting. In this mode, you cannot use Revives or any items on your pokemon. Thus, once you sacrifice one pokemon, there’s no going back. You will have to continue with the others and pray that your strategy succeeds. That’s not the only problem though. The issue is that now, their pokemon have 400 EV in each stat. FOUR HUNDRED. If you read that right, you’ll realise that’s 2400 EV total compared to the normal 510 EV total cap you can reach. Nearly five times the pokemon limit, while having no restrictions per stat. They’re nightmares if it falls out of control, you get paralysed in the wrong turn or you get a crit. You might just give up since you won’t be able to regain control. Imagine a Chansey with Eviolite and 400 EV onto every single stat. Following the latest update, in an attempt to fix the multiple AI exploits by users, Bosses now cannot have 2 pokemon be put to sleep at the same time, they will switch whenever their pokemon run out of PP, are Encored into a bad move, and more conditions. However, they are now Choice Locked. You can counter some Boss pokemon by making them Choice Lock on purpose so that they use ineffective moves until they switch out. They will reward you with money, items (they can be a bit bad and just give berries, or give you really rare pokemon, PvP items which can later be sold for some nice money, or just completely troll you), and more stuff. You can check the cooldowns for each region’s bosses in Celadon Office Floor 2 Cooldown Checker, Goldenrod City House 1, Slateport City House 1 and Canalave City House 1. If you disconnect in the middle of a boss battle, it will count as a loss. Same if the server crashes. So press F if you crash. Before you battle each boss, check out their information on the PROWiki to know what teams they have and how to prepare your team, structure, build it and itemize against them. https://prowiki.info/index.php?title=Bosses What Team should I use for Bosses? Well, boy. The simple answer would be to tell you: “Come on, this is Pokemon! There’s millions of possible team combinations! You can use anything you want!” But that would be lying. There’s a massive amount of pokemon that are simply too weak, have no useful movesets, no recovery, no boosting moves, are unevolved, or simply are wrongly trained to function against bosses. You can make a Magikarp sweep bosses by baton passing +6 on every stat onto him, and you could do the same with literally almost pokemon in existence. However, this does not mean they’re viable. It simply means that some pokemon require way too much work to function. They’re not worth training at all. Don’t waste your time on them. (I mean, if you’re willing to sweep bosses with a +6 Caterpie, go for it I guess lol) This guide will constantly be updated with new additions or possible options onto the teams and strategies I want to present. We could add literally every single pokemon in Gens 1 and 2 because they can all learn Curse and we can make cheese strategies with that but… This doesn’t work like that. I will cover a section on gimmick picks that might be fun to use, but only work under specific conditions. Disclaimer: before we start, we have to keep it clear. There’s no single “six pokemon team” that works for EVERY boss and is super godly, super cheap or extremely good, and that will SURELY make you a MULTIMILLONAIRE like that nigerian cousin prince from Africa who e-mails you at 3 in the morning telling you that you’ve earned an inheritance for 15 million dollars and wants to know all your bank details. There's always going to be changes. Teambuilding: The Process Any guide that tells you “helo wiz dis team you wil bit eberi boss team omg dis is the best team eva!!! subscrib to my iutub chanel!!!” is just lying. You have to use your brain and adapt to every situation. You can’t just spam the same six pokemon for all bosses in the game. Most guides that argue “you only need six pokemon” start making exceptions like “ah well yea you need to change one member of your team for this one, and then you have to change these two for the other one...”. You get the point. There’s no definitive six members to your boss team, and if you just wanted to not learn and stupidly get 6 pokemon and immediately start bossing without using strategy, please drop this guide. You’re here to learn, not to spam 6 pokemon nonstop. What if you use a Dragon pokemon to sweep and try your luck against a boss with Fairy types? You’ll miserably fail. If your plan was to simply break through 6 pokemon with brute force: You can already give up. You can’t. You’re fighting illegaly high stat pokemon with absurdly hard to fight builds that can suddenly outspeed you and oneshot you nonstop. You need a way to stop them from literally obliterating you in a single move. You have two options: either you build an entire team based around sweeping as many bosses as possible, or you just run gimmick pokemon that will try to cheese as many bosses as possible. (Rattata pls) We will go over three main strategies in this guide. They’re the most common, cheap and easy to execute strategies for bosses currently in PRO. These are pretty common choices, and I will give you both a walmart low cost version that can be obtained by someone in Kanto with just three or four badges and a more expensive but still obtainable version for newbies that will be explained throughout the guide. I will try to explain the function of each team member, possible substitutions and give example movesets and items and builds that will work for your boss choices. We want to cover setup sweeping, baton passing and gimmick teams to fight them. You will see that there are common team members that repeat throughout all strategies: that’s because they’re needed to break through specific possible problems that most bosses share. I might edit this guild in the future to add new extra strategies, video proof, and new additions to each team. Related/Important guides you can/should read before making a Boss Team. EV, IV, Nature, Ability, Stats: These are extremely common terms you should already be familiar with if you want to get into bossing, since it’s the lategame. If you still don’t understand how they work… what are you doing? Get into reading more guides to understand how do they work! You can’t start from the top of your house if the pillars are not built! It’s like going to the gym and skipping leg day. https://pokemonrevolution.net/forum/topic/152671-natures-abilities-ev-iv-and-stats-for-newbies-the-guide/?tab=comments#comment-840375 This guide explains how do they work, what you need to know and how to know if your pokemon is fit for bosses or not. I’ll try to provide more specific examples later on so you understand if your team is ready to do bosses or not. If you need to learn the basics, check these! https://pokemonrevolution.net/forum/topic/153453-how-to-hunt-specific-abilities-guide-for-newbies/?tab=comments#comment-845477 https://pokemonrevolution.net/forum/topic/157347-how-to-start-hunting-any-pokemon-the-newbie-guide/?tab=comments#comment-871144 If you need to learn how to hunt for specific abilities for specific pokemon in this team that require them, you should check out this one. It explains how to hunt for specific abilities. https://pokemonrevolution.net/forum/topic/153443-how-to-ev-train-your-pokemon-for-newbies-and-safari-ev-wald-guide/?tab=comments#comment-845437 You might have to use this guide when you have to EV train your pokemon for Boss Battles. Common terms we need to learn for this guide Memento and Mementoers Memento is a move that will sharply decrease the opponent’s Attack and Special Attack when used and will then faint the user. For example, Whimsicott will use Memento and Goodra will have its Physical and Special Attack decreased by two stages, then Whimsicott will faint. This move is essential for bossing as it will severely cripple the opponent’s attacking capabilities (and their will to live). Since bosses do not switch pokemon, they have no way to remove the stat drops (unless they use Haze or have abilities like Clear Body). We will exploit this to setup any pokemon we want to. Before you use Memento: keep in mind that some enemies are way too strong and can’t be handled even after a single Memento. Destiny Bond a threat if they’re too annoying (haha Air Slash go brrrr) or if they’re too strong (Mewtwo on steroids). Also, don’t be stupid and Memento a Clear Body Pokemon, for the love of god. Also, keep in mind that if you have the ability Prankster and you are facing a Dark Type opponent, most Status moves will be disabled and have no effect on the opponent. Memento is one of them. Be careful when you use Cottonee and Whimsicott! Accuracy/Precision Debuffing Flash/Sand Attack/Any accuracy decreasing move and Debuffers. Flash will simply lower the opponent’s accuracy by one stage, dropping his chances to hit any move drastically. We will use these moves to lower the opponent’s chance to hit us in any way. This is essential for bosses, since if we get hit and crit, we’re probably dead with no way to recover from disaster. We want bosses to miss as much as possible. Keep in mind we’re running completely on a 100% luck factor here. Other Debuffing Moves Charm/Featherdance, Eerie Impulse, Scary Face, Screech, Metal Sound/Fake Tears: These moves go together with the moves mentioned above. These attacks are needed in bosses to cripple the opponent’s attack so that they do not destroy us, their special attack, their defenses, or their speed. They’re quintessential to avoid being oneshot without any way to react to it. While there are more debuff moves, these are the ones that will help us the most. Calculating Stat Drops Now that you’ve read this, you should take a look at how stat increases and drops work. Each stat drop or increase in Attack, Defense, Special Defense, Special Attack, Speed is a 50%. If your stat is lowered or increased, it’s by one stage. If it says sharply, it’s by two stages (whether down or up) and drastically by three stages. Growl would lower our Attack by one stage (50%), but then we could Swords Dance, which would increase our Attack by two stages. Our Attack would go first to 0% (neutral) and to 50%, since it would’ve gone from -50% to 50% increase. Still confused? Well. let’s explain it better. You start at 0 stage drops or increases. Moves or abilities such as Intimidate can lower or increase your stats in battle (Defiant, Intimidate, Lightninrod, Speed Boost, Weak Armor, etc). The limits are 6 stage drops or 6 stage increases. Thus, you can have your stats lowered or increased up to 6 stages. For example, if I growl an opponent 6 times, his Attack will be decreased by 75%. However, if he uses Swords Dance once, his Attack will go back to having been decreased only 4 stages (50% decrease in Attack, or -4, as we can say it). If he uses it once more, he’ll be at -2 stages, and if he uses it again, he’ll be back at 0 stage drops. It’s quite easy to understand if you just count up and down. They don’t work on real percentages: Stage Drops (and %) are not very real. If your stat is increased by a stage, each stage is a multiplier or a divider by .5. So you can understand it properly: +6 stages = x4 to the stat that has been increased by that amount of stages. +5 stages = x3.5 to the stat that has been increased by that amount of stages. +4 stages = x3 to the stat that has been increased by that amount of stages. +3 stages = x2.5 to the stat that has been increased by that amount of stages. +2 stages = x2 to the stat that has been increased by that amount of stages. +1 stages = x1.5 to the stat that has been increased by that amount of stages. 0 stages = No changes. This is where you start from. -1 stages = x2/3 to the stat that has been decreased by that amount of stages. -2 stages = x2/4 to the stat that has been decreased by that amount of stages. -3 stages = x2/5 to the stat that has been decreased by that amount of stages. -4 stages = x2/6 to the stat that has been decreased by that amount of stages. -5 stages = x2/7 to the stat that has been decreased by that amount of stages. -6 stages = x2/8 to the stat that has been decreased by that amount of stages. Imagine Golem has 100 Speed. He uses Rock Polish once. He goes to 2 Stages, and his Speed goes to 200. (x2 multiplier). Now the enemy uses Mud Shot and drops your Speed by one stage. He goes at 150 Speed (x1.5 multiplier, you went from 2 stages to 1 stage). Now he Rock Polishes again and he jumps to 3 stages (x2.5 multiplier). His Speed is now 250. See? % don’t apply properly. If it was a %, a 100% increase would’ve meant that his Speed would’ve gone from 150 to 300. It works by Stages, so it goes to 250 instead. % only work based on the TOTAL STAT you see in the numbers in your pokemon’s description. The multiplier will always work on that stat, and it will not work as a %. If it worked on percentages, the 100% increase (or x2 in our real world) would’ve made 150 go to 300, instead of 250. Otherwise, we could abuse this repeatedly to grow our stats in battle infinitely. Now comes the stupid part. Stages DON’T HAVE THE SAME EXACT MULTIPLIERS WHEN IT COMES TO Evasion and Accuracy. I put it in caps SO YOU READ IT BETTER. Probably because Evasion and Accuracy are pure RNG based mechanics and they’d be WAY too broken with classic stat changes (we would abuse Fissure lol). Stages in these two stats work like this: +6 stages = x3 to the stat that has been increased by that amount of stages. +5 stages = x2.6 to the stat that has been increased by that amount of stages. +4 stages = x2.3 to the stat that has been increased by that amount of stages. +3 stages = x2 to the stat that has been increased by that amount of stages. +2 stages = x1.6 to the stat that has been increased by that amount of stages. +1 stages = x1.3 to the stat that has been increased by that amount of stages. 0 stages = No changes. This is where you start from. -1 stages = x0.75 to the stat that has been decreased by that amount of stages. -2 stages = x0.6 to the stat that has been decreased by that amount of stages. -3 stages = x0.5 to the stat that has been decreased by that amount of stages. -4 stages = x0.42 to the stat that has been decreased by that amount of stages. -5 stages = x0.375 to the stat that has been decreased by that amount of stages. -6 stages = x0.33 to the stat that has been decreased by that amount of stages. https://bulbapedia.bulbagarden.net/wiki/Statistic I suggest you give the entire thing a read. Setup Moves Dragon Dance, Quiver Dance, Nasty Plot, Agility, Swords Dance, Tail Glow, Iron Defense, Amnesia, Calm Mind, Cosmic Power, Minimize, Double Team, Coil, Curse, Autotomize: These moves are the moves we will use to set up. The issue with these moves is that most pokemon that have access to amazing moves (Butterfree literally learns some of the most overpowered moves for Bosses, legit, EVER) completely SUCK. They increase our stats (each one has a different function) and allow us to defeat bosses easily. We cannot defeat bosses without these moves and a clear strategy. For example, we could use Dragon Dance on an Inner Focus Dragonite, but we would not be able to stall a Boss via Roost and Dragon Dance since we need the extra Multiscale protection to get a few extra dances before we start sweeping. Hazards (no, not the football player) Hazards are moves that will cause effects upon the opponent once they switch in. Most hazards cause damage upon the opponent’s switch, they will deal a % of the opponent’s max HP (for example, Spikes, Stealth Rocks, Toxic Spikes). They’re essential to make bosses easier, as they ignore their defenses and just deal maximum HP % damage. For example, placing three Spikes will make all the opponent’s non-Levitate pokemon or non-Flying pokemon lose 25% of their max HP. Spikes and Toxic Spikes have issues, though. Since they can be avoided by some of the boss pokemon (and, specifically, we NEED to break Multiscale ability in some bosses, as it will allow them to survive hits they should NOT be able to, as it halves all damage dealt by the first hit they receive upon being at full HP), we have to utilise Stealth Rocks to their fullest potential. However, it is also recommended that you carry a Forretress with all three hazards to first set up Stealth Rocks and then try to spread as many Spikes and Toxic Spikes as possible. We want to use Stealth Rocks because nothing is immune to Stealth Rocks unless they have the ability Magic Guard active. This will allow us to lower the bosses incoming max HP, break stuff like Focus Sash and Sturdy (which only work if the user is at full HP) and allow us to score extra kills we normally would not be able to. Sticky Web is also considered a hazard, but we don’t really need that one. For this guide, we will mainly abuse Stealth Rocks. Screens The moves Light Screen and Reflect reduce incoming damage and last for 5 turns (or 8 turns if we hold the item Light Clay). These two halve special damage received (Light Screen) and physical damage received (Reflect). They will protect us from getting oneshot while we setup our sweeper or while we setup our Baton Passer. We will try to use them with a tanky screener so we can also try to stall the Boss if we deem it necessary. Weak Screeners are not recommended, as they could get oneshot by priority moves before we set them up, and that’d be disastrous (Alakazam I’m looking at you.) Status Inducing Moves Status effects are: Burn (deals a % of the opponent max’s HP per turn, also halves their physical attack, enables abilities such as Guts which increases your physical attack and negates the downside of Burn, except for the % damage per turn). Paralysis (slows the opponent by 75% and has a chance of 25% every turn to paralyse the opponent so they won’t do anything, also enables Guts). Sleep (will completely disable the opponent for one to three turns unless they use Sleep Talk or Snore). NOTE: You can only put ONE Boss pokemon to sleep. The Sleep Clause prevents more than one being put to sleep at once. Poison (same as Burn, but does not reduce their attack. There are two types of poison, the normal one deals 1/8th of the opponent’s max HP every turn and the other one (badly poisoned status) escalates from 1/16 per turn to 16/16 per turn as time goes by. It will increase by 1/16th every turn. Thus, the first turn will be 1/16, then 2/16, then 3/16, and so on. There’s also Freeze, which will completely paralyse a pokemon without any way to escape it other than using certain Fire type moves or waiting each turn for a chance to thaw out. (You could use healing items, but not in PvP). You can thaw out by being Scalded or using Flame Wheel. We mainly will only use Paralysis (Thunder Wave, mainly) to cripple a boss pokemon’s to make it be unable to attack sometimes to setup on them or to make them slower so that they always attack last. We could use Burn or Poison, but we don’t want the opponent’s pokemon to faint while we’re setting up. Counter / Mirror Coat Counter/Mirror Coat: These moves will counter the opponent’s attack by dealing twice as much damage as you were dealt in the same turn. Counter will deal double of the physical damage you took and Mirror Coat will deal double of the special damage you took. A few pokemon can exploit certain mechanics in these bosses (Wobbuffet, Golem and Magnezone mainly, but also other pokemon such as Ampharos or Clefable) to oneshot any boss pokemon and take it out instantly without having to resort to strategy. The only thing we have to calculate is the maximum possible HP amount our pokemon can reach, and multiply it by 2 to see how much damage we can deal. If you’re too lazy to do it: Sudowoodo and Magnezone with max HP investment at level 100 with 31 IV in HP and 252 EV in HP will do 343 x 2 damage with Counter and Mirror Coat, which can only be survived by atleast 221 HP Base Stat pokemon with 400 EV in HP (thus, base 221 HP stat, 31 IV in HP and 400 EV in HP, which will give them 100 HP into their Total Stats.) However, with higher max HP pokemon, since we can take more damage (for example, Magnezone can only take up to 343 damage, while Chansey with a Focus Sash using the same strategy can take more than 650 damage, can Counter for over ONE THOUSAND THREE HUNDRED POINTS OF DAMAGE. 1300. Do you realise how monstruous this is? We can abuse this in bosses to literally wipe them out in existence. However, this won’t work on Boss Tanks, as they normally don’t deal enough damage to oneshot them in retaliation. Destiny Bond This move will faint the opponent if the opponent faints you in the same turn you used this move. This move is often used to take out a Boss Pokemon in the same turn as you are fainted, so as to remove something extremely dangerous from the boss team that you cannot tank even after two Memento. Destiny Bond will fail to work if you use it two consecutive turns. However, if you use it in the first turn, don’t take out the opponent, but in the next turn the opponent takes you out BEFORE you can use it in that turn for the second consecutive time, you will faint the opponent. Example: Gengar is faster. He uses Destiny Bond, opponent does not faint you, thus no one faints. Turn 2, he uses Destiny Bond. However, since he went first before your opponent and he managed to use it twice, Destiny Bond will now FAIL and will not work. Wobuffet is slower. He uses Destiny Bond after surviving an enemy hit. Next turn, your opponent hits first and faints you. Since you used Destiny Bond this turn again BUT WERE NOT ABLE TO USE IT TWICE, it WILL work and faint the opponent too. The problem is that, with the AI strategy, pokemon may now switch when they would instead die from Destiny Bond. Be careful! Baton Pass This move will allow you to switch between two pokemon while retaining the stat boosts you got in the pokemon that is using the move. We will use this to carry boosts towards our sweeping pokemon that we obtained from setup moves. This move is essential to clearing Bosses while using Baton Pass or setting up our whole strategy. For example, if our Furret uses three Amnesia, six Coil and three Agility, he will be at +6 Attack, Defense, Speed, Special Defense. We can now use Baton Pass and all the boosts will be placed upon the pokemon we will switch on. We will take a hit in that turn, so we have to hope the opponent does not roll a roulette at -6 accuracy, -6 decreased attacking capabilities and criticals us at +6 in all stats. (It can happen, but it will approximately be one in a few thousand chances). Perish Song Once used, this move will faint all pokemon in the field after 3 turns unless you switch out. This is an optional strategy to use, still added it in. We can use this strategy if we can stall the game long enough. However, I consider it sub-par, because we will need to switch pokemon in the last turn before the opponent faints, and we will run the risk of having a pokemon faint stupidly. We also need to survive atleast three turns per Perish Song usage. We can easily get through this by using a Perish Song Politoed with Protect and Dive with Lagging Tail (… Bhimoso, what are you even writing at 4 in the morning and what are these strategies you’re coming up with. You need to sleep). Sturdy/Focus Sash The ability Sturdy and the item Focus Sash will prevent your pokemon from fainting in a single hit if your pokemon is at full HP. These will be exploited in order to ensure you can setup your strategy. Endeavor + Quick Attack/Sucker Punch: We will combine the move Endeavor and these two moves to cheese some bosses completely without using any strategy. If a pokemon has the move Endeavor and uses it when he’s at 1 HP (after the Focus Sash he holds activates), the opponent’s HP will be reduced to 1. Then, we can Quick Attack to outspeed and get a free kill before the boss pokemon can even react. This can be used 6 times per team to cheese some bosses in PRO completely and beat them in one or two minutes. We will also exploit this on Kangaskhan since he is immune to flinches, Donphan since he has Sturdy + Priority, Golem for the same reasons, Raticate, etc. BIG NOTE: This strategy will not work on pokemon that have Sitrus Berry or Leftovers equipped. After you use Endeavor on them, they will immediately heal a big % of their Max HP. Thus, you won't be able to kill them in one hit. Weathers There are four weathers in pokemon: Sun, Sand, Rain and Hail. These four have different effects, different abilities interact with them. Sun increases fire type damage moves, reduces water damage power moves, increases Morning Sun’s healing power, enables Chlorophyl, Solar Power, and more. Rain does the opposite and enables Rain Dish and Swift Swim. Sand powers up the Special Defense of all Rock Types in battle, enables Sand Veil and Sand Rush. It will also damage all non Rock, Steel or Ground types each turn. Hail only deals damage to non Ice Types each turn and enables abilities like Slush Rush. We can go deeper onto this topic but we will only explore the basics. The reason why we don’t go super deep into Weather teams is because they’re borderline useless in Bosses. Pure Weather teams struggle to set up strategies as more often than not their coverage is kinda limited. We can, however, make a semi weather balanced team + outside components to fix the team. The main issue is that not many weather pokemon are good sweepers for bosses, as they either lack power or the bulk to be able to survive while you set up. Not only that, but 8 turns isn't enough. Item Removing Moves Knock Off, Trick, Switcheroo: Knock Off is used to disable the boosts that the bosses gain fro[m Choice Items so that they hit way softer and we can stall them out easily. We only use this strategy against extremely powerful bosses such as Thor, who hit absurdly hard and have almost no counterplay. Against the less powerful bosses, we can avoid this. Trick and Switcheroo can also work, just exchange an Oran Berry. Oran Berries are obtainable everywhere and they’re worth 1 pokedollar in trade chat, since you’ll easily stock up 999 of them in your inventory. This will leave them with a useless item. We can exploit these moves with really fast attackers to steal the opponent’s Choice item and trade them something useless that will either only harm them or not work at all. I’d suggest Alakazam, since he’s extremely fast and he can Trick anything you want onto the opponent. In some bosses, it is very important to Switcheroo or Trick or remove their Life Orb, because if we don't remove it, it will be impossible for us to set up properly as they will die before we can set up our strategy. Recovery Moves Synthesis, Softboiled, Morning Sun, Roost, Moonlight, Slack Off and other moves like Rest that heal up your pokemon’s HP by different amounts depending on certain conditions. We could also add Leech Seed into the mix, Ingrain, Aqua Ring, and more. These are required for Stallers in order to get through bosses safely. Some of them are heavily unreliable though. Ingrain would keep us stuck in battle without being able to switch, Leech Seed depends on the opponent’s max HP and not on percentages, and we depend on them instead of our own % HP. Some also rely on weather conditions and that can potentialy cripple us. Roost can also be a troll sometimes, making us eat accidental Earthquakes for breakfast. Wonder Guard Wonder Guard is an ability which only Shedinja has which will make him immune to almost all attacks in existence. This ability can be abused against certain bosses since they are limited by the 4 move syndrome and they have no way of bypassing this immunity. The issue is: If Shedinja is hit once, he faints. Any status that damages each turn, hazards, weather conditions, abilities that allow bypassing other abilities (haha Mold Breaker go brrrr) and certain moves will ignore this ability completely. Thus, we have to plan out and check each boss moveset before we go and fight them. We will also look over the names for each role in any possible team. Keep in mind any of these roles can be fulfilled by ANY pokemon in the game that has access to these. Team Roles Debuffer This is the pokemon in your team who will spam stat decreasing moves onto the opponent. He has to either be tanky, or fast. We will normally use a Memento pokemon and a debuffer next to ensure we can cripple the boss pokemon to exploit it. This position can be filled by ANY pokemon with really good stat-lowering moves, specially if they have recovery options and are bulky. We’ll only use budget options in this guide (Pidgeot and Electrode mainly). While there are other options (Ampharos and Clefable), we normally want to focus on the best pokemon for each role, or the cheapest and easiest to farm, as we don’t want to elongate our suffering further. We already have to farm a LOT of pokemon for bosses. Thus, we’ll mainly stick to Pidgeot and Electrode, unless we face Electric-immune pokemon. We will also use Jumpluff, Cottonee, Whimsicott and others. Memento Mentioned above. He just uses Memento. That’s it. The position can be filled by ANY Memento pokemon, but the two main ones are Jumpluff (budget option) and Whimsicott. The third optional one is Dugtrio together with Mismagius. However, Jumpluff and Whimsicott have way more utility options than these two. We can also run Weezing as an optional budget option that can also stall and damage at the same time. However, he’s slower than my brain’s processing time. Hazard Setter The guy that spams Hazards like a madman. This position can be filled by ANY pokemon that has Hazard moves (Spikes, Toxic Spikes, Stealth Rocks and Sticky Web). The most notable is Forretress, who can learn the first three. We will use Golem as a budget option. We NEED to set up Stealth Rocks, ALWAYS (By the way, I’m fully aware it’s spelled Stealth Rock. I’m just lazy to fix it at this point). Then, we’ll set up three Spikes and two Toxic Spikes if possible. We don’t care if our hazarder faints as long as he sets up one Stealth Rocks. Screens The member that just sets up Light Screen or Reflect according to the enemy. We preferably want him to be tanky to avoid being oneshot by a Shadow Sneak or a Sucker Punch, unless we 100% believe in a really fast screen setter that will instantly faint so as to enable the next pokemon to be switched in without receiving a single free hit. (If you get fainted, you can switch without losing a turn). Baton Pass The one that will setup as much as possible and Baton Pass onto the Sweeper/Staller. The Baton Passer should have a reliable recovery, overpowered boosting moves (Swords Dance + Speed Boost, Quiver Dance, Dragon Dance), a reliable bulk to go along with it (Ninjask can’t tank anything even with the opponent at -4 or -6 stats…) and the appropriate moveset for it. We need to boost our sweeper as much as possible. Smeargle can also be used, however, it requires a LOT of skill. Staller An incredibly tanky pokemon with absurd defensive capabilities and recovery options that will slowly wear down the bosses’ pokemons until the boss loses. This is normally an emergency option if everything goes wrong. We will normally use this with Chansey and Clefable, who are extremely disgusting and tanky pokemon, obnoxious to deal with and barely unkillable (unless you get accidentally crit, in that case, you’re screwed). We can also do this with other reliably tanky pokemon with recovery options such as Roost or Softboiled. Sweepers and Setup Sweepers An incredibly strong and hard-hitting pokemon that will hit the opponent as hard as possible to defeat them in a single hit if possible. There’s also the variant of Setup Sweepers who do not depend on Baton Passing because they’re so good that they require barely any assistance. We can also add weather dependant sweepers. We will only use Setup Sweepers that are easy to hunt (mainly, unless needed). Any pokemon with high Attack, Special Attack (one of the two or both) and decent Speed can be used as a Sweeper in Baton Pass teams. Thus, we don’t really have to worry too much in Baton Pass about specific sets or pokemon. Destiny Bond This guy just comes in and takes out an opponent’s pokemon to ensure he can’t sweep you without any way to stop him. They are used to stop anything that is way too strong to stop once it gets going. We will use Gengar 100% of the time, since he’s almost guaranteed to almost always pull it off. However, we can use any Destiny Bond +Speed nature fast pokemon with Choice Scarf to Destiny Bond any threat we see and we don’t want to deal with. We can also use Wobbuffet, but we need to have a functioning brain to properly use him, and spoilers: I don’t have one. BEWARE THAT, after the AI changes, sometimes the AI will switch and your Destiny Bond attempt will fail. Weather Setter Only in weather related teams, there will be a weather setter with an ability such as Drought, Drizzle, Snow Warning or Sand Stream to set up the weather appropriate for the team. These teams are not very good in bosses since they often suffer from type disadvantages against many overpowered boss pokemon. Their strategy is also dependant on the turns the weather will last for. We could use Tyranitar, Hippowdown, Politoed, Pelipper, Ninetales, Torkoal, or Abomansnow. The issue with weather teams is that we run on limited turns where the weather will last, but stat changes will never run out due to turns going by, unlike weather, which ends at 5 turns (or 8 with the correct weather rock item equipped). Thus, we’re running a strategy on a limited time to set up (spoilers: it’s not going to be enough time 99% of the time to fully set up and getting it going) and we can’t even waste a single turn or we’ll have to repeat the whole strategy again. Status Setter While it normally falls onto the responsibility of either the Light Screener, the Hazarder or the Staller, there can be a pokemon that is exclusively dedicated to Yawn to make the opponent sleep, Thunder Wave to paralyse it, and so on. I don’t recommend wasting an slot just for it though. We will use an Electric pokemon like Electrode for this. We can also use a Klefki to do the job, but I’m not a fan of the guy. He’s not the… key… to our success… get it… because he’s a key… ha ha I’m such a comedian please don’t beat me I swear I won’t tell bad jokes again. Counter/Mirror Coat User (Wobbuffet go BRRRR) It forms part of the cheese strategy to just oneshot a pokemon by using Counter or Mirror Coat while holding a Focus Sash or having the ability Sturdy. This strategy can be used to cheese some bosses entirely (used to be used with Hannah, rip Hannah though). We will abuse this with Magnezone and Golem, since they have a free Focus Sash as Sturdy. We can also abuse this with Sudowoodo, as he has an incorporated Sucker Punch (priority to break Focus Sashes and Multiscale). We will use this to cheese some bosses without having to use anything else than pressing a single button. Disabler Very optional, pokemon that will use the move Disable to protect us from a specific move we don’t want the boss to use. Any pokemon that can use the Disable move is useful for this strategy. We would use this if the boss kept spamming a move which would otherwise not allow our strategy to work (Air Slash Togekiss or Shaymin, for example). Since the AI changes, this position is nerfed, as bosses may now change when disabled. Roarer / Whirlwind Also extremely optional, we’d only include a pokemon with the moves Roar or Whirlwind (also Dragon Tail, but this can be blocked by Fairy Types) if the opponent’s boss pokemon has setup moves and starts setting up and removing its worsened stats. The issue with these moves is that you’ll almost always move last since they have negative priority (the opposite of moves like Quick Attack or Extremespeed, basically). You’re taking extra risks here. Wonder Guard This deserver a special mention: we can use Shedinja vs certain bosses if we know he is immune to everything they will use against us and if they do not have Hazards, Weather, Status Moves or Abilities that will go through Wonder Guard. We can use Shedinja with Toxic and certain moves to quickly wear down and solo some bosses like madmen. Now that we’ve covered all of these terms and roles, it is finally time to start building a team! Before you start and fight any boss, check their teams in https://prowiki.info/index.php?title=Bosses Sample Teams! Newbie Section, easy teams for newbies/ideas you can try, fully built and ready to use! In this section I will provide a few Sample Teams that newbies can easily try out, hunt for and experiment with. The cores of the teams are easy to hunt and can be modified according to your budget. I will tell you what positions each member does, what should you try in a team and what you can experiment with. The teams I will provide are RISK FREE, SAFE AND NEWBIE FRIENDLY. We will not play with risks here, we will play it slow, safe and 100% success rate (that's what she said). We do not want something fast but not something super slow either. The aim of these sample teams will be for newbies to build a safe to use team they can replicate against bosses. Self Setup Based Teams In Self Setup Based teams, the point of the team is to make the Boss weak through debuffing it with stat drops, status and other moves we can use to then set up a Sweeper and faint every single one of the Boss pokemon in (if possible) a single hit. A Self Setup sweeper is a sweeper that does not need help from a Baton Passer. It can boost by itself. These are extremely rare to find, as they require either access to very good setup moves or a varied movepool. These pokemon should also have great Base Stats to begin with, as otherwise they will be very weak against Bosses, even when boosting +6 on all stats. Self Setup sweepers are somewhat weak to Status Ailments (burn, poison and paralysis specially, the most common status found in Bosses), to Taunts, Critical Hits (as they ignore stat boosts) and Roar/Whirlwind/Dragon Tail. There are multiple ways we can avoid these. Now, we will try to build a team based on a Self Setup pokemon. I recommend that, for any Self Setup Based Team, use pokemon that can learn the following moves: -Cosmic Power -Quiver Dance -Dragon Dance -Work Up These three moves are some of the best and more accessible Boosting moves. Cosmic Power and Quiver Dance are the best as they will allow you to run over entire Boss Teams without any issue. We will first make up 6 team slots. Team Slot 1 Team Slot 2 Team Slot 3 Team Slot 4 Team Slot 5 Team Slot 6 If we are playing in Easy Difficulty, against just level 100 pokemon with no useful items or EV training, we barely need any help. Thus, the only important core is: Memento user here. Jumpluff/Whimsicott/Cottonee/Dugtrio. Hazard Setter. Golem/Bronzong/Forretress. Setup Sweeper. Team Slot 4, 5 and 6 are available. If we want to ensure our Setup Sweeper can do the job, we can fll in Team Slot 4 with another Debuffer. For example, Team Slot 1 and Team Slot 4 are Whimsicott and Jumpluff. If we feel we need another Setup Sweeper if our Setup Sweeper accidentally dies, we can fill Team Slot 5 with another Setup Sweeper like Clefable. Team Slot 6 is now available. We could for example use a Shedinja if we are sure the opponent's team cannot hit us supereffectively. This Shedinja would be our last resort. I will make a sample team for Easy Difficulty. This sample team will be a low cost team. Sample Team - Easy Difficulty This Sample Team is entirely possible to capture and train in Kanto, without leaving the region. However, for full access to all moves, you will need access to Johto / a friend can give you TMs or help you out. Slot 1 - Jumpluff. Naive/Hasty/Jolly/Timid nature. 252 EV Speed, 252 EV HP. 20+ IV recommended in all stats, SPECIALLY Speed. Brightpowder equipped. Any Ability. Moveset: Memento (obligatory), Flash (optional), Worry Seed (optional), Stun Spore (optional). If the Boss first pokemon is very weak against our Jumpluff, we will spam Flash and Stun Spore until they are paralysed and -6 Precision. We can use Worry Seed to disable their ability if their ability is dangerous (for example, Speed Boost, Huge Power, Adaptability). We will use Memento when we decide it is needed to debuff them. Slot 2 - Golem. Adamant/Brave. 252 EV Atk, 252 HP. 20+ IV HP ATK DEF SPDEF recommended. Brightpowder equipped. Sturdy. Moveset: Stealth Rock (obligatory), Counter (optional but recommended), Explosion (very recommended), the last move is up to you. Golem's only functions are to either set up Stealth Rock to break the Sturdy ability and Sash of the opponent, or to use Counter against the boss first pokemon to take it down in a single hit. Golem allows you to faint any physical attacker for free in an emergency. Slot 3 - Dugtrio. Jolly/Naive/Hasty nature. 252 EV Speed, 252 EV ATK. 20+ IV Speed and ATK recommended. Brightpowder/Focus Sash equipped. Any ability. Moveset: Memento (obligatory), Stealth Rock (optional), any two other attacking moves. If any accidents happen with Jumpluff, we will use Dugtrio to debuff instead. It can also set up Stealth Rock if needed. With this, we have ensured that our next 3 slots can be occupied by anything. The Boss will be VERY debuffed and weak after two Memento + other debuffs. I will give you an example of three Self Setup Sweepers we can fit in a single team. Slot 4 - Slowbro/Slowking (NON MEGA, if you are a newbie with no budget for now to beat the Megaquest Boss.) Slowbro - Calm/Sassy. 252 EV SPDEF, 252 HP. 20+ IV DEF, SPDEF, HP and SPATK recommended. Any ability. Leftovers. Moveset: Slack Off (obligatory)/Rest (optional), Calm Mind (option 1), Amnesia (option 2, if you have no access to Hoenn / nobody can sell you a TM). Iron Defense (obligatory, unless you're a poor newbie, then Withdraw), Surf (if you're poor and have not reached Hoenn). Example: Slack Off - Amnesia - Withdraw - Surf (very newbie friendly moveset) Slack Off - Calm Mind - Iron Defense - Surf (not so newbie friendly). Slowbro sets itself up, boosts its DEF, SPDEF and (if you have Calm Mind) SPATK to +6. It heals with Leftovers + Slack Off. It is almost impossible to faint with this combo. Slowbro is the best Boss Self Setup Sweeper. It is extremely easy to farm, very accessible for newbies, easy to understand too. We need to set up our DEF and SPDEF to +6 stages, then our Spatk, then sweep. Slowking - Bold/Relaxed. 252 EV DEF, 252 HP. 20+ IV DEF, SPDEF, HP and SPATK recommended. Any ability. Leftovers. Copy the entire explanation I mentioned above. The only difference between both is that Slowbro has more DEF, Slowking has more SPDEF, and Slowbro has a Megaevolution but Slowking doesn't (I never understood why). The nature choice is to balance their DEF and SPDEF differences. Note: Slowbro and Slowking ONLY HAVE ONE SLOT TO USE AN ATTACKING MOVE. Some bosses have Water Type immune pokemon (ability Water Absorb, Storm Drain). Before you begin the boss, write down if any pokemon is immune to Surf. Slowbro and Slowking have access to other moves such as Flamethrower, Psychic and once again, Surf. You can train multiple Slowbro/Slowking for bosses and switch around them as you need. You copy the same moveset, but instead of Surf, you replace the attacking move. Beware that Flash Fire grants an immunity to Fire Type attacks and Dark Types are immune to Psychic. Slot 5 - Clefable Bold/Relaxed, 252 EV DEF, 252 HP. 20+ IV DEF, SPDEF, HP and SPATK recommended. Magic Guard. Leftovers. Moveset: Cosmic Power (obligatory), Softboiled (obligatory)/Rest (optional)/Moonlight (optional), Moonblast (obligatory), Calm Mind (optional, if you want SPATK boosts)/Toxic (if you want to take the Boss safe but slow, you can Toxic it and keep attacking while you heal up constantly. Note: Clefable only has one slot for your attacking move as Cosmic Power + Softboiled are normally required. Clefable learns an absurd amount of attacking moves: Shadow Ball, Psychic, Flamethrower, Ice Beam, Thunderbolt, Moonblast and so on. It is a good choice to train multiple Clefable for Bosses as you will be able to switch around them depending on the boss lineup. For example: Softboiled - Cosmic Power - Toxic - Moonblast Softboiled - Calm Mind - Cosmic Power - Moonblast Softboiled - Calm Mind - Cosmic Power - Flamethrower Softboiled - Calm Mind - Cosmic Power - Ice Beam. Softboiled - Calm Mind - Cosmic Power - Psychic Softboiled - Calm Mind - Cosmic Power - Shadow Ball Clefable has the same exact strategy as Slowbro/Slowking. Slot 6 - This slot is completely up to you. However, I will add another low tier Setup Sweeper that is also a good option for bosses. Gyarados Adamant, 252 EV ATK, 252 EV Speed/HP (preferably Speed). 20+ IV ATK, DEF, SPEED, SPDEF, HP recommended. Intimidate. Leftovers. Moveset: Dragon Dance (obligatory), Waterfall (obligatory, however, if you do not have access to the HM, use Aqua Tail, but it has a 10% chance to miss). Earthquake (optional), Crunch (optional but recommended), Ice Fang (optional and not recommended). Gyarados is an emergency sweeper. It is also slightly frail and dangerous to use, but it is an incredible PvE sweeper to farm and use. Dragon Dance - Waterfall/Aqua Tail, Crunch/Ice Fang, Earthquake Sample Team - Medium Difficulty This is now a serious fight. You are now going to fight an AI that cheats and has an illegal EV Spread. Thus, we are not going to use completely low cost options, we are going to give preference to properly built teams. Slots 1, 2 and 3 are going to be dedicated to properly set up our entire team. Slots 4 and 5 are going to be slightly flexible. Slot 6 must be an extremely strong Self Setup Sweeper that can 100% safely set up. Slot 1 - Jumpluff. Naive/Hasty/Jolly/Timid nature. 252 EV Speed, 252 EV HP. 20+ IV recommended in all stats, SPECIALLY Speed. Brightpowder equipped. Any Ability. Moveset: Memento (obligatory), Flash (optional), Worry Seed (optional), Stun Spore (optional). If the Boss first pokemon is very weak against our Jumpluff, we will spam Flash and Stun Spore until they are paralysed and -6 Precision. We can use Worry Seed to disable their ability if their ability is dangerous (for example, Speed Boost, Huge Power, Adaptability). We will use Memento when we decide it is needed to debuff them. Slot 2 - Whimsicott. Bold/Calm (Relaxed/Sassy might also work). If Bold, 252 EV DEF, 252 HP. if Calm, 252 SPDEF, 252 HP. 20+ IV DEF SPDEF HP. Lagging Tail equipped. Prankster. Moveset: Switcheroo (Obligatory), Memento (obligatory), Cotton Spore (obligatory), Charm (preferred most of the time)/Worry Seed/Flash. Whimsicott will Switcheroo the Lagging Tail, which makes the opponent ALWAYS move last. HOWEVER, LAGGING TAIL CANNOT BE PLACED ON POKEMON HOLDING A MEGA EVOLUTION STONE. For these, you will use Cotton Spore instead. Slot 3 - Forretress. Relaxed/Impish, Careful/Sassy. If Relaxed/Impish, 252 EV DEF, 252 HP. If Careful/Sassy, 252 SPDEF, 252 HP. 20+ IV DEF SPDEF HP. Leftovers/Brightpowder equipped (your choice). Sturdy. Moveset: Stealth Rock (obligatory), Toxic Spikes (obligatory), Spikes (obligatory), Explosion (obligatory). Forretress will first set up either Stealth Rock or two Toxic Spikes, then set up the rest. These are needed against most Medium Bosses or they will take too long to defeat. Slot 4 - Pineco. Copy exactly what I said in the section mentioned above with Forretress. Something that you might've not realised by now is that you can carry a PREEVOLUTION together with an EVOLUTION in the same team. The point of bringing a Pineco in your team aside from a Forretress is to be able to set up extra Hazards that Forretress was not able to as it probably fainted while in the process. Slot 5 - Optional free slot. Most of the time, I bring a Cottonee here, copy everything I said on Whimsicott and bring it as an emergency Debuffer. Sometimes I carry a Shedinja (regardless of nature and IVs) with Toxic and any attacking moves as an emergency to finish off some Bosses that cannot hurt Shedinja at all. I recommend using a Naive/Hasty Shedinja with Dig and Protect so that, if needed, you can stall out a few Boss pokemon by spamming Protect, then using Dig, surviving with Focus Sash, then Dig again and to keep stalling. Sometimes I bring a Bold Chansey with all IV at 20+, Seismic Toss, Toxic, Softboiled, Counter. Sometimes a Wobbuffet, Sometimes an Impish/Careful Drapion Battle Armor 20+ with Acupressure, Rest, Cross Poison and Night Slash. This slot is free. Slot 6 - The best Self Setup Pokemon in PRO: Mega Slowbro. There is quite literally NOTHING that compares to it. Mega Slowbro wants a Calm/Sassy Nature, 20+ IV DEF SPDEF HP SPATK, any ability (and obviously the Slowbronite Megastone). 252 EV SPDEF, 252 EV HP, 4 DEF. Mega Slowbro will always have the same 3 moves, then a different attacking move depending on the boss: Slack Off, Iron Defense, Calm Mind + Attacking move: Surf/Flamethrower/Ice Beam/Psychic. Depending on the boss, you need to change the attacking move (if the opponent is immune to it), or stall the opponent out spamming any move until they die from Toxic Spikes (which you should've set up earlier with Pineco + Forretress. Sample Team - Hard Difficulty The real challenge begins here. You now fight Bosses who cheat with 400 EVs around all stats. You now NEED to cheese as much as possible. Your plan changes. This section is a copy and paste from Medium Difficulty, however, there are some changes. The plan here is to Memento THREE CONSECUTIVE TIMES with Whimsicott, Cottonee and Jumpluff on the first pokemon of each boss. Then, Pineco and Forretress must set all possible hazards and then use Explosion. Finally, Slowbro will Megaevolve, set up against the opponent and sweep the 6 pokemon alone. The only possible weaknesses Slowbro has is Taunt (never used by Bosses), Mold Breaker (this bypasses Shell Armor and gives the opponent a chance to crit, has the same effect as Zekrom and Reshiram's abilities) and Toxic Poison. There is NOTHING ELSE that can take Mega Slowbro down. If you play it intelligently, you should win 90% or higher of all your Boss Fights. If preferred, DON'T Memento immediately always but instead Switcheroo Lagging Tail so that Slowbro will be able to go first against the Boss' first pokemon to set up easily. However, against Hard Bosses, 2 out of 3 of your Memento users should always Memento so that Slowbro runs NO risks while setting up. Slot 1 - Whimsicott. Bold/Calm (Relaxed/Sassy might also work). If Bold, 252 EV DEF, 252 HP. if Calm, 252 SPDEF, 252 HP. 20+ IV DEF SPDEF HP. Lagging Tail equipped. Prankster. Moveset: Switcheroo (Obligatory), Memento (obligatory), Cotton Spore (obligatory), Charm (preferred most of the time)/Worry Seed/Flash. Whimsicott will Switcheroo the Lagging Tail, which makes the opponent ALWAYS move last. HOWEVER, LAGGING TAIL CANNOT BE PLACED ON POKEMON HOLDING A MEGA EVOLUTION STONE. For these, you will use Cotton Spore instead. Slot 2 - Cottonee. COPY EVERYTHING MENTIONED IN SLOT 1. Slot 3 - Jumpluff. Naive/Hasty/Jolly/Timid nature. 252 EV Speed, 252 EV HP. 20+ IV recommended in all stats, SPECIALLY Speed. Brightpowder equipped. Any Ability. Moveset: Memento (obligatory), Flash (optional), Worry Seed (optional), Stun Spore (optional). If the Boss first pokemon is very weak against our Jumpluff, we will spam Flash and Stun Spore until they are paralysed and -6 Precision. We can use Worry Seed to disable their ability if their ability is dangerous (for example, Speed Boost, Huge Power, Adaptability). We will use Memento when we decide it is needed to debuff them. Slot 4 - Forretress. Relaxed/Impish, Careful/Sassy. If Relaxed/Impish, 252 EV DEF, 252 HP. If Careful/Sassy, 252 SPDEF, 252 HP. 20+ IV DEF SPDEF HP. Leftovers/Brightpowder equipped (your choice). Sturdy. Moveset: Stealth Rock (obligatory), Toxic Spikes (obligatory), Spikes (obligatory), Explosion (obligatory). Forretress will first set up either Stealth Rock or two Toxic Spikes, then set up the rest. These are needed against most Medium Bosses or they will take too long to defeat. Slot 5 - Pineco. Copy exactly what I said in the section mentioned above with Forretress. Something that you might've not realised by now is that you can carry a PREEVOLUTION together with an EVOLUTION in the same team. The point of bringing a Pineco in your team aside from a Forretress is to be able to set up extra Hazards that Forretress was not able to as it probably fainted while in the process. Slot 6 - The best Self Setup Pokemon in PRO: Mega Slowbro. There is quite literally NOTHING that compares to it. Mega Slowbro wants a Calm/Sassy Nature, 20+ IV DEF SPDEF HP SPATK, any ability (and obviously the Slowbronite Megastone). 252 EV SPDEF, 252 EV HP, 4 DEF. Mega Slowbro will always have the same 3 moves, then a different attacking move depending on the boss: Slack Off, Iron Defense, Calm Mind + Attacking move: Surf/Flamethrower/Ice Beam/Psychic. Depending on the boss, you need to change the attacking move (if the opponent is immune to it), or stall the opponent out spamming any move until they die from Toxic Spikes (which you should've set up earlier with Pineco + Forretress. Baton Pass Setup Teams Baton Pass revolves around the self named move that allows you to Switch onto another pokemon WHILE RETAINING ALL STAT BOOSTS. We will try to debuff the Boss Team, then set up with a single pokemon, then Baton Pass onto another pokemon. The advantage of Baton Pass is that you can use ALMOST ANY POKEMON as the sweeper of the team. The pokemon will receive a +6 in all stats (if possible). Sample Team - Easy Difficulty The Sample Team for Easy Difficulty will try to remain only Kanto / Johto if possible. Thus, the following pokemon will only need these 2 regions. I will provide a list for all possible PRO Baton Passers and best Sweepers at the end of this section. However, I will show you the CORE of each Team and Difficulty. For Easy Difficulty, ANY Sweeper works. For Medium Difficulty, MOST Sweepers will work. For Hard, ONLY USE THE BEST. Slot 1 - Jumpluff. Naive/Hasty/Jolly/Timid nature. 252 EV Speed, 252 EV HP. 20+ IV recommended in all stats, SPECIALLY Speed. Brightpowder equipped. Any Ability. Moveset: Memento (obligatory), Flash (optional), Worry Seed (optional), Stun Spore (optional). If the Boss first pokemon is very weak against our Jumpluff, we will spam Flash and Stun Spore until they are paralysed and -6 Precision. We can use Worry Seed to disable their ability if their ability is dangerous (for example, Speed Boost, Huge Power, Adaptability). We will use Memento when we decide it is needed to debuff them. Slot 2 - Golem. Adamant/Brave. 252 EV Atk, 252 HP. 20+ IV HP ATK DEF SPDEF recommended. Brightpowder equipped. Sturdy. Moveset: Stealth Rock (obligatory), Counter (optional but recommended), Explosion (very recommended), the last move is up to you. Golem's only functions are to either set up Stealth Rock to break the Sturdy ability and Sash of the opponent, or to use Counter against the boss first pokemon to take it down in a single hit. Golem allows you to faint any physical attacker for free in an emergency. Slot 3 - Dugtrio. Jolly/Naive/Hasty nature. 252 EV Speed, 252 EV ATK. 20+ IV Speed and ATK recommended. Brightpowder/Focus Sash equipped. Any ability. Moveset: Memento (obligatory), Stealth Rock (optional), any two other attacking moves. If any accidents happen with Jumpluff, we will use Dugtrio to debuff instead. It can also set up Stealth Rock if needed. Slot 4 - UP TO PERSONAL CHOICE. I generally recommend a Screen Setter if you want such as Electrode so you can Baton Pass easily for a few turns. Electrode - Calm, 252 EV SPDEF, 252 HP. Otherwise, Timid, 252 EV HP, 252 SPEED. Any ability. 20+ IV everything except ATK. Light Clay equipped (afaik this item is obtainable in Kanto). Moveset: Light Screen (obligatory), Reflect (obligatory), Thunder Wave (optional), Debuff move (Flash, Eerie Impulse, etc). Slot 5 - Baton Passer Slot 6 - Sweeper Sample Team - Medium Difficulty Slot 1 - Whimsicott. Bold/Calm (Relaxed/Sassy might also work). If Bold, 252 EV DEF, 252 HP. if Calm, 252 SPDEF, 252 HP. 20+ IV DEF SPDEF HP. Lagging Tail equipped. Prankster. Moveset: Switcheroo (Obligatory), Memento (obligatory), Cotton Spore (obligatory), Charm (preferred most of the time)/Worry Seed/Flash. Whimsicott will Switcheroo the Lagging Tail, which makes the opponent ALWAYS move last. HOWEVER, LAGGING TAIL CANNOT BE PLACED ON POKEMON HOLDING A MEGA EVOLUTION STONE. For these, you will use Cotton Spore instead. Slot 2 - Cottonee. COPY EVERYTHING MENTIONED IN SLOT 1. Slot 3 - Jumpluff. Naive/Hasty/Jolly/Timid nature. 252 EV Speed, 252 EV HP. 20+ IV recommended in all stats, SPECIALLY Speed. Brightpowder equipped. Any Ability. Moveset: Memento (obligatory), Flash (optional), Worry Seed (optional), Stun Spore (optional). If the Boss first pokemon is very weak against our Jumpluff, we will spam Flash and Stun Spore until they are paralysed and -6 Precision. We can use Worry Seed to disable their ability if their ability is dangerous (for example, Speed Boost, Huge Power, Adaptability). We will use Memento when we decide it is needed to debuff them. Slot 4 - Forretress. Relaxed/Impish, Careful/Sassy. If Relaxed/Impish, 252 EV DEF, 252 HP. If Careful/Sassy, 252 SPDEF, 252 HP. 20+ IV DEF SPDEF HP. Leftovers/Brightpowder equipped (your choice). Sturdy. Moveset: Stealth Rock (obligatory), Toxic Spikes (obligatory), Spikes (obligatory), Explosion (obligatory). Forretress will first set up either Stealth Rock or two Toxic Spikes, then set up the rest. These are needed against most Medium Bosses or they will take too long to defeat. Slot 5 - Baton Passer Slot 6 - Sweeper Sample Team - Hard Difficulty Slot 1 - Whimsicott. Bold/Calm (Relaxed/Sassy might also work). If Bold, 252 EV DEF, 252 HP. if Calm, 252 SPDEF, 252 HP. 20+ IV DEF SPDEF HP. Lagging Tail equipped. Prankster. Moveset: Switcheroo (Obligatory), Memento (obligatory), Cotton Spore (obligatory), Charm (preferred most of the time)/Worry Seed/Flash. Whimsicott will Switcheroo the Lagging Tail, which makes the opponent ALWAYS move last. HOWEVER, LAGGING TAIL CANNOT BE PLACED ON POKEMON HOLDING A MEGA EVOLUTION STONE. For these, you will use Cotton Spore instead. Slot 2 - Cottonee. COPY EVERYTHING MENTIONED IN SLOT 1. Slot 3 - Jumpluff. Naive/Hasty/Jolly/Timid nature. 252 EV Speed, 252 EV HP. 20+ IV recommended in all stats, SPECIALLY Speed. Brightpowder equipped. Any Ability. Moveset: Memento (obligatory), Flash (optional), Worry Seed (optional), Stun Spore (optional). If the Boss first pokemon is very weak against our Jumpluff, we will spam Flash and Stun Spore until they are paralysed and -6 Precision. We can use Worry Seed to disable their ability if their ability is dangerous (for example, Speed Boost, Huge Power, Adaptability). We will use Memento when we decide it is needed to debuff them. Slot 4 - Forretress. Relaxed/Impish, Careful/Sassy. If Relaxed/Impish, 252 EV DEF, 252 HP. If Careful/Sassy, 252 SPDEF, 252 HP. 20+ IV DEF SPDEF HP. Leftovers/Brightpowder equipped (your choice). Sturdy. Moveset: Stealth Rock (obligatory), Toxic Spikes (obligatory), Spikes (obligatory), Explosion (obligatory). Forretress will first set up either Stealth Rock or two Toxic Spikes, then set up the rest. These are needed against most Medium Bosses or they will take too long to defeat. Slot 5 - Baton Passer Slot 6 - Sweeper List of Baton Passers (Note: I will be assuming that, from this list onwards, all your Baton Passers have 20+ or higher IV AND your Sweepers also do. BECAUSE IT'S REALLY, REALLY NEEDED AND RECOMMENDED). For Physical Attackers Furret. Careful/Impish. If Careful, 252 HP, 252 SPDEF. If Impish, 252 HP, 252 DEF. Leftovers. Any ability. 20+ IV DEF SPDEF HP Moveset: Coil (obligatory), Agility (obligatory), Baton Pass (obligatory), Amnesia (obligatory) Furret is the first and easiest Baton Passer to obtain in the game. Furret learns all these 4 moves via Level Up. You can literally get a good one in the first route of the game, Route 1. You will spam Coil or Amnesia first, then Agility, then Coil, then Baton Pass onto a physical sweeper. Ninjask/Scolipede/Blaziken. Jolly/Adamant (tbh even Hasty/Naive/Lonely/Naughty work) 252 ATK 252 HP (your speed is already insane). Leftovers. Speed boost. 20+ IV HP ATK SPEED. Moveset: Substitute, Swords Dance, Protect, Baton Pass. These 3 do the same thing: Protect to stack Speed Boosts, Substitute, Set up Swords Dances, then Baton Pass them. All Difficulties Viable For Special Attackers Venomoth. Bold. 252 HP, 252 DEF. Shield Dust. Leftovers. Moveset: Quiver Dance (obligatory), Substitute (obligatory), Roost (obligatory), Baton Pass (obligatory) Similar to Furret, Venomoth is the second and easiest Baton Passer for SPATK users to get in the game. However, there's a very big problem with Venomoth. Venomoth DOES NOT HAVE ACCESS TO DEF RAISING MOVES. Thus, you MIGHT die if hit by a physical move. If you fail to OHKO a pokemon, there is the chance you might accidentally lose due to not having your DEF stat raised. Note: There's actually more Baton Passers that can Baton Pass Quiver Dance (such as Ribombee). However, none is as easy to obtain and hunt as Venomoth is. They all also don't have a DEF raising move. All Difficulties Viable Lunatone & Solrock Lunatone: Bold. 252 HP, 252 DEF. Leftovers. Levitate. Moveset: Cosmic Power, Rock Polish, Calm Mind, Baton Pass. (obligatory, I'll just write it once from now on because my fingers hurt) Lunatone. Yes, surprising as hell. I didn't know it learned these things either. Solrock: Careful, 252 HP, 252 SPDEF, Leftovers, Levitate. Moveset: Cosmic Power, Rock Polish, Calm Mind, Baton Pass. Easy & Medium Viable, Hard is risky. For Both (flexible) Leavanny. Impish/Careful. 252 HP, 252 DEF if Impish. 252 SPDEF instead if Careful. Leftovers. Any ability. Moveset: Calm Mind/Swords Dance (obligatory), Iron Defense (obligatory), Agility (obligatory), Baton Pass (obligatory). This is the most expensive Spatk Baton Passer by far, hardest to find too. Not recommended at all because it's a big headache. But well, if you want to try it... Easy & Medium Viable, not recommended on Hard. Lopunny. Impish/Careful, 252 HP, 252 DEF Impish, 252 SPDEF Careful. Leftovers. HAS TO BE LIMBER OR CUTE CHARM. Moveset: Cosmic Power (obligatory), Work-Up (obligatory), Agility (obligatory), Baton Pass (obligatory) YES, YOU ARE SEEING THIS RIGHT. IT CAN LEARN ALL THESE MOVES. DON'T ASK ME HOW OR WHY. It's actually an amazing baton passer. All Difficulties Viable. Medicham & Dodrio Medicham: Impish/Careful. 252 HP 252 DEF Impish, 252 SPDEF Careful. Leftovers. Pure Power is nice to level up faster. Acupressure, Substitute, Recover, Baton Pass. You basically spam Acupressure untill all your stats are +6 hiding behind a Substitute. Then, you Baton Pass. Dodrio: Same natures, EV spread, item, any ability. Same moveset, however, Roost and not Recover. Same strategy. (Would you ever figure out these two were actually broken Baton Passers?) All Difficulties Viable. Not a joke, they're insane. Mew. Bold/Calm, 252 HP, 252 DEF if Bold, 252 SPDEF if Calm. Leftovers. Any ability: Moveset: Bulk Up/Iron Defense (if the sweeper is a physical attacker, prioritise Bulk Up), Rock Polish, Calm Mind, Baton Pass. If you're somehow up to do an entire Legendary Quest just for this, you can also use Mew lmao. List of Sweepers by Type Below I will provide a list of the Pokemon I would recommend the MOST for each Type. THIS DOES NOT MEAN THEY ARE EACH THE BEST OR THAT THEY ARE THE ONLY OPTIONS. THERE'S MORE POKEMON THAT MIGHT BE VIABLE TOO. However, I will try to keep it for the best options in each case. Note: I will be assuming your pokemon below have 20+ IV in all IMPORTANT stats. Example: Gengar all stats are important but ATK is irrelevant. Snorlax all stats are important but SPATK SPEED are irrelevant. Note 2: Normally, you need 4 VERY strong attacks of different types to cover as many pokemon as possible, on each pokemon. You're trying to use each Sweeper in a Baton Pass team to cover as many bosses as possible. I recommend Focus Sash, Expert Belt, Life Orb, Muscle Band, Wide Glasses, Scope Lens, Lum Berry as held items. If you need to activate specific abilities, use the right item (Scope Lens - Sniper, Guts - Flame Orb, Toxic Boost - Toxic Orb) I will skip the worst options. However, if you wish to use a Magikarp to sweep bosses, do it. Normal Ambipom - Skill Link / Technician - Adamant - 252 ATK 252 SPEED Bouffalant - Reckless - Adamant - 252 ATK 252 SPEED Braviary - Sheer Force - Adamant - 252 ATK 252 SPEED Lopunny (Mega) - Adamant - 252 ATK 252 SPEED Cinccino - Skill Link / Technician - Adamant - 252 ATK 252 SPEED Diggersby - Huge Power - Adamant - 252 ATK 252 SPEED Exploud - Scrappy - Rash/Modest - 252 SPATK 252 SPEED Fearow - Sniper - Adamant - 252 ATK 252 SPEED Kangaskhan (mega or not, I even forgot this gets a mega in gen 6 lol) - Scrappy - Adamant - 252 ATK 252 SPEED Kecleon - Protean - Adamant - 252 ATK 252 HP Miltank - Scrappy - Adamant - 252 ATK 252 HP Noctowl - Tinted Lens - Modest - 252 SPATK 252 SPEED Persian - Technician - Naughty/Rash - 252 ATK/SPATK 252 SPEED Pidgeot (Mega) - Modest - 252 SPATK 252 SPEED Porygon Z - Adaptability - Modest - 252 SPATK 252 SPEED Raticate - Guts - Adamant - 252 ATK 252 SPEED Sawsbuck - Serene Grace - Adamant - 252 ATK 252 SPEED Snorlax - Immunity/Thick Fat - Adamant - 252 ATK 252 HP Staraptor - Reckless - Adamant - 252 ATK 252 SPEED Stoutlant - Scrappy - Adamant - 252 ATK 252 SPEED Swellow - Guts - Adamant - 252 ATK 252 SPEED Swellow - Scrappy - Modest - 252 SPATK 252 SPEED Ursaring - Guts - Adamant - 252 ATK 252 SPEED Zangoose - Toxic Boost - Adamant - 252 ATK 252 SPEED Fighting Blaziken (Mega or not) - Speed Boost - Adamant - 252 ATK 252 SPEED Breloom - Technician/Poison Heal - Adamant - 252 ATK 252 SPEED Chesnaught - Bulletproof (YOU'RE BULLETPROOF, NOTHING TO LOSE, FIRE AWAY FIRE AWAY) - Adamant - 252 ATK 252 HP Conkeldurr - any abi - Adamant - 252 ATK 252 HP Emboar - Reckless - Adamant - 252 ATK 252 HP Gallade (mega or not) - Adamant - 252 ATK 252 SPEED Hariyama - Guts - 252 ATK 252 HP Heracross (mega or not) - Adamant - 252 ATK 252 SPEED Hitmonchan - Iron Fist - Adamant - 252 ATK 252 SPEED Hitmonlee - Reckless - Adamant - 252 ATK 252 SPEED Hitmontop - Technician - Adamant - 252 ATK 252 SPEED/HP Infernape - Iron Fist - Adamant - 252 ATK 252 SPEED Infernape - Blaze - Modest - 252 SPATK 252 SPEED Keldeo - Justified - Modest - 252 SPATK 252 SPEED Kommo-o - Bulletproof - Adamant - 252 ATK 252 SPEED Kommo-o - Bulletproof - Modest - 252 SPATK 252 SPEED Lopunny (Mega) - Adamant - 252 ATK 252 SPEED Lucario (Mega or not) - Adamant - 252 ATK 252 SPEED Lucario (Mega or not) - Modest - 252 SPATK 252 SPEED Machamp - No Guard/Guts - Adamant - 252 ATK 252 SPEED Medicham (Mega or not) - Pure Power - Adamant - 252 ATK 252 SPEED Mienshao - Reckless - Adamant - 252 ATK 252 SPEED Pangoro - Mold Breaker - Adamant - 252 ATK 252 SPEED Sawk - Sturdy/Mold Breaker - Adamant - 252 ATK 252 SPEED Throh - Guts/Mold Breaker - Adamant - 252 ATK 252 HP Flying Aerodactyl (Mega or not) - Rock Head - Adamant - 252 ATK 252 SPEED Altaria (Mega or not, but if possible Mega) - Adamant - 252 ATK 252 SPEED Braviary - Sheer Force - Adamant - 252 ATK 252 SPEED Fearow - Sniper - Adamant - 252 ATK 252 SPEED Noctowl - Tinted Lens - Modest - 252 SPATK 252 SPEED Pidgeot (Mega) - Modest - 252 SPATK 252 SPEED Staraptor - Reckless - Adamant - 252 ATK 252 SPEED Charizard (mega X if possible) - Blaze - Adamant - 252 ATK 252 SPEED Charizard (mega Y if possible) - any abi - Modest - 252 SPATK 252 SPEED Dragonite - Any abi - Adamant - 252 ATK 252 SPEED (I don't recommend the special version) Honchkrow - Super Luck - Adamant - 252 ATK 252 SPEED Landorus - Adamant - 252 ATK 252 SPEED Ledi-HHAHAHAHA JUST KIDDING DON'T, or Iron Fist - Adamant - 252 ATK 252 SPEED. If someone records themselves beating a boss by punching it with a Ledian, I will give them a prize. Moltres - Modest - 252 SPATK 252 SPEED Pelipper - Drizzle - Modest - 252 SPATK 252 SPEED Salamance (mega or not) - Adamant - 252 ATK 252 SPEED Pinsir (mega) - Adamant - 252 ATK 252 SPEED Scyther (if you're a gigachad) - Technician - Adamant - 252 ATK 252 SPEED Shaymin Sky - Modest - 252 SPATK 252 SPEED Sigylph - Magic Guard - Bold - 252 DEF 252 HP Thundurus - Modest - 252 SPATK 252 SPEED Togekiss - Modest Super Luck/Serene Grace- 252 SPATK 252 SPEED Unfezant (why in the f...) - Super Luck - Adamant - 252 ATK 252 SPEED Vespiquen - any abi - Impish/Careful - 252 HP, 252 DEF if Impish, 252 SPDEF if Careful Zapdos - Modest - 252 SPATK 252 SPEED Poison Beedrill Mega - Adamant - 252 ATK 252 SPEED Drapion - Battle Armor/Sniper - Adamant - 252 ATK 252 SPEED Gengar - Cursed Body - Modest - 252 SPATK 252 SPEED Muk/Alo Muk - Poison Touch - Adamant - 252 ATK 252 HP Nidoking/Nidoqueen - Sheer Force - Modest - 252 SPATK 252 SPEED Roserade - Technician - Modest - 252 SPATK 252 SPEED Scolipede - any abi (Speed Boost is better) - Adamant - 252 ATK 252 SPEED Seviper - Infiltrator - Rash/Modest - 252 SPATK 252 SPEED Venomoth - Tinted Lens - Modest - 252 SPATK 252 SPEED Venusaur Mega - Relaxed - 252 DEF 252 HP Vileplume - any abi - Modest - 252 SPATK 252 HP Ground Camerupt Mega (not recommended much) - Modest - 252 SPATK 252 HP Diggersby - Huge Power - Adamant - 252 ATK 252 SPEED Donphan - Sturdy - Adamant - 252 ATK 252 HP Excadrill - Mold Breaker - Adamant - 252 ATK 252 HP Dugtrio - any abi - Adamant - 252 ATK 252 SPEED Garchomp - any abi - Adamant - 252 ATK 252 SPEED Golem - Sturdy - Adamant - 252 ATK 252 HP Golurk - No Guard - Adamant - 252 ATK 252 HP Hippowdown - Sand Stream - Adamant - 252 ATK 252 HP Krookodile - any abi - Adamant - 252 ATK 252 SPEED Mamoswine - any abi - Adamant - 252 ATK 252 SPEED Marowak - Battle Armor - Adamant - 252 ATK 252 HP Nidoking/Queen - Sheer Force - Modest - 252 SPATK 252 SPEED Rhyperior - Reckless/Solid Rock - Adamant - 252 ATK 252 HP Steelix Mega - Adamant - 252 ATK 252 HP Swampert/Mega - Adamant - 252 ATK 252 SPEED/HP Rock Aerodactyl/Mega - Rock Head - Adamant - 252 ATK 252 SPEED Aggron - Rock Head - Adamant - 252 ATK 252 HP Mega Aggron - Careful - 252 SPDEF 252 HP Armaldo - Adamant - Battle Armor - 252 ATK 252 SPEED/HP Aurorus - Snow Warning - Modest - 252 SPATK 252 SPEED Barbaracle - Tough Claws/Sniper - Adamant - 252 ATK 252 SPEED/HP Carracosta - Sturdy - Adamant - 252 ATK 252 SPEED/HP Cradily - Storm Drain - Relaxed - 252 DEF 252 HP Crustle - Shell Armor - Adamant - 252 ATK 252 SPEED/HP Diancie Mega - Rash - 252 SPATK 252 SPEED Gigalith - Sand Stream - Adamant- 252 ATK 252 HP Golem Alolan - Galvanise - Adamant - 252 ATK 252 SPEED/HP Kabutops - any abi - Adamant - 252 ATK 252 SPEED Lycanroc - any abi and form - Adamant - 252 ATK 252 SPEED Omastar - any abi - Modest - 252 SPATK 252 SPEED Rampardos - Mold Breaker - Adamant - 252 ATK 252 SPEED Relicanth - Adamant - Rock Head - 252 ATK 252 SPEED/HP Rhyperior - Reckless/Solid Rock - Adamant- 252 ATK 252 HP Sudowoodo - Rock Head - Adamant - 252 ATK 252 HP Tyranitar (mega or not) - Sand Stream - Adamant - 252 ATK 252 SPEED/HP Tyrantrum - Rock Head/Strong Jaw - Adamant - 252 ATK 252 SPEED Bug Accelgor - any abi - Modest - 252 SPATK 252 SPEED Armaldo - Adamant - Battle Armor - 252 ATK 252 SPEED/HP Crustle - Shell Armor - Adamant - 252 ATK 252 SPEED/HP Ariados (DUDE, WHY) - Sniper - Adamant - 252 ATK 252 SPEED Beedrill Mega - Adamant - 252 ATK 252 SPEED Butterfree - Modest - Tinted Lens - 252 SPATK 252 SPEED Escavalier - Adamant - Shell Armor - 252 ATK 252 HP Heracross (mega or not) - Adamant - 252 ATK 252 SPEED Kricketune (NO, JUST NO) - Technician - Adamant - 252 ATK 252 SPEED Leavanny - any abi - Adamant - 252 ATK 252 SPEED Pinsir - Mold Breaker - Adamant - 252 ATK 252 SPEED Pinsir - Mega - Adamant - 252 ATK 252 SPEED Scizor (Mega or not) - Adamant - Technician - 252 ATK 252 SPEED/HP Scyther (if you're a gigachad) - Technician - Adamant - 252 ATK 252 SPEED Shedinja (DON'T RELY ON THIS THING, BUT IT'S GOOD TO CHEESE) - Adamant - 252 ATK 252 SPEED Venomoth - Modest - Tinted Lens - 252 SPATK 252 SPEED Yanmega - Modest - Tinted Lens - 252 SPATK 252 SPEED Volcarona - Any abi - Modest - 252 SPATK 252 SPEED Ghost Golurk - No Guard - Adamant - 252 ATK 252 HP Gengar - Cursed Body - Modest - 252 SPATK 252 SPEED Aegislash - Rash - 252 SPATK 252 SPEED Mega Banette - Adamant - 252 ATK 252 HP Chandelure - Flash Fire/Infiltrator - Modest - 252 SPATK 252 SPEED Dhelmise - Steelworker - Adamant - 252 ATK 252 HP Dusknoir - any abi - Adamant - 252 ATK 252 HP Froslass - any abi - Modest - 252 SPATK 252 HP Marowak Alola - Rock Head - Adamant - 252 ATK 252 SPEED/HP Mimikyu - Adamant - 252 ATK 252 SPEED Rotom (any form) - Modest - 252 SPATK 252 SPEED Spiritomb - Quiet - 252 SPATK 252 HP Trevenant - Adamant - 252 ATK 252 HP Steel Aegislash - Rash - 252 SPATK 252 SPEED Scizor (Mega or not) - Adamant - Technician - 252 ATK 252 SPEED/HP Aggron - Rock Head - Adamant - 252 ATK 252 HP Mega Aggron - Careful - 252 SPDEF 252 HP Excadrill - Mold Breaker - Adamant - 252 ATK 252 HP Steelix Mega - Adamant - 252 ATK 252 HP Lucario (Mega or not) - Adamant - 252 ATK 252 SPEED Lucario (Mega or not) - Modest - 252 SPATK 252 SPEED Metagross (Mega or not) - Clear Body - Adamant - 252 ATK 252 SPEED/HP Bisharp - Defiant - Adamant - 252 ATK 252 SPEED/HP Empoleon - Modest - 252 SPATK 252 HP Magnezone - Modest - Sturdy - 252 SPATK 252 HP Mawile Mega - Adamant - 252 ATK 252 SPEED/HP Heatran - Modest - 252 SPATK 252 SPEED Fire Arcanine - Adamant - 252 ATK 252 SPEED Blaziken mega or not - Speed Boost - Adamant - 252 ATK 252 SPEED Camerupt Mega - Quiet - 252 SPATK 252 HP Chandelure - Modest - 252 SPATK 252 SPEED Chari X - Adamant - 252 SPEED 252 ATK Chari Y - Modest - 252 SPEED 252 SPATK Darmanitan - Adamant - Sheer Force - 252 ATK 252 SPEED Delphox - Modest - Blaze - 252 SPATK 252 SPEED Emboar - Reckless - Adamant - 252 ATK 252 SPEED/HP Flareon - Guts - Adamant - 252 ATK 252 SPEED Houndoom Mega (or not) - Flash Fire - Modest - 252 SPATK 252 SPEED Infernape - Iron Fist - Adamant - 252 ATK 252 SPEED Infernape - Blaze - Modest - 252 SPATK 252 SPEED Magmortar - Modest - 252 SPATK 252 SPEED Marowak Alola - Rock Head - Adamant - 252 ATK 252 SPEED/HP Ninetales - Drought - Modest - 252 SPATK 252 SPEED Rapidash - Adamant - Flash Fire - 252 ATK 252 SPEED Typhlosion - Modest - 252 SPATK 252 SPEED Volcarona - Modest - 252 SPATK 252 SPEED Water Azumarill - Adamant - Huge Power - 252 ATK 252 SPEED/HP Barbaracle - Adamant - Tough Claws - 252 ATK 252 SPEED/HP Blastoise Mega - Modest - 252 SPATK SPEED/HP Carracosta - Adamant - Sturdy - 252 ATK 252 SPEED/HP Clawitzer - Modest - 252 SPATK 252 SPEED/HP Cloyster - Skill Link - 252 ATK 252 SPEED/HP Crawdaunt - Adamant - Adaptability - 252 ATK 252 SPEED/HP Empoleon - Modest - 252 SPATK 252 HP/SPEED Feraligatr - Adamant - Sheer Force - 252 ATK 252 SPEED Gorebyss - Modest - 252 SPATK 252 SPEED Greninja Protean/Battle Bond - Modest or Rash - 252 SPATK 252 SPEED Gyarados Mega - Adamant - 252 ATK 252 SPEED Kabutops - Adamant - 252 ATK 252 SPEED Keldeo - Modest - 252 SPATK 252 SPEED Kingler - any ability (all 3 are amazing for this dude) - Adamant - 252 ATK 252 SPEED/HP Manaphy - Modest - 252 SPATK 252 SPEED/HP Octillery - Modest - Sniper - 252 SPATK 252 HP/SPEED Omastar - Modest - 252 SPATK 252 SPEED Pelipper - Modest - Drizzle - 252 SPATK 252 SPEED Politoed - Modest - Drizzle - 252 SPATK 252 SPEED Sharpedo (mega or not) - Adamant - Speed Boost - 252 ATK 252 SPEED Slowbro Mega - Calm/Sassy - 252 SPDEF 252 HP Slowking - Bold/Relaxed - 252 DEF 252 HP Starmie - Modest - 252 SPATK 252 SPEED Swampert (mega or not) - Adamant - 252 ATK 252 HP/SPEED Wailord - Modest - 252 SPATK 252 SPEED/HP Grass Abomasnow Mega - 252 SPATK 252 HP - Quiet Abomas Mega 2 - 252 ATK 252 HP - Brave Breloom - Technician - 252 ATK 252 SPEED Cacturne - Brave/Adamant - 252 ATK 252 HP Celebi - Modest - 252 SPATK 252 SPEED Chesnaught - Adamant - Bulletproof - 252 ATK 252 SPEED/HP Dhelmise - Adamant - Steelworker - 252 ATK 252 HP Exeggutor - Modest - 252 SPATK 252 HP Alolan Exegg - Modest - 252 SPATK 252 HP Leafeon - Adamant - 252 ATK 252 SPEED Roserade - Technician - Modest - 252 SPATK 252 SPEED Sceptile Mega - Modest - 252 SPATK 252 SPEED Serperior - Modest - Contrary - 252 SPATK 252 SPEED Shaymin Sky - Modest - 252 SPATK 252 SPEED Sunflora - Modest - 252 SPATK 252 HP Torterra - Adamant - Shell Armor - 252 ATK 252 HP Venusaur Mega - Relaxed - 252 DEF 252 HP Electric Ampharos (Mega or not but I recommend Mega) - Modest - 252 SPATK 252 SPEED Elektross - Modest/Quiet (weird af pokemon) - 252 SPATK 252 HP Electivire - Adamant/Naughty - 252 ATK 252 SPEED Golem Alola - Galvanise - Adamant - 252 ATK 252 SPEED Heliolisk - Modest - 252 SPATK 252 SPEED Jolteon - Modest - Volt Absorb - 252 SPATK 252 SPEED Luxray - Adamant - Guts - 252 ATK 252 SPEED Magnezone - Modest - Sturdy - 252 SPATK 252 SPEED Manectric (mega) - Modest - 252 SPATK 252 SPEED Pikachu - Modest - 252 SPATK 252 SPEED Psychic Alakazam (mega or not) - Modest - 252 SPATK 252 SPEED Delphox - Modest - 252 SPATK 252 SPEED Espeon - Modest - 252 SPATK 252 SPEED Exeggutor - Modest - 252 SPATK 252 SPEED Gallade/Mega Gall - Adamant - 252 ATK 252 SPEED Gardevoir / Mega Garde - Modest - 252 SPATK 252 SPEED Jynx - Modest - 252 SPATK 252 SPEED Medicham / Medicham Mega - Pure Power - Adamant - 252 ATK 252 SPEED Metagross / Mega Meta - Clear Body - Adamant - 252 ATK 252 SPEED/HP Reuniclus - Magic Guard - Modest - 252 SPATK 252 HP Slowbro / Mega - Calm/Sassy - 252 SPDEF 252 HP Slowking - Bold/Relaxed - 252 DEF 252 HP Starmie - Modest - 252 SPATK 252 SPEED Ice Abomasnow Mega - Quiet/Brave. Quiet 252 SPATK, Brave 252 ATK, rest 252 HP Aurorus - Modest - Snow Warning - 252 SPATK 252 SPEED Beartic - Adamant - 252 ATK 252 SPEED Cloyster - Adamant - Skill Link - 252 ATK 252 SPEED/HP Glaceon - Modest - 252 SPATK 252 SPEED Glalie Mega - Adamant/Modest/Naughty/Rash - 252 ATK Ada Naughty, 252 SPATK Modest Rash, 252 SPEED rest Jynx - Modest - 252 SPATK 252 SPEED Mamoswine - Adamant - 252 ATK 252 SPEED Vanilluxe - Modest - Snow Warning 252 SPATK 252 SPEED Weavile - Adamant - 252 ATK 252 SPEED Dragon Altaria Mega - Adamant - 252 ATK 252 SPEED Ampharos Mega - Modest - 252 SPATK 252 SPEED Sceptile Mega - Modest - 252 SPATK 252 SPEED Charizard X - Adamant - 252 ATK 252 SPEED Dragonite - Adamant - 252 ATK 252 SPEED Druddigon - Sheer Force - 252 ATK 252 HP Exegg Alola - Modest - 252 SPATK 252 HP Garchomp - Adamant - 252 ATK 252 SPEED Haxorus - Mold Breaker - Adamant - 252 ATK 252 SPEED Goodra - Modest - Sap Sipper - 252 SPATK 252 SPEED Hydreigon - Modest - 252 SPATK 252 SPEED Kommo-o - Modest - Bulletproof - 252 SPATK 252 SPEED Kommo-o - Adamant - Bulletproof - 252 ATK 252 SPEED Salamance - Adamant - 252 ATK 252 SPEED Tyrantrum - Adamant - 252 ATK 252 SPEED Dark Absol Super Luck/Absol Mega - Adamant - 252 ATK 252 SPEED Bisharp - Defiant - Adamant - 252 ATK 252 SPEED Cacturne - Adamant - 252 ATK 252 HP Crawdaunt - Adamant - Adaptability - 252 ATK 252 SPEED/HP Drapion - Adamant - Battle Armor/Sniper - 252 ATK 252 SPEED Greninja / Ash Greninja - Modest - Protean (Gren) - 252 SPATK 252 SPEED Gyara Mega - Adamant - 252 ATK 252 SPEED Honchckrow - Adamant - Super Luck - 252 ATK 252 SPEED Houndoom Mega - Modest - 252 SPATK 252 SPEED Hydreigon - Modest - 252 SPATK 252 SPEED Krookodile - Adamant - 252 ATK 252 SPEED Muk - Alola - Adamant - Poison Touch - 252 ATK 252 HP Pangoro - Adamant - Mold Breaker - 252 ATK 252 SPEED Sharpedo Mega - Adamant - 252 ATK 252 SPEED Spiritomb - Quiet - 252 SPATK 252 HP Weavile - Adamant - 252 ATK 252 SPEED Fairy Altaria - Mega - Adamant - 252 ATK 252 SPEED Azumarill - Huge Power - Adamant - 252 ATK 252 SPEED Clefable - Magic Guard - Bold - 252 DEF 252 HP Diancie Mega - Rash - 252 SPATK 252 SPEED Gardevoir/Mega - Modest - 252 SPATK 252 SPEED Granbull - Adamant - 252 ATK 252 HP/SPEED Mawile Mega - Adamant - 252 ATK 252 SPEED/HP Mimikyu - Adamant - 252 ATK 252 SPEED Sylveon - Pyxilate - Modest - 252 SPATK 252 SPEED/HP Togekiss - Modest - Super Luck/Serene Grace - 252 SPATK 252 SPEED Mini cheese Team (for PvE Quests, but also Bosses) Endeavour + Priority abuse. Too lazy to even think? Do you want to abuse an absurdly stupid and cheap strategy by just spending a few Focus Sash? Alright. The below strategy is used to cheese specific bosses that are giving you a headache or PvE quests that you otherwise cannot beat. Sometimes, these bosses WILL ALLOW YOU TO USE 6 OF THE SAME POKEMON. Train a Lonely/Naughty Rattata, Raticate, Kangaskhan (Inner Focus if the enemy pokemon has flinching moves, Scrappy if they're a Ghost type), Taillow, Swellow (Scrappy if possible) Buneary, Lopunny and Corphish/Crawdaunt. Teach them Endeavor. Then, to Rattata and Raticate, teach them Sucker Punch and Quick Attack. To Kangaskhan, teach it Sucker Punch. To Buneary and Lopunny, teach them Quick Attack. To Crawdaunt, teach it Aqua Jet. To Taillow/Swellow, Quick Attack. Train them 252 ATK 252 SPEED EV (just to make them level up faster), Lonely nature, with trash IV (to faint in a single hit). Equip them a Focus Sash. Use Endeavor, then use a priority move. Free wins! Weaknesses: Endeavor does not work on Ghost Types unless you have the ability Scrappy. Endeavor makes Contact so be careful with Rough Skin/Rocky Helmet/Iron Barbs. Already Built Sample Teams Mega Slowbro and its guide Baton Pass and its guide
- 71 replies
-
- 35
-
-
Welcome to: How to make money, the guide! Before we start with the guide, I'd like to clarify certain things: This guide is mainly aimed to those newbies, semi advanced and somewhat experienced players that are in desperate need of money to survive on PRO's economy. This guide is not really aimed at expert multimillionaire players. However, some of these players might appreciate some of the advice and make use of some of the guide I'll be writing down here. I'll be mentioning a LOT of options and brainstorming a lot of ideas for any player to use. (Also, I'll add a lot of humour into it :v) These are also REALISTIC things you can do, not impossible or overcomplicated stuff. They're basic and easy. Are you stuck in Kanto trying to get a bike but these pokeballs keep making you poor? Are you hardstuck on Sabrina and have completely lost faith on moving on? Are you trying to defeat Mewtwo but he keeps oneshotting your team and you have no idea how to farm money to buy potions because you didn't bother to spend 5 minutes to google that the ability Sturdy would've helped you? If so, this is your guide! Welcome to how to make money in PRO 101! or "how did Bhimoso lose his sanity to this level to make guides instead of playing the game"! This guide will first be aimed at you newbies who are still in Kanto trying to buy a bike, a good rod, a parcel, and a house on route 19 (Spoilers: you can't, sadly). Then, we'll go over your monetary options in Johto, in Hoenn (spoiler alert: Hoenn sucks when it comes to making money. Seriously. IT SUCKS.) and finally, Sinnoh. I will try to condense as much info and options as I can for you all. I will also read comments on this guide and link other guides that may help you out or have relevant info. You can bring in suggestions too, although I have a big selection of stuff to post. Choose the region you've reached to or the ones you're interested in the most. As an extra and very useful decision: Remember you can have up to 4 accounds and play in all of them, complete the story 4 times, trade with yourself and help yourself a bit. If you have 4 accounts, you can do all of these methods four times and gain four times the normal amount of money. That will make you rich beyond absurd levels and will skyrocket your money gain. You can gain millions in a day just by doing all of this stuff in your accounts. I repeat: MILLIONS. Keep in mind it is no longer allowed to do Dig Spots and Bosses in both servers as it's against PRO's Rules because of economy reasons (according to developers). Remember to do Dig Spots every three days, Pokestops every day and a half, Mushrooms every 2 weeks, Bosses every 2 weeks, daily excavations and fight trainers every week for maximized money gains. You'll earn absurd amounts of money this way. Let's get into it! Kanto If you're a newbie, I will be assuming you are just starting, have reached the middle point of Kanto and noticed you REALLY need money for that bike or you're ultra desperate in the Elite Four. If not, you can still do all of these, and include Bosses, Love Island extras and more stuff! Missions Let's start with the simplest and first option, before we move onto the others: Missions. If you remember from your visits in Viridian City, you'll have noticed the officer there has missions for you. These missions can be done in almost all Kanto cities which have gyms: Viridian, Pewter, Cerulean, Celadon and Cinnabar. All these cities have 2+ missions each, some of which are easy and appropriate for the current situation you're in, but some are a bit too hard to do them economically. I'll list all of these which are easily manageable for newbies and the ones not so manageable. Remember you can only do missions once! Viridian City: Take the Rattata Hair quest. Teach TM Thief to a pokemon that is a physical attacker and is a good hm slave (Sentret/Nidoran when they evolve will be), ensure he has no items equipped and spam Thief against Rattatas in route 1. Once he steals a Rattata hair, be sure to remove it from him and get 2 more Rattata hair (3 in total). Go and get the reward for the quest, this is an easy money making one. You will also be able to steal items from other pokemon if you feel so. (This is of great use later on!) Beat Bug Catcher Gerald in Viridian Forest. This is just free money, just beat him lol. Same goes with catching a sentret. However, they only appear at morning and day time in route 1 (if you do not know when does a pokemon spawn, use the Reborn Bot in the official PRO discord. -> https://discord.gg/98pMNxq ). Do all quests in Viridian, basically. Total gain: 15.5k pokedollars. (that's a LOT at the beggining of PRO) Pewter City: Beat Brock (yes, it's a quest reward lol). Then talk to Jenny to get a bit of money. Afterwards, catch a Pikachu in Viridian Forest. They're not very common but they're easy to find. For the Headbutt quest: teach Headbutt in the entrance of Viridian Maze (the tree in Viridian Forest which has a hole, north from the entrance from the south) to a HM Slave. Show it to Jenny and she'll give you a lot of money (it will pay more than the 2k you need to teach headbutt to a pokemon.) Try to headbutt trees in the first routes and cities and get a Silcoon. Show it to her and you'll get extra money. You'll get 7750 pokedollars if you did not give the Silcoon, you'll get an extra 9k if you do. Cerulean City: Here, one of the quests is not really manageable, which sucks a bit. Do the teaching dig to a pokemon quest: either train a Sandshrew or Diglett until they learn dig via level-up and then show it to Jenny, or teach the TM to a Pokemon that can learn it (preferably a HM slave). When you've done this, you'll get a Soft Sand (increases ground type moves power). If you then go to route 3 and Mt Moon and dig up dig spots (or in other places) and bring atleast two different gems to Jenny, you'll get a Big Pearl. Sell it to the item maniac in route 25 for 9k pokedollars! Afterwards, you can try your luck with the Clefairy one: to know if it has Cute Charm, poison it. If it loses HP, it either has Cute Charm or its hidden ability. If it doesn't, it has Magic Guard. However, be ready for the pain, because he's not common and he only appears in night time in MT Moon. Then, bring it to Jenny for a reward. Then, give it to the girl in the library in Vermillion to get two rare candies. Afterwards, go back to Jenny and get a lot of money for it. The other quest is to EV train a pokemon partially. I'll explain: You need to EV train a pokemon so that one of its stats has more than 50 EVS in comparison to another stat. These are the blue numbers in your pokemon's description. You can google what EVs (or Effort Values) mean and how they work. I'll do a guide on it soon! -> https://bulbapedia.bulbagarden.net/wiki/Effort_values The pokemon you train must have 50 or more EVS over another stat's EVS. For example, its attack EVs have to be 51 if its HP EVs are 0. As long as this condition applies to two stats, you can show the pokemon to Jenny and she'll reward you. In total, you will get 29k pokedollars. Celadon City: There are two bounties here for two missions. However, the Fight Michael one should be avoided for now: it requires you to get the bike (thus, you'd need to spend 60k money for it). However, if you managed to get the bike, go and fight Michael in route 17 and beat him. Talk to Jenny and you'll get some nice 10k! Afterwards, do the HP up one, this gives a LOT of money: 14k! Here's the catch though: you need to either buy an HP up for around 8k in the department store and give it to Jenny, so you'll receive 6k in benefits. However, you can also obtain it via digging or in pokeballs in certain routes! If you manage to find one, bring it to her, or simply but it for the 6k. Your choice.! You'll gain 16k, 24k if you dug up the HP UP or obtained it somewhere else. Cinnabar Island: There are three quests you can do here. The easiest and most rewarding one is to fightArticuno and get its seen data. To get it, you only need to fight it, the result of the fight does not matter. He's in the depths of Seafoam Islands, in B4F. You can look up the map in the PRO Wiki (https://prowiki.info/index.php?title=Seafoam_Islands) and try to get to him. He's around level 60-70. You can choose to destroy him with rock, steel, electric or fire moves or just relog while fighting him and be teleported back to Cinnabar with its seen data. You'll get 12k for this. Revive a Fossil in the Cinnabar Island (any fossil you dug up or the one obtained in Mt Moon). Show it to Jenny and you'll get 6k and a Hard stone. You'll have earned 18k in total. Ignore the Corsola quest completely: it only rewards 10 Lure Balls. Pokestops Our next resource is: Pokestops! Have you seen these clowns around Kanto, which walk around certain areas? If you talk to them after having beaten 4 Kanto Badges, you will be able to obtain items from them! These items may vary from simple Potions or Repels to PP Ups and Rare Candies. We are looking for these 2, which are the rarest items to get from them (it's around a 10% chance to get them each time you talk to a clown). These are INCREDIBLE items for the lategame, and so, you can sell PP Ups for around 3k and Rare Candies for 7k in Trade Chat. If you get lucky and get a few Rare Candies in Kanto, you'll be able to get a lot of money pretty quickly if you sell them. The full list of locations are: Viridian City: Under the gym. Viridian Forest: In front of the Viridian Maze Tree, go to the east. Pewter City: East from the museum, top right of Pewter. Route 3 Pokecenter: In front of the Mt Moon entrance, outside of the Pokecenter, to its left, in front of the tunnel entrance. Route 4: In front of the Cerulean Cave Entrance (requires surf). Route 25: In front of Bill's House. Route 5: In front of the Daycare. Vermillion City (Harbor): Just walking around there. Diglett Cave: Entrance from Vermillion, just go inside. Route 10: There's one next to the Pokecenter and another one in the Power Plant Entrance. As an extra: some of the pokestops VERY rarely give useful TMs you can use while in Kanto Story. The powerplant one can give you TM Thunderbolt and the one in Viridian gives you TM Earthquake. You can also buy them in Gym 3 and Gym 8 in Kanto, respectively. Pokestops have a cooldown of only 36 hours. After a day and a half of having talked to them all, go and talk to them again, and pray to the RNGesus gods to bless some Rare Candies upon you. You'll normally always get atleast 15k+ worth of items every time you do it. Dig Spots Here comes the real money maker of our guide: Dig spots will basically either skyrocket your savings or troll you extremely hard and give you a lot of basic stuff such as pokeballs and evolution stones that might help a bit, but not as much as getting rich, which is our aim right now. Dig spots require you to either own a Shovel or a Pokemon in your team who knows the move Dig (can be taught with the TM number 28 which can be bought in Celadon Department store and other places, can also be learned upon level up by Diglett and Sandshrew). The pokemon must also have more than 150 happiness. Dig spots are spread across the world and you can look for them and their locations in the wiki (http://prowiki.info/index.php?title=Diggable_Patches). Digging these spots will either spawn a wild pokemon (some of which are really rare and useful for Kanto Story!) or a lot of rare and useful items you will make use of by selling or using them a lot. We will go over the route you should follow, what places you should really visit and which dig spots you can skip if you don't want to waste too much time while running on four accounts. Along this route we will also grab some hidden items and overworld items we can sell later on. The locations for dig spots in kanto are: Route 3, Mt Moon, Rock Tunnel, Route 14, Route 15, Diglett Cave, and if you have access to Sevii Islands (which requires having beaten Kanto E4 and having a Membership active (donate to the game, it helps improve it!) there are also in Water Path and Tanoby Ruins. Hidden and Overworld items. All along PRO there are hidden items spread everywhere which are very hard to find: some block your road and you'll accidentally bump into them, and you'll interact with them and grab them by accident thinking: "owo watz diz? *touches interact button and grabs item* basically. Other useful items are overworld ones which you'll see in the form of pokeballs in the overworld. There's way too many items in the game to name them all, but since I wanted to make this guide and allow anyone to become rich as soon as Kanto goes, I listed ALL of the monetary items findable in pro in a guide. In this guide, we'll make routes so that you can pick up as many of these as you can along your adventure, routing along certain specific spots and grabbing and picking up certain items. It will be a long process, but the amount of money you'll earn is insane. I will also detail what tools you will need to get to all required places. For now, look up all the places available in Kanto, since it's what matters for now, and it's (right now) directed towards newbies. Services and Trading This is basically the least profitable method in the early game. You don't have a macho brace (diggable if you have absurd luck, obtainable in an easy trade in Goldenrod) to give EV services (however, you can always buy it from someone else!), it would cost money and EV Safari wald costs 10k per visit, no access to mega high level areas to level up such as Cerulean Cave (however, you do have access to Smoke Balls in wild Weezings and Koffings in Cinnabar Mansion and False swipers in Cubone, since it learns it at level 27 in Rock Tunnel), no access to reliable Sync hunting methods (you'd have to hunt Abras forever... you'd be required to have a Diglett with Arena trap, which is not hard to get, but they're tier 6 and they take forever to hunt in the early game), basically nothing that is profitable right now. What you have to do is to trade. Sell the Rare Candies you obtained along the way during pokestops, dig spots and hidden items for around 7k each in trade chat. Never go for a lower place. Try to buy Kanto synchs (natus obtained in route 28 by more advanced players) that can be useful for your story and that you can invest in hunting pvpable pokemon that are immediately sellable untrained such as Gastly, which requires no black medallion, is tier 1 in Vermillion Graveyard (as early as pre 3rd badge) and is extremely easy to hunt and sell. However, I heavily do not suggest you to do this now. I suggest that you invest from 5 to 10k per natu synch nature to hunt useful pokemon with good natures for your story. The Kanto later gyms are pretty hard, and the E4 is a mindless grind without using decent pokemon. Bosses For now, your option to do Bosses is near impossible and almost non-existant. You can't obtain a macho brace unless you trade, can't obtain most boss pokemon unless you trade, you would only be able to make a team with insane synchronise luck and only kanto obtainable pokemon (Slowbro, Gyarados, Steelix, etc). You would be extremely restricted when it comes to options, have next to no resources unless you save up with 4 accounts doing all what this guide recommends you and someone helps you out A LOT. Aside from that, you'd have to buy exp services since you don't have access to Cerulean Cave, you don't meet almost any requirements for any boss... yeah, you get the point. Bosses should be skipped ATLEAST until you beat Johto E4. However, if someone lends you an entire Kanto Only Boss Team, then try out your luck! They require a lot of strategy, but if you believe you can do it with these teams, then try it out! Here you can have more info about it. https://prowiki.info/index.php?title=Bosses Trainer/Wild battles If you have a Membership active, one of your options is to fight wild battles as it will double the money gain you earn (and this is basically the last resort once you've done everything else). My recommendation is that you fight every single trainer you find after earning the 4th badge, and that you grind money in Kanto (if you've not beaten the E4 yet) fighting wild pokemon and leveling up at the same time (it will pay off, trust me) in Seafoam Islands B4F, Cinnabar Mansion and Victory Road B3F. It is incredibly worth it to train your pokemon nonstop. Avoid trainer battles before the 4th badge that you believe you don't really need. Trainer battles reset after 7 days, so refight them if you're desperate for money! Reroll Ticket Quest If you donate five Fossils to the Pewter City Museum (Dome Fossil, Helix Fossil, Old Amber, Claw Fossil and Root Fossil), you'll be able to claim a Reroll Ticket. This can be once per account, up to four accounts (as you're allowed to).. This IV Reroll Ticket can be sold in Trade Chat for over 650 or 700k per ticket and will give you alarming amounts of money while in Kanto. However, there is an issue: To donate these fossils, you need the Caught data in your Pokedex of Kabuto, Omanyte, Aerodactyl, Anorith and Lileep. To revive Anorith and Lileep, you need to first find the fossils in dig spots, revive Dome and Helix fossil, level Omanyte and Kabuto to obtain Omastar and Kabutops evolved data, and THEN go to Ruins of Alph and revive Claw and Root fossil after having dug them up to obtain their seen data. If you want to skip all of this trouble (aside from just reviving Aerodactyl, Omanyte, Kabutops in Cinnabar and the other two fossils in Johto), simply do Dig Spots a few times until you have dug these 5 fossils. Then, ask a friend to trade you the 5 revived pokemon so you can get the Dex Caught data from them and you do not waste your fossils reviving them. Donate them in the museum, obtain the Reroll Ticket and sell it in Trade Chat for 650k or even more. Enjoy your free money! It can be done once per account. Route to Farm: Explanation We will now make a route that is easy to go around, requires just a bit of time and is plausible to do for any newbie. We will choose the two options and explain both of them: with and without hidden items. The difference between grabbing hidden items or not is the time difference, HM slave requirements and the fact that the hidden items do not have the same cooldowns as overworld items, and some items have different cooldowns (for some strange reason). Thus, I'll try to highlight which items do respawn and how often you should do every route. You should do the Pokestop route every 36 hours, the Dig Spots every 72 hours and the Item route every 14 days (yes, I can't multiply 14 x 24 because I failed maths in highschool, don't bully me okay?) Remember: You need to have beaten the 4th badge (and preferably, the 5th and have access to HM Surf) to do all of this. This is very early in the game, and the route is planned to help you as much as it can to fight Sabrina and the next leaders and E4. Missions can be done as early as having no badges, but you need to have beaten the 4th badge to be able to reach ALL Kanto dig spots and that Pokestops will give you items. If you talk to them before you earn the 4th badge, they won't give you anything and disappear for 36 hours! If you want to do Pokestops and Dig Spots, I've designed a route that works for both things at the same time so you do not need to learn different routes. If you also want to take overworld items and hidden items into account, you'll have to do small detours at the beginning of Kanto, and at the end, there will be a bit of exploring Seafoam Islands. I will try to explain the combined route and add the hidden items you can find as extras. Remember I put the link with all the locations above, it's super detailed, check it out! We will start in Viridian City. Here, go to the bottom left part, cross the bridge and grab the pokeball to get a Rare Candy. It respawns every 7 days. Go in front of the gym and talk to the pokestop. Go north until you reach Viridian Forest, reach the Viridian Maze Tree, then grab the hidden rare candy on the left behind the tree (use the link above for hidden items). Talk to the pokestop on the right of that tree. Head to Pewter City and talk to the Pokestop on the top east corner of the city, east from the Museum. Head to route 3 and immediately go down. Check out all stones (there's a Stardust hidden in one of them), grab all dig spots, continue through route 3 and grab the next dig spots. Reach the Mt Moon pokecenter, talk to the pokestop and enter the Pokecenter to have a reset relog point. (This is just to come back after you grab all dig spots in Mt Moon). In Mt Moon, immediately go to the left and south to grab 4 dig spots next to the fat mountain guy. Go to the top right of the same floor and grab these 4 dig spots, go back to almost the entrance and go down the ladder. Grab the pokeballs along the way, since one of these has a Star Piece (the one when you just went down the ladder). Go deep in that ladder path and you'll find a few dig spots. Leave the ladder, go to the top right as you did before to grab those 4 dig spots, but now go to the left, go down that ladder, grab the next dig spots and relog in any wild fight. Afterwards, use the dig shortcut to skip Mt Moon, then head to Cerulean Cave entrance, surf and talk to the Pokestop after having crossed Route 4 (if you do not have surf yet and are doing this at 4 badges, ignore this one, go to Cerulean and continue). Go up to route 24, head to route 25 and talk to the next Pokestop there. Go south to Cerulean, then south to route 5 and talk to the next pokestop. Go to the right of Cerulean and get to Route 9. Reach Route 10, enter the pokecenter, talk to the pokestop, then go north to route 9, surf to the Power Plant, talk to the pokestop and enter a wild battle and relog to teleport to the pokecenter. Enter Rock Tunnel, grab the 6 dig spots, leave in the same exit you entered, use the dig hole skip to reach Lavender's side, enter Rock Tunnel again, head to the left ladder and grab the dig spots by going down and up the multiple stairs (spoilers: there's a lot) Now leave south for Lavender and enter the pokecenter, leave it and head south to route 12. Go south and grab the Rare Candy mentioned in the guide above, then head south nonstop until you reach routes 13 and 14. In route 14, grab the dig spots in the southeastern corner, head west to grab the dig spots in route 15. Now you can choose to take a detour: If you have surf, go to Fuchsia, head south to route 19, then go to the west and enter Seafoam Islands. Use the guide above to get around 20k in value in worth of items, then enter a wild battle, and relog. If you do not have it, relog after grabbing route 15's dig spots. Go to Vermillion, grab the Pokestop in the Harbor, enter Diglett Cave to grab the last missing Kanto pokestop and go through it to grab the remaining 8 dig spots. Congratulations, you just earned an absurd amount of money! If you have surf, beat Kanto e4 and have a membership active: grab the dig spots in Tanoby Ruins and Water Path (Sevii Islands, deep into the quest, it's pretty fast and they're worth it!. The route 27 rare candy, the love island one (if you have access to it, you need 120 Kanto native pokes caught data in dex and 38 evolved. Talk to Oak in Pallet Town to know how much progress you've made!) There's a LOT of hidden items worth a lot in the Sevii Islands. Visit them! Remember: You can do Pokestops every 36 hours, Dig Spots every 72 hours and Items every 2 weeks. Enjoy the money! I hope this helps newbies a lot Johto Here we have the second region of the game which encompasses the second generation, the Johto Region! Similar to Kanto, it has a lot of resources to search from! Pokestops Following Kanto's same procedure, there are nine Pokestops spread across Johto's map. They give the same approximate rewards and they're still profitable too as you can get PP UP or Rare Candies with some luck. However, there's a catch. You can only access Pokestops after you obtain the 8th badge! Thus, I do not recommend you do any route for Johto until you reach the 8th badge (as you can't dig early in the game, either). The pokestops are in: Violet City Union Cave Slowpoke Well Ilex Forest National Park Burned Tower Olivine Lighthouse Lake of Rage Dark Cave (Blackthorn Side) Dig Spots As there were Dig Spots in Kanto, there are also Dig Spots in Johto! Sadly, there's only 3 different locations instead of the massive amounts of locations where dig spots would be located in Kanto. However, there's a LOT of Dig Spots in all Johto locations, specially in Slowpoke Well, where RNG Gods normally bless you with absurd amounts of good monetary items. As mentioned before with the info in the Kanto Dig Spots, you can find them in Dark Cave starting from Violet's side, with some help using Surf and Rock Smash (and Flash, since I am incredibly blind, I cannot get through caves without it), Slowpoke Well (where there are dig spots literally EVERYWHERE, in both the entrance floor and the one below using surf) and Mt Mortar, in which depths resides the Item Recycler, which we might use later. The ones in Mt Mortar are in the 3 entrances available from the route east from Ecruteak. Thus, just go inside one room in all of them, dig the 4 spots in each room, leave and enter from the next entrance (one at the west, one at the east and one at the center while surfing). Hidden and Overworld Items As present in Kanto too, there are some Overworld and Hidden items really useful and thankfully, these are pretty easy to obtain! (Unlike Hoenn, which will be an incredible pain lol.) There's not many obtainable items in Johto, but there's a lot of Nuggets and they are all easy to obtain. Aside from that, only two require some extra stuff (such as the Forest Pit one), unlike Kanto's, a lot of these before required to have beaten Kanto's E4 or have done sidequests or fulfilled a lot of requirements. We will be picking up some nice juicy Rare Candies too while on the way to our routing! Bug Catching Contest The Bug Catching Contest is... unreliable at its best. However, it's still a somewhat good way to make money. I'll go straight to the point: If you get first place, you gain a lot of money. However, that's not even 2 nuggets worth of prizes and it's only every 24 hours. We are not focusing on the Contest itself for that. (Check out more info:) https://prowiki.info/index.php?title=Bug_Catching_Area What we are focusing on is the incredibly rare wild pokemon that exclusively appear here. You have 20 minutes to hunt very rare pokémon and try to sell them later once the contest is done. There's a long list of sellable pokemon here. I don't recommend doing any of this, to be fair, as selling will be complicated unless you get a really good pokemon (Larvesta, for example). Nonetheless, I'll leave you all of this info linked, so that you can give it a try! Services and Trading After having reached Johto, a lot of possibilities open up! You gain access to the Macho Brace in Goldenrod, thus allowing you to give EV Services. You also unlock Dragon's Den and, with a lot of hard work, you can unlock Cerulean Cave. You also gain access to Mt Silver after the E4, and thus, you can start giving EXP and EV Services. You also now are able to trade more stuff from the two regions that you find around and you can try your luck in the Bug Catching Contest and capture really rare pokemon and sell them. Johto Spawns also give you the chance to find a lot more rare pokemon and if you're lucky, sell them for some nice money! You can also sell Synchs you find in Ruins of Alph and Route 28! Get them, they're easy money! Bosses In Johto, you can't really do many bosses as you've just gotten into the second region and you might not yet have a boss team. However, you can actually build one easily: get a macho brace in goldenrod, a smoke ball from wild koffings and weezings, natu synchs from ruins of alph (or route 28) and get a few boss pokemon! To give you an example, you can get two Memento Weezings, a Sturdy Hazard Forretress, a Screen setter Bronzong, a Paralyser Chansey and a sweeper Volcarona. They're all perfectly obtainable in the first two regions and are a near perfect team to fight all bosses in PRO. Good luck! Trainer and Wild Battles So we have some good news here: You can now farm money while fighting pokemon in Dragon's Den! You can get up to 550 pokedollars per fight with ms active, which is quite a lot (20 pokemon = 10k! That's not bad!) and if you unlock Cerulean Cave, the number goes up to 620! Aside from this, you can also do the same process as you did after Kanto: just defeat all trainers after the 4th badge. I heavily suggest grinding in Dragon's Den while surfing to get some easy money. Route to Farming We'll do the same as we did in Kanto: We first need to explain that to obtain the Pokestop prizes from them, you actually need the 8th badge in Johto, in contrast with the 4th badge of Kanto (I have no idea why). Thus, it is more recommendable that you simply skip dig spots until you've beaten 8th badge so you can farm dig spots, pokestops, hidden items, trainers and dragon's den in that order. I will also design a route that takes pokestops and dig spots into account while grabbing hidden items. I will also add the optional hidden ones you can grab or the ones that are harder to obtain but might be worth it (the deep sea tooth one for example). I suggest you bring a lot of hm slaves because you'll really need them. We will begin in Violet City, by grabbing the hidden rare candy behind the gym sign, and talking to the pokestop next to Bellsprout Tower. Afterwards, we will head east to Route 31, dig to the other side and talk to the pokestop. Dig to route 31 again and enter the cave, go into its depths using rock smash and dig the 5 spots inside. Relog in a battle to appear in Violet. We will head south until we reach the Union Cave, talk to the Pokestop and use the dig shortcut. We will talk to the Pokestop in Slowpoke Well and instead of heading inside, we will go to Ilex Forest and talk to the next pokestop. Now go inside of Slowpoke Well and pray to the RNG Gods while you dig all of the first floor and second floor, which will (if you have a bit of luck) make you rich like Jeff Bezos. Relog in a wild battle after you've dug up everything. We will now head west from Violet to the National Park, grab the pokestop there and go south to route 35. Surf and grab the hidden Nugget under the Berry Tree and relog in a wild battle. Head to Ecruteak and enter the Pokecenter, we will use it to teleport two or three times. Talk to the Pokestop in the Burned Tower and grab the Nugget in the second floor inside, relog in a wild battle. We will ignore the Bell Tower Rare Candy since it's a bit hard to obtain. Take it if you want, but it takes ages to grab it. Now, we will assume you have not reached Hoenn yet, and thus, we will not take the route to Olivine yet. We will now go to the east route from Ecruteak, enter Mt Mortar from the left entrance, grab the dig spots, use the dig shortcut outside, enter from there and grab the dig spots, leave, surf to the left and enter Mt Mortar again. dig the spots, go down the ladder and grab the Rare Candy in the north. If you've beaten Johto E4, go deep into Mt Mortar and grab the other hidden item in Forest Pit (check the guide I linked before). Relog in a wild battle, and if you're willing to, travel to Lake of Fury, grab the pokestop there and relog. It's positioned in a really awkward place to reach, so there's basically no other choice than just going there and relogging in a fight. We will then go to Olivine City, but before reaching it, grab the Nugget in the Lampost in the northern exit (check the guide), grab the Pearl in Olivine City near the gym in the small fence, grab the Rare Candy in front of the Lighthouse and talk to the Pokestop. Everything in Johto is done now, but if you want an extra: Surf south from Route 41, grab the hidden items along the way, Pearls and Deep Sea items, and reach Hoenn (if you completed the requirements!) Hoenn Here we access PRO's third region, based on the third generation (wow, who wondered). Spoiler alert: Hoenn SUCKS at making money. The main issue with the region is the absence of dig spots, pokestops and other resources we had in previous regions. Furthermore, the distance between hidden items is absurd, to absurd extents. Yea, it sucks. Hidden and Overworld Money Items We'll start with a few good news: Hoenn is FILLED WITH AN ABSURD AMOUNT OF VALUABLES. By absurd, and by writing it in caps, I mean there's a LOT of GOOD money to gain in Hoenn. There's items practically everywhere in the map. You'll become a multimillonaire quicker than I can pronounce potato. See? You already own a company. You're rich! They're mainly placed in water zones so you'll need surf, and you'll also be able to obtain the Deep Sea items after the Hoenn E4 to get to Sinnoh. Services and Trading In Hoenn, you'll be able to find highly valuable pokemon such as Timburr, Ferroseed, and other really, REALLY good PVP/Bossable pokemon that can easily be sold for absurdly high amounts of money (also one of my favs like Deino). I really recommend you take the time and visit Valley of Steel, a zone where you can catch really rare stuff, and that you travel around Hoenn and find incredibly rare pokemon. Do it, boy, DO IT! You also gain access to Hoenn pokemon, so I guess that's good lol. You'll be able to sell and buy more stuff. Also, hunt Gibles on the Moon! Excavations While I do not generally recommend excavations to make money, it's still worth it in the VERY long run, or in the very lategame of PRO. You need 100k pokedollars to unlock them. You also need to pay 2.5k pokedollars to enter an excavation (guess why I didn't recommend them to make money in the first place lol). You can farm certain rare pokemons there by bringing your sync pokemon with you and capturing rare pokemon with correct natures to resell them. You can also farm artifact pieces to purchase rare items and fossils to resell whatever stuff you obtain. If you also happen to find rare bones, you'll be able to sell them to an item maniac. I don't recommend it, but well, it's really fun to try it daily. Mushrooms If you go to Petalburg Forest, you'll find a lot of shrooms there. If you talk to them, you can harvest shrooms to later sell them in the pokemon maniac. If you bring a Paras/Parasect with you, the next time you gather the shrooms, they'll have multiplied. I really recommend doing this since it grants a lot of extra money. Do this every 2 weeks, with Paras and Parasect in your team. It's free real shrooms! Bosses Hoenn has a nice amount of extra bosses to fight against, and I recommend doing the optional fights vs the overworld pokemon minibosses too. Farm them every 2 weeks fo some nice money, if you get lucky, you might get PVP items to resell! Trainer and Wild Battles My suggestion here is to fight EVERY TRAINER that is placed after the 5th badge in Petalburg. Thus, after surfing from Mauville (or surfing southwest from Petalburg or south from Slateport), fight ALL THE TRAINERS YOU FIND. They give a decent amount and there's a massive amount of trainers in Hoenn. (That's why it's really painful, mainly). Also, be aware that almost all of them will be swimmers, so bring a surfer with you. Route to Farming The route in Hoenn is easier to follow than before. if you start in Lilycove, we'll start a clockwise route by defeating everything in our way, picking up hidden items and reaching Slateport. From there, we'll go south until we get to Dewford, destroying everything and picking up hidden items, We'll go north to Rustboro, grab the pokecenter there, grab everything in Oldale and Route 103 and Route 110 and teleport back. We'll go north to Meteor Falls to pick some hidden stuff (Stardust) and we'll go south afterwards and reach Mauville, from there, it's just going back to Lilycove. I suggest starting in Lilycove. We'll go east to route 124, beat everything and pick whatever items we find. Reach Mossdeep, go to the north and defeat everything, enter route 135 if you have beaten the E4 and pick the Deep Sea Items. Go south again, and from Mossdeep head south. Continue picking up items as you visit all water routes and keep defeating everything for money. Continue south and then reach the water town to the west. Continue your journey until Slateport and grab the pokecenter there. Go north to route 110, pick up the stuff there (including New Mauville), pick up the stuff in route 103 too and the Rare Candy in the town, get an encounter and log out to teleport back. We'll now go South from Slateport, go through the water routes fighting everything and grabbing multiple items until we reach Dewford. Repeat the same process north and reach Rustboro. Grab the pokecenter here because we'll visit Meteor Falls just to grab the stardust and teleport back. Grab the shrooms in the forest and then we'll proceed to go to Mauville through the route 116 tunnel, and then go east. We'll go north until we reach Fortree while fighting everything and then go down fighting all trainers until we reach Lilycove. Sinnoh We will now dwelve into PRO's fourth and (currently) final region. Sinnoh has (Thankfully) some stuff to do and grind, such as Dig Spots, the Battle Tower (although I won't cover it here because it doesn't grant you an important gain), and the aforementioned activities you can do. However, the issue with Sinnoh is its weird structure, as trying to grind trainers who are spread out throughout the region is way harder than in previous regions. In Kanto, you could do them in a circle, same as in Johto. In hoenn, you had to take two routes to defeat them. Here it's just a spread fest of trainers, but we'll eventually get there. There are no pokestops here, sadly. Dig spots Sinnoh brings back the Dig Spots mechanic for good: there are spread dig spots throughout the region and there are a lot of them. The best thing is that they usually carry some good monetary items you'll be able to sell and, if you get lucky, you'll dig up some rare pokemon that are otherwise extremely hard to find (yey). There are Dig Spots spread around: The first ones are in the cave above Jubilife city, then to the east of Eterna City, before and after the dig spot shortcut, and if we head east from Celestic Town, we'll find more. We'll then go to the Southeast to Veilstone and head southwest through the tunnel to find more dig spots and end up in Solaceon. We'll finally head south to Hearthorne while grabbing the dig spots on the way and climb Mt Coronet to find a few dig spots on the summit (Although I don't really recommend grabbing these, they barely ever grant anything useful and they're just hard to find and get to). We'll return to Jubilife and make a small trip to the east, enter Oreburgh Gate and surf in the floor below to grab the last dig spots. Hidden and Overworld Items The Hidden and Overworld items in Sinnoh suffer from the exact same problem as Hoenn did: While there's a lot of interesting and good hidden items we can sell, they're really spread out. Some are super far away (one is near Snowpoint, the Ice Stone to evolve Alolan Vulpix), and some are near other hidden items, in good grinding areas versus high level trainers (Victory Road), but still far from other places. However, I highly suggest grabbing them all, even though they're all spread in weird places (such as the south of Sandgem Town). Services and Trading Fun and weird fact: Sinnoh actually doesn't have all that many interesting pokemon to hunt that are not found in other regions. It mainly has some niche stuff that you can use in PVP and hunt down, but not that much. However, what we can make use of it is the fact that we'll now have unlocked ALL region accessible pokemon in the world and thus, we'll be able to trade anything in the game we're interested in and we'll resell it. Heliolisk is a nice pokemon to hunt, such as Metang! Bosses Such as with previous regions, Sinnoh has MANY really difficult bosses (it's normal, considering by this point in the game you should've become an advanced player and close to an expert in PRO), as you have progressed into the game. It has really high rewards for each of them and I highly suggest you fight them all. You can gain really interesting items and a LOT of money if you get lucky enough. Trainer and Wild Battles Fighting trainers in Sinnoh is... weird. You should fight all trainers after the 4th gym, but they're all over the place. You would have to fight these around Canalave, Pastoria, the route to Snowpoint and the mountain and the ending part of Sinnoh in the southeast of the world, and the Victory Road trainers. It's a bit complicated to get to all zones, and to also fight the trainers in MT Coronet. The route is just uncomfortable because it demands that you go to all places in Sinnoh, practically, instead of just being able to cross certain routes. If you're still in, however, get ready to travel and fight A LOT. Solaceon Daily Quest In Solaceon, you can find the News Reporter Building. There, you can show them the pokemon they will ask you every day. If you do this seven consecutive days, the last day reward can be a Reroll Ticket or other super big prizes. You will also obtain Master Balls and other extremely useful stuff for players that can be traded and sold in Trade Chat. These pokemons will range from the Starters in Sinnoh to the last Sinnoh Pokemon. The list is entirely comprised of SINNOH DEX POKEMON. The other requirement is that YOU MUST CATCH THESE POKEMONS YOURSELF. THEY CANNOT BE FROM ANOTHER PLAYER. Route to Farming The route in Sinnoh can be a bit weird, considering it's mainly a square we can more or less navigate through, but it has weird extensions (Canalave, Snowpoint, the eastern part) where you will basically get a bit lost to be able to farm money if you want to obtain extra stuff. If you're not into losing too much time to gather money, just do Dig Spots and Bosses in Sinnoh. It's not a big deal, you can make up the small money you would earn from trainers via grinding pokemon instead. We will try to start in Canalave, taking the southern Big Pearl and moving east onto route 218, grabbing the Rare Candy. We will enter the pokecenter in Jubilife, travel to the starting town to get the rare candy, then going to Sandgem Town (as we crossed earlier) and going down to the water routes, fighting everything in our way and picking up the hidden items. Relog while in battle and we'll head north from Jubilife, do the Dig Spots in the cave and continue and exit to the north to the next town. We'll continue north to Eterna to enter the pokecenter, go south to the route under the bike lane to pick up another item, relog in a fight and head east from Eterna. We'll pick up the dig spots in both sides of the mountain, enter the pokecenter in Celestic, and optionally, we will take the time to enter Mt Coronet, fight all galaxy members, then pick up the Mt Coronet dig spots, relog in a fight, travel through Mt Coronet and leave through the northern exit. We will fight all trainers in the snowy route until Snowpoint and pick up the Ice Stone in route 217. This part is optional, but really worth it! After this, we'll head east from Celestic, pick up the Nugget, dig spots and then head southeast until we reach Veilstone. If you want, enter the pokecenter here, then head south and decide: If you want to do the optional route, fight all trainers going south, then going east to the last gym badge city while picking up the hidden items on the route. You can also try and go to Pastoria and find the hidden items around the city, but this is pretty time consuming. Once you reach the last gym badge city, go north, fight everything, grab all hidden items in Victory Road and fight the trainers there. Find a wild encounter and teleport back. Now you can continue the normal route, do the dig spots in the tunnel and reach Solaceon, go south and dig the other last dig spots. Reach Hearthorne, enter the pokecenter and optionally, pick up the Mt Coronet dig spots if you didn't pick them up before. Go through the mountain to reach Oreburgh, to enter Oreburgh Gate and pick up the last dig spots in the region and thus, congratulations! You've done everything in this guide Enjoy your money now!
- 29 replies
-
- 13
-
-
Hello everyone! After search a bit about all bosses, compare their teams, trying to find counters etc.. i ended up making this team that can defeat any boss in the game. Might take a bit getting all this pokes but 100% worth to do it. HOW TO USE IT If the first pokemon used by the boss is a physical attacker you should put Gyarados, Intimidate will cute his attack, now you keep switching between Slowbro and Gyarados until you cut all enemy pokemon attack. After that you are going to put Umbreon and spam Flash. Now you can use Snorlax and stack amnesia and curse, if snorlax dies you repeat the process and stack clefable or Slowbro depending on the boss team. If the first pokemon is a Special Attacker use Umbreon and spam Flash, then use Snorlax/Clefable/Slowbro to stack! Chansey will be your cover when needed. Click here -> https://pokepast.es/0f667c474a81e8ef Enjoy and if possible Like/Bump the post!
- 13 replies
-
- 11
-
-
[spoiler=Halloween Candies Locations In Murky Town] Sandy [House 1]- 1x Halloween Candy [Free] Uno [House 1]-1x Halloween Candy, 1x Red Halloween Candy [Have to battle] Baswedan [House 2]- 1x Halloween Candy [Free] Annies [House 2]- 1x Halloween Candy, 1x Orange Halloween Candy [Have to battle] Officer Agus [Outside PC]- 1x Orange Halloween Candy, 1x Halloween Candy [Have to battle] Witch Neroli [PokeCenter]- 1x Halloween Candy [Free] Plumber Carl [PokeCenter] - 1x Halloween Candy, 1x Red Halloween Candy [Have to battle] Mummy Setnov [PokeCenter]- 1x Orange Halloween Candy, 1x Halloween Candy [Have to battle] Ghost Rafael [PokeCenter]- 1x Red Halloween Candy, 1x Halloween Candy [Have to battle] Ghost Ronnie- 1x Halloween Candy [Free] Now since we have collected these sweet candies, let's start the quest. To do so, we'll have to talk to Vice Mayor Butch. He'll tell us that recently, an explorer had discovered that many gems and minerals could be found on the Unison Mountain. As a result, the Mayors of two other towns (Mayor Vlad of Dreadtown and mayor Camelia of Serenia Village) of the Phantasm Land started fighting for that mountain which caused destruction everywhere. The only one who could stop them, Mayor Gorge of Murky Town had also disappeared. So he sees us as a trainer with great potential. Thus, we have to save Phantasm Land! He'll ask us to either stop the mayor of Dreadtown or Serenia Village. You can choose either of them. (Although choosing Dreadtown will save you 5 Halloween Candies and some time too!) [/Quote] [Anchor=GS][/anchor][Anchor=GS] [/Anchor] [spoiler=Hilda's Team] Florges Delphox Sylveon Excadrill Clefable Aromatisse After you've defeated her, follow the ladders inside and get to Camelia's House 3F. Here, Camelia promises us that she'll stop fighting with Dreadtown if we defeat her. It is pretty easy to defeat her. [spoiler=Camelia's Team] [spoiler=Camilea's Team] Gardevoir Krookodile Gastrodon Chandelure Sylveon Altaria Since you chose Serenia Village, skip the next part and jump to Mayor Gorge. [/Quote] [Anchor=Mayor Gorge][/anchor][Anchor=Mayor Gorge] [/Anchor] Dark Valley is to the North of Necropolis. It has got two or three trainers. There are some nice spawns there as well! [spoiler=Credits] Allsmell Omgupta3 Two to three of my images got deleted due to some reason. So I needed some help with the images. Waleed1301 Belzebel The banner was made by Robo-Shark (Deviantart)
-
Its the best im going to do. Let us begin the incomprehensible guide to the halloween event! Things you will need: Your standard boss killing team(aka level 100's) A pokemon with the foresight move and a pokemon with miracle eyes move(these will be important later on). Head to vermillion(or any port city with a ship to a different region) and then towards the gym, just south of the gym you will find a cosplayer wearing toilet paper, talk to him and head to murkytown. Once you are in murky town you want to talk to vice mayor butch and select dreadtown (you will need to go back there for dakrai later on so unlock it early) before leaving for dread town speak to all the npc's in murky and get yourself some candy. Once you have obtained said candy you are ready to move forward. Head north and talk to the spirits at the end of the path in the picture provided. You will then need to find all 3 spirits and the free honedge to progress to the next area. After you find all 3 + the free pokemon you are ready to talk to the spirits and move on, you need to head north until you see the pokecenter. Once you find the pokecenter head to down the path on the far right side and through unison cave. Continue heading east until you find the npc selling focus sashes, its a scam and gives you 5 expert belts. then you need to go towards the south east to talk to an npc who wants 5 candies to enter dreadtown. Once you go into dreadtown you will need to head north to mayor vlad, you will need to beat the mummy in front of the castle then you will need to beat mayor vlad. After you beat vlad you will notice a hole in the wall just right of him, this is for later, ignore it for now because its the entrance to necropolis. Go back to the pokecenter you were at before dreadtown, then head north and beat mayor gorge who has giratina. Once you beat him head on back to murky town to claim your reward of a houndoom mount or vamp clothing, both come with a pumpkin hat. Once done you are ready for darkrai! <<<<Darkrai Part>>>> The two pokemon with the moves listed at the start will now be needed. make your way back to mayor vlad in dreadtown, to the right you will see a statue with a hole behind it, squeeze on through and make your way to necropolis. We shall start the darkrai quest here. Heal your pokemon and grab your foresight pokemon. Go slightly north to alucard castle, talk to girl up the stairs on the left side. She wants you to hunt down 3 ghosts, search every god damn tile for those invisible pokes. Once you have beaten all 3 go up the stairs to the left, and search every tile as you go there are more hidden pokemon(i believe there are 4 for the left side) Once you talk to the old man at the end he will want you to help is brother on the right side(this side has 10) search every tile along the way again. Once you have unlocked both staircases, head back to the pokecenter and grab the miracle eyes pokemon. You will need to search for the hidden alucard(mine was on the left side) he will most likely be next to the visible alucard, so just search every tile again.(most likely right next to the visible boss) Once you lose to him and head on to the edge of darkness. If you don't die more than 5 times before beating nightingale, you will get a clone starter when you grab the starter. Dont worry if you die in here, just make sure you never wake up. This area is a one time only area. Here you will be tasked with beating the real alucard without your own team. search all the sparkly bits to go to the dark realm. Grab your munna at the start and then have fun looking around, find the growlithe on the left side of the map who is surrounded by gastly. Grab the repel located in a ball nearby and use it to only fight 2 level 20 gastly, Once done growlithe will join your team! He will be the main one you need to level. Head to the north and enter the castle.On the right side of the room you will see a door to walk through, search all the cans and find the rats to get alolan rattata. To unlock the first healing station, just talk to the pc to the right of the cell containing the audino. You will have to beat a pokemon that is rather easy with growlithe. Then head through the passage at the top right of the map, to grab the fire stone located behind the electric fence. To unlock the fence talk to both pylons to fight a rotom. Make sure you do NOT do the ritual to obtain a firestone. In the cave where cubone is find the mudkip/talk to the lamps/talk to the murkrow for cubones bone to get cubone. Once you have the fire stone, level up your growlithe to my suggested level of 45 and evolve him. Once he is level 45 and evolved head on up to nightingale located up the stairs of the main room just before the first healing station. After you beat her, grab all 3 of the balls in the room. You WILL need the moon stone for later! Head back into the cave, and the doorway located in the southwest you will have to fight a battle against all 3 kanto starters and their evolution's at level 25. If you had less than 5 times you will obtain a clone starter of your choice. If you died more than 5 times or selected your starter before fighting nightingale they will just be a normal kanto starter. After this fight the amount of deaths does not matter so go wild. There are many pokemon around who will drop valuable items such as carbos, rare candy and other healing items. Once completed head on back to the first room of that building and talk to the clefairy, then talk to the bookshelfs to get a clue on the statues. Talk to the entei statue first, select volcanic eruptions. talk to the dragonite statue and select jealousy then dodge left. Talk to ho-oh to get the final clue, then talk to the cases with flowers to fight roselia to get clefairy(level this up and evolve it with the moon stone from nightingale to fight umbra as it can NOT be switched out). Level the clefairy to 35, evolve it and teach it soft boiled. After the clefable is leveled, you can go fight umbra which is located to the north in the cave for cubone. You will need clefable in the first slot and it can not be switched out. Now you are ready to head to the south of the main starting area, where the final boss waits in the 3rd floor of the castle. You can keep fighting his guards for easier leveling up, just after you fight his spiritomb and shiny spiritomb go heal at the audino and then his guards will be reset. You can also go around the map and fight the solo pokes for rare candies, ev items and healing items/revives. Once you hit roughly 65 on arcanine just keep attempting the final boss fight until you have a favorable fight against torterra and lucario. Once you beat the darkrai you will be teleported back to the real world, go pick up your false swiper, your timid sync, and anything else you need to catch him. Once you are ready head on back to alucard castle and back to alucards room where darkrai waits at level 50. Good luck There is a free reroll outside Alucard castle, you only get to keep one stat. Final edit: Special thanks go to Lilythana, Papfuglen, and Xurion for being my test dummies to allow for me to be able to put together a somewhat useful guide.
-
 Hello! Today im here to show you the team that i use to defeat bosses on the hard dificulty, the reason im making this post is that i hope to find more help for my team to get higher success as, even with a pretty good win ratio, there are still some imperfections in it that i believe some people, who have more experience than me in boss fights, can potentially help me out. Since i started fighting against bosses i realized that with all the buffs they give to them so the AI can someone even out the for the lack of cognition, i knew it couldnt be beaten in a fair fight, odds are if youre bringing your pvp HO team, youll get overwhelmed by the insane amount of bulk and power these pokemon can dish out. Even your tankiest walls from the fatter stalls will struggle taking hits from these freaks, making stall while more possible to beat bosses than any offense could, its still an unreliable way to beat them, not to mention its slow as well. While im sure most players have already realized this, the question now comes, how can we circunvent this? Well one thing the AI will never do that is definitely exploitable is the fact it never switches, no matter how bad the situation is for the pokemon in front of them, they just keep using moves with it, and thats why i believe memento with stat passing is the most efficient way to beat bosses. Knowing what i wanted to use, all i missed now was the pokemon themselves. Just a heads up, im a bit of a slacker when it comes to geting good pokemon, so mostly what you see here is by no means the optimal choice of either ability/nature or ev spreads, however ill be posting down whats i believe to be the best options for each member, in regards to my experience using this team. Starting with the memento users, its pretty obvious why they are so essencial to any boss team, as a big part of setting up against them is all possible due to the fact we incapacitate them, and no better move does that than memento, yes your pokemon dies but the trade off is way worth it. Duggy is used, as he is one of the few pokemon that provides rocks while learning memento as well, not to mention its really good speed stat allows it to outspeed most boss leads on hard dificulty, which means there is no need to use a focus sash, i cant exactly pinpoint the stat but what i can say is that its fast enough to outspeed neroli's celebi (100 speed) while being slower than pewdie's starmie (115 speed). You only want to use focus sash if you either get outsped or you want rocks, which should only come necessary to pokemon who get avoided of getting ohko'd like with link's sturdy donphan/skarmory and chuck's or koichi's (dont recall which one is it lol) sashed hitmons and other instances like sash zard with oak, tho it has defog on his lead rotom-w so it might not be worth there. Attacking isnt even gonna be a thing with this guy so you might as well slap as many hms you can so you can access some of the bosses. All you basically want is speed, and speed nature, which it shouldnt be hard to get by since diglett are one of the easiest mons to grind. Luckily for me i got the best possible amount where i was only going for 25+. Whimsicott is hands down the best memento user for this, as with prankster it pretty much guarantees it, you only need to give it memento and lvl him up to 100 so it can be used in bosses, no ev train or nature is required. Cottonee is used to for the third memento and drop the pokemon stats one final time, to its lowest, no reason to use cottonee over whimsicott, its just cooler over having 2 whimsicotts, plus who knows if they might implement a species clause for this boss fights. Baton pass chain With the bosses offensive stats reduce to its maximum, it comes to these three last slots to overtake and open the doors for one of the pokemon to sweep with all of the stats buffed. With that said there is one move i wanted to abuse in particular, stored power. With its recent addition (move didnt work properly before) this gives an insane buff to stat passing raising its viability against bosses even higher. The idea was to raise as many stats as possible with two of the members and give all the buffs to the pokemon dedicated to sweep, the one who carries stored power. With some thinking and looking at the resources at hand i came up with the core that i believe does this job pretty effectively, all limitations considered. Venomoth is without a doubt one of the best stat passers in the game, as not only it covers 3 stats buffs with just one move, it also gets reliable recovery making it much more consistent to setup against various pokemon and to cap it all off, its ability shield dust protects it from any secondary effect, so no freezes, no paras, no confusions, no flinches etc. unfortunately mine is tinted lens which is definitely not the ability that you want but i didnt want to grind for a shield dust venomoth so i just go with this one. That isn't say they are hard to get, because they certainly arent, having plenty of routes where its tier 1. QD, roost and bp are obivious for its moves, bug buzz isnt bad if you dont wanna put all the pressure to one pokemon to do the sweeping, tho sleep powder or stun spore might be smarter just so it guarantees a potential turn where the mon doesnt get an oportunity to hax you once you bp out. Evs are a bit up to you, max speed is certainly not the most optimal choice but it does mean you outspeed most pokemon just after one qd up, which might've not been the case if you didnt invest in speed and its always nice to be faster than your opponent and take control ASAP. Tho defense investment is wise, as it is the one stat venomoth doesnt coverwithh boosts, i dont really have an exact value or optimal spread for this so just try to go for what you think its better. Leftovers/black sludge is the best item, tho a super effective berry might be worth considering or a sitrus, tho lefties is just consistent hp so its the best item overall. Since there is only one usefull stat that venomoth cant buff, this leaves the job for vaporeon who is curiously, the only pokemon that learns the combination of acid armor and baton pass outside the accelgor line, which doesnt leave us with a lot of options and vaporeon is clearly the better one as its much bulkier and has a much better defensing typing on top of that. I usually like to bring this pokemon to start the stat buffs as it gives more bulk to venomoth if necessary. Moveset seems pretty self explanatory and evs just make it that much better at setting the stat it needs, lefties is used for the same reasons as venomoth however since that vaporeon isnt protected by shield dust another to take in consideration is lum berry, as it would suck really bad to potentially lose to a para/freeze/confusion. Clef seems to me like the best choice to abuse stored power as it covers whatever doesnt get affected by it pretty well with moonblast and further coverage with fire that hits steels who resist both typings, but as you might realize, with stored power being as strong as it is, its almost unnecessary to use it beside some very specific scenarios like metagross, bronzong, jirachi or shedinja. If you successfully setup all stats to max you've got in your hands a stored power with a grand total 500 base power, which means there is also no chance to get walled by things like unaware as for example neroli's unaware clef gets easily 2hko'd and toothless' quag simply gets ohko'd. Life orb further boosts the power of your attacks should give it a last push to pretty much one shot everything that comes in on you, links heatran for example gets one shotted by stored power. I would say nature wouldnt matter in this case but it actually does, dont be like me and use -speed on your clefs because it actually means your slower than pewdie's scarf jirachi even at +6 which is super annoying as you can probably guess. Exceptional scenarios: There are some bosses who like to make my life a bit more dificult with their leads, examples of these are misty and its mirror shot milotic, lorelei with its blizzard ninetales-a, letrix with togekiss, sage's glaceon with blizzard as well and terminator's phazing moltres. To which i have the following answers: Magnezone beats everything but terminator's moltres. Heatran is used to beat moltres. Obviously there are easier ways to deal with these things other than having the need to use pvp ready pokemon, its up to you on how you and what you have to deal with it. Threats: While the team has mostly a favourable position compared to other bosses, there are still ways that they can slip through the cracks, things like setupfrom the opponent, phazing or venomoth being at the mercy of a crit or simply getting overwhelmed like in some cases with saphirr's primal groudon. There might be some other flaws some of you may have caught on and if so i would appreciate a lot if you mentioned what those were. Conclusion: Thank you for taking the time to read this whole mess, i understand this isnt the most organized post (sorry about that lol) but i hope you enjoyed and could help me out pointing either things i could do to make my team better or things that threaten it in general and if you have learnt something from this threat, im glad i couldve been helpful in any way and wish you the best of luck for the bosses.
-
- 3
-
-
We have listed ALL of the locations of monetary items in PRO. We've calculated the money gain and taken screenshots and written down the location of all these items: Pearl, Big Pearl, Nugget, Stardust, Star Piece, Big Nugget, Big Mushroom, Small Mushroom. As an extra, I am also listing Rare Candy, since they seem to be of everyone's interest and they're insta sellable on the PROMarket. I've gone through the entire PRO Wiki and made an entire list of the places where the monetary items are. However, there's still a lot of items missing, missing info, and screenshots, and the previous guides for monetary items and hidden items are outdated and the pictures do not even work anymore. I've listed the places I've already been to and taken a screenshot of, but there's still a LOT to find out. I'd ask you all if you want to collaborate to come and help out to find the missing spots and the remaining screenshots for all the info we've gathered. I'm going to copy paste the list here and link the zip file with all my work for now. We are also missing the time frame in which these items respawn, as we are not 100% sure the Wiki info is correct since it's mostly outdated (some of these spots even changed). The guide is 99% done and can thus be considered complete, but it will be edited if any new findings appear or if anyone takes better screenshots of some areas. For now, pictures will be uploaded as attachments in the bottom of this post, and will be fixed and uploaded properly in the post itself. There are way too many pictures to be posted, so it would completely break the post order. We're constantly going to use the Hidden and Monetary Item Location Guide throughout this process: https://pokemonrevolution.net/forum/topic/132722-url ! Approximate Money Gain if you pick em all up. Big Nugget : 20k (x2 in total) = 40k Nugget: 5k (x10 in total) = 50k Pearl: 3k (x15 in total)= 45k Big Pearl: 9k (x6 in total) = 54k Stardust: 1.5k (x5 in total) = 7.5k Star Piece: 6k (x4 in total) = 24k Tiny Shroom: 1.5k (x1 in total) = 1.5k Total FIXED possible gain from grabbing everything: 369k Kanto Items Viridian City Rare Candy: Bottom side after the bridge. - 7 days. Viridian Forest Rare Candy; Behind the tree next to the maze. - 14 days. Mt Moon B1F Star Piece: South from the team rocket guy down the first ladder. - 14 days. Route 3 Stardust: In the first dig spots at the beggining of the route, it's in the northwestern rock. - doesn't respawn. Route 12 Rare Candy: South from the Camper Justin pokeball, 2 tiles down from it. - 14 days. Route 16 Rare Candy (Bicycle needed): Pokeball. - 14 days. Route 17 Rare Candy: East of Cue Ball Corey, between the rightmost pillars. - doesn't respawn. Seafoam B1F Pearl: Southeast from westmost B2F Ladder, tall stalagmite. Credits to Waleed1301 for the picture! - doesn't respawn. Seafoam B3F Pearl: East of the westmost tall stalagmite from the B2F ladder. - doesn't respawn. Seafoam B4F Nugget: Centermost stalagmite of the island reachable from the second eastmost B3F ladder. - doesn't respawn. Note: the location is different for each player. Route 27 Rare Candy: Left of the tree with an axe on it, near Johto Falls. - doesn't respawn. Kanto Extra Items Cerulean Cave 1F Nugget: Pokeball. - respawns, 14 days Cerulean Cave B1F Nugget: Rock smash some rocks and you will find it. Credit to Ashes55! Doesn't respawn. Ceru Cave 1F Rare Candy: Just when you enter, between the water and the rocks above the staircase in the entrance. - 7 days Love Island Diamond Domain Cave Rare Candy: Pokeball. - Doesn't respawn (for some reason) Island One Treasure Beach Starpiece: Next to the old man, under umbrella. - Doesn't respawn. Island One Kindle Road: In the thin line to the left of the saunas, hidden Nugget at the bottom of the sand - Doesn't respawn. Island Five Stardust: Rock to the left of the bridge, on the beach. - Doesn't respawn. Island Five Meadow Pearl: In the beach, the leftmost shell. Doesn't respawn. Island Five Chrono Chross Nugget: Behind a tree. - Doesn't respawn. Water Path Pearl: In the middle of the route, in the sand castle, - Doesn't respawn. Island Six Big Nugget: It's in the cave you have to go through while doing the Meowth Quest. Pokeball. - Doesn't respawn. Vulcan Island Shore Rare Candy: Enter the Vulcan Path, go to the bottom left, climb up the stairs, exit to the south. Next to the boss. - Can't check if it respawns. Vulcan Forest Rare Candies: Next to the northern exit. - Same as above. Johto Items Violet City Rare Candy: Behind the gym sign. - doesn't respawn Route 35 Nugget: Surfing to the left, below the berry tree patch. - doesn't respawn Burned Tower Floor 2 Nugget: In the top left center rocks. - doesn't respawn Bell Towe Rare Candy: In the last floor before Ho-Oh, behind the pillar. - doesn't respawn. Mt Mortar B1F Rare Candy: North East Corner Pokeball. - doesn't respawn. Forest Pit Rare Candy: small rock west and north from Halley. - doesn't respawn. Route 39 Nugget: To the lampost next of Sentret. - doesn't respawn. Olivine City Rare Candy: In a rock in front of the Lighthouse. - doesn't respawn Olivine City Pearl: In the rightmost tile in the horizontal fence to the southeast of the gym. - doesn't respawn Johto Extra Items Route 49 Rare Candy: In the Southmost Island. - doesn't respawn. Mt Silver 2F Rare Candy: In the central rock in the northern exit. - doesn't respawn. Ruins of Alph Rare Candy: In the interior south west corner. - doesn't respawn. Ruins of Alph Rare Candy: In the northwest one. - doesn't respawn. Hoenn Items Oldale Town Rare Candy: Under the pokecenter. respawns every 7 days Meteor Falls B1FR Stardust: Below tess. doesn't respawn New Mauville Rare Candy: South of the stairs. respawns every 7 days Fortree City Tiny Mushroom: Below the bridge on the bottom right.- Doesn't respawn Shoal Cave High Tide Entrance Room Star Piece: To the left of the entrance, on a rock. Doesn't respawn Sootopolis City Rare Candy: Next to the Poke Mart. Requires Rock Smash. - Doesn't respawn Granite Cave B2F Rare Candy: Pokeball in the middle of the way - Respawns every 7 days. Route 105 Pearl and Big Pearl: Check the shells in the islands. - Doesn't respawn. Route 106 Stardust: Near the Granite Cave eastern wall. - Respawns every 7 days. Route 108 Pearls: Next to the first isolated rock in the center of the route from the west. Respawns every 7 days. Route 108 Rare Candy. Behind the palm tree in the north-westmost island. Respawns every 7 days. Route 109 Big Pearl: In the middle of water west of Peeko Sailor's boat Respawns every 7 days. Extra: Route 109 PP UP from the Route 108 exit. Respawns every 7 days. Route 110 Rare Candy: At the north end of the cycling road, just before going up the platform. Respawns every 7 days Route 116 Pearl: North of the tree maze part. Requires Cut. Doesn't respawn. Route 121 Nugget: Beyond the northmost fence in the eastern part of the route. Requires Cut. Doesn't respawn. Route 124 Pearl: In the south-eastmost divespot. doesn't respawn. Route 128 Pearl: In the south-east dead-end of the main area, accessible from Route 127 Underwater. Doesn't respawn. Route 127 Rare Candy: Top Left left of bird keeper Byron behind one of the trees. - doesn't respawn. Route 132 Rare Candy: On the westmost palm tree in the islands on the southwest part of the route. Doesn't respawn. Route 135 Pearl: On top of the mountain on the east side of the bridge connecting middle islands. Doesn't respawn. Hoenn Extra Items Nap Cave B1F Nugget: On a small crystal near the south-west corner of B1F. Doesn't respawn. Nap Cave B1F Rare Candy: On a small crystal in the center east of B1F. Doesn't respawn. Secret Nap Area Pearl: In the far east of the beach. Doesn't respawn. Nap Shore Pearl: In the shell from the exit to Route 49. Doesn't respawn. Valley Of Steel Eastern Peak Rare Candy: It's behind a tree. Doesn't respawn. Valley Of Steel Western Peak Rare Candy: It's behind a tree. Doesn't respawn. Sinnoh Items + Extra Items Canalave City Big Pearl: Invisible under the big different tree, reach it by surfing south from the boat. Respawns every 7 days. Mt Coronet South 2F Star Piece: In the east-most room accessible from the eastmost ladder of 3F. - Doesn't respawn. Mt Coronet 6F Rare Candy: On the north-eastmost rock. - Doesn't respawn. Pokemon Mansion Big Nugget: In the second western room from the entrance. - Doesn't respawn. Pokemon Mansion Rare Candy: After defeating Liam in the furthest western room from the entrance. - Doesn't respwn. Twinleaf Town Rare Candy: In the south-west of the town. Requires Surf. - Respawns every 7 days. Victory Road 2F Rare Candy: On the rock one tile north of the northmost rock smash rock in the south-east path.. Requires Rock Smash. Victory Road B1F Deep Big Pearl: After entering the maze part from the south, follow the path north, west, north, east, then go south one tile, on the rock to the east. Victory Road B1F Pearl:. From the south-westmost ladder, on the westmost accessible small rock before going down the stairs. Route 206 Rare Candy: In the north-west corner of the ground level, west of the Warward Cave - Respawns every 7 days. Route 208 Star Piece: Directly north of the Mt Coronet entrance, which requires to do a detour. - Doesn't respawn. Route 210 Nugget: On the large rock in the north-west part of the route, reachable by following the horizontal north bridge to the west. - Doesn't respawn. Route 212 South Stardust: In the south-east corner of the swamp part, south of Ranger Taylor. - Respawns every 7 days. Route 213 Big Pearl: On the south-eastmost small rock on the island in the south-east corner of the route. Requires Surf. - Respawns every 14 days. Route 215 Rare Candy: In the center north of the route, near Black Belt Nathaniel. Requires Cut. - Doesn't respawn. Route 217 Ice Stone: Behind a tree. (Credits to Waleed1301) Route 218 Rare Candy: In the north-east corner of the route. Requires Surf. Doesn't respawn. Route 220 Pearl: On the large rock two tiles right from SwimmerTrollrah, the southmost swimmer. - Respawns every 14 days. Route 222 Pearl: On the westmost large rock on the beach. - Respawns every 14 days. Extra: Route 222 2 PP UP next to Tuber Conner Fence - Respawns every 7 days. Route 224 Big Pearl: On the small rock next to Jingoss - Respawns every 14 days Route 225 Rare Candy: In the north-west of the route, directly west from Miner Elikike123. - Doesn't respawn. Route 228 Nugget: In the north-east corner, next to the north end of the long bridge. - Doesn't respawn. Pictures and Locations of each Hidden Item (all regions and side areas)
- 27 replies
-
- 15
-
-
This is one of the ways to defeat lance. My method only needs two [Level.100] Pokemon: Gengar、Gyarados Gyarados Set: Move: Dragon Dance、Ice Fang、Surf Equipment: Never-Melt Ice //just make sure one shot, It will be need more [Dragon Dance] if you don't have Team Leader is Gengar and also a pioneer of death. Script: 1. Face to Dragonite, let Gengar trigger the Cursed Body. //It have 30% Chance. If not triggered, log out and again 2. Switch to Gyarados and use [Dragon Dance] 2-3 times If triggered. 3.Use [ice Fang] until battle end. //You can use [Dragon Dance] once if the opposite side gets Frozen


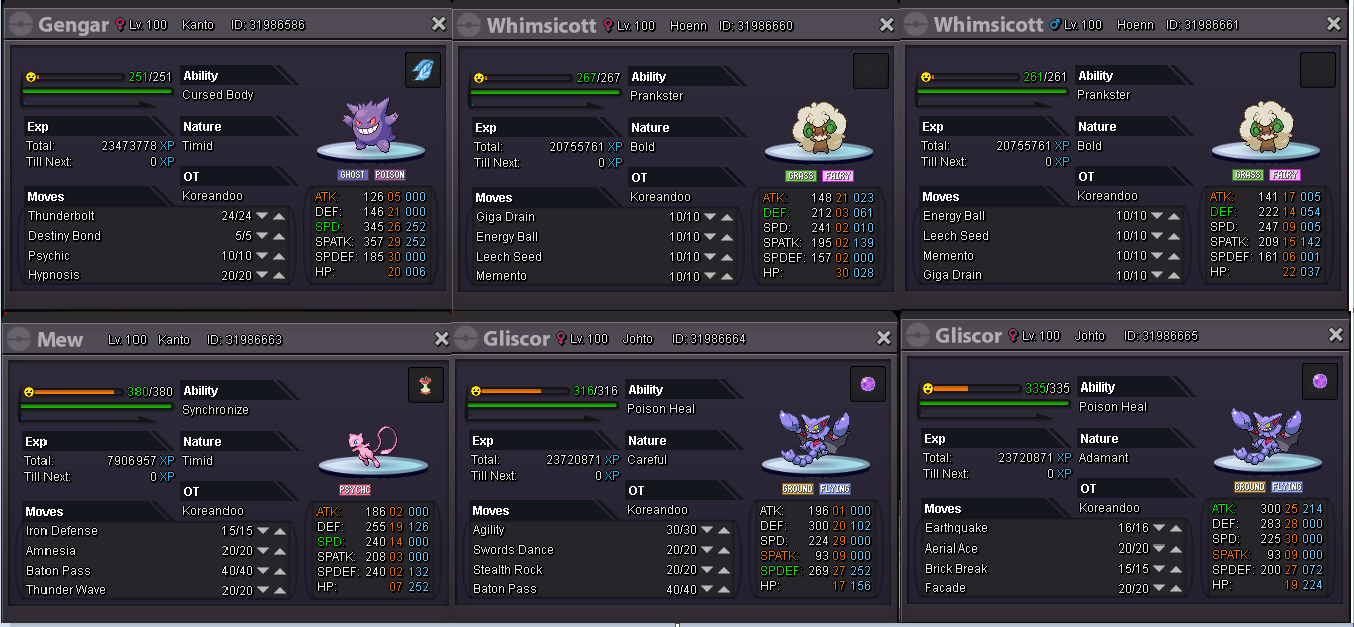


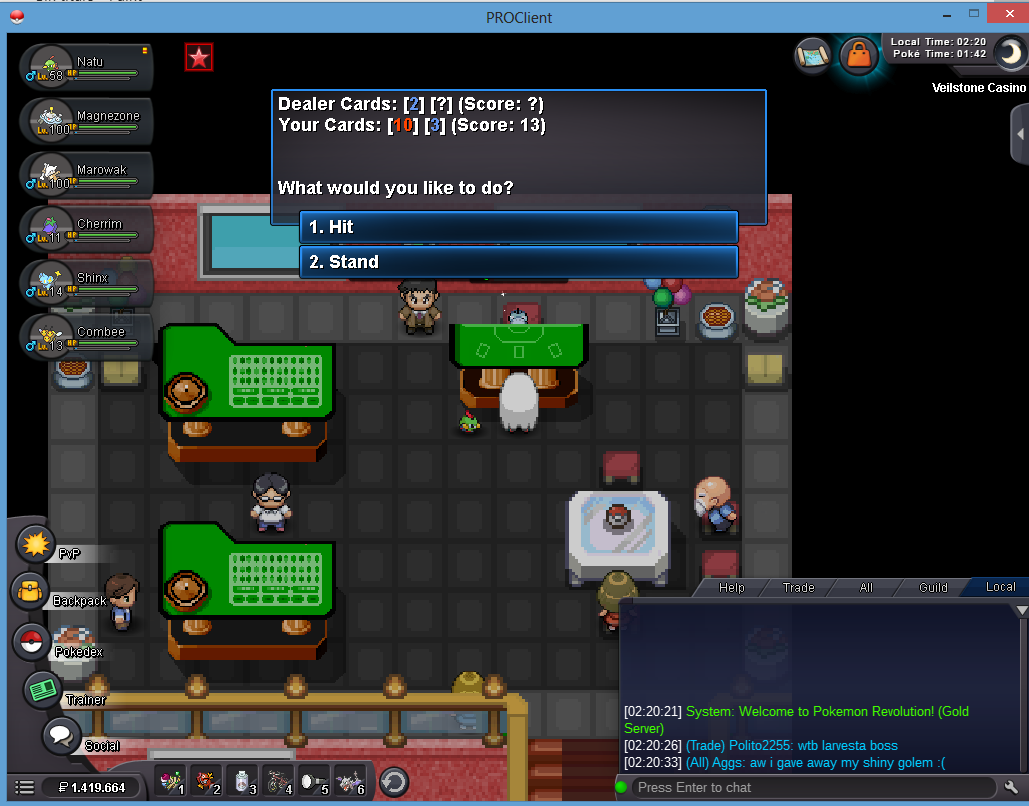
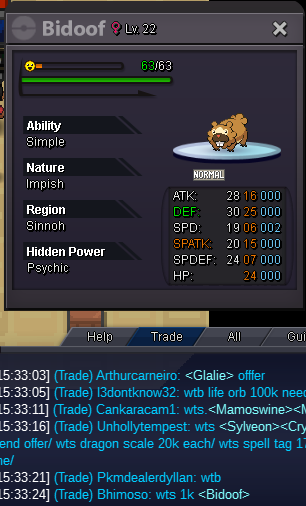
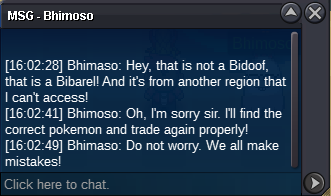
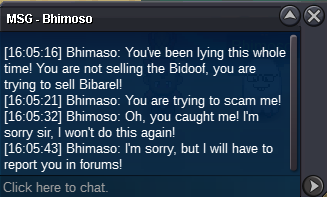
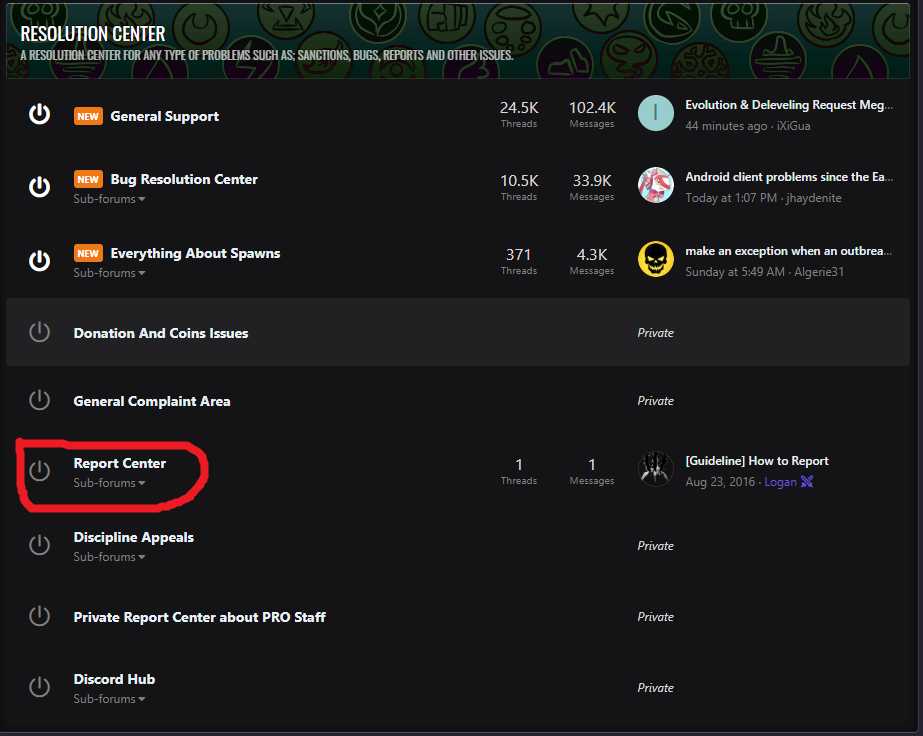
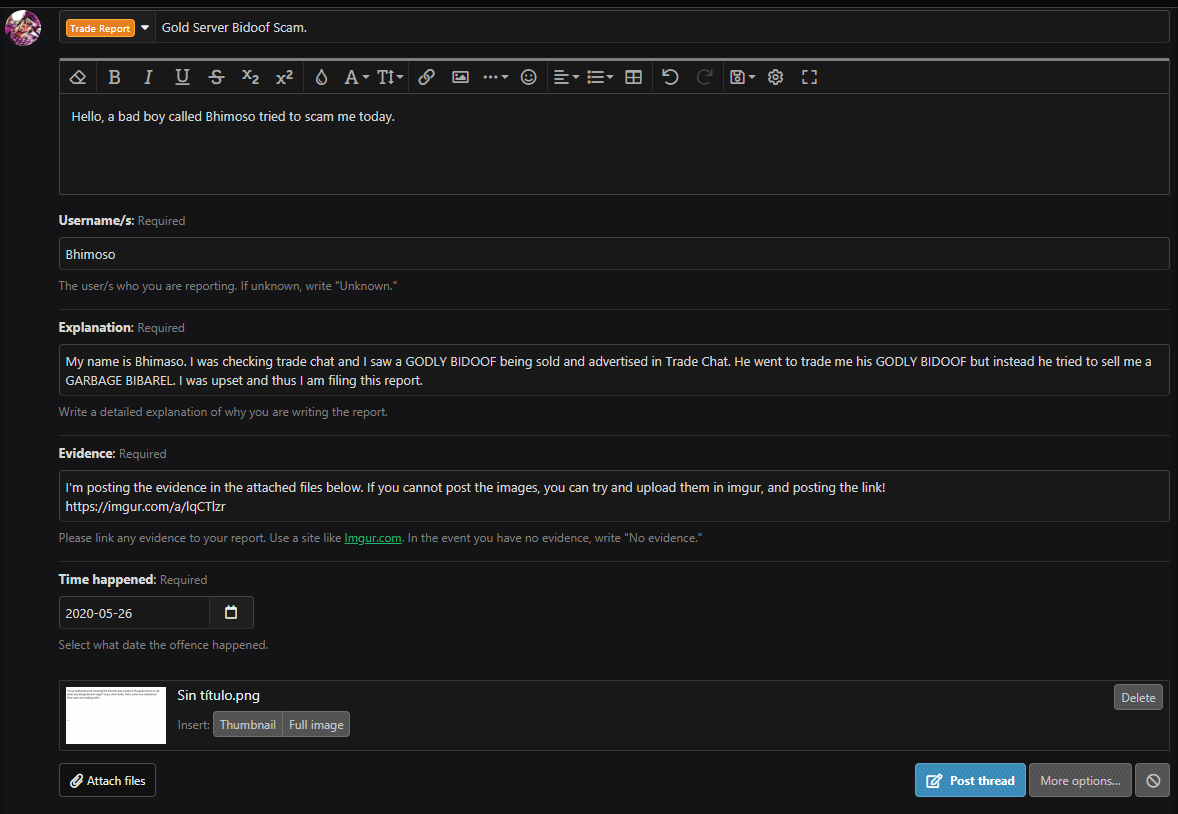
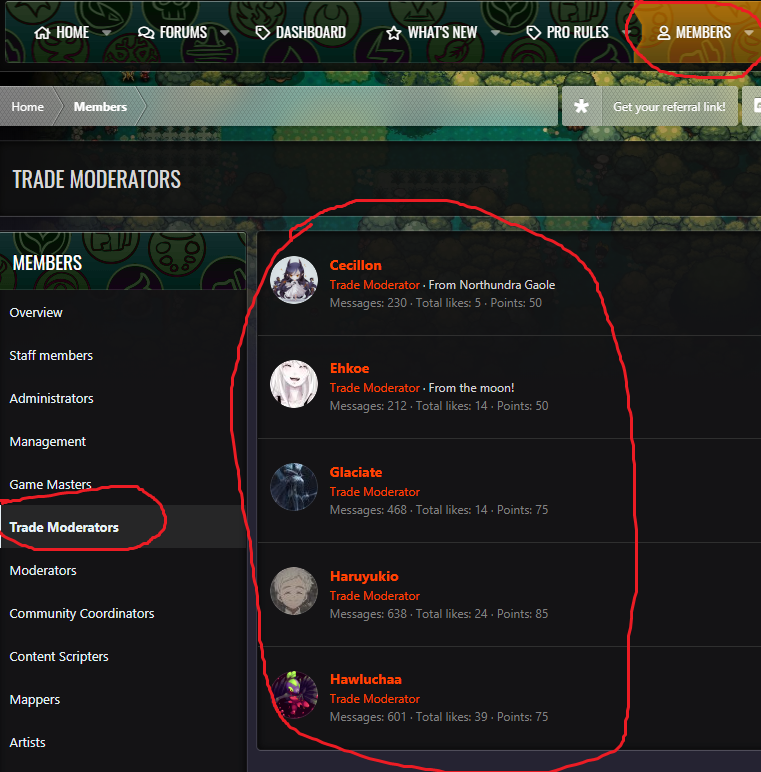
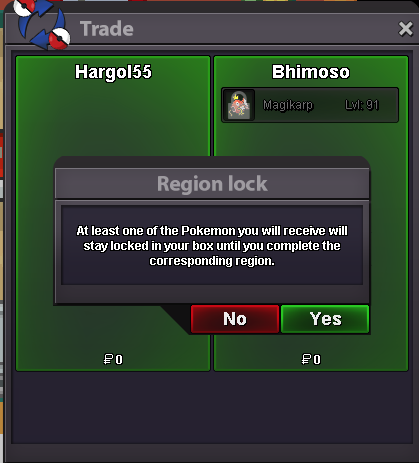
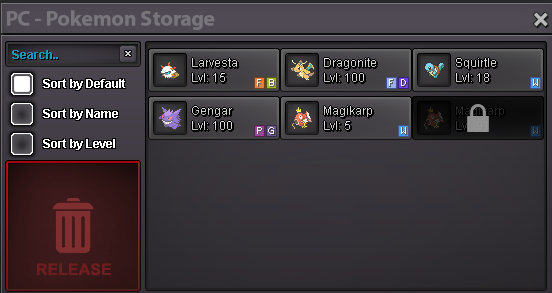

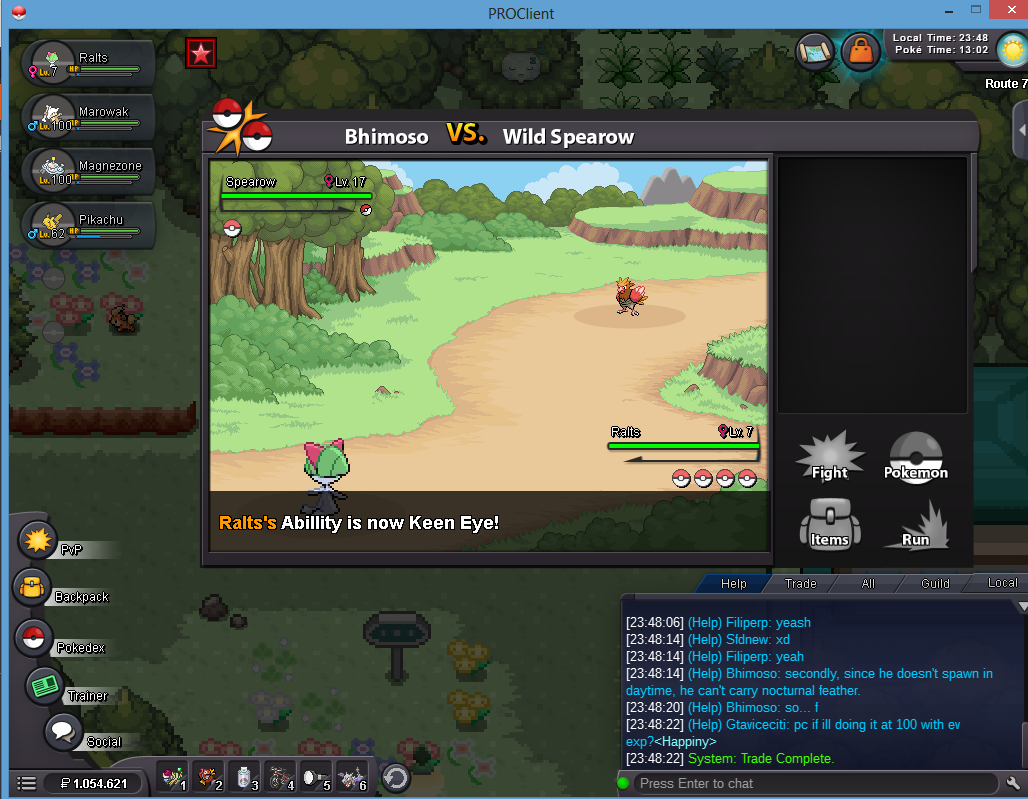
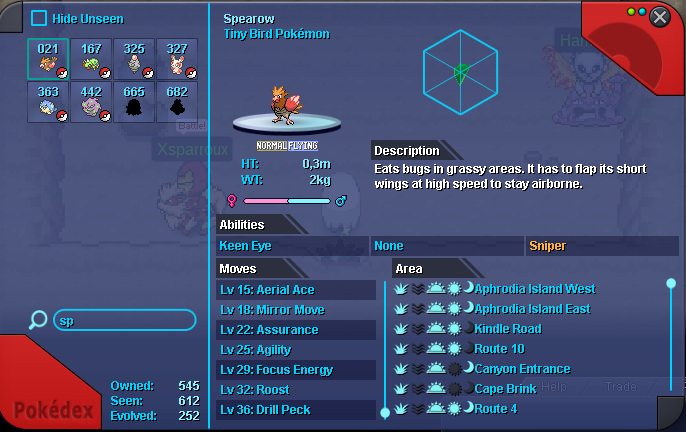

.png.992b42dcaccb2dede31f615044c91bbf.png)
.png.14a69f354610c8d6bc74ce0db71bb6bc.png)
.png.705e679060e4459f7b8804a4a4efb46e.png)
.png.66af1068d54277af506af2bdddbca8a7.png)
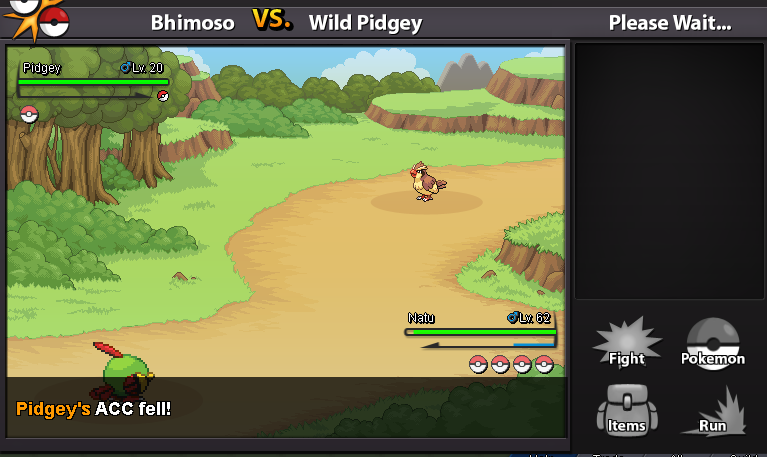
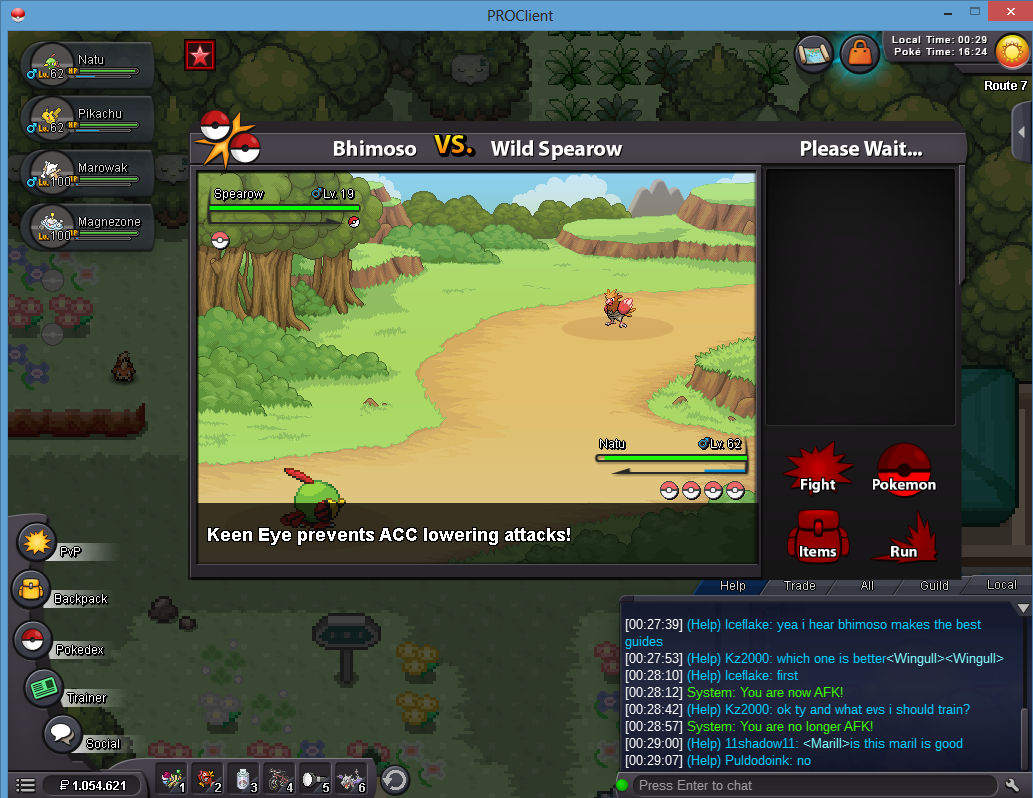
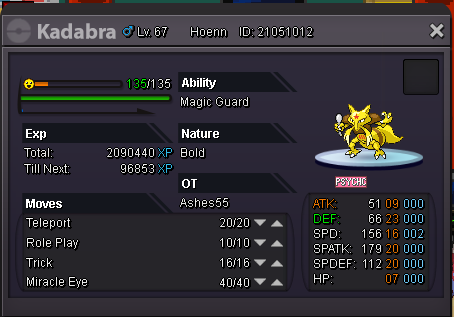
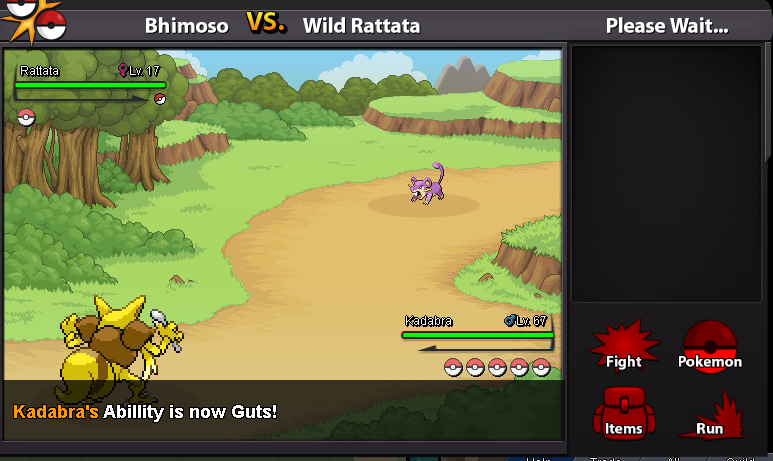


.png.5b939229bbc4c6a4e0e5df7a3487d2f0.png)
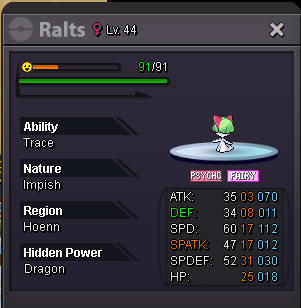
.png.16f69a49a36d65308ffc75a1eb6b7ce9.png)

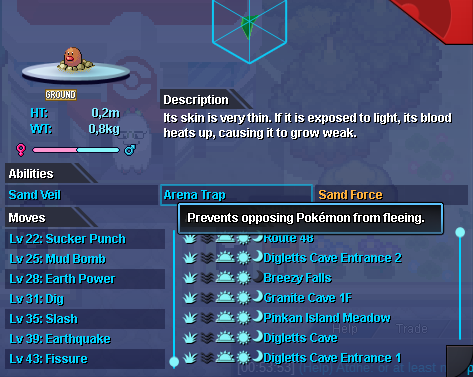
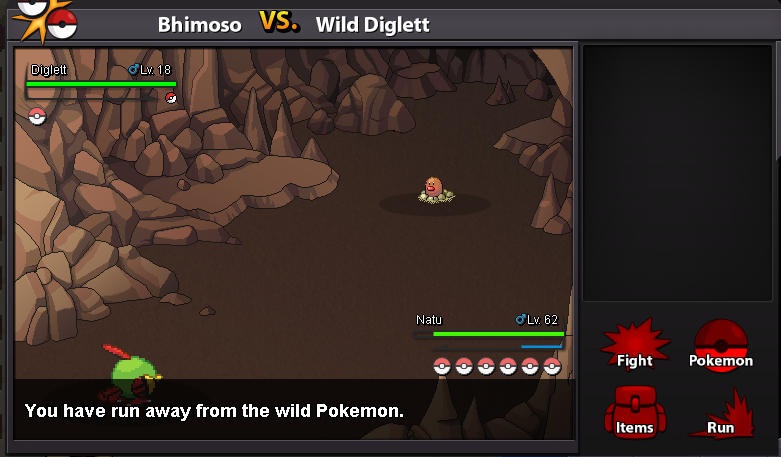
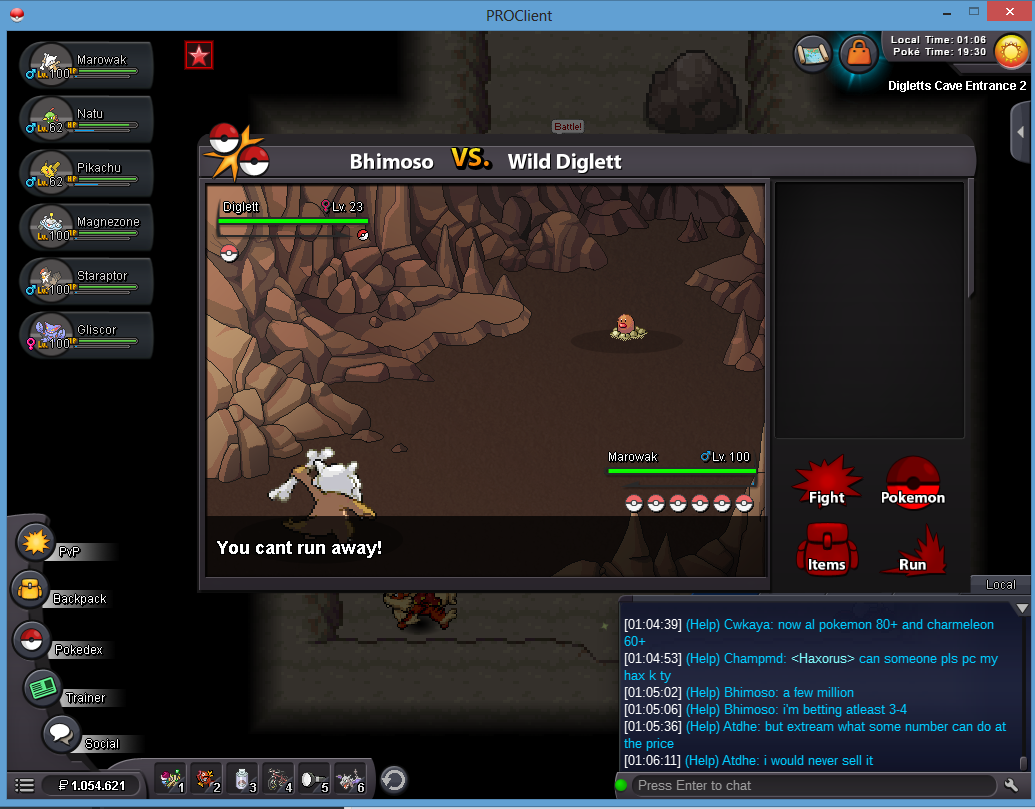

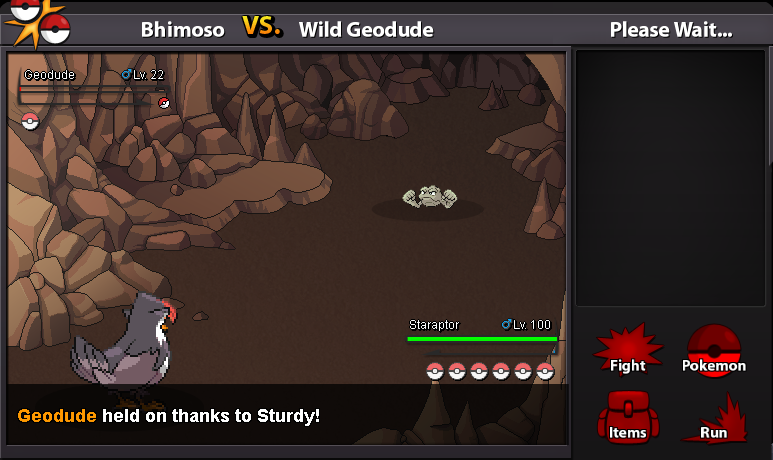

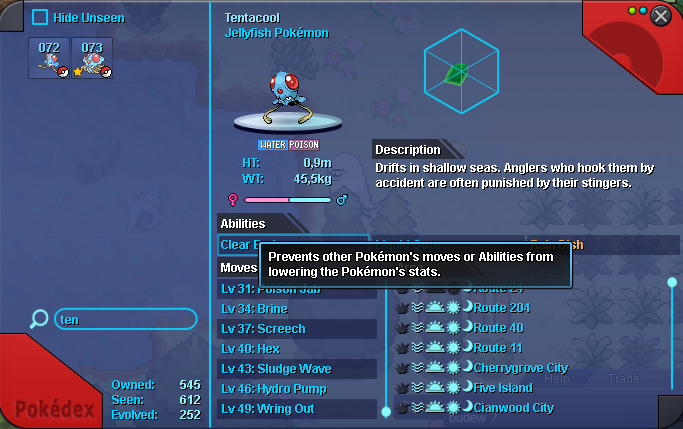
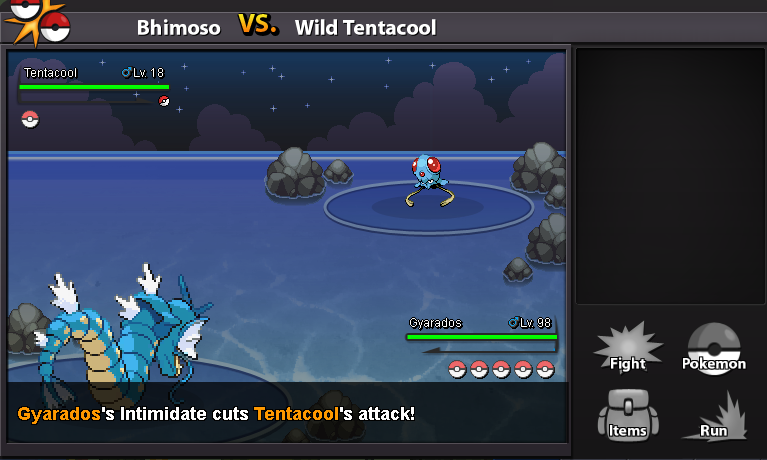

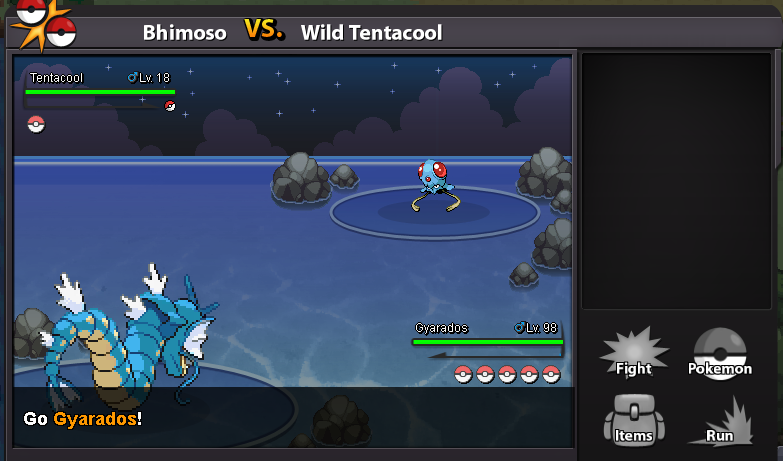
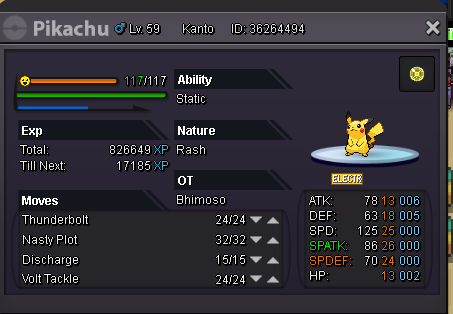

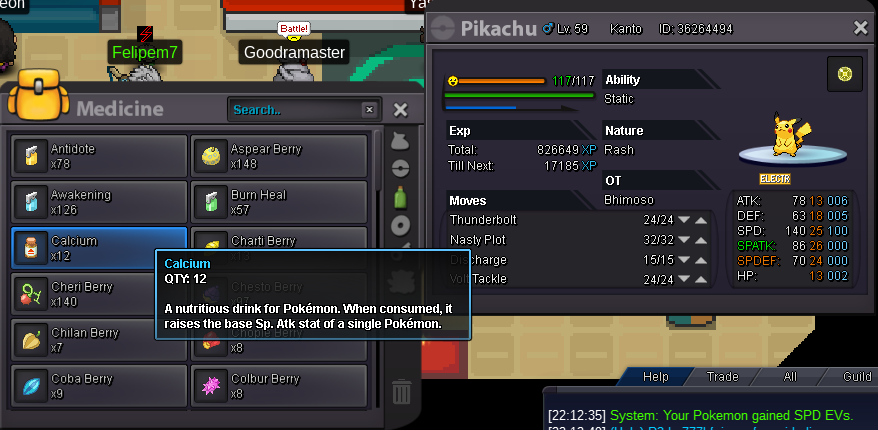

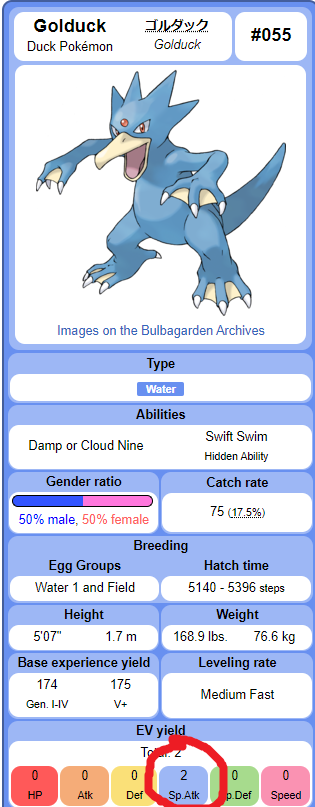

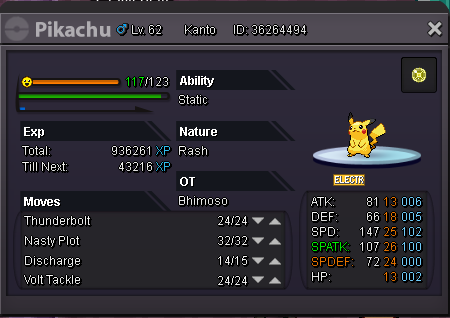

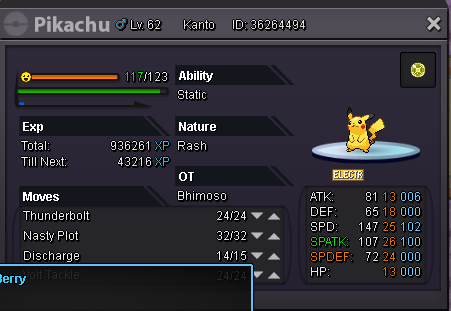

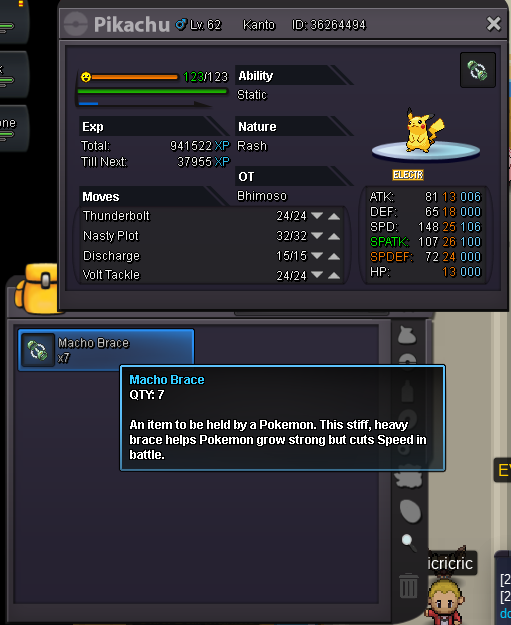

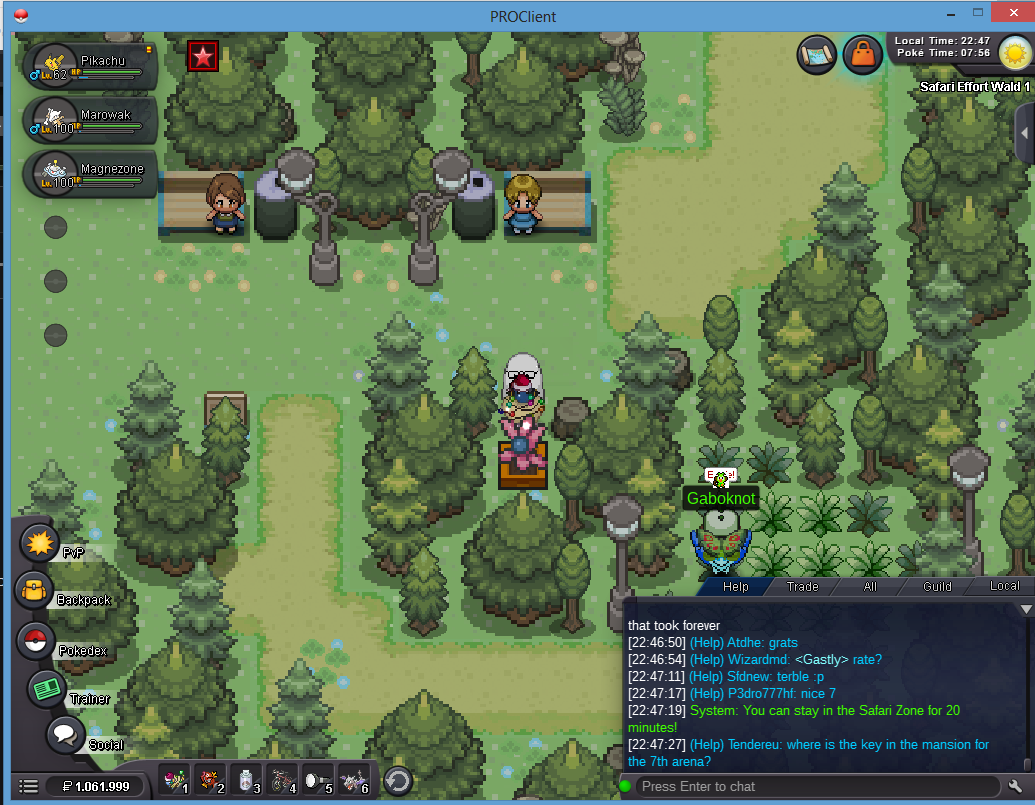
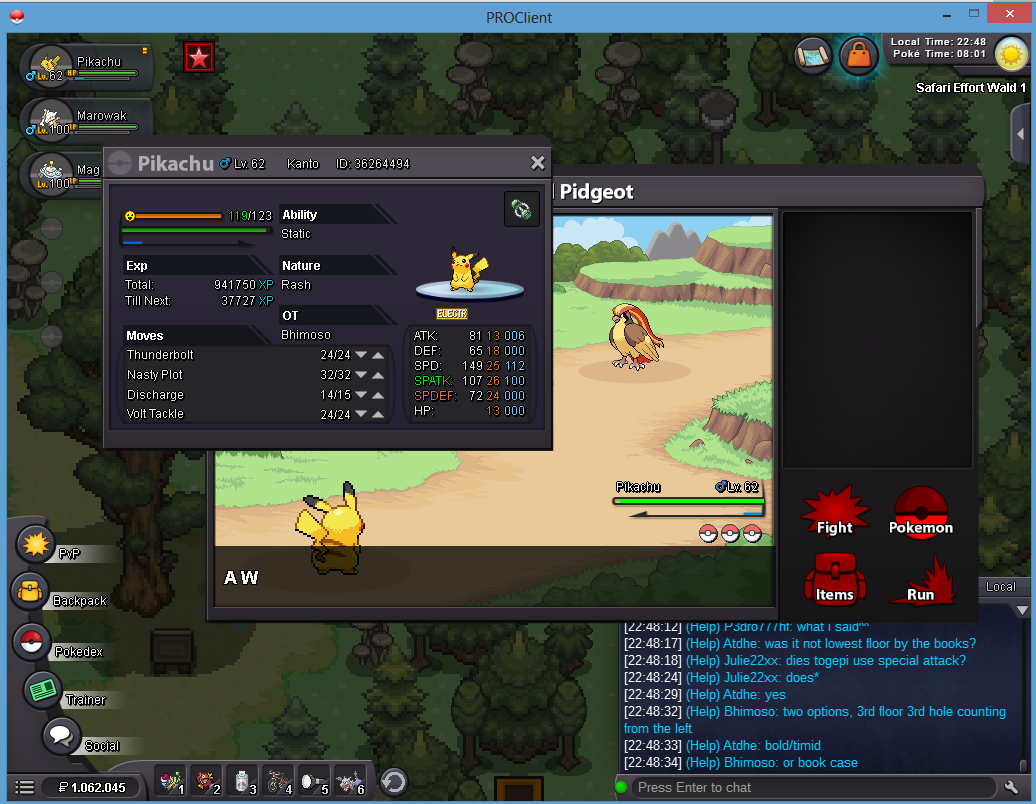
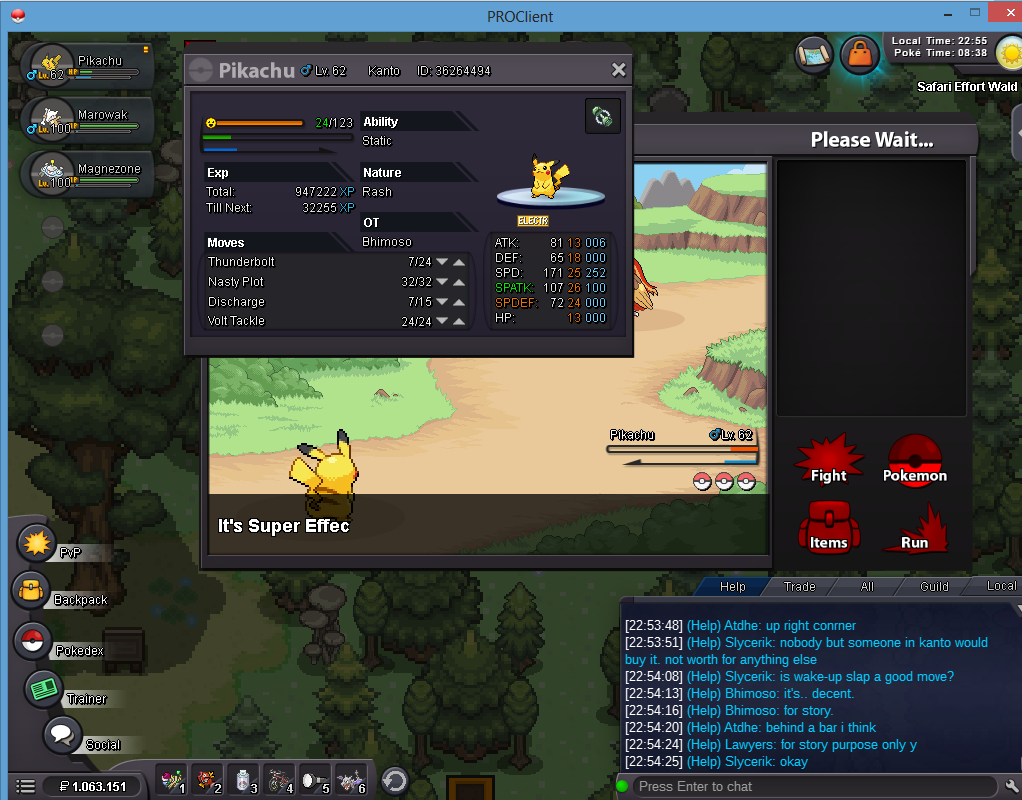
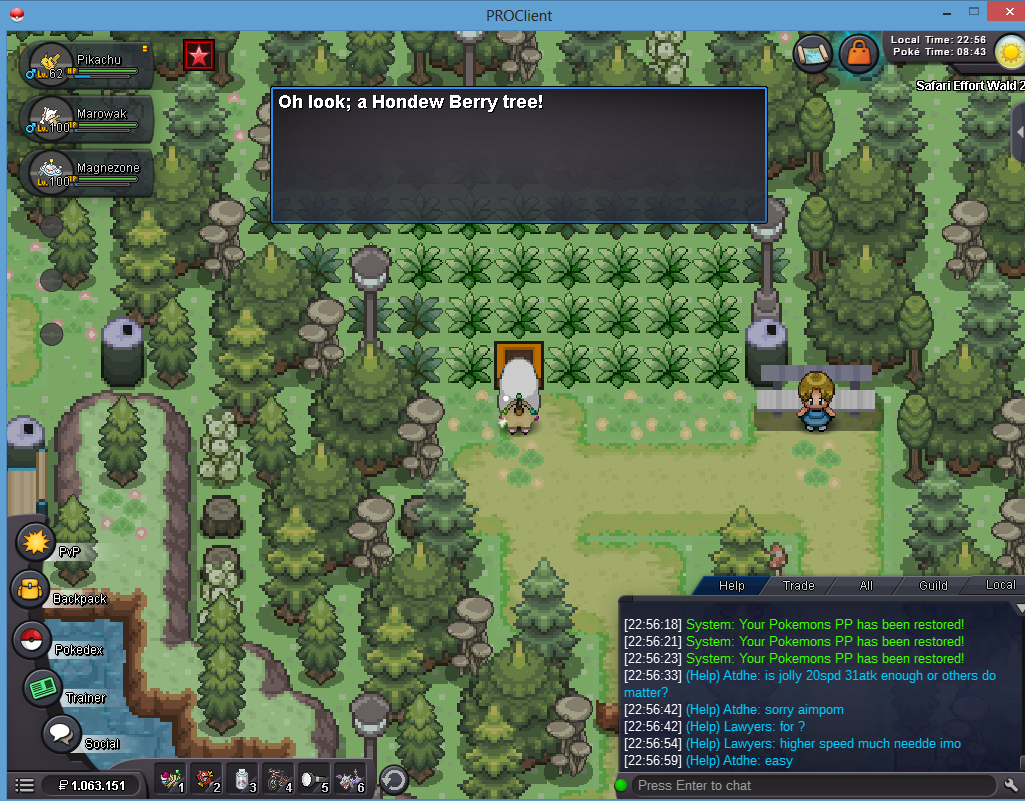
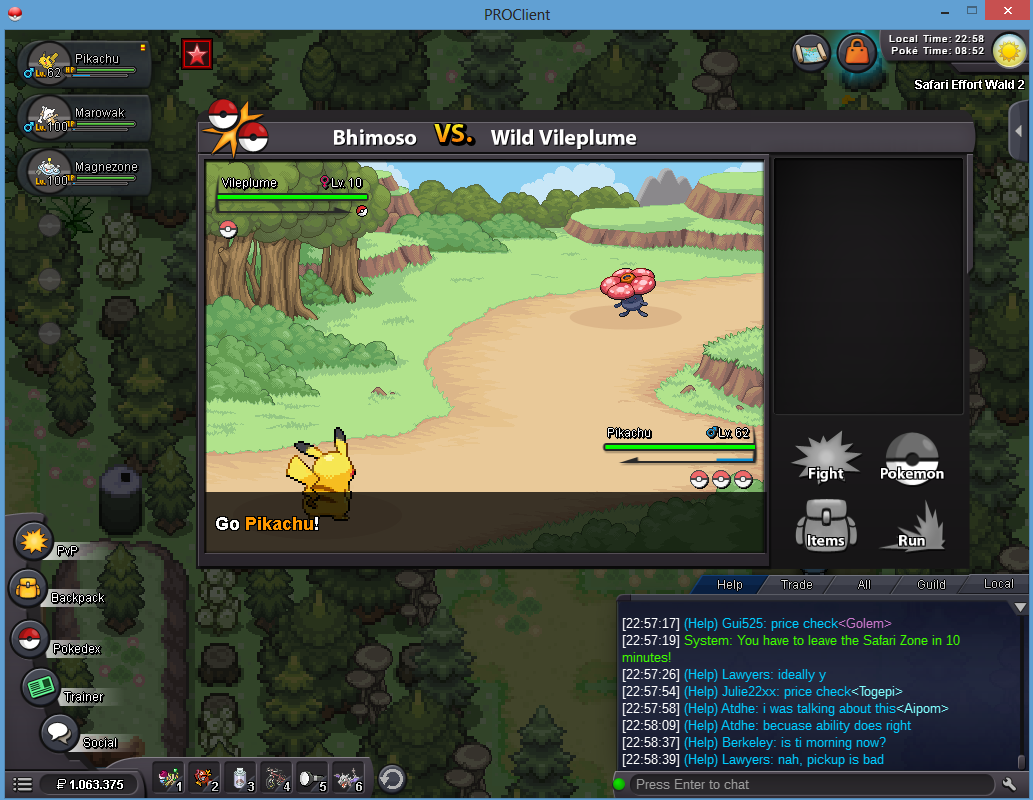


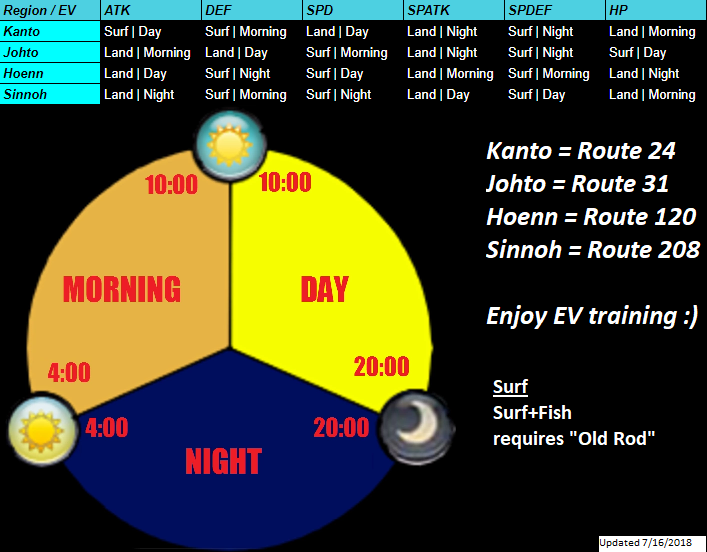
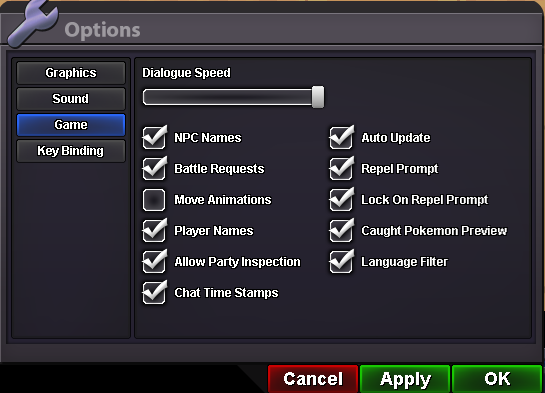


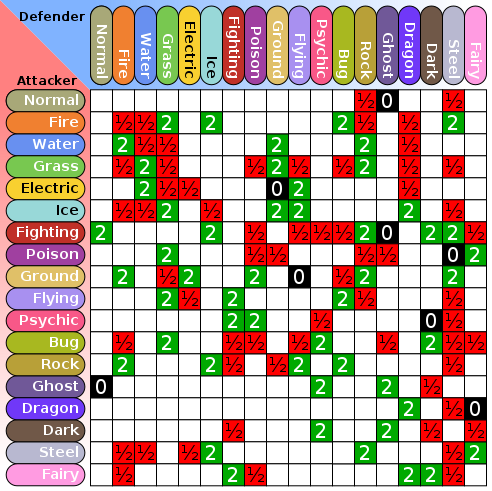

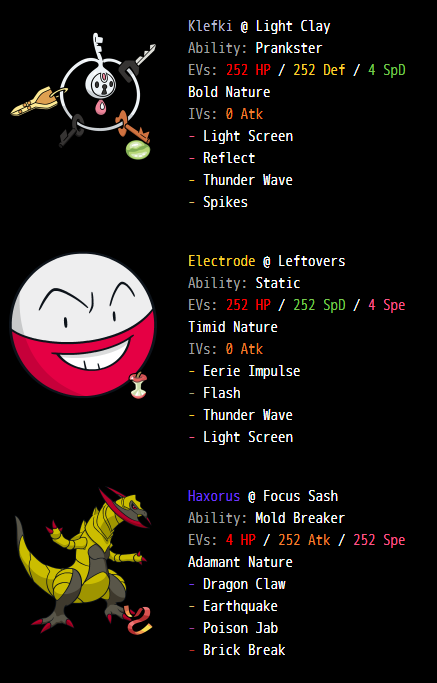
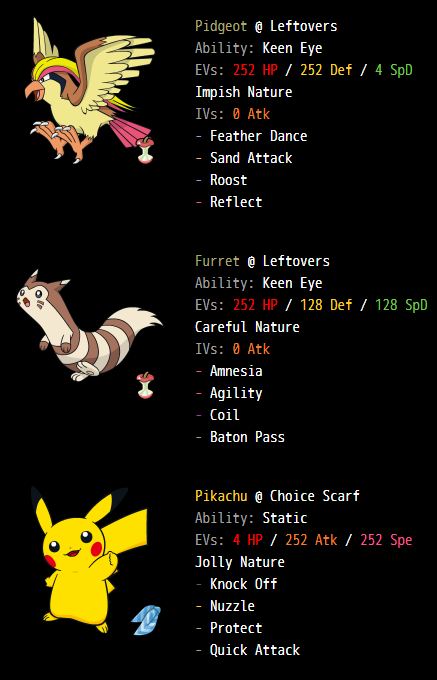
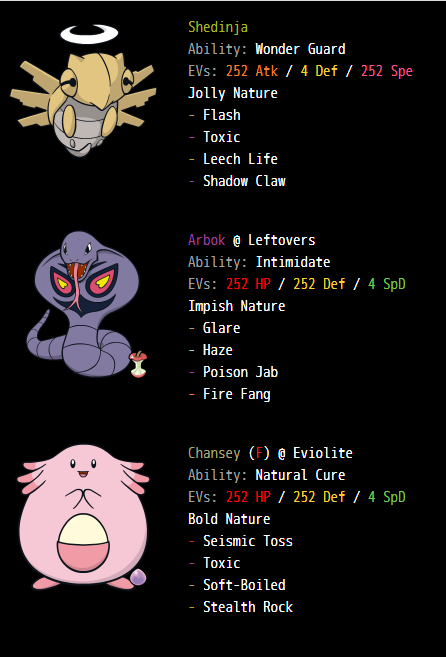
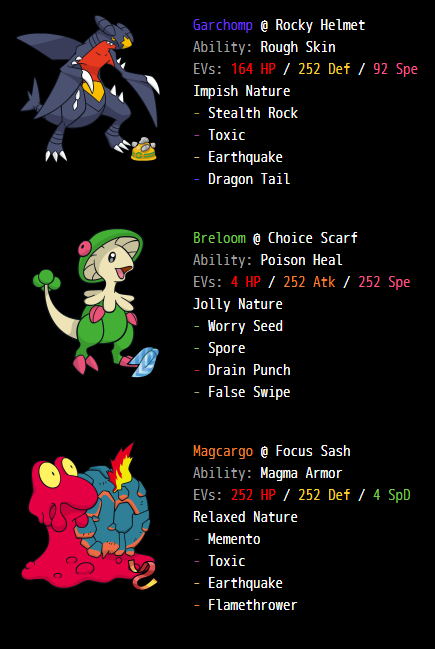
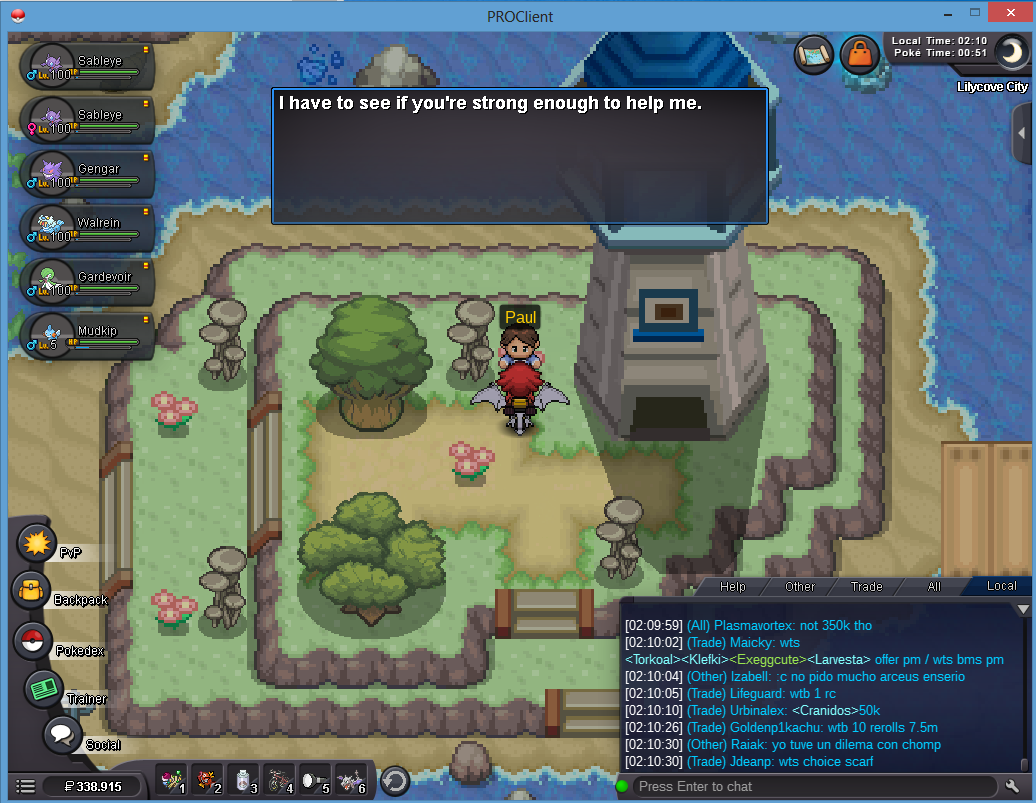


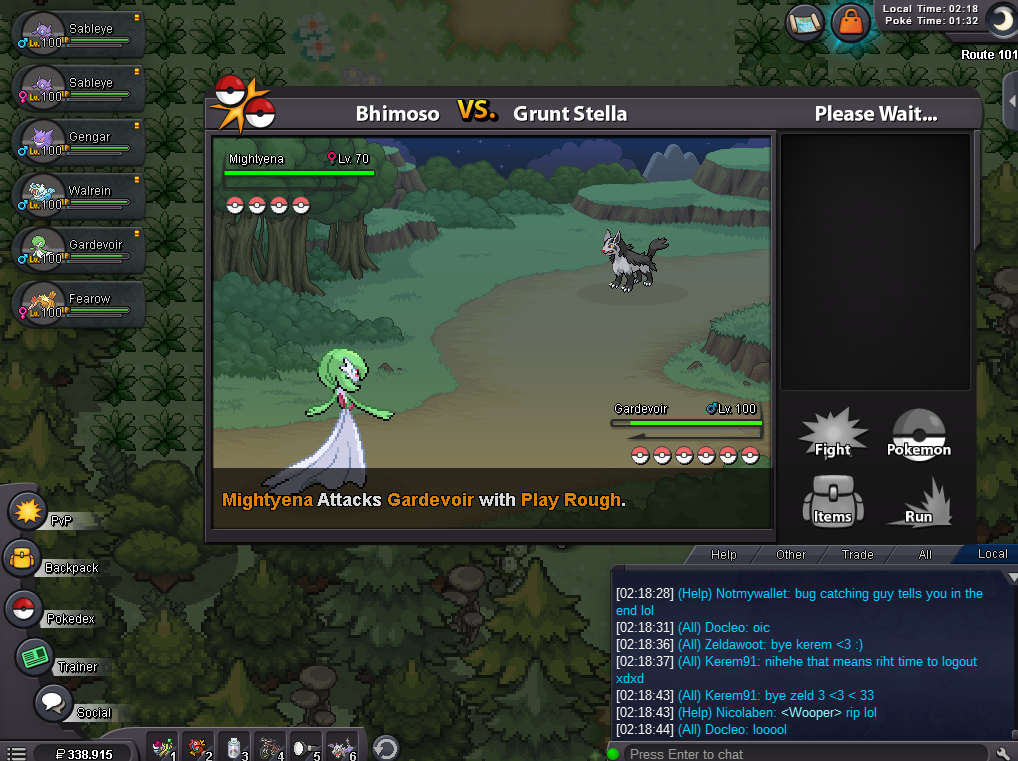
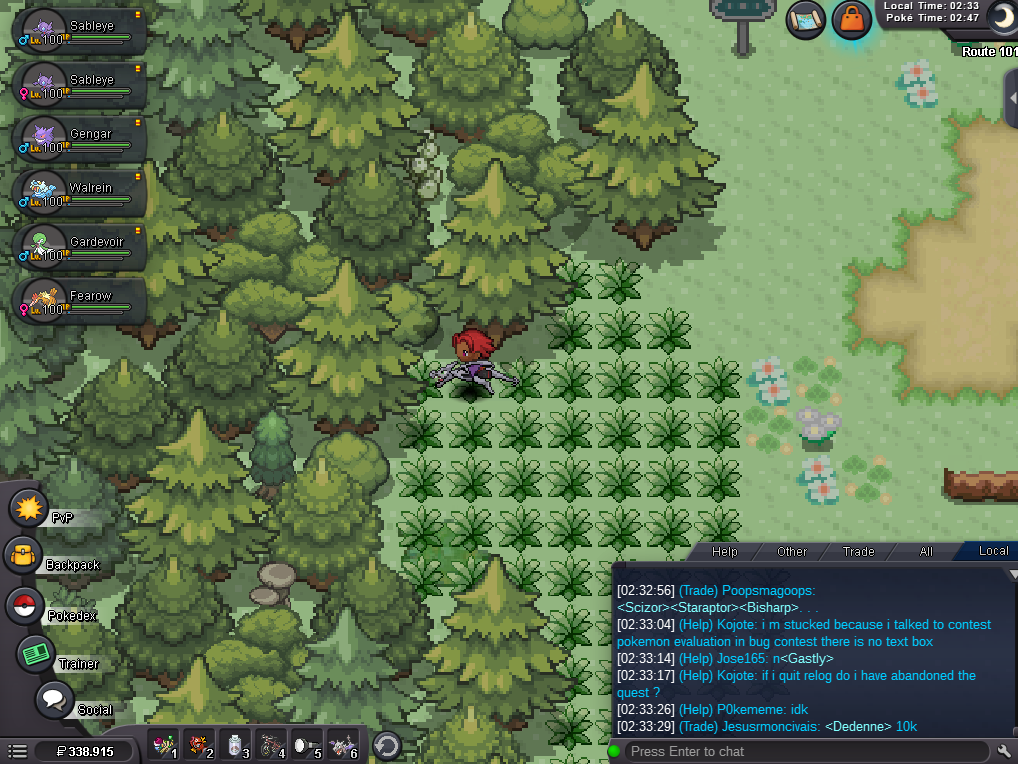
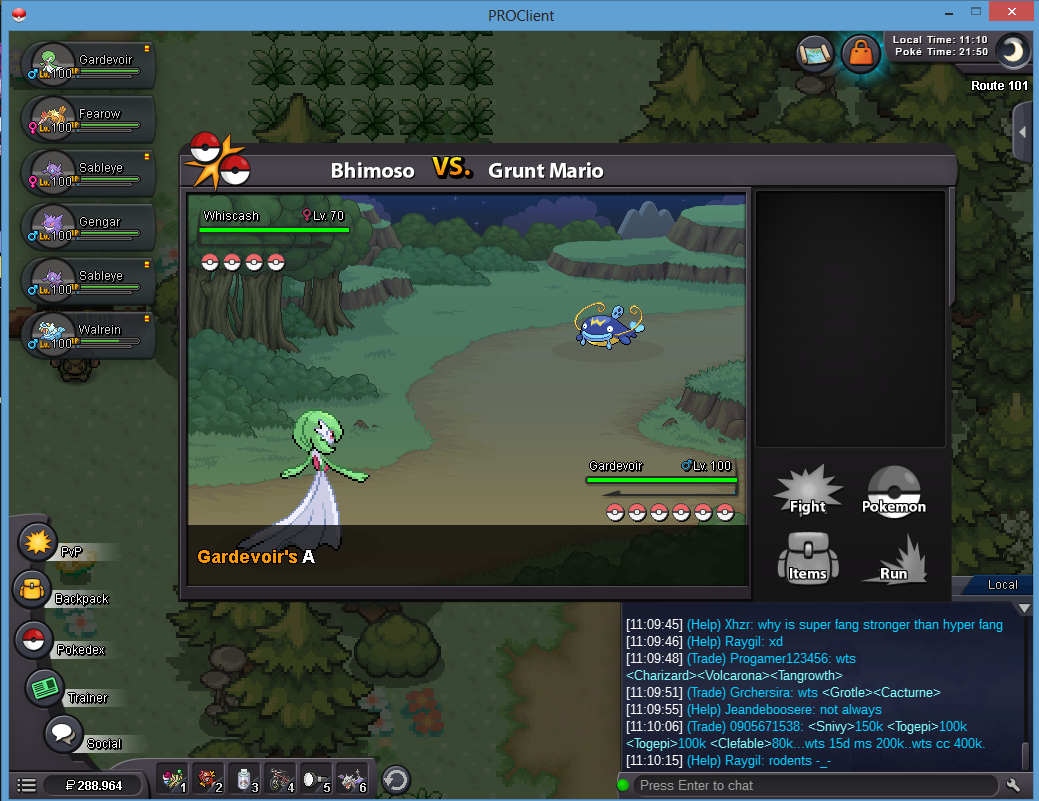

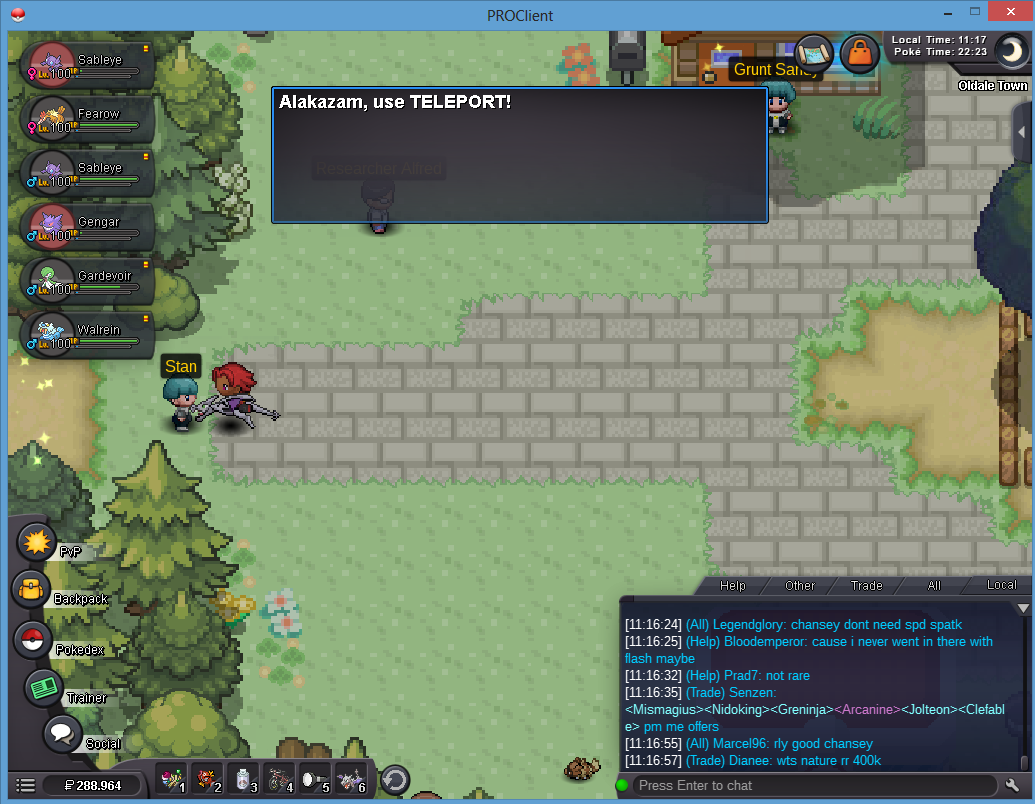
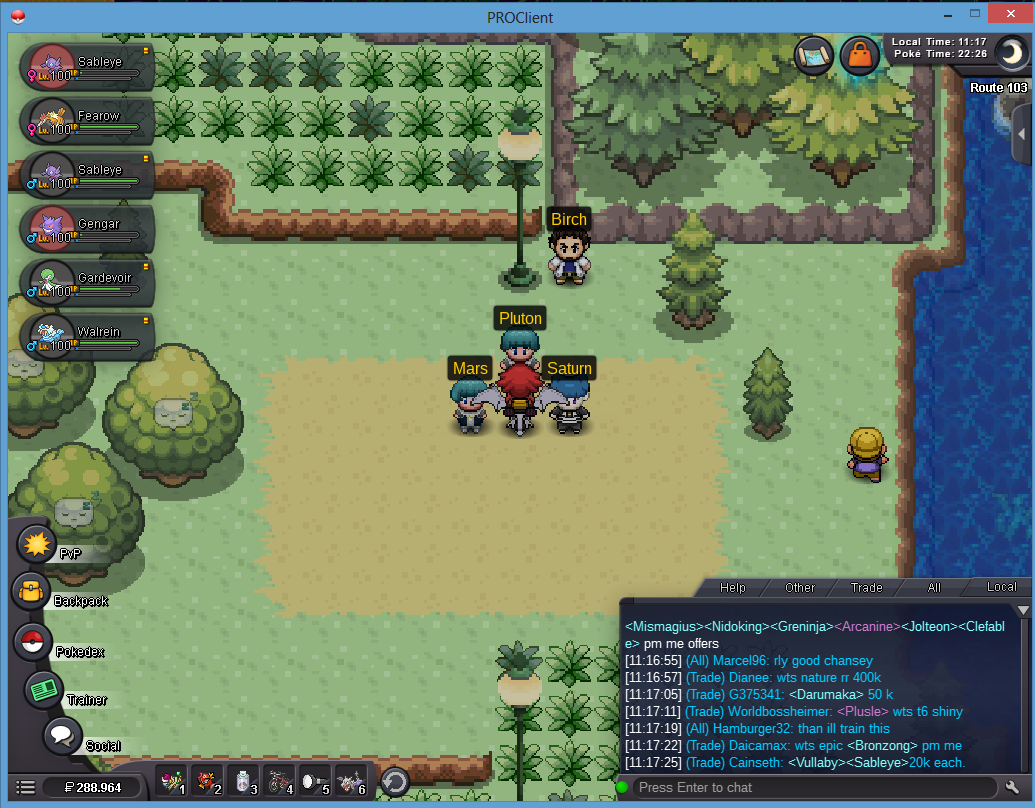
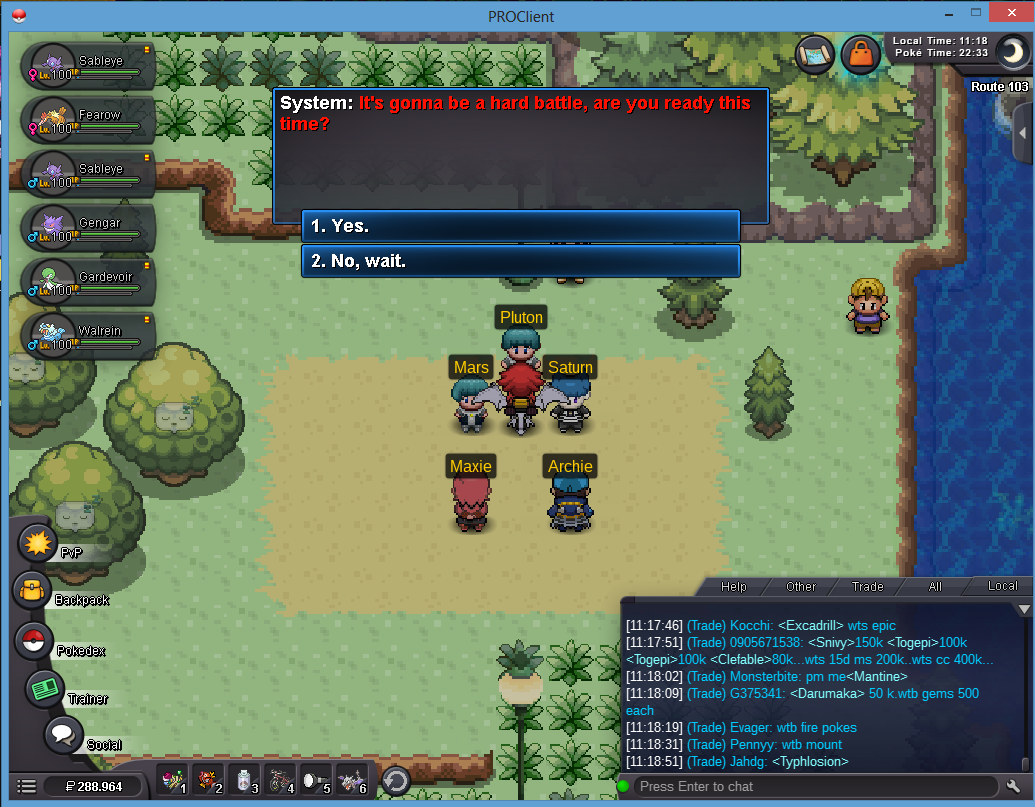

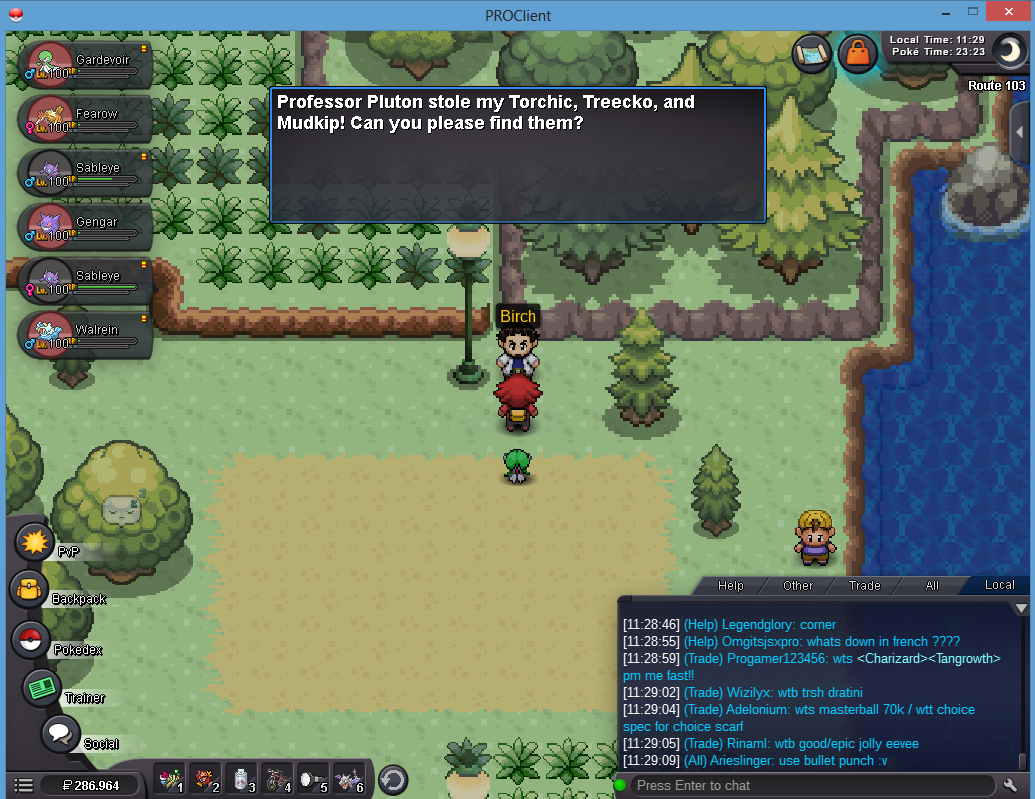


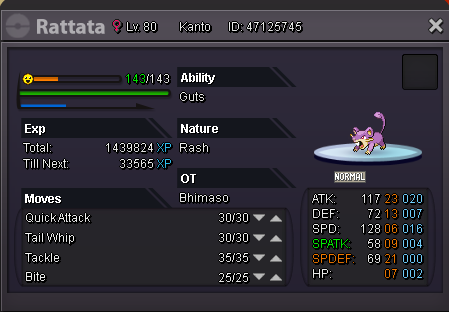
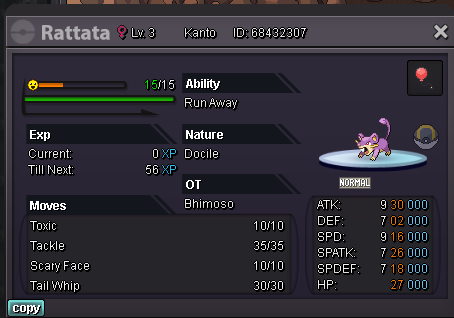
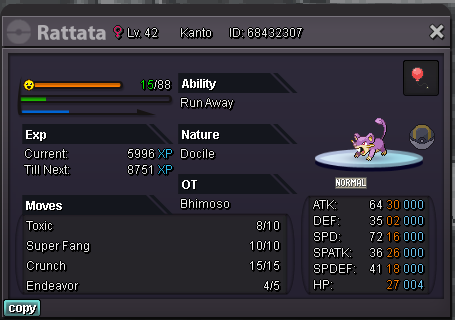


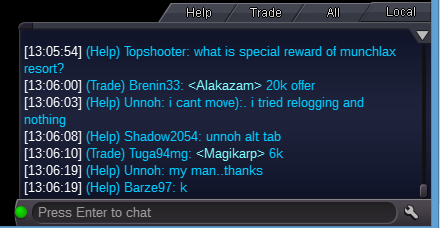


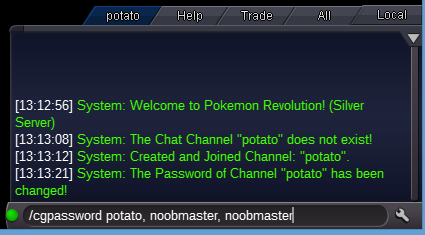

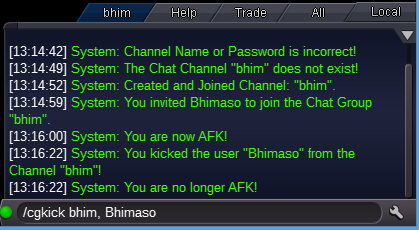


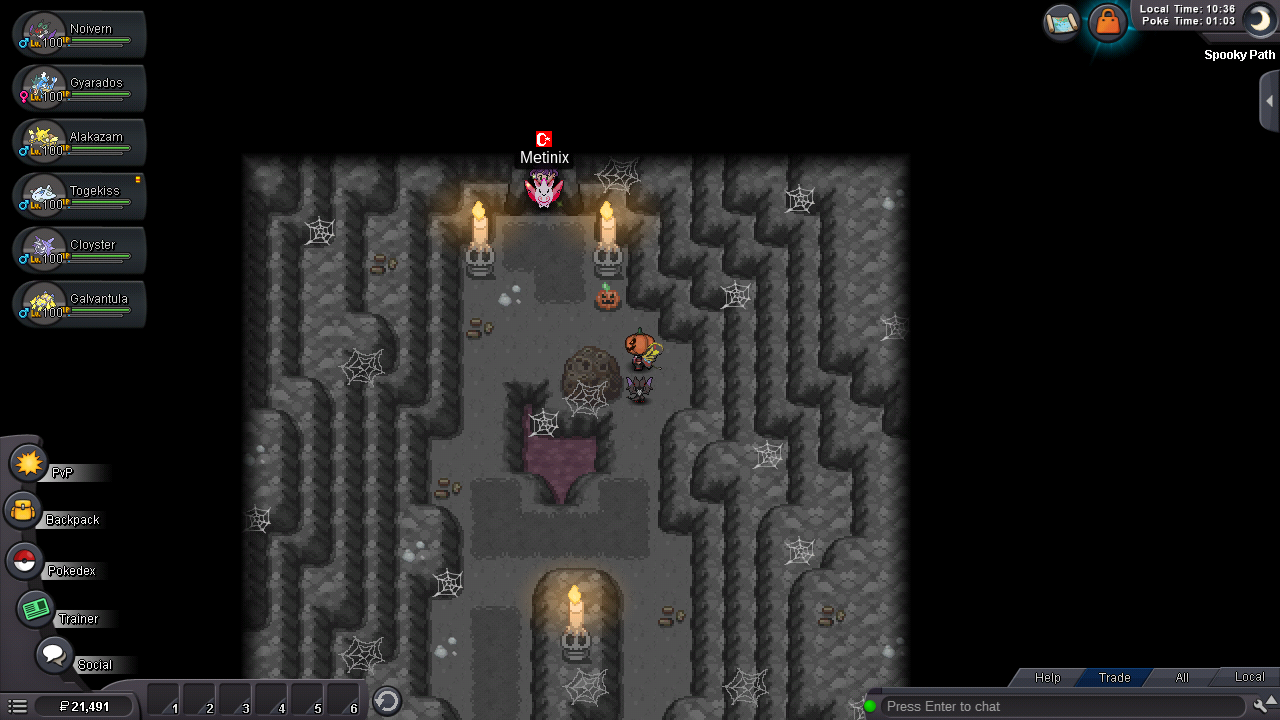


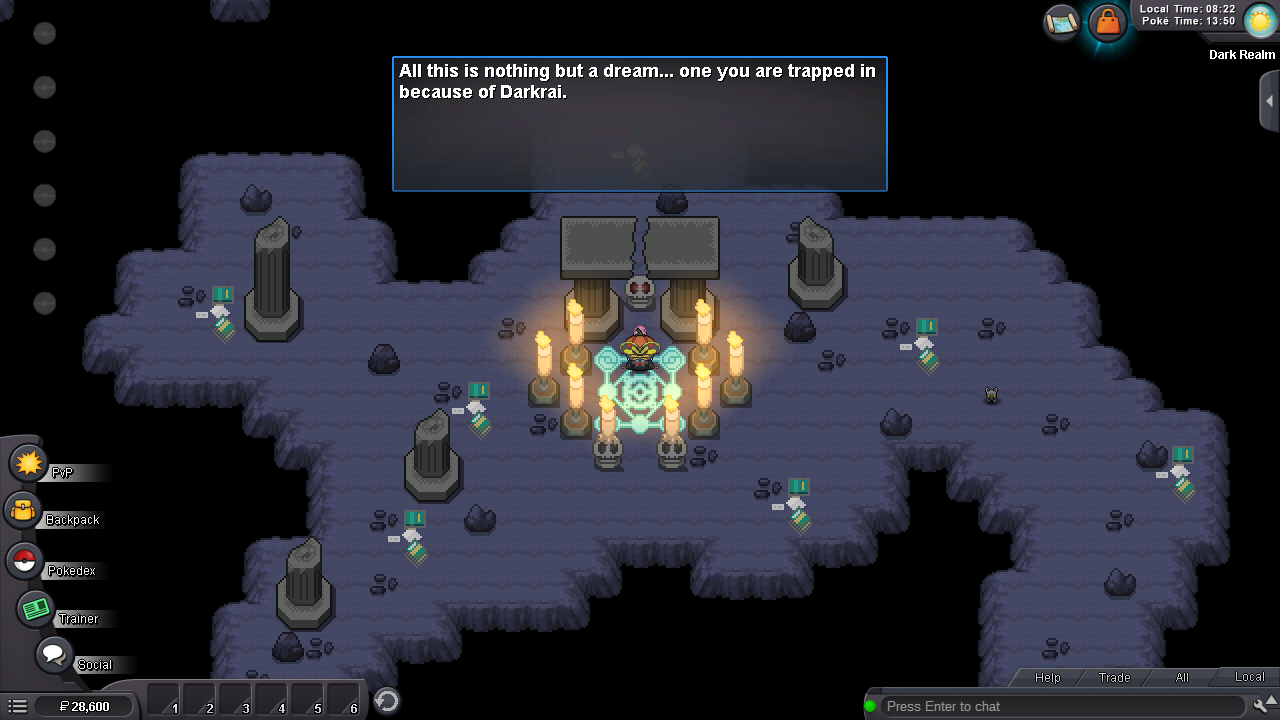
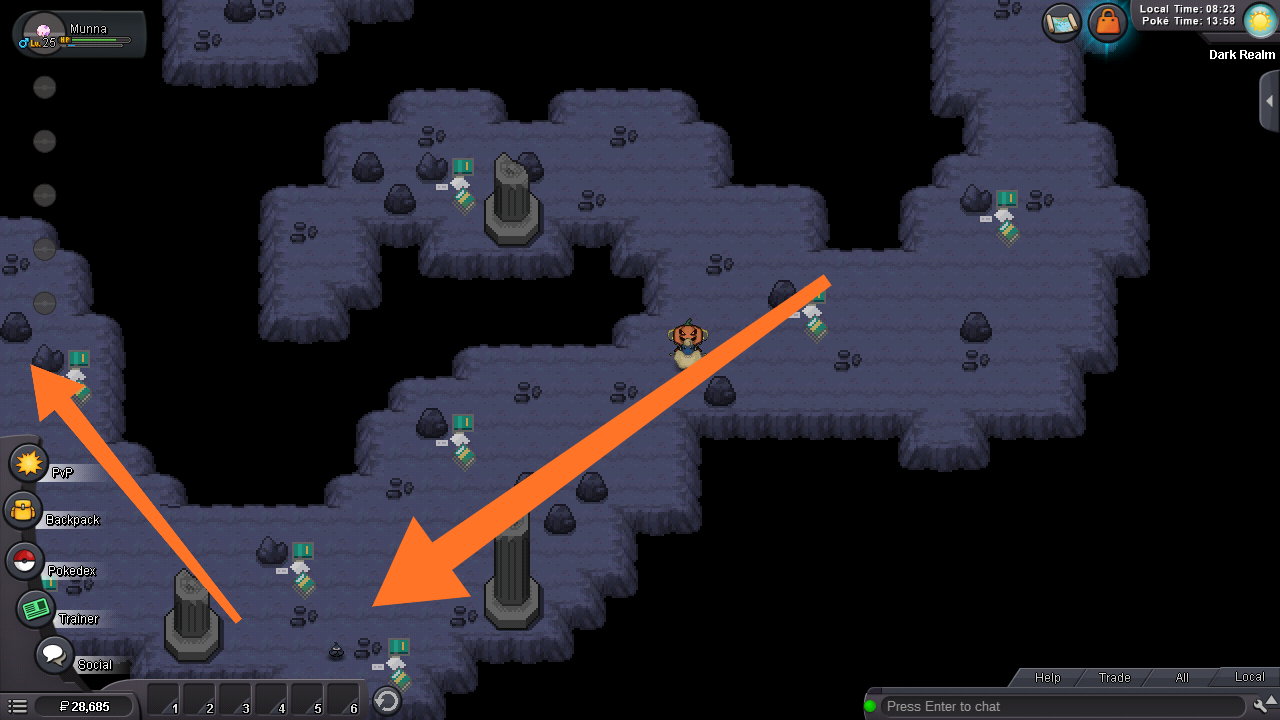
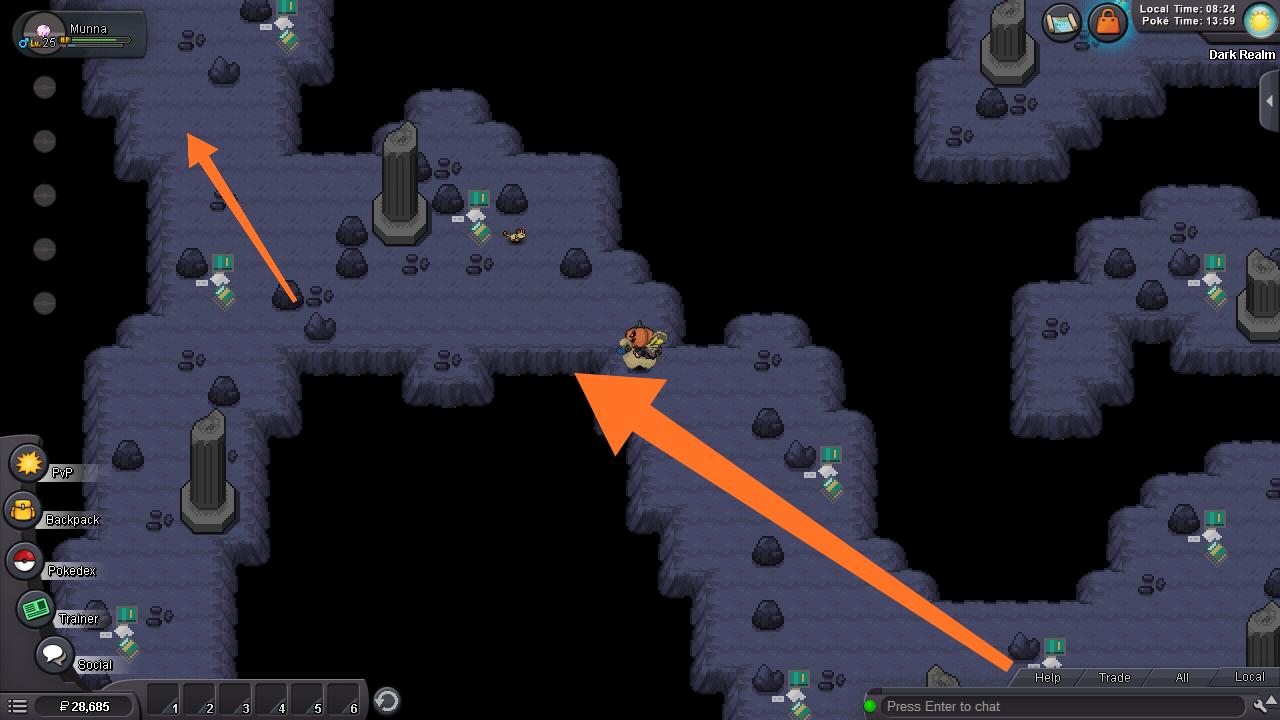
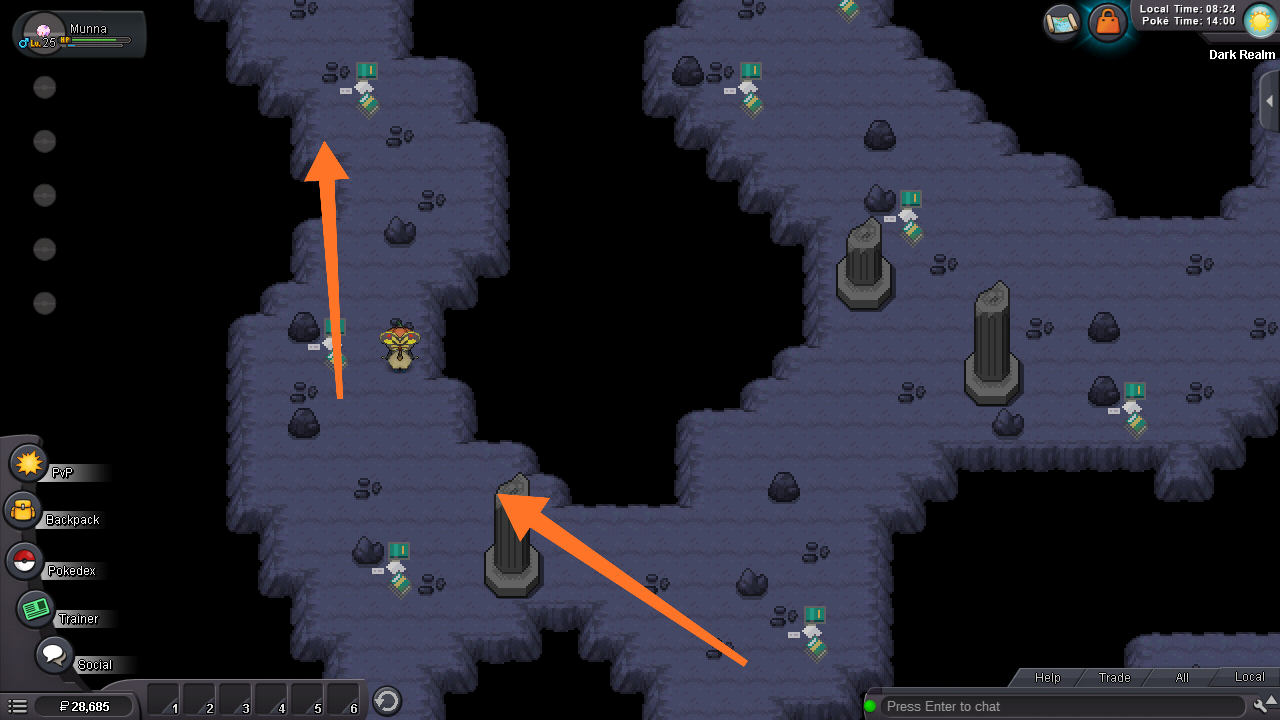
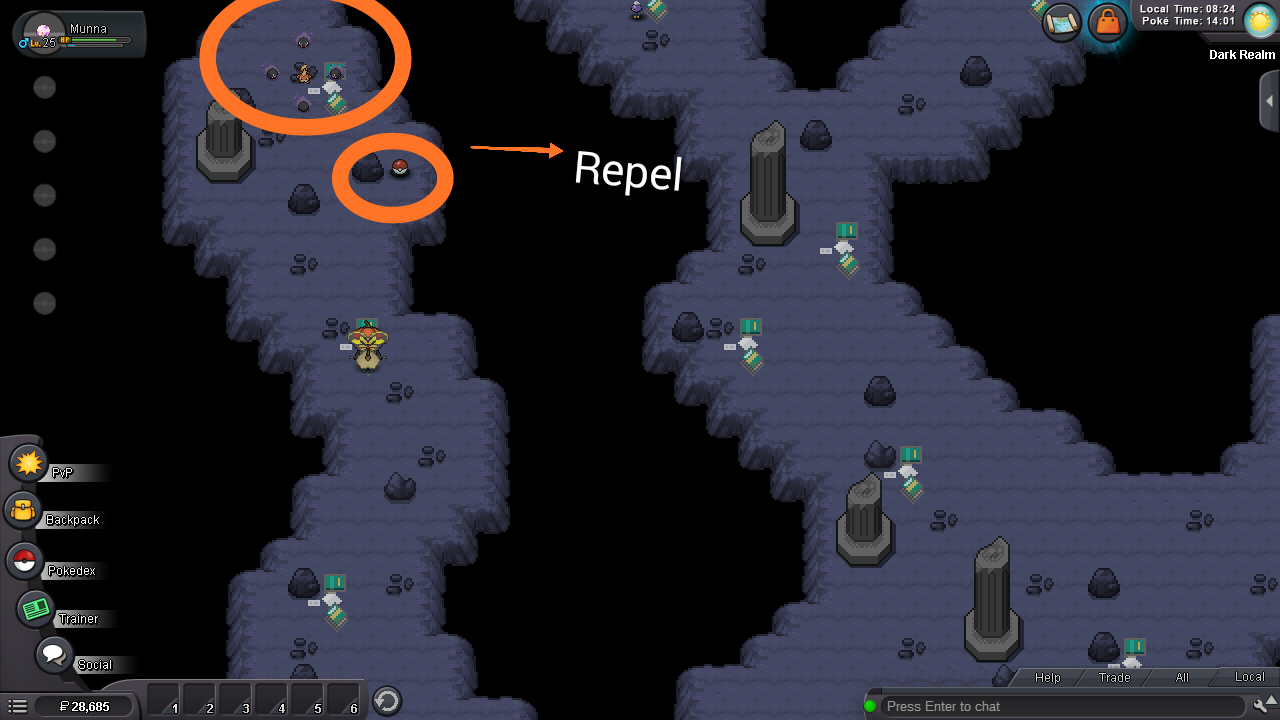
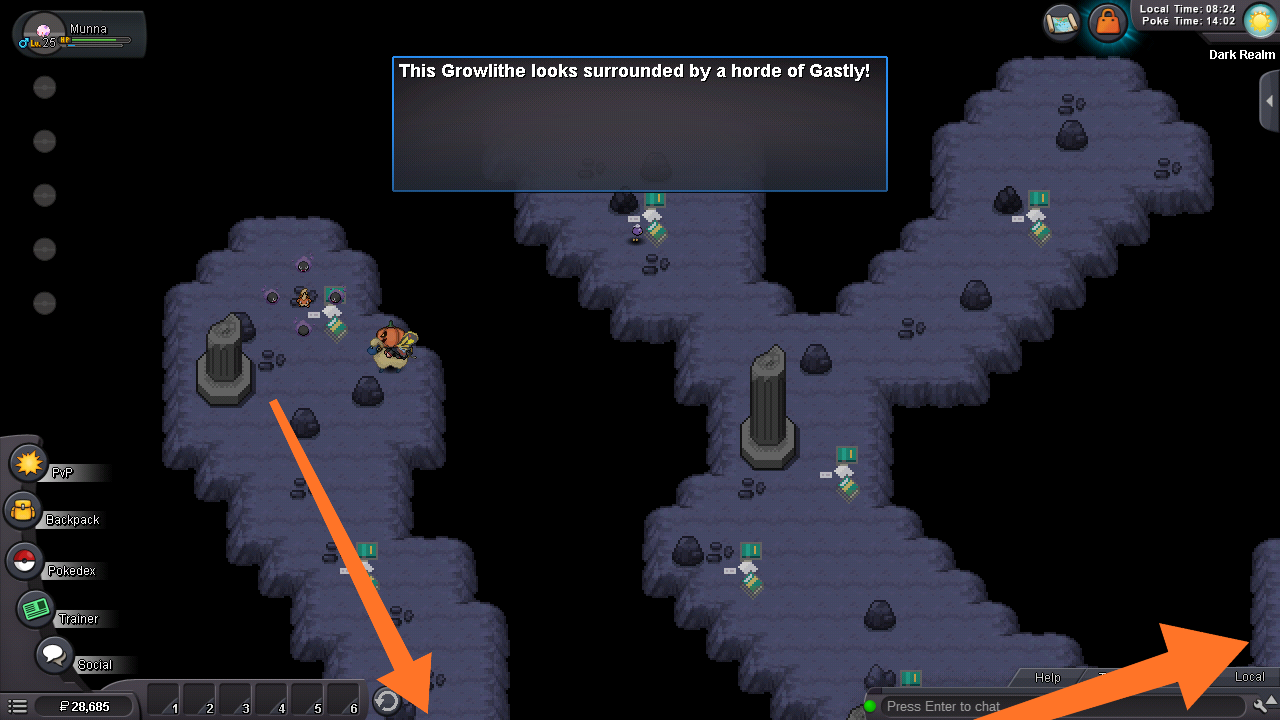


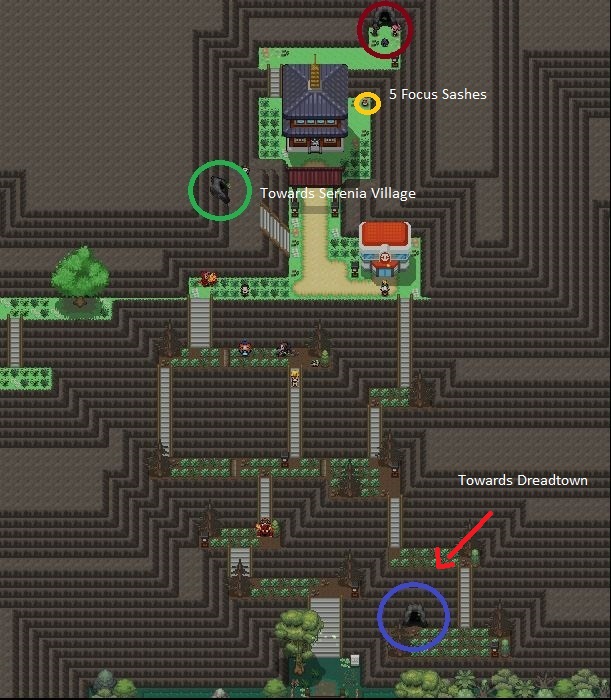


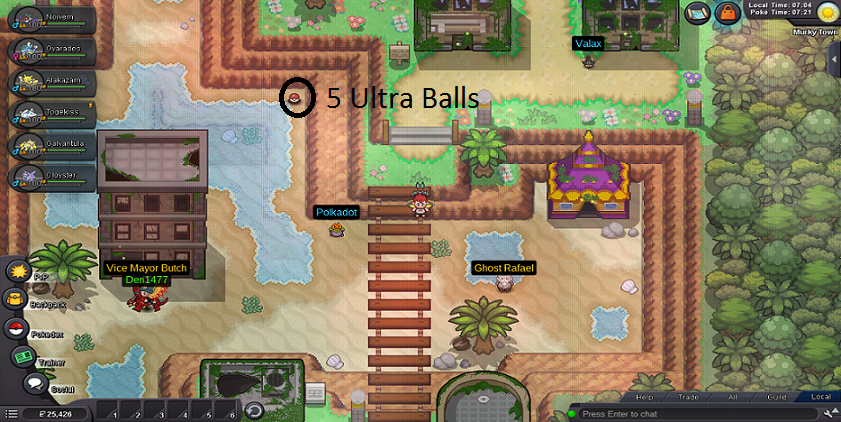


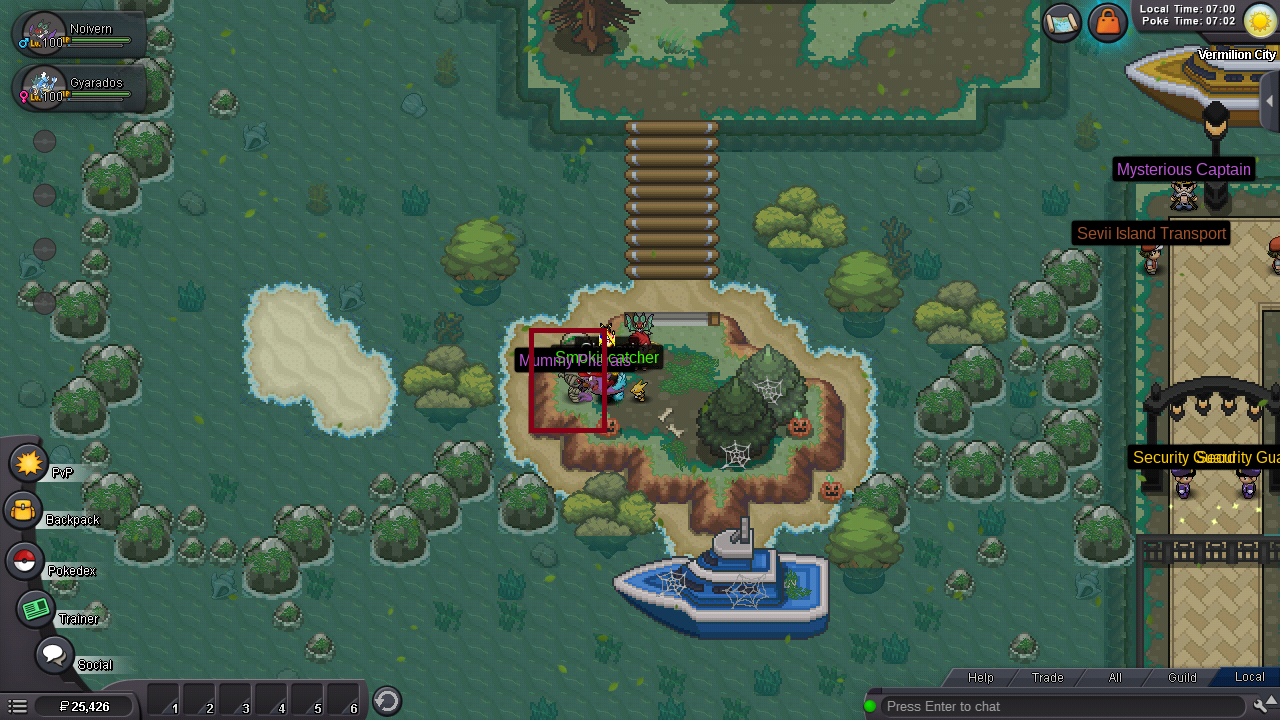

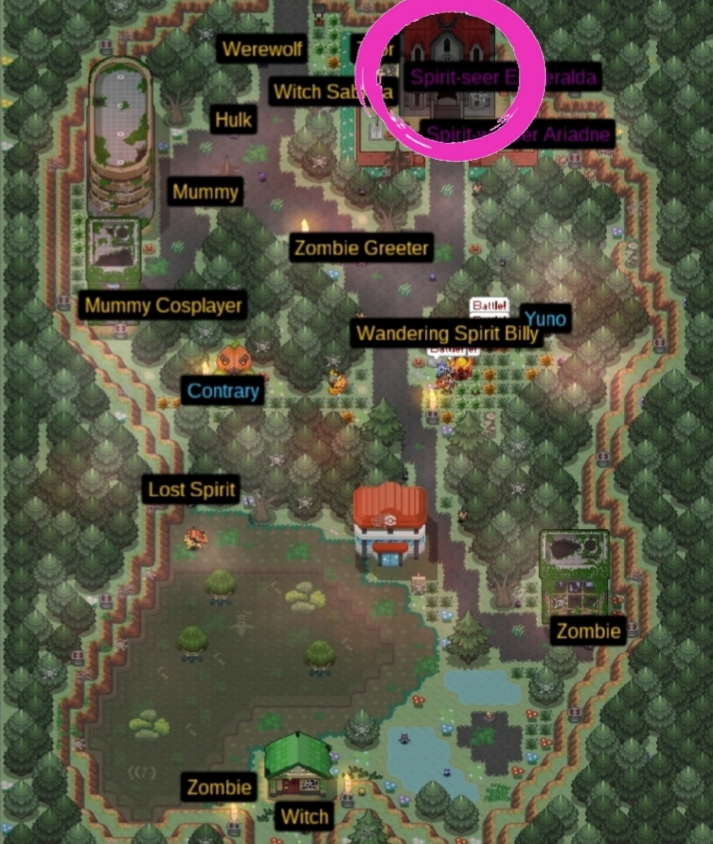


.png.bc32d520b863db68c71e9aaa31e890ed.png)
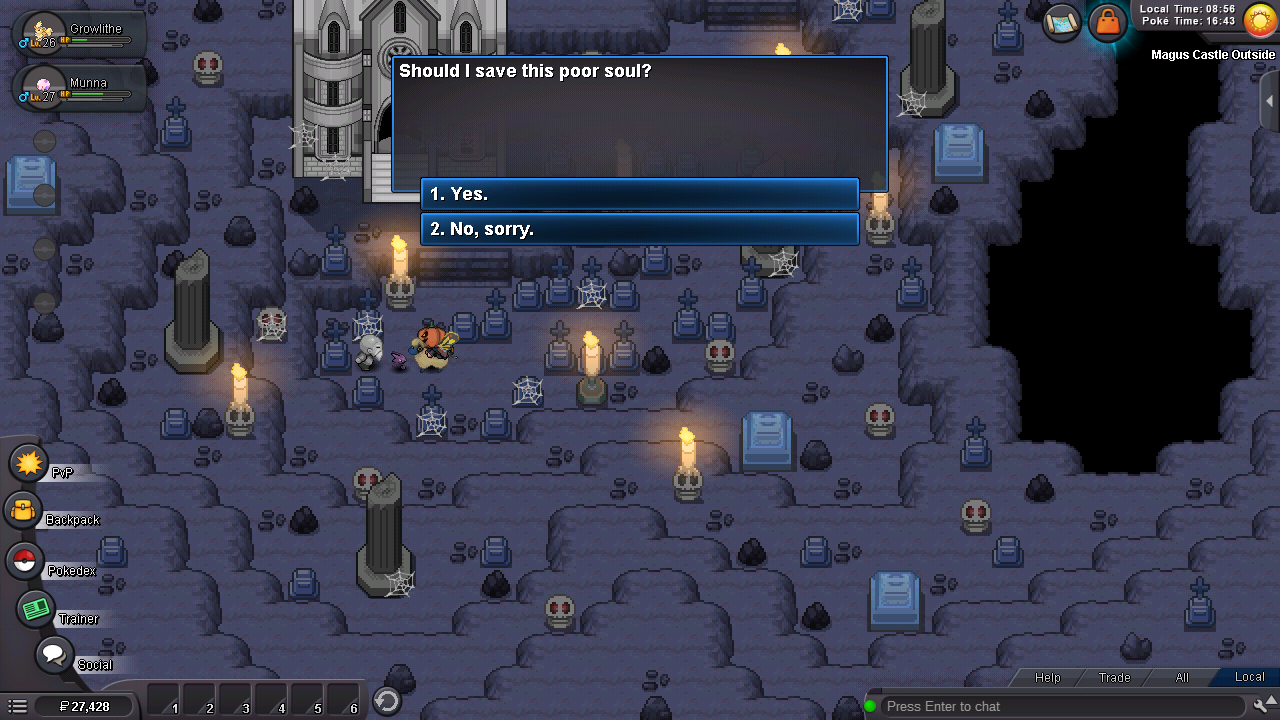
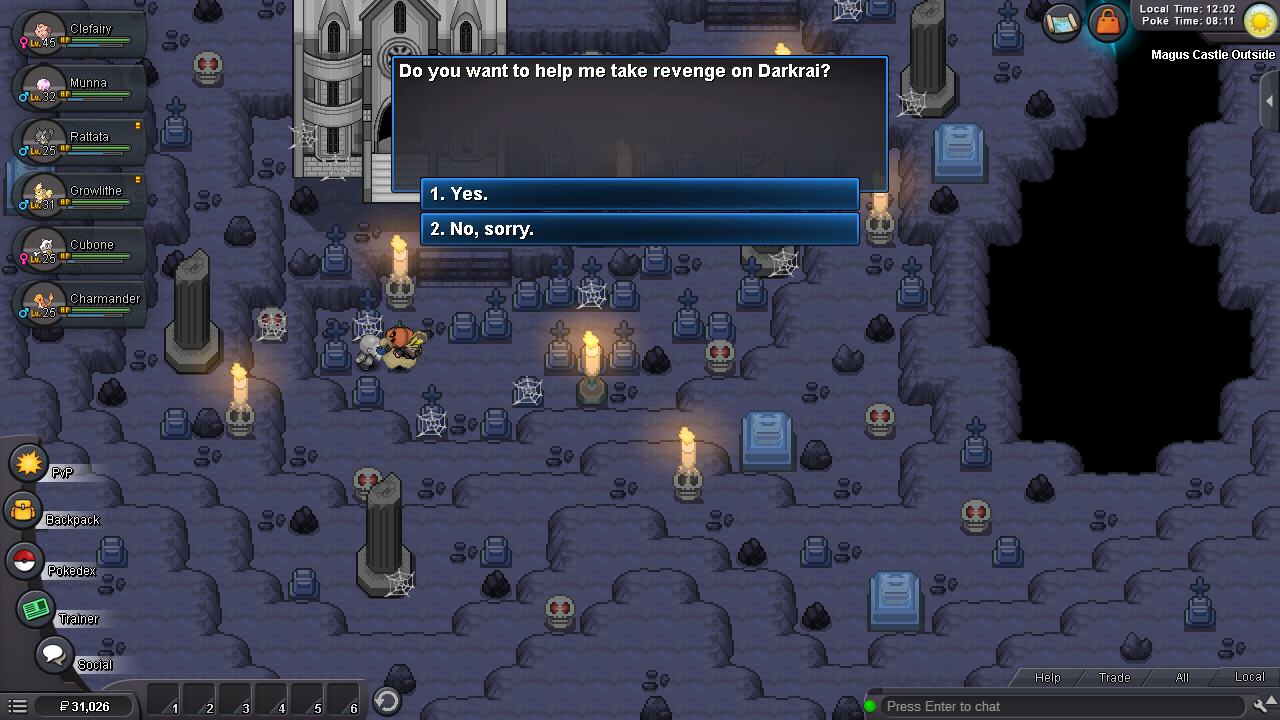
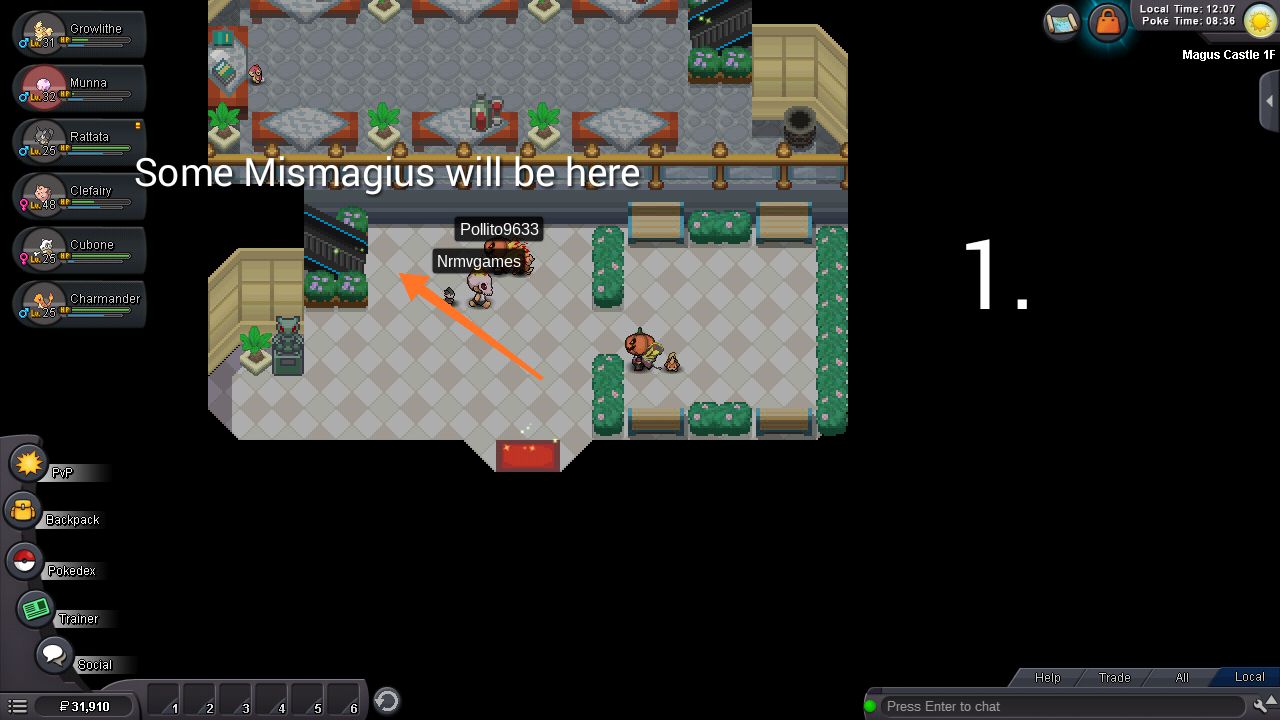
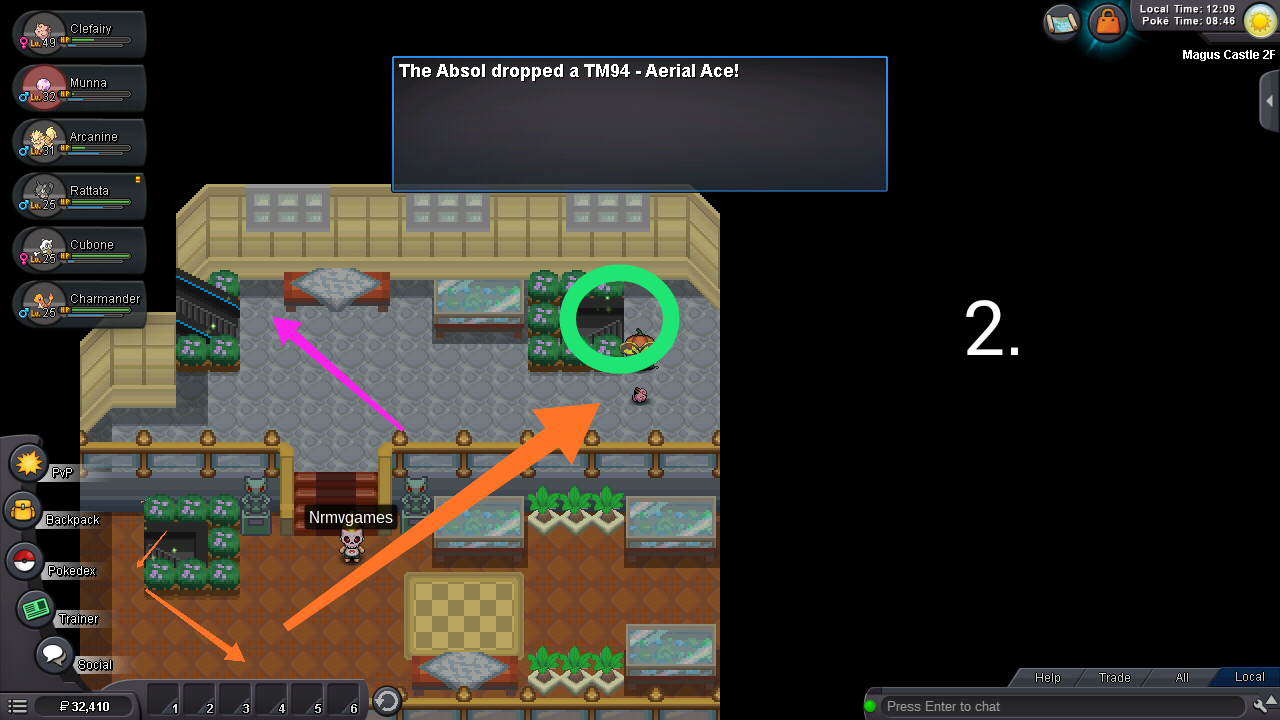
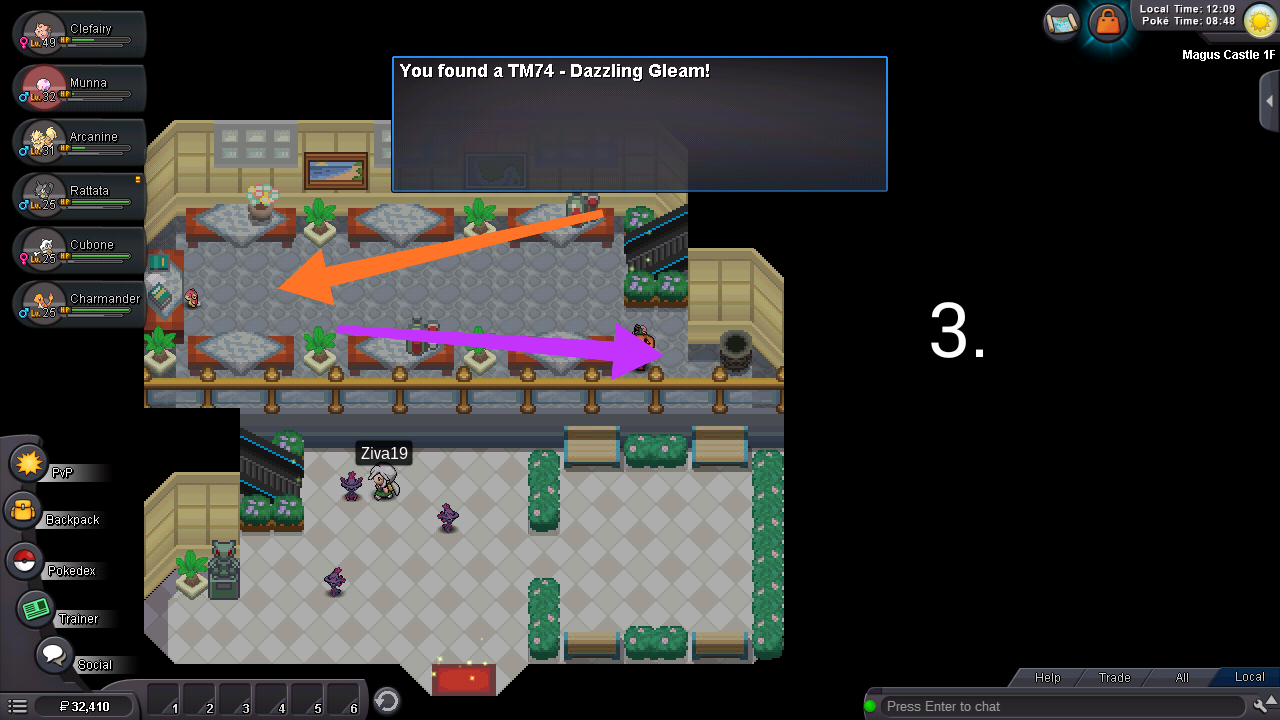
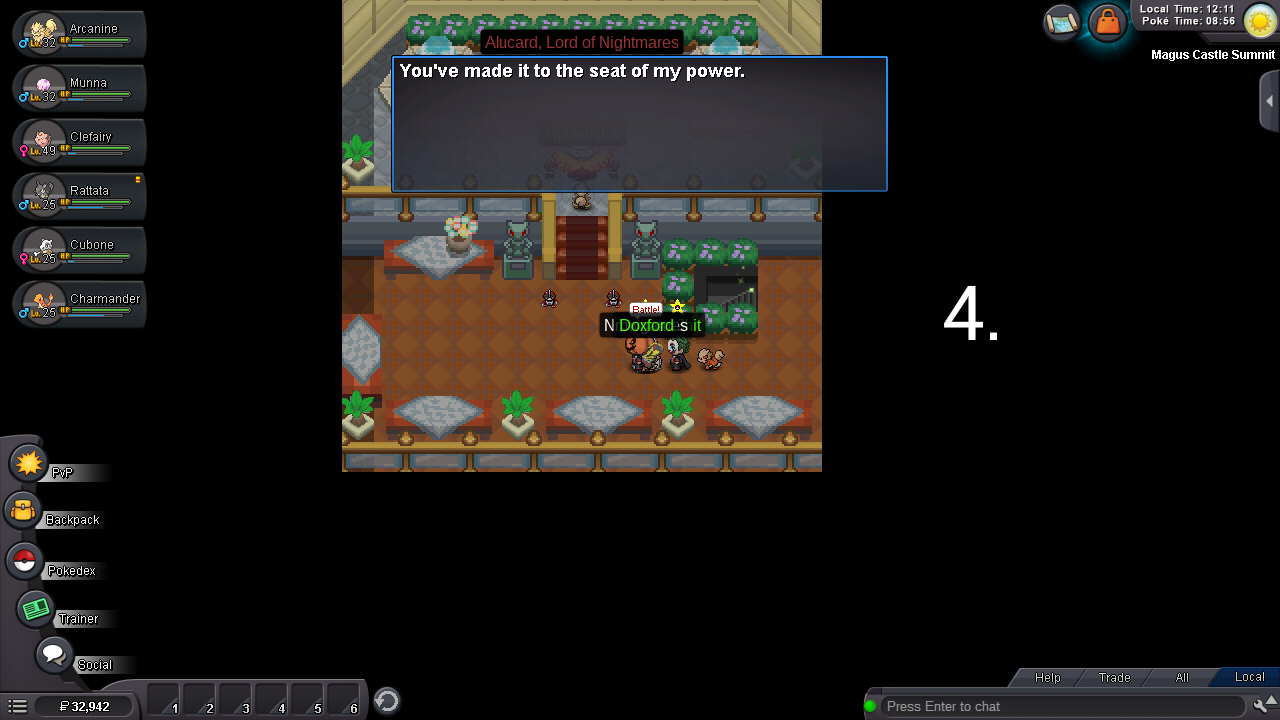
.jpeg.d8790cd500fb7c9a9457a5e0399bc819.jpeg)


.png.b80fdc5633ecb7c9425146b4d1ed3caf.png)
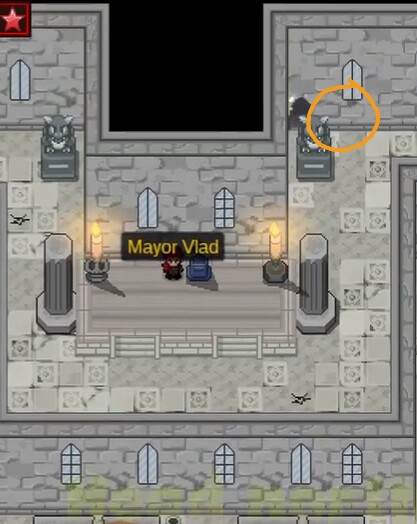
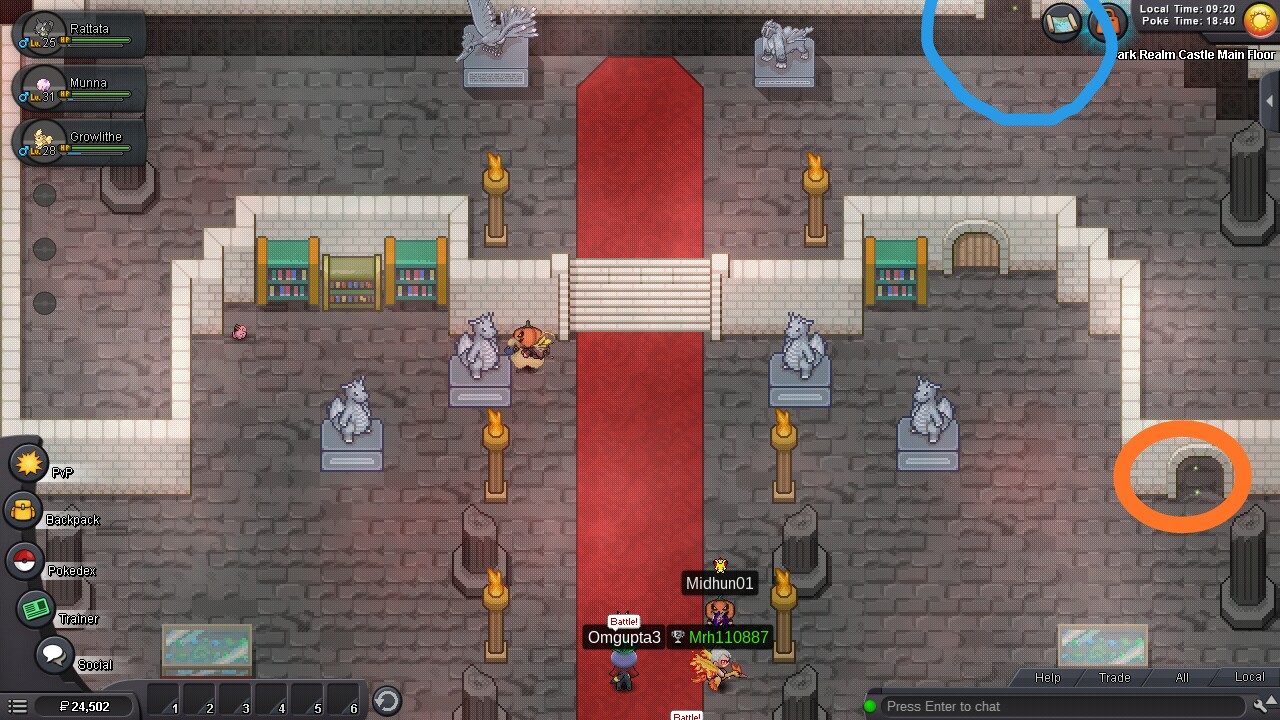


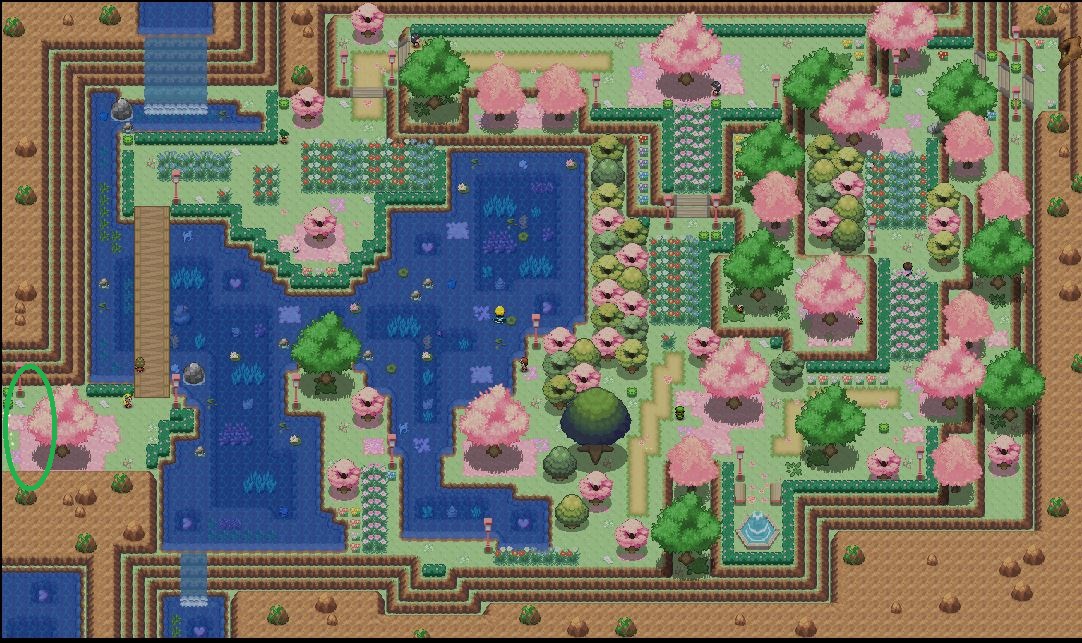
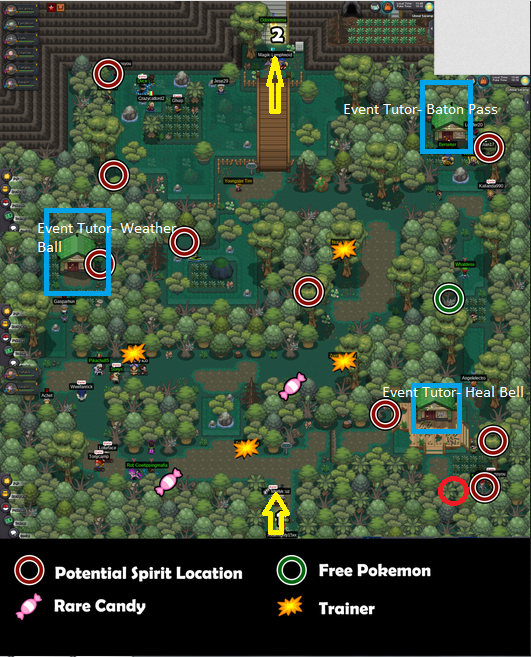

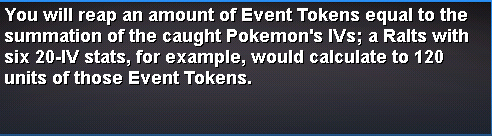


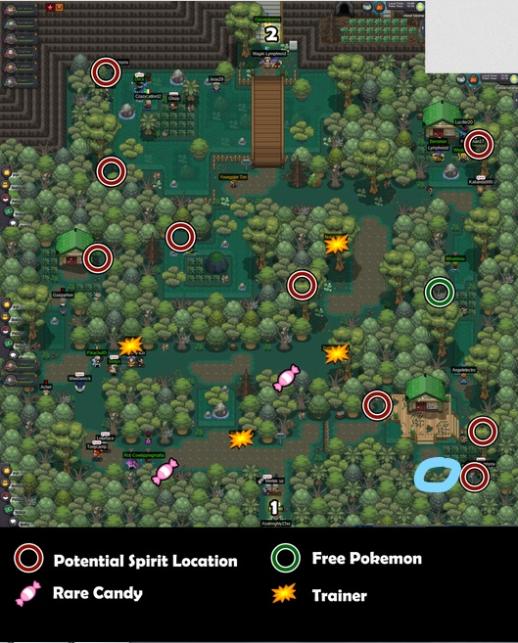

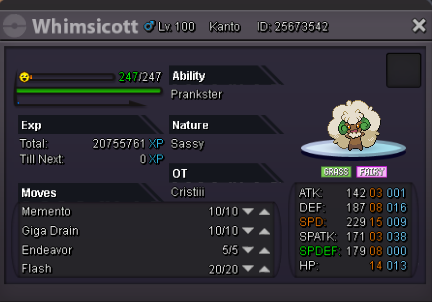

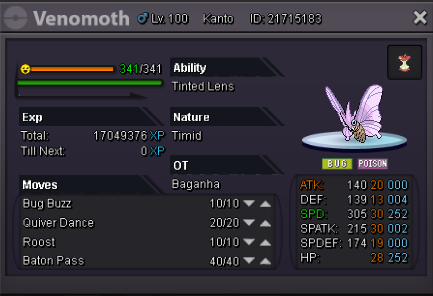
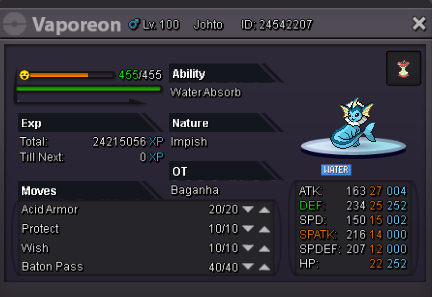
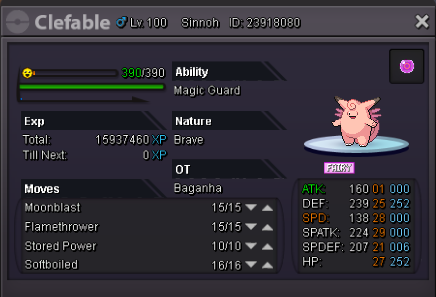
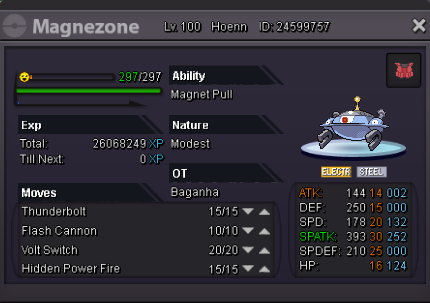
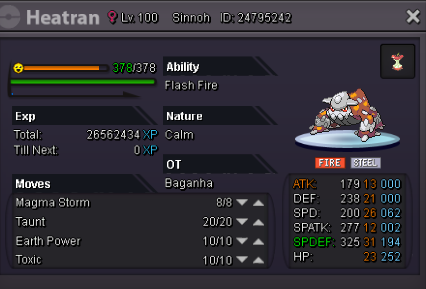


.png.a8d0c8cfe3a58fd5367ed4c75f6b8f7b.png)


.png.7a55c021d2ac4d6c19bc9ebd84f9c64a.png)


.png.c3553370fbc0a6a6ffa08cfec5621e6c.png)


(1).png.0d9fb169810704b0acfeb174accaae1a.png)
.png.663262fa5db4c32b69aac79d6993d846.png)


.gif.5cd55978149d8d6a70dd02cc7d69c532.gif)
.gif.8a96de7ddb64b5aa501a20d35187cc03.gif)