Search the Community
Showing results for tags 'wip'.
-
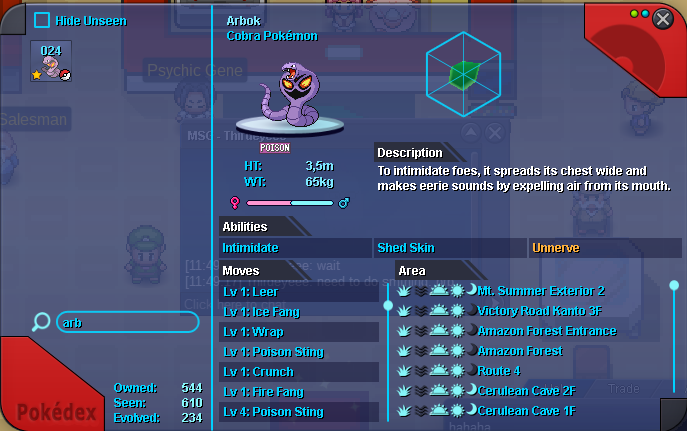
Hello, with Gen 7 Pokemon and Mechanics being added to the game sometime soon, I just want to make a little post mentioning exactly what changes we should expect to be coming to PRO such as, Stat changes, Abilities, Moves etc.. STAT CHANGES The Following Pokemon received stat changes in Generation 7! Arbok - Attack 85 -> 95 Dugtrio - Attack 80 -> 100 Farfetch'd - Attack 65 -> 90 Dodrio - Speed 100 -> 110 Electrode - Speed 140 -> 150 Exeggutor - Sp. Def 65 -> 75 Noctowl - Sp. Atk 76 -> 86 Ariados - Sp. Def 60 -> 70 Qwilfish - Def 75 -> 85 Magcargo - HP 50 -> 60, Sp. Atk 80 -> 90 Corsola - HP 55 -> 65, Def 85 -> 95, Sp. Def 85 -> 95 Mantine - HP 65 -> 85 Swellow - Sp. Atk 50 -> 75 Pelipper - Sp. Atk 85 -> 95 Masquerain - Sp. Atk 80 -> 100, Speed 60 -> 80 Delcatty - Speed 70 -> 90 Volbeat - Def 55 -> 75, Sp. Def 75 -> 85 Illumise - Def 55 -> 75, Sp. Def 75 -> 85 Lunatone - HP 70 -> 90 Solrock - HP 70 -> 90 Chimecho - HP 65 -> 75, Def 70 -> 80, Sp. Def 80 -> 90 Woobat - HP 55 -> 65 Crustle - Attack 95 -> 105 Beartic - Attack 110 -> 130 Cryogonal - HP 70 -> 80, Def 30 -> 50 --------------------------------------------------------------------------------------------------------------- ABILITY UPDATES The following Pokemon received ability additions or changes in Generation 7! Beartic - Gained Slush Rush Roggenrola and Boldore - Gained Weak Armor Gigalith - Gained Sand Stream Gengar - Levitate -> Cursed Body Pelipper - Gained Drizzle Torkoal - Gained Drought Vanilluxe - Gained Snow Warning Legendary Dogs - Hidden Abilities changed -> Inner Focus --------------------------------------------------------------------------------------------------------------- ABILITY DIFFERENCES The following abilities have been updated in Gen 7! Aerilate: The power boost has been decreased from 30% to 20% Gale Wings: The ability only activates when the Pokémon has 100% of its Hit Points remaining Parental Bond: Second hit only does 25% of the first hit's damage rather than 50%. Pixilate: The power boost has been decreased from 30% to 20% Prankster: When targeting a Dark-type opponent, the move with priority now fails. The move will still work on Ally Dark-type Pokémon Refrigerate: The power boost has been decreased from 30% to 20% Weak Armor: The Speed stat now increases by two stages And these are all the new abilities! --------------------------------------------------------------------------------------------------------------- MOVE CHANGES The following moves have been changed in Generation 7! Tackle: 50 power -> 40 Power Leech Life: 20 power -> 80 Power 15PP -> 10 PP Swagger: 90 Accuracy -> 85% Accuracy Sucker Punch: 80 Power -> 70 Power Dark Void: 80% Accuracy -> 50% Accuracy Ally Switch: +1 Priority -> +2 Priority Flying Press: 80 Power -> 100 Power Fell Stinger: 30 Power -> 50 Power Parabolic Charge: 50 Power -> 65 Power Diamond Storm: 50% chance for +1 Defense for the user -> 50% chance for +2 Defense for the user Water Shuriken: Physical -> Special Mystical Fire: 65 Power -> 75 Power Thunder Wave: 100% Accuracy -> 90% Accuracy The following pokemon have has moves given to them in Generation 7 These are the new moves! Some pokemons level up movesets have been updated in ULTRA SUN and MOON these changes can be found here: https://serebii.net/ultrasunultramoon/movesetchange.shtml (Thank you Sviper!) I Plan on adding all these SoonTM --------------------------------------------------------------------------------------------------------------- Mechanic Changes Burn Damage per turn was lowered from 12% -> 6% (thank you Akalli!) Confusion chance 50% -> 33% --------------------------------------------------------------------------------------------------------------- NEW POKEMON! Lets be real, it would be a ton of work to list every single Gen 7 Pokemon on a single thread, maybe ill update it one day but for now here a link to the pokedex!~ Link: https://www.serebii.net/sunmoon/pokemon.shtml --------------------------------------------------------------------------------------------------------------- I hope this helps new players or maybe some veterans remember exactly what the changes were in Gen 7, this is a W.I.P and if i missed anything or something isn't correct please let me know and I will add it!~ Thanks for reading
-
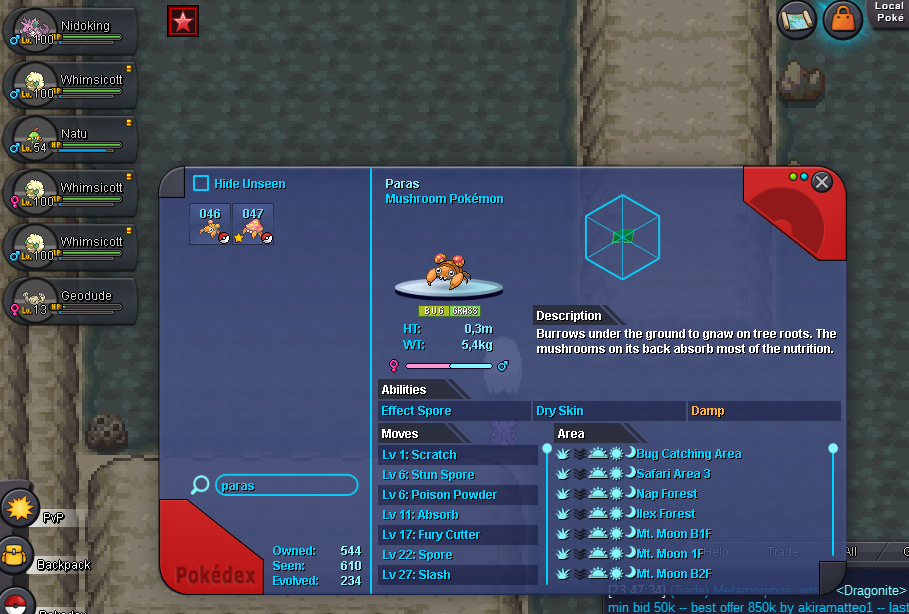
Feel free to post in here or send me a message if you have any informations regarding reworked spawns. To find a specific Pokemon or Berry just open up the spoilers and use CTRL+F search function. 1. Berries/General info: 2. Kanto: [spoiler=ROUTES] Route 1 Beedrill Ekans Pinsir Rattata Silcoon Grepa Berry Lum Berry Oran Berry Persim Berry Sitrus Berry Route 2 Ekans Rattata Sentret Silcoon Venonat Yanma Grepa Berry Lum Berry Oran Berry Persim Berry Sitrus Berry Tamato Berry Route 3 Beedrill Butterfree Caterpie Ekans Kakuna Silcoon Cheri Berry Pecha Berry Rawst Berry Route 4 Exeggcute Kakuna Natu Rattata Silcoon Venonat Grepa Berry Persim Berry Sitrus Berry Route 7 Beedrill Caterpie Gastly Kakuna Rattata Babiri Berry Cheri Berry Leppa Berry Pecha Berry Route 8 Exeggcute Kakuna Natu Pidgey Silcoon Lum Berry Sitrus Berry Tamato Berry Route 11 Caterpie Natu Pidgey Pinsir Rattata Silcoon Babiri Berry Cheri Berry Leppa Berry Pecha Berry Rawst Berry Roseli Berry Route 13 Beedrill Gastly Metapod Pidgey Pineco Rattata Grepa Berry Lum Berry Oran Berry Persim Berry Sitrus Berry Tamato Berry Route 14 Metapod Noctowl Pidgey Rattata Silcoon Cheri Berry Leppa Berry Rawst Berry Roseli Berry Route 15 Aipom Caterpie Metapod Natu Rattata Venonat Cheri Berry Leppa Berry Pecha Berry Rawst Berry Route 22 Ekans Metapod Noctowl Rattata Spearow Aspear Berry Lum Berry Oran Berry Starf Berry [spoiler=CITIES/OTHER PLACES] Cerulean City Cascoon Exeggcute Gastly Golbat Metapod Weedle Chesto Berry Grepa Berry Lum Berry Sitrus Berry Lavender Town Gastly Kakuna Misdreavus Pidgey Sableye Cheri Berry Rawst Berry Roseli Berry Pallet Town Bulbasaur Charmander Caterpie Exeggcute Rattata Silcoon Squirtle Venonat Lum Berry Persim Berry Sitrus Berry Tamato Berry Pewter City Cascoon Golbat Pidgey Spearow Weedle Aspear Berry Chesto Berry Lansat Berry Lum Berry Oran Berry Starf Berry Vermilion City Farfetch'd Munchlax Natu Pidgey Spearow Zubat Hondew Berry Occa Berry Passho Berry Qualot Berry Wacan Berry Viridian City Ekans Ledian Metapod Silcoon Spearow Aspear Berry Chesto Berry Lansat Berry Starf Berry Vermilion City Graveyard Ekans Gastly Misdreavus Murkrow Pidgey Coba Berry Haban Berry Kasib Berry Payapa Berry Viridian Forest Beedrill Cascoon Kakuna Silcoon Weedle Babiri Berry Grepa Berry Leppa Berry Oran Berry Pecha Berry Persim Berry Rawst Berry Roseli Berry 3. Johto: [spoiler=ROUTES] Route 26 Heracross Hoppip Noctowl Spinarak Teddiursa Red Apricorn Yellow Apricorn Route 27 Ariados Gligar Hoothoot Ledian Pidgey Teddiursa Colbur Berry Pink Apricorn Route 28 Ledyba Pidgey Sentret Sneasel Colbur Berry Pink Apricorn Red Apricorn Route 29 Aipom Gligar Hoothoot Ledian Sentret Teddiursa Chople Berry Black Apricorn Blue Apricorn Green Apricorn Route 30 Hoppip Natu Noctowl Nuzleaf Sentret Slakoth Colbur Berry Shuca Berry Red Apricorn White Apricorn Yellow Apricorn Route 31 Aipom Hoppip Ledyba Noctowl Spinarak Volbeat Colbur Berry Kebia Berry Pink Apricorn Red Apricorn White Apricorn Route 32 Ledian Noctowl Slakoth Teddiursa Colbur Berry Pink Apricorn Red Apricorn White Apricorn Route 33 Hoothoot Ledian Spinarak Teddiursa Chople Berry Rindo Berry Yache Berry Black Apricorn Blue Apricorn Route 34 Heracross Ledyba Misdreavus Natu Noctowl Teddiursa Yache Berry Green Apricorn Route 35 Heracross Ledian Ledyba Natu Noctowl Chople Berry Rindo Berry Yache Berry Green Apricorn Route 36 Aipom Hoothoot Ledian Natu Seedot Teddiursa Kebia Berry Shuca Berry Pink Apricorn Red Apricorn White Apricorn Yellow Apricorn Route 38 Ledyba Natu Sneasel Taillow Wurmple Grepa Berry Lum Berry Oran Berry Persim Berry Tamato Berry Route 44 Ariados Hoothoot Natu Spinarak Teddiursa Rindo Berry Yache Berry Black Apricorn Green Apricorn Red Apricorn Route 46 Gligar Misdreavus Noctowl Pidgey Sentret Teddiursa Chople Berry Rindo Berry Yache Berry [spoiler=CITIES/OTHER PLACES] Azalea Town Ledian Natu Sentret Yanma Chople Berry Rindo Berry Yache Berry Black Apricorn Blue Apricorn Cherrygrove City Hoppip Sentret Teddiursa Chople Berry Rindo Berry New Bark Town Chikorita Cyndaquil Pineco Poochyena Seedot Taillow Totodile Aspear Berry Lum Berry Starf Berry Olivine City Burmy Fearow Phantump Spinarak Trevenant Volbeat Hondew Berry Passho Berry Violet City Gligar Hoppip Misdreavus Natu Sentret Colbur Berry Kebia Berry Pink Apricorn Red Apricorn Ilex Forest Hoppip Ledian Natu Scyther Teddiursa Yanma Chople Berry Rindo Berry Yache Berry Black Apricorn Blue Apricorn Green Apricorn Red Apricorn Mt. Silver Exterior Pidgey Swinub Venonat Red Apricorn Mt. Silver Upper Mountainside Noctowl Swinub Chople Berry Yache Berry 4. Hoenn: [spoiler=ROUTES] Route 101 Illumise Seedot Route 102 Cacnea Poochyena Taillow Hondew Berry Route 103 Cacnea Nuzleaf Seedot Pomeg Berry Route 111 North Baltoy Cacnea Slakoth Kelpsy Berry Route 112 Cacnea Staravia Wingull Yanma Passho Berry Qualot Berry Wacan Berry Route 113 Cacnea Poochyena Taillow Volbeat Hondew Berry Occa Berry Route 115 Nuzleaf Taillow Scyther Route 116 Beautifly Seedot Surskit Taillow Babiri Berry Cheri Berry Rawst Berry Route 117 Cacnea Taillow Wurmple Apicot Berry Kelpsy Berry Petaya Berry Salac Berry Route 119A Slakoth Surskit Volbeat Yanma Apicot Berry Kelpsy Berry Route 120 Burmy Cherubi Illumise Seedot Surskit Wurmple Hondew Berry Occa Berry Passho Berry Qualot Berry Wacan Berry Route 123 Dustox Illumise Nuzleaf Poochyena Seedot Apicot Berry Pomeg Berry [spoiler=CITIES/OTHER PLACES] Fortree City Pidgey Taillow Wingull Wurmple Pecha Berry Roseli Berry Leev Town Port Illumise Surskit Volbeat Occa Berry Passho Berry Littleroot Town Cacnea Seedot Qualot Berry Mauvile City Cacnea Apicot Berry Salac Berry Oldale Town Beautifly Seedot Roseli Berry Rustboro City Hoothoot Misdreavus Poochyena Shuppet Spinarak Taillow Chilan Berry Kasib Berry Mt. Pyre Exterior Nuzleaf Seedot Leppa Berry Rawst Berry Roseli Berry Petalburg Woods Cacnea Illumise Pineco Shroomish Taillow Wurmple Occa Berry Passho Berry Qualot Berry Wacan Berry 5. Sinnoh: 6. Custom areas:
-
GREETINGS PRO PLAYER'S IN THIS GUIDE I WILL SHOW YOU MY WAY TO BEAT EVERY SINGLE BOSS VERY EASY. edit: i have quit the game so this thread will not be finished so for the boss i didnt added here just follow the same strategy and you gonna have success eerie impulse for sp att pokes then setup Charm for att pokes then setup this team have 2 sweepers so incase you lose one you will have a backup 2 pokes to harshly deacrese sp att or attack instead one tank that can take hits from both special and physical attacks and klefki to setup walls. [spoiler=MAIN TEAM] [spoiler=MAIN TEAM] [spoiler=MAIN TEAM] [spoiler=MAIN TEAM] This is the team you will mostly use. Nature/Ability and evs must be the same Ivs doesn't matter a lot but epics pokes will help. [spoiler=BOSS TEAM #2] [spoiler=BOSS TEAM #2] [spoiler=BOSS TEAM #2] [spoiler=BOSS TEAM #2] This team is being used only on specific bosses to save up time. Its an extra team very affordable and good to have it in your pve pokes list. Nature/Abilty and Ivs/evs Doesn't matter you just need x6 trash 100lvl raticate. [spoiler=EXTRA POKES YOU WILL NEED] BOSSES [spoiler=KANTO] [spoiler=KANTO] [spoiler=KANTO] [spoiler=KANTO] [spoiler=BROCK] [spoiler=BROCK] [spoiler=BROCK] POKE YOU WILL NEED: KLEFKI GYARADOS WOBBUFET LEAD WITH KLEFKI AND DO LIGHT SCREEN (he will do fire blast) THEN DO THUNDER WAVE AND IF YOU SURVIVE 2 HITS DO AS MANY SPIKES AS YOU CAN. AFTER YOU DIE GO WITH WOBBUFET AND DO x3 CHARM THEN SWITCH TO GYARADOS AND DO x2-4 DRAGONS DANCE AND THEN START SWIPE. AERODACTYL WATERFALL GOLEM WATERFALL STEELIX WATERFALL CRADILY ICE FANG TOXICROAK ICE FANG TERAKLION WATERFALL [spoiler=PUMPKIN KING] [spoiler=PUMPKIN KING] [spoiler=PUMPKIN KING] POKE YOU WILL NEED: KLEFKI GYARADOS LEAD WITH KLEFKI AND DO REFLECT THEN DO AS MANY SPIKES AS YOU CAN, AFTER KLEFKI DIES SWITCH TO GYARADOS AND DO x2 DRAGONS DANCE AND THEN START SWIPE. BISHARP WATERFALL SHUCKLE WATERFALL YANMEGA ICE FANG ROSERADE ICE FANG GOURGEIST CRUNCH TOGEKISS WATERFALL [spoiler=KOICHII] [spoiler=KOICHII] POKES YOU WILL NEED: KLEFKI ELECTRODE GYARADOS LEAD WITH KLEFKI AND DO LIGHT SSCREEN THEN DO THUNDER WAVE AND AFTER THAT DO AS MANY SPIKES YOU CAN (MAX 3) LET THE KLEFKI DIE IF HAVEN'T DIE ALREADY AND SWITCH TO ELECTRODE AND DO x3 EERIE IMPULSE AND THEN DO AGAIN LIGHT SCREEN. SWITCH TO GYARADOS AND DO x6 DRAGONS DANCE THEN SWIPE. LUCARIO WATERFALL HITMONCHAN WATERFALL HITMONTOP WATERFALL HITMONLEE WATERFALL GALLADE CRUNCH PANGORO WATERFALL [spoiler=CHUCK] [spoiler=CHUCK] [spoiler=CHUCK] POKES YOU WILL NEED: KLEFKI WOBBUFET CLEFABLE LEAD WITH KLEFKI AND DO REFLECT THEN DO THUNDER WAVE AND THEN DO AS MANY SPIKES AS POSSIBLE THEN SWITCH TO WOBBUFET AND DO x3 CHARM SWITCH TO CLEFABLE AND DO x6 COSMIC POWER AND x6 CALM MIND THEN START SWIPE. MACHAMP MOONBLAST INFERNAPE MOONBLAST MIENSHAO MOONBLAST CONKELDURR MOONBLAST POLIWRATH MOONBLAST BRELOOM MOONBLAST [spoiler=ERIKA] [spoiler=ERIKA] [spoiler=ERIKA] POKES YOU WILL NEED: WOBBUFET GYARADOS LEAD WITH WOBBUFET AND DO x3 CHARM THEN SWITCH TO GYARADOS AND DO x6 DRAGONS DANCE THEN START SWIPE. FERROTHORN CRUNCH VOLCARONA WATERFALL LUDICOLO CRUNCH CELEBI CRUNCH TORTERRA WATERFALL TANGROWTH ICE FANG [spoiler=GEORGE] [spoiler=GEORGE] [spoiler=GEORGE] POKES YOU WILL NEED: KLEFKI WOBBUFET GYARADOS LEAD WITH KLEFKI AND DO REFLECT THEN DO THUNDER WAVE AND DO AS MANY SPIKES AS POSSIBLE THEN SWITCH TO WOBBUFET AND DO x3 CHARM THEN SWITCH TO GYARADOS AND DO x6 DRAGONS DANCE AND START SWIPE. ARCANINE WATERFALL STOUTLAND WATERFALL GRANBULL WATERFALL HOUNDOOM WATERFALL MANECTRIC WATERFALL LUCARIO WATERFALL [spoiler=ENTEI GUARDIAN] [spoiler=ENTEI GUARDIAN] [spoiler=ENTEI GUARDIAN] POKES YOU WILL NEED: KLEFKI WOBBUFET GYARADOS LEAD WITH KLEFKI AND DO REFLECT THEN DO THUNDER WAVE AND DO AS MANY SPIKES AS POSSIBLE THEN SWITCH TO WOBBUFET AND DO x3 CHARM THEN SWITCH TO GYARADOS AND DO x6 DRAGONS DANCE AND START SWIPE. ENTEI WATERFALL INFERNAPE WATERFALL RESHIRAM WATERFALL GLISCOR ICE FANG SERPERIOR ICE FANG CHANDELURE WATERFALL [spoiler=JESSIE AND JAMES] [spoiler=JESSIE AND JAMES] [spoiler=JESSIE AND JAMES] JESSIE POKES YOU WILL NEED: KLEFKI PIKACHU ELECTRODE CLEFABLE CHANSEY LEAD WITH KLEFKI AND DO LIGHT SCREEN THEN DO THUNDER WAVE AND DO AS MANY SPIKES AS POSSIBLE THEN SWITCH TO ELECTRODE AND DO x3 EERIE IMPULSE AND THEN DO AGAIN LIGHT SCREEN NOW GO WITH CHANSEY AND PUT STEALTH ROCK THEN DO x6 FLASH THEN SWITCH TO CLEFABLE AND DO x6 COSMIC POWER AND x6 CALM MIND THEN START SWIPE. PORYGON-Z MOONBLAST ARBOK MOONBLAST GOURGEIST MOONBLAST YANMEGA MOONBLAST JELLICENT MOONBLAST SEVIPER MOONBLAST JAMES. POKES YOU WILL NEED: KLEFKI PIKACHU RATICATE RATICATE WOBBUFET GYARADOS LEAD WITH RATICATE DO ENDEAVOUR AND THEN DO QUICK ATTACK LET THE RATICATE DIE AND SWITCH TO RATICATE THEN DO ENDEAVOUR AND THEN QUICK ATTACK LET THE RATICATE DIE AND SWITCH TO KLEFKI DO REFLECT THEN DO THUNDER WAVE AND AS MANY SPIKES AS POSSIBLE THEN SWITCH TO WOBBUFET AND DO x3 CHARM THEN SWITCH TO GYARADOS AND DO x6 DRAGONS DANCE AND THEN START SWIPE. ARCANINE WATERFALL GYARADOS CRUNCH AMOONGUSS ICE FANG COFAGRIGUS CRUNCH [spoiler=KLOHVER] [spoiler=KLOHVER] [spoiler=KLOHVER] POKES YOU WILL NEED: RATICATE KLEFKI GYARADOS ELECTRODE LEAD WITH RATICATE DO ENDEAVOUR AND THEN DO SUCKER PUNCH LET THE RRATICATE DIE AND SWITCH TO KLEFKI THEN DO LIGHT SCREEN AND AFTER THAT DO THUNDER WAVE AND DO AS MANY SPIKES AS POSSIBLE (max 3) THEN SWITCH TO ELECTRODE AND DO x3 EERIE IMPULSE AND DO LIGHT SCREEN THEN SWITCH TO GYARADOS AND DO x6 DRAGONS DANCE AND START SWIPE. SHAYMIN-SKY ICE FANG MEGANIUM ICE FANG LILLIGANT ICE FANG GOGOAT ICE FANG VILEPLUME ICE FANG [spoiler=NAERO] [spoiler=NAERO] [spoiler=NAERO] POKES YOU WILL NEED: KLEFKI ELECTRODE GYARADOS LEAD WITH KLEFKI AND DO LIGHT SCREEN THEN DO THUNDER WAVE AND DO AS MANY SPIKES AS POSSIBLE THEN SWITCH TO ELECTRODE AND DO x3 EERIE IMPULSE AND SWITCH TO GYARADOS THEN DO x6 DRAGONS DANCE AND START SWIPE. TOGEKISS ICE FANG SNORLAX WATERFALL MR MIME CRUNCH BLISSEY WATERFALL ELECTRIVE WATERFALL MAGMORTAR WATERFALL [spoiler=NIKOLA] [spoiler=NIKOLA] [spoiler=NIKOLA] POKES YOU WILL NEED: RATICATE RATICATE RATICATE RATICATE RATICATE RATICATE LEAD WITH RATICATE AND DO ENDEAVOUR AND THEN DO SUCKER PUNCH LET THE RATICATE DIE AND SWITCH TO RATICATE DO ENDEAVOUR AND THEN DO SUCKER PUNCH LET THE RATICATE DIE AND SWITCH TO RATICATE DO ENDEAVOUR AND THEN DO SUCKER PUNCH LET THE RATICATE DIE AND SWITCH TO RATICATE DO ENDEAVOUR AND THEN DO SUCKER PUNCH LET THE RATICATE DIE AND SWITCH TO RATICATE DO ENDEAVOUR AND THEN DO SUCKER PUNCH LET THE RATICATE DIE AND SWITCH TO RATICATE DO ENDEAVOUR AND THEN DO SUCKER PUNCH. [spoiler=OFFICER SHAMAC] [spoiler=OFFICER SHAMAC] [spoiler=OFFICER SHAMAC] POKES YOU WILL NEED: KLEFKI WOBBUFET GYARADOS LEAD WITH KLEFKI AND DO REFLECT THEN DO AS MANY SPIKES AS POSSIBLE AND SWITCH TO WOBBUFET AND DO x3 CHARM THEN SWITCH TO GYARADOS AND DO x6 DRAGONS DANCE AND START SWIPE. SWAMPERT CRUNCH SWELLOW ICE FANG GOODRA ICE FANG LAPRAS CRUNCH CINCCINO WATERFALL LATIAS CRUNCH [spoiler=PREHAX] [spoiler=PREHAX] [spoiler=PREHAX] Still testing [spoiler=PROFESSOR OAK] [spoiler=PROFESSOR OAK] [spoiler=PROFESSOR OAK] POKES YOU WILL NEED: KLEFKI ELECTRODE CLEFABLE LEAD WITH KLEFKI AND DO LIGHT SCREEN THEN DO AS MANY SPIKES AS POSSIBLE AND SWITCH TO ELECTRODE THEN DO x3 EERIE IMPULSE AND DO LIGHT SCREEN THEN SWITCH TO CLEFABLE AND DO x6 CALM MIND AND x6 COSMIC POWER THEN START SWIPE. ROTOM-WASH MOONBLAST VENUSAUR MOONBLAST CHARIZARD MOONBLAST BLASTOISE MOONBLAST TAUROS MOONBLAST DRAGONITE MOONBLAST [spoiler=SHARY AND SHAUI] [spoiler=SHARY AND SHAUI] [spoiler=SHARY AND SHAUI] Still testing [spoiler=URAHARA] [spoiler=URAHARA] [spoiler=URAHARA] POKES YOU WILL NEED: KLEFKI GYARADOS WOBBUFET LEAD WITH KLEFKI AND DO REFLECT THEN DO THUNDER WAVE AND IF YOU SURVIVE DO AS MANY SPIKES AS POSSIBLE THEN SWITCH TO WOBBUFET AND DO x3 CHARM THEN SWITCH TO GYARADOS AND DO x6 DRAGONS DANCE AND START SWIPE. LUCARIO WATERFALL HO-OH WATERFALL VOLCARONA WATERFALL RAIKOU WATERFALL DONPHAN WATERFALL TOGEKISS ICE FANG [spoiler=XYLOS] [spoiler=XYLOS] [spoiler=XYLOS] Still testing [spoiler=OFFICER JENNY] [spoiler=OFFICER JENNY] [spoiler=OFFICER JENNY] POKES YOU WILL NEED: RATICATE RATICATE RATICATE RATICATE RATICATE RATICATE LEAD WITH RATICATE AND DO ENDEAVOUR AND THEN DO SUCKER PUNCH LET THE RATICATE DIE AND SWITCH TO RATICATE DO ENDEAVOUR AND THEN DO SUCKER PUNCH LET THE RATICATE DIE AND SWITCH TO RATICATE DO ENDEAVOUR AND THEN DO SUCKER PUNCH LET THE RATICATE DIE AND SWITCH TO RATICATE DO ENDEAVOUR AND THEN DO SUCKER PUNCH LET THE RATICATE DIE AND SWITCH TO RATICATE DO ENDEAVOUR AND THEN DO SUCKER PUNCH LET THE RATICATE DIE AND SWITCH TO RATICATE DO ENDEAVOUR AND THEN DO SUCKER PUNCH. [spoiler=Johto] [spoiler=BATTLE BOT] [spoiler=BATTLE BOT] [spoiler=BATTLE BOT] POKES YOU WILL NEED: KLEFKI WOBBUFET GYARADOS LEAD WITH KLEFKI AND DO REFLECT THEN DO THUNDER WAVE AND AS SPIKES AS POSSIBLE THEN SWITCH TO WOBBUFET AND DO X3 CHARM THEN SWITCH TO CHANSEY AND DO x6 FLASH AND PUT STEALTH ROCK THEN SWITCH TO GYARADOS AND DO X4-6 DRAGONS DANCE AND START SWIPE MEGA MEWTWO X CRUNCH PRIMAL GROUDON WATERFALL XD001 CRUNCH PRIMAL KYOGRE CRUNCH MEGA LATIOS CRUNCH MEGA RAYQUAZA ICE FANG [spoiler=BRUNO] [spoiler=BRUNO] [spoiler=BRUNO] POKES YOU WILL NEED: KLEFKI WOBBUFET GYARADOS LEAD WITH KLEFKI AND DO REFLECT THEN DO x3 SPIKES AND LET THE KLEFKI DIES SWITCH TO WOBBUFET AND DO x3 CHARM THEN SWITCH TO GYARADOS AND DO x4 DRAGONS DANCE AND START SWIPE. STEELIX WATERFALL HARIYAMA WATERFALL HITMONLEE WATERFALL THROH WATERFALL SAWK WATERFALL SCRAFTY WATERFALL [spoiler=BUGSY] [spoiler=BUGSY] [spoiler=BUGSY] POKES YOU WILL NEED: LEAD WITH RATICATE AND DO ENDEAVOUR AND THEN DO SUCKER PUNCH LET THE RATICATE DIE AND SWITCH TO RATICATE DO ENDEAVOUR AND THEN DO SUCKER PUNCH LET THE RATICATE DIE AND SWITCH TO RATICATE DO ENDEAVOUR AND THEN DO SUCKER PUNCH LET THE RATICATE DIE AND SWITCH TO RATICATE DO ENDEAVOUR AND THEN DO SUCKER PUNCH LET THE RATICATE DIE AND SWITCH TO RATICATE DO ENDEAVOUR AND THEN DO SUCKER PUNCH LET THE RATICATE DIE AND SWITCH TO RATICATE DO ENDEAVOUR AND THEN DO SUCKER PUNCH. [spoiler=SUICUNE GUARDIAN] [spoiler=SUICUNE GUARDIAN] [spoiler=SUICUNE GUARDIAN] POKES YOU WILL NEED: RATICATE RATICATE RATICATE RATICATE RATICATE RATICATE LEAD WITH RATICATE AND DO ENDEAVOUR AND THEN DO SUCKER PUNCH LET THE RATICATE DIE AND SWITCH TO RATICATE DO ENDEAVOUR AND THEN DO SUCKER PUNCH LET THE RATICATE DIE AND SWITCH TO RATICATE DO ENDEAVOUR AND THEN DO SUCKER PUNCH LET THE RATICATE DIE AND SWITCH TO RATICATE DO ENDEAVOUR AND THEN DO SUCKER PUNCH LET THE RATICATE DIE AND SWITCH TO RATICATE DO ENDEAVOUR AND THEN DO SUCKER PUNCH LET THE RATICATE DIE AND SWITCH TO RATICATE DO ENDEAVOUR AND THEN DO SUCKER PUNCH. [spoiler=LANCE] [spoiler=LANCE] [spoiler=LANCE] [spoiler=LANCE] POKES YOU WILL NEED: KLEFKI WOBBUFET CLEFABLE LEAD WITH KLEFKI AND DO LIGHT SCREEN THEN DO REFLECT AND IF YOU SURVIVE DO THUNDER WAVE AFTER KLEFKI DIES GO WITH WOBBUFET AND DO X3 CHARM THEN SWITCH TO CLEFABLE AND DO x6 CALM MIND AND x6 COSMIC POWER AND START SWIPE. SALAMENCE MOONBLAST DIALGA MOONBLAST LATIOS MOONBLAST GARCHOMP MOONBLAST GYARADOS MOONBLAST DRAGONITE MOONBLAST [spoiler=LORELEI] [spoiler=LORELEI] [spoiler=LORELEI] [spoiler=LORELEI] POKES YOU WILL NEED: KLEFKI GYARADOS ELECTRODE CHANSEY LEAD WITH KLEFKI AND DO LIGHT SCREEN THEN DO THUNDER WAVE AFTER THAT DO AS MANY SPIKES AS POSSIBLE THEN SWITCH TO CHANSEY AND DO X6 FLASH THEN DO STEALTH ROCK AND SWITCH TO ELECTRODE DO LIGHT SCREEN THEN DO x3 EERIE IMPULSE AND SWITCH TO GYARADOS THEN DO x4 DRAGONS DANCE AND START SWIPE ALOLAN NINETALES WATERFALL ALOLAN SANDSLASH WATERFALL ARTICUNO WATERFALL WEAVILE WATERFALL LAPRAS CRUNCH SLOWBRO CRUNCH [spoiler=PEWDIE AND DIEPY] [spoiler=PEWDIE AND DIEPY] [spoiler=PEWDIE AND DIEPY] POKE YOU WILL NEED (PEWDIE) KLEFKI GYARADOS ELECTRODE LEAD WITH KLEFKI AND DO LIGHT SCREEN THEN DO THUNDER WAVE AFTER THAT DO AS MANY SPIKES AS POSSIBLE THEN SWITCH TO ELECTRODE AND DO X3 EERIE IMPULSE AND THEN DO LIGHT SCREEN THEN SWITCH TO GYARADOS AND DO X6 DRAGONS DANCE AND START SWIPE STARMIE CRUNCH ALAKAZAM CRUNCH SLOWKING CRUNCH JIRACHI CRUNCH LATIOS CRUNCH MEW CRUNCH POKES YOU WILL NEED (DIEPY) KLEFKI CHANSEY ELECTRODE WOBBUFET GYARADOS LEAD WITH KLEFKI AND DO REFLECT THEN SWITCH TO WOBBUFET AND DO COUNTER AFTER AZUMARILL DIES SWITCH TO CHANSEY AND DO TOXIC TO CLEFABLE AND DO STEALTH ROCK AFTER CLEFABLE DIES SWITCH TO KLEFKI AND DO REFLECT THEN SWITCH TO WOBBUFET AND DO x3 CHARM THEN SWITCH TO GYARADOS AND DO x6 DRAGONS DANCE AND START SWIPE XERNEAS WATERFALL SYLVEON WATERFALL TOGEKISS WATERFALL DIANCIE WATERFALL [spoiler=MISTY] [spoiler=MISTY] [spoiler=MISTY] POKES YOU WILL NEED: KLEFKI CHANSEY GYARADOS WOBBUFET LEAD WITH CHANSEY AND DO TOXIC THEN PUT STEALTH ROCK'S AFTER MILOTIC DIES SWITCH TO KLEFKI AND DO REFLECT THEN DO THUNDER WAVE AND PUT x3 SPIKES THEN SWITCH TO WOBBUFET AND DO x3 CHARM THEN SWITCH TO GYARADOS AND DO X6 DRAGONS DANCE AND START SWIPE GYARADOS CRUNCH STARMIE CRUNCH CRADILY ICE FANG BLASTOISE CRUNCH TOGEKISS ICE FANG [spoiler=THOR] [spoiler=THOR] [spoiler=THOR] POKES YOU WILL NEED: KLEFKI CLEFABLE WOBBUFET LEAD WITH KLEFKI AND DO REFLECT THEN DO THUNDER WAVE AND DO AS MANY SPIKES AS POSSIBLE THEN SWITCH TO WOBBUFET AND DO x3 CHARM THEN SWITCH TO CLEFABLE AND DO x6 CALM MIND AND x6 COSMIC POWER AND START SWIPE DRAGONITE MOONBLAST TYRANITAR MOONBLAST GRENINJA MOONBLAST ZAPDOS MOONBLAST MAMOSWINE MOONBLAST LUGIA MOONBLAST [spoiler=NEROLI] [spoiler=NEROLI] [spoiler=NEROLI] STILL TESTING [spoiler=TERMINATOR] [spoiler=TERMINATOR] [spoiler=TERMINATOR] Stil testing [spoiler=PROFESSOR ELM] [spoiler=PROFESSOR ELM] [spoiler=PROFESSOR ELM] POKES YOU WILL NEED ELECTRODE GYARADOS LEAD WITH ELECTRODE AND x3 EERIE IMPULSE THEN DO LIGHT SCREEN AND SWITCH TO GYARADOS THEN DO x6 DRAGONS DANCE AND START SWIPE CORSOLA CRUNCH TOGEKISS ICE FANG MEGANIUM ICE FANG TYPHLOSION WATERFALL FERALIGATR CRUNCH TYRANITAR WATERFALL [spoiler=SAGE] [spoiler=SAGE] [spoiler=SAGE] POKES YOU WILL NEED KLEFKI GYARADOS ELECTRODE LEAD WITH KLEFKI AND DO LIGHT SCREEN THEN DO THUNDER WAVE AND DO x3 SPIKES THEN SWITCH TO ELECTRODE DO x3 EERIE IMPULSE AND DO LIGHT SCREEN THEN SWITCH TO GYARADOS AND DO x6 DRAGONS DANCE AND START SWIPE GLACEON FLAREON VAPOREON JOLTEON SYLVEON ESPEON [spoiler=Hoenn] [spoiler=GINGERY JONES] [spoiler=GINGERY JONES] [spoiler=GINGERY JONES] POKES YOU WILL NEED: KLEFKI CLEFABLE WOBBUFET LEAD WITH KLEFKI AND DO REFLECT THEN DO AS MANY SPIKES AS POSSIBLE AFTER KLEFKI DIES SWITCH TO WOBBUFET AND DO x3 CHARM THEN SWITCH TO CLEFABLE AND DO x6 COSMIC POWER AND x6 CALM MIND THEN START SWIPE CONKELDURR MOONBLAST KLINKLANG MOONBLAST GOLURK MOONBLAST MANDIBUZZ MOONBLAST CLAWITZER MOONBLAST PANGORO MOONBLAST [spoiler=RAIKOU GUARDIAN] [spoiler=RAIKOU GUARDIAN] [spoiler=RAIKOU GUARDIAN] POKES YOU WILL NEED: DUSKLOPS KLEFKI WOBBUFET GYARADOS LEAD WITH DUSCLOPS AND DO TOXIC THEN SPAM FLASHES AND REST TILL ZEKROM DIES AFTER THAT DO FLASHES ON EXCADRILL TILL YOU DIE OR REACH THE MAX NUMBER (6) SWITCH TO KLEFKI AND DO REFLECT AND x3 SPIKES THEN SWITCH TO WOBBUFET AND DO x3 CHARM THEN SWITCH TO GYARADOS AND DO x6 DRAGONS DANCE AND START SWIPE EXCADRILL WATERFALL RAIKOU WATERFALL QUAGSIRE CRUNCH EELEKTROSS WATERFALL MAGNEZONE WATERFALL
-
Suspicious Bot resides in Dock Island House 1 , it is an old, dilapidated desktop. When you try to boot it, it immediately summons a trio of powerful Pokemon It is a gauntlet challenge, meaning that you will have to defeat progressively stronger teams for better rewards. You are allowed to bring three Pokemon, and the boss will select three from a pool of 138. The chances of stronger Pokemon showing up increases as you win more games. When the boss finally defeats you, rewards await! [spoiler=Rewards] . Round 1 Team 1 [TABLE] [TR] [TD] Pokemon [/TD] [TD] Moves [/TD] [TD] Item [/TD] [/TR] [TR] [TD] Unown [/TD] [TD] Hiddenpower [/TD] [TD] [/TD] [/TR] [TR] [TD] Scatterbug [/TD] [TD] Bug bite tackle [/TD] [TD] [/TD] [/TR] [TR] [TD] Mudkip [/TD] [TD] Icebeam hydro pump [/TD] [TD] [/TD] [/TR] [/TABLE] Team 2 [TABLE] [TR] [TD] Pokemon [/TD] [TD] Moves [/TD] [TD] Item [/TD] [/TR] [TR] [TD] [/TD] [TD] [/TD] [TD] [/TD] [/TR] [TR] [TD] [/TD] [TD] [/TD] [TD] [/TD] [/TR] [TR] [TD] [/TD] [TD] [/TD] [TD] [/TD] [/TR] [/TABLE] Team 3 [TABLE] [TR] [TD] Pokemon [/TD] [TD] Moves [/TD] [TD] Item [/TD] [/TR] [TR] [TD] [/TD] [TD] [/TD] [TD] [/TD] [/TR] [TR] [TD] [/TD] [TD] [/TD] [TD] [/TD] [/TR] [TR] [TD] [/TD] [TD] [/TD] [TD] [/TD] [/TR] [/TABLE] Round 2 Team 1 [TABLE] [TR] [TD] Pokemon [/TD] [TD] Moves [/TD] [TD] Item [/TD] [/TR] [TR] [TD] Treecko [/TD] [TD] Crunch drain punch [/TD] [TD] [/TD] [/TR] [TR] [TD] Torchic [/TD] [TD] Low kick Flamethrower [/TD] [TD] [/TD] [/TR] [TR] [TD] Scatterbug [/TD] [TD] Bug bite Tackle [/TD] [TD] [/TD] [/TR] [/TABLE] Team 2 [TABLE] [TR] [TD] Pokemon [/TD] [TD] Moves [/TD] [TD] Item [/TD] [/TR] [TR] [TD] [/TD] [TD] [/TD] [TD] [/TD] [/TR] [TR] [TD] [/TD] [TD] [/TD] [TD] [/TD] [/TR] [TR] [TD] [/TD] [TD] [/TD] [TD] [/TD] [/TR] [/TABLE] Team 3 [TABLE] [TR] [TD] Pokemon [/TD] [TD] Moves [/TD] [TD] Item [/TD] [/TR] [TR] [TD] [/TD] [TD] [/TD] [TD] [/TD] [/TR] [TR] [TD] [/TD] [TD] [/TD] [TD] [/TD] [/TR] [TR] [TD] [/TD] [TD] [/TD] [TD] [/TD] [/TR] [/TABLE] Round 3 Team 1 [TABLE] [TR] [TD] Pokemon [/TD] [TD] Moves [/TD] [TD] Item [/TD] [/TR] [TR] [TD] Scatterbug [/TD] [TD] Poison powder Bug bite Tackle [/TD] [TD] [/TD] [/TR] [TR] [TD] Bulbasaur [/TD] [TD] Sludgebomb Energy ball [/TD] [TD] [/TD] [/TR] [TR] [TD] Aipom [/TD] [TD] Tailslap [/TD] [TD] [/TD] [/TR] [/TABLE] Round 4 Team 1 [TABLE] [TR] [TD] Pokemon [/TD] [TD] Moves [/TD] [TD] Item [/TD] [/TR] [TR] [TD] Floette [/TD] [TD] Moonblast Synthesis Toxic [/TD] [TD] [/TD] [/TR] [TR] [TD] Abra [/TD] [TD] Psychic [/TD] [TD] [/TD] [/TR] [TR] [TD] Tangela [/TD] [TD] Leech seed Giga drain [/TD] [TD] [/TD] [/TR] [/TABLE] Round 5 Team 1 [TABLE] [TR] [TD] Pokemon [/TD] [TD] Moves [/TD] [TD] Item [/TD] [/TR] [TR] [TD] Metang [/TD] [TD] Meteor mash [/TD] [TD] [/TD] [/TR] [TR] [TD] Sneasel [/TD] [TD] Swords dance Knock off [/TD] [TD] [/TD] [/TR] [TR] [TD] Eelektrik [/TD] [TD] Wild charge [/TD] [TD] [/TD] [/TR] [/TABLE] Round 6 Team 1 [TABLE] [TR] [TD] Pokemon [/TD] [TD] Moves [/TD] [TD] Item [/TD] [/TR] [TR] [TD] Zweilous [/TD] [TD] Crunch [/TD] [TD] [/TD] [/TR] [TR] [TD] Staravia [/TD] [TD] Brave bird [/TD] [TD] [/TD] [/TR] [TR] [TD] Glalie [/TD] [TD] Ice beam Freeze dry [/TD] [TD] [/TD] [/TR] [/TABLE] Round 7 Team 1 [TABLE] [TR] [TD] Pokemon [/TD] [TD] Moves [/TD] [TD] Item [/TD] [/TR] [TR] [TD] Kingler [/TD] [TD] Swords dance [/TD] [TD] [/TD] [/TR] [TR] [TD] Bellossom [/TD] [TD] Quiver dance Giga drain [/TD] [TD] [/TD] [/TR] [TR] [TD] Heatmor [/TD] [TD] Super power [/TD] [TD] [/TD] [/TR] [/TABLE] Round 8 Team 1 [TABLE] [TR] [TD] Pokemon [/TD] [TD] Moves [/TD] [TD] Item [/TD] [/TR] [TR] [TD] Claydol [/TD] [TD] Icebeam Earthpower [/TD] [TD] [/TD] [/TR] [TR] [TD] Golem [/TD] [TD] Fire punch Stone edge [/TD] [TD] [/TD] [/TR] [TR] [TD] Honchkrow [/TD] [TD] Sucker punch [/TD] [TD] [/TD] [/TR] [/TABLE] Round 9 Team 1 [TABLE] [TR] [TD] Pokemon [/TD] [TD] Moves [/TD] [TD] Item [/TD] [/TR] [TR] [TD] Dragalge [/TD] [TD] Sludge wave Focus blast [/TD] [TD] [/TD] [/TR] [TR] [TD] Bellossom [/TD] [TD] Quiver dance Giga drain [/TD] [TD] [/TD] [/TR] [TR] [TD] Jolteon [/TD] [TD] Thunder bolt [/TD] [TD] [/TD] [/TR] [/TABLE] Round 10 Team 1 [TABLE] [TR] [TD] Pokemon [/TD] [TD] Moves [/TD] [TD] Item [/TD] [/TR] [TR] [TD] Seismitoad [/TD] [TD] Icy wind hydro pump [/TD] [TD] [/TD] [/TR] [TR] [TD] Virizion [/TD] [TD] Close combat Leaf blade Swords dance [/TD] [TD] [/TD] [/TR] [TR] [TD] [/TD] [TD] [/TD] [TD] [/TD] [/TR] [/TABLE] Team 2 [TABLE] [TR] [TD] Pokemon [/TD] [TD] Moves [/TD] [TD] Item [/TD] [/TR] [TR] [TD] Medicham [/TD] [TD] Thunder punch Ice punch [/TD] [TD] [/TD] [/TR] [TR] [TD] Flygon [/TD] [TD] Dragon dance Earthquake Outrage [/TD] [TD] [/TD] [/TR] [TR] [TD] Articuno [/TD] [TD] Freeze dry [/TD] [TD] [/TD] [/TR] [/TABLE] Round 11 Team 2 [TABLE] [TR] [TD] Pokemon [/TD] [TD] Moves [/TD] [TD] Item [/TD] [/TR] [TR] [TD] Houndoom [/TD] [TD] Fireblast [/TD] [TD] [/TD] [/TR] [TR] [TD] Dragalge [/TD] [TD] Sludgewave Focus blast [/TD] [TD] [/TD] [/TR] [TR] [TD] Sableye [/TD] [TD] Foul play [/TD] [TD] [/TD] [/TR] [/TABLE] Round 12 Team 2 [TABLE] [TR] [TD] Pokemon [/TD] [TD] Moves [/TD] [TD] Item [/TD] [/TR] [TR] [TD] Aromatisse [/TD] [TD] Moonblast [/TD] [TD] [/TD] [/TR] [TR] [TD] Espeon [/TD] [TD] calm mind Psyshock [/TD] [TD] [/TD] [/TR] [TR] [TD] Drapion [/TD] [TD] Poison jab Knock off Swords dance [/TD] [TD] [/TD] [/TR] [/TABLE] Round 13 Team 2 [TABLE] [TR] [TD] Pokemon [/TD] [TD] Moves [/TD] [TD] Item [/TD] [/TR] [TR] [TD] Mamoswine [/TD] [TD] Icicle crash Earthquake [/TD] [TD] [/TD] [/TR] [TR] [TD] Crobat [/TD] [TD] Brave bird Roost [/TD] [TD] [/TD] [/TR] [TR] [TD] Espeon [/TD] [TD] Calm mind Psyshock [/TD] [TD] [/TD] [/TR] [/TABLE] Round 14 Team 2 [TABLE] [TR] [TD] Pokemon [/TD] [TD] Moves [/TD] [TD] Item [/TD] [/TR] [TR] [TD] Sylveon [/TD] [TD] Hypervoice [/TD] [TD] [/TD] [/TR] [TR] [TD] Milotic [/TD] [TD] Scald Icebeam [/TD] [TD] [/TD] [/TR] [TR] [TD] Nidoking [/TD] [TD] Sludgewave [/TD] [TD] [/TD] [/TR] [/TABLE] Round 15 Team 2 [TABLE] [TR] [TD] Pokemon [/TD] [TD] Moves [/TD] [TD] Item [/TD] [/TR] [TR] [TD] Conkeldurr [/TD] [TD] Ice punch Drain punch [/TD] [TD] [/TD] [/TR] [TR] [TD] Heracross [/TD] [TD] Reversal Megahorn [/TD] [TD] [/TD] [/TR] [TR] [TD] Goodra [/TD] [TD] Powerwhip Fire punch Outrage [/TD] [TD] [/TD] [/TR] [/TABLE] Round 16 Team 2 [TABLE] [TR] [TD] Pokemon [/TD] [TD] Moves [/TD] [TD] Item [/TD] [/TR] [TR] [TD] Gyarados [/TD] [TD] Dragon dance Bounce [/TD] [TD] [/TD] [/TR] [TR] [TD] Rotom wash [/TD] [TD] Thunder bolt Hydro pump [/TD] [TD] [/TD] [/TR] [TR] [TD] Goodra [/TD] [TD] Powerwhip Fire punch outrage [/TD] [TD] [/TD] [/TR] [/TABLE] Round 17 Team 2 [TABLE] [TR] [TD] Pokemon [/TD] [TD] Moves [/TD] [TD] Item [/TD] [/TR] [TR] [TD] Entei [/TD] [TD] Sacred fire Extreme speed [/TD] [TD] [/TD] [/TR] [TR] [TD] Dragonite [/TD] [TD] Outrage Fire punch [/TD] [TD] [/TD] [/TR] [TR] [TD] Chandelure [/TD] [TD] Fire blast [/TD] [TD] [/TD] [/TR] [/TABLE] Round 18 Team 2 [TABLE] [TR] [TD] Pokemon [/TD] [TD] Moves [/TD] [TD] Item [/TD] [/TR] [TR] [TD] Tangrowth [/TD] [TD] Sludge bomb Giga drain [/TD] [TD] [/TD] [/TR] [TR] [TD] Latias [/TD] [TD] Draco meteor [/TD] [TD] [/TD] [/TR] [TR] [TD] Skarmory [/TD] [TD] Brave bird [/TD] [TD] [/TD] [/TR] [/TABLE] Round 19 Team 2 [TABLE] [TR] [TD] Pokemon [/TD] [TD] Moves [/TD] [TD] Item [/TD] [/TR] [TR] [TD] Togekiss [/TD] [TD] Air slash Aura sphere [/TD] [TD] [/TD] [/TR] [TR] [TD] Heatran [/TD] [TD] Flamethrower [/TD] [TD] [/TD] [/TR] [TR] [TD] Excadrill [/TD] [TD] Earthquake Iron head [/TD] [TD] [/TD] [/TR] [/TABLE] Round 20 Team 2 [TABLE] [TR] [TD] Pokemon [/TD] [TD] Moves [/TD] [TD] Item [/TD] [/TR] [TR] [TD] Alakazam [/TD] [TD] Psychic [/TD] [TD] [/TD] [/TR] [TR] [TD] Lucario [/TD] [TD] Focus blast [/TD] [TD] [/TD] [/TR] [TR] [TD] heatran [/TD] [TD] Flamethrower [/TD] [TD] [/TD] [/TR] [/TABLE]
-
Hello Everyone :PikaLurk::PikaLurk: Today i'll be posting my low budget team for bosses. cuz i've seen alot struggling with new bosses So i tried to create one with less pokemons and easy to use am still working on it want to make it 1000% accurate. So if there is a problem with it don't hesitate to comment it i'll try to work on it Here's the team used to solo most of the bosses Strategy Snorlax: For thos who will attack with special moves you will use x3 Amnesia and x6 curse then start sweeping Slowbro: For thos who will attack with attack moves so u'll use x3 Iron Defense and x6 Calm mind then start sweeping Gengar: Choice scarfed mostly to kill an annoying pokemon with destiny bond who can kill easily slowbro and snorlax and we are using scarf cuz hard bosses has 400 ev on there pokemons so to make sure he out speed them Whimsicott: Mostly to use charm or endeavor depending on the one u are facing and sometimes we'll endeavor for some bosses (don't forget focus sash) Raticate: To easily kill some annoying pokemon with endeavor then sucker punch (don't forget focus sash) Chansey: In case where snorlax dies we'll use chansey to replace him Ninetales: We gonna use it just for erika and bugsy so its not required if u got one fire poke fast scarfed of course :q Kanto Johto Hoenn Sinnoh Others Looking forward for u thoughts and hope u like it .. in case u need somthing just pm me on my discord KasBaRino#6065 :CharYay::CharYay::CharYay:
- 17 replies
-
- 13
-

-
-Disclaimer/Avant-propos: -Information: -Differences/Différences I)Special-Based Team/Team Basée sur le Spécial 1)Basic use of the Team/Utilisation basique de la Team 2)Complex use of the Team/Utilisation complexe de la Team 3)Pros and cons/Avantages et inconvénients.
- 1 reply
-
- 4
-

-
Hey! Trouble getting evolutions? Or filling your Dex? This is your one stop solution! Here in this guide I am about to list down all the possible evolutions obtainable in Game. [spoiler=Region : Kanto] [spoiler=Region : Kanto] [spoiler=Evolution By Level Up] Bulbasaur -(lvl 16)->Ivysaur-(lvl 32)->Venusaur Charmander-(lvl 16)->Charmeleon-(lvl 36)->Charizard Squirtle-(lvl 16)->Wartortle-(lvl 36)->Blastoise Caterpie-(lv l7)->Metapod-(lvl 10)->Butterfree Weedle-(lv l7)->Kakuna-(lvl 10)->Beedrill Pidgey-(lvl 18)->Pidgeotto-(lvl 36)->Pidgeot Rattata-(lvl 20)->Raticate Spearow-(lvl 20)->Fearow Ekans-(lvl 22)->Arbok Sandshrew-(lvl 22)->Sandslash Nidoran F-(lvl 16)->Nidorina Nidoran M-(lvl 16)->Nidorino Zubat-(lvl 22)->Golbat Oddish-(lvl 21)->Gloom Paras-(lvl 24)->Parasect Venonat-(lvl 31)->Venomoth Diglett-(lvl 26)->Dugtrio Meowth-(lvl 28)->Persian Psyduck-(lvl 33)->Golduck Mankey-(lvl 28)->Primeape Poliwag-(lvl 25)->Poliwhirl Abra-(lvl 16)->Kadabra Machop-(lvl 28)->Machoke Bellsprout-(lvl 21)->Weepinbell Tentacool-(lvl 30)->Tentacrule Geodude-(lvl 25)->Graveler Ponyta-(lvl 40)->Rapidash Slowpoke-(lvl 37)->Slowbro Magnemite-(lvl 30)->Magnezone Doduo-(lvl 31)->Dodrio Seel-(lvl 34)->Dewgong Grimer-(lvl 38)->Muk Gatly-(lvl 25)->Haunter Drowzee-(lvl 26)->Hypno Krabby-(lvl 28)->Kingler Voltorb-(lvl 30)->Electrode Cubone-(lvl 28)->Marowak Koffing-(lvl 35)->Weezing Rhyhorn-(lvl 42)->Rhydon Horsea-(lvl 32)->Seadra Goldeen-(lvl 33)->Seaking Magikarp-(lvl 20)->Gyarados Omanyte-(lvl 40)->Omastar Kabuto-(lvl 40)->Kabtops Dratini-(lvl 30)->Dragonair-(lvl 55)->Dragonite [spoiler=Evolution By Evolution Stones] Pikachu-(Thunder Stone)->Raichu Nidorina-(Moon stone)->Nidoqueen Nidorino-(Moon Stone)->Nidoking Clefairy-(Moon stone)->Clefable Vulpix-(Thunder Stone)->Ninetails Jigglypuff-(Moon stone)->Wigglytuff Gloom->(Leaf stone)->Vileplume Growlithe-(Fire stone)->Arcanine Poliwhirl-(Water Stone)->Poliwarth Weepinbell-(Leaf Stone)->Victreebel Shellder-(Water Stone)->Cloyster Exeggcute-(Leaf Stone)->Exeggcutor Staryu-(Water Stone)->Starmie Eevee-(Water Stone)->Vaporeon Eevee-(Thunder Stone)->Jolteon Eevee-(Fire Stone)->Flareon [spoiler=Evolution By Trade] Kadabra-(Trade)->Alakazam Machoke-(Trade)->Machamp Graveler-(Trade)->Golem Haunter-(Trade)->Gengar [spoiler=Region : Johto] [spoiler=Evolution By Level Up] Chiorita-(lvl 16)->Bayleaf-(lvl 32)->Magenium Cyndaquil-(lvl 14)->Quilava-(lvl 36)->Typhlosion Totodile-(lvl 18)->Croconaw-(lvl 30)->Feraligatr Sentret-(lvl 15)->Furret Hoothoot(lvl 20)->Noctowl Ledyba-(lvl 18)->Ledian Spinarak-(lvl 22)->Ariados Chincou-(lvl 27)->Lanturn Natu-(lvl 25)->Xatu Mareep-(lvl 15)->Flaffy-(lvl 30)->Ampharos Marill-(lvl 18)->Azumarill Hoppip-(lvl 18)->Skiploom-(lvl 27)->Jumpluff Wooper-(lvl 20)->Quagshire Pineco-(lvl 31)->Forretress Snubull-(lvl 23)-.Granbull Teaddiursa-(lvl 30)->Ursaring Slugma-(lvl 38)->Magcargo Swinub-(lvl 33)->Piloswine Remoraid-(lvl 25)->Octillary Houndour-(lvl 24)->Houndoom Phanphy-(lvl 25)->Donphan Smoochum-(lvl 30)->Jynx Elekid-(lvl 30)->Electabuzz Magby-(lvl 30)->Magmar Larvitar-(lvl 30)->Pupitar-(lvl 55)->Tyranitar [spoiler=Evolution By Stone ] Gloom-(Sun Stone)->Bellosome Sunkern-(Sun Stone)->Sunflora [spoiler=Evolution By Trade] Poliwhirl-(Trade+King's rock)-Politoed Slowpoke-(Trade+King's rock)->Slowking Onix-(Trade+Metal Coat)->Steelix Scyther-(Trade+Metal Coat)->Scizor Seadra-(Trade+Dragon Scale)->Kingdra Porygon-(Trade+upgrade)->Porygon2 [spoiler=Evolution By Happiness] Golbat-(Max Happiness)->Crobat Pichu-(Max Happiness)->Pikachu Cleffa-(Max Happiness)->Clefairy Igglybuff-(Max Happiness)->Jigglybuff Togepi-(Max Happiness)->Togetic Eevee-(Max Happiness @ DayTime + lvl Up)->Espeon Eevee-(Max Happiness @ NightTime + lvl Up)->Umbreon Chansey-(Max Happiness)->Blissey [spoiler=Evotlution By Other Methods] Tyrogue-(lvl 20 , if Atk>Def)->Hitmonlee Tyrogue-(lvl 20 , if Atk<Def)->Hitmonchan Tyrogue-(lvl 20 , if Atk=Def)->Hitmontop [spoiler=Region : Hoenn] [spoiler=Evolution By Level Up] Treeko-(lvl 16)->Grovyle-(lvl 36)->Sceptile Torchic-(lvl 16)->Combusken-(lvl 36)->Blaziken Mudkip-(lvl 16)->Marshtomp-(lvl 36)->Swampert Poocheyena-(lvl 18)->Mightyena Zigzagoon-(lvl 18)->Linoone Wurmple-(lvl 7)->Silcoon-(lvl 10)->Beautifly Wurmple-(lvl 7)->Cascoon-(lvl 10)->Dustox Lotad-(lvl 14)->Lombre Seedot-(lvl 14)->Nuzleaf Taillow-(lvl 22)->Swellow Wingull-(lvl 25)->Pelipper Ralts-(lvl 20)->Kirlia-(lvl 30)->Gardevoir Surskit-(lvl 20)-Masquerain Shroomish-(lvl 23)->Breloom Slakoth-(lvl 18)->Vigoroth-(lvl 36)->Slaking Nincada-(lvl 20)->Ninjask Whismur-(lvl 22)->Louderd-(lvl 40)->Exploud Makuhita-(lvl 24)->Hariyama Aron-(lvl 32)->Larion-(lvl 42)->Aggron Meditite-(lvl 37)->Medicham Electrike-(lvl 26)->Manetric Gulpin-(lvl 26)->Swalot Carvanha-(lvl 30)->Sharpedo Wailmer-(lvl 40)->Wailord Numel-(lvl 33)->Camelrupt Spoink-(lvl 32)->Grumpig Trapinch-(lvl 35)->Vibrava-(lvl 45)->Flygon Cacnea-(lvl 32)->Cacturne Swablu-(lvl 35)->Altaria Barbroach-(lvl 30)->Wishcash Corphish-(lvl 30)->Crawdaunt Baltoy-(lvl 36)->Claydol Lileep-(lvl 40)->Cradily Anorith-(lvl 40)->Armaldo Shuppet-(lvl 37)->Banette Duskull-(lvl 37)->Dusclops Snorunt -(lvl 42)->Glalie Spheal-(lvl 32)->Sealeo-(lvl 42)->Walrein Bagon-(lvl 30)->Shelgon-(lvl 50)->Salamance Beldum-(lvl 20)->Metang-(lvl 45)->Metagross [spoiler=Evolution By Stone] Lombre-(Water stone)->Ludicolo Nuzleaf-(Leaf stone)->Shiftry [spoiler=Evolution By Trade] Feebas-(Trade+Prism scale)->Milotic Clamperl-(Deeps sea tooth)->Huntail Clamperl-(Deeps sea scale)->Gorebyss [spoiler=Evolution By Happiness] Azuill-(Max Happiness + levelup)->Marill Wynaut-(Max Happiness)->Wobbuffet [spoiler=Evolution By Other Methods ] Nincada-(Have an extra pokeball in bad and a free slot in part + evolve a nincada @ lvl 20)->Shedinja [spoiler=Region : Sinnoh] [spoiler=Evolution By Level Up] Turtwig-(lvl 18)->Grotle-(lvl 32)->Torterra Chimchar-(lvl 14)->Monferno-(lvl 36)->Infernape Piplup-(lvl 16)->Prinplup-(lvl 36)->Empoleon Starly-(lvl 14)->Starvia-(lvl 34)->Staraptor Bidoof-(lvl 15)->Bibarel Kricketot-(lvl 10)->Kricktune Shinix-(lvl 15)->Luxio-(lvl 30)->Luxray Cranidos-(lvl 30)->Rampardos Shieldon-(lvl 30)->Bastiodon Burmy-(if male, lvl 20)->Mothim Burmy-(if female, lvl 20)->Wormadam Combee-(if female, lvl 21)->Vespiquen Buizel-(lvl 26)->Floatzel Cherubi-(lvl 25)->Cherrim Shellos-(lvl 30)->Gastrodon Drifloon-(lvl 28)->Driflim Stunky-(lvl 34)->Stuntank Bronzer-(lvl 33)->Bronzong Gible-(lvl 24)->Gabite-(lvl 48)->Garchomp Hippopotas-(lvl 34)->Hippowdon Skorupi-(lvl 40)->Drapion Crogunk-(lvl 37)->Toxicroak Finneon-(lvl 31)->Lumineon Snover-(lvl 40)->Abomasnow [spoiler=Evolution By Stone/Item ] Roselia-(Shiny stone)->Roserade Misdreavus-(Dusk Stone)->Mismagius Murkrow-(Dusk stone)-Honchkrow Glameow-(Moon stone)->Purugly Happiny-(level up at day while hoding Oval stone)->Chansey Sneasel-(Level up at night while holding Razor Claw)->Weavile Togetic-(Shiny stone)->Togekiss Gligar-(Level up at night while holding Razor Claw)->Gliscor Kirlia-(if male. Dawn stone)->Gallade Snorunt-(if female, Dawn stone)->Froslass [spoiler=Evolution By Trade] Rhydon-(Trade while holding Protector)->Rhyperior Electabuzz-(Trade while holding Electrizer)->Electivire Magmar-(Trade while holding Magmarizer)->Magmortar Porygon2-(Trade while holding Dubious disc)->PorygonZ Dusclops-(Trade while hlding Reaper cloth)->Dusknoir [spoiler=Evolution By Happiness] Budew-(Max Happiness)->Roselia Buneary-(Max Happiness)->Lopunny Chingling-(Max Happiness)->Chimecho Munchlax-(Max Happiness + level up)->Snorlax Riolu-(Max happiness + levl up in day)->Lucario [spoiler=Evolution By Other Methods] Aipom-(level up while knowning move "Double Hit")->Ambipom Bonsly-(level up while knowning move "Mimic")->Sudowoodo Mime Jr.-(level up while knowning move "Mimic")->Mr Mime Mantyke-(Level up while having remoraid in party)->Mantine Magneton-(level up at Power Plant(Kanto) , New Mauvile(Hoenn))->Magnezone Lickitung-(level up while knowing move "Rollout")->Lickilicky Tangela-(level up while knowing move "Ancient power")->Tangrowth Yanma-(level up while knowing move "Ancient power")->Yanmega Eevee-(Exp gain in Eterna Forest)->Leafeon Eevee-(Exp gain in Route 217)->Glaceon Piloswine-(level up while knowing move "Ancient power")->Mamoswine Nosepass-(level up at Power Plant(Kanto) , New Mauvile(Hoenn))->Probopass Thanks to @rubyboy002 for the art Thanks to @Kimap for giving me the idea of making this guide Special thanks to @XanthinaRose for helping me through ideas and points I am working on completion of this guide , stay tuned for more regions. :RowletHeart:
- 21 replies
-
- 15
-

-
It is 47 bosses because: I didn't include jessie & james since the requirement is pikachu(but you could just swap with empoleon) I didn't include the bosses like prehax(2team), nikola, suspicious bot(3team) I do this guide for those who are irritated to go pokemon center like me just to change the team. And I look through the guides there is no one that is literally 6 team vs all the bosses they just go back in the pokemon center just to swap the pokemon for the requirement of the boss. I just wanted to share my team so that when there is someone wants to do their original 6 pokes vs all boss. This guide maybe also for upcoming mega if there will be no change in the requirements. I also have prepared for the future 6 team vs all bosses(unfortunately except jessie&james again :( ) for the upcoming mega that uses Mega Gyarados as a sweeper since it have Mold Breaker and I'll go make a guide if it became successful. I just hope there will be no change in the requirements. It is also time efficient as you could see in the example of a battle in "Example of a fight" section. It will only takes less than 4mins in every single boss Team Requirements for a 6 team: 1 pokemon that knows waterfall to go to Terminator 1 pokemon that iron defense to start Steven 1 dragon type to start Lance 1 ghost type to start Morty 1 fire type to start Saphirr 2 steel types to start Steven 1 Pikachu to start Jessie&James [spoiler=My 6 team] [spoiler=Why these pokemon?] [spoiler=Why these pokemon?] I use this kind of team because: Mismagius is a excellent lead that has high speed that can do; memento for reducing attk and spattk, destiny bond for the pokes that have +stat, skill swap for those who have annoying ability like clear body have access to taunt, so that you could use taunt+destiny bond combo Item: Mostly Choice Scarf, sometimes Focus Sash Dugtrio is a steel type has high speed and could lower speed of the opponent due to the ability and have access to memento Item: Always Choice Scarf Chandelure is a dual ghost/fire type that has memento Item: Always Choice Scarf Empoleon is a steel type that have stealth and knock off. Also have feather dance to -2attk the opponent Knock off those who have choice band, choice specs, and life orb Stealth for those who have Sash or Sturdy Item: Focus Sash or Leftovers (I always use Sash but I never has been broken since the damage of the opponent will only deal 1/4 damage due to the memento Mew is so bulky and can baton pass all stats Item: Always Leftovers Haxorus is a dragon type that have mold breaker for all pokes Item: Your choice; Muscle Band, Life Orb, or Lum Berry For future: Sweeper: Mega Gyarados have access to Mold Breaker :) [TABLE] [TR] [TD][/TD] [TD][/TD] [TD][/TD] [/TR] [TR] [TD][/TD] [TD][/TD] [TD][/TD] [/TR] [/TABLE] For Jessie&James: [spoiler=Example of a fight] Example of a boss fight: Still learning to edit and adjusting the screen :) So basically what I do in these boss is get the least possible attack so that Mew could handle all attacks The perfect example of a battle is a dual bosses like Medusa&Eldir: [TABLE] [TR] [TD]For Medusa Mismagius memento Alolan-Dugtrio memento Chandelure memento Then it will have -6 attack and -6 special attack Empoleon knock off and stealth rock Therefor it would just tickle Mew even crits Mew all do the baton pass +stat Haxorus all do the sweeping[/TD] [TD]For Eldir Sash Mismagius Taunt and Destiny bond since 317 is speed of gyarados you could outspeed it Alolan-Dugtrio memento Chandelure memento Then it will have -4 attack and -4 special attack Empoleon feather dance knock off and stealth rock Therefore -6attack now and it would just tickle Mew even crits Mew all do the baton pass +stat Haxorus all do the sweeping[/TD] [/TR] [/TABLE] Another example is Steven: Steven has annoying ability for some players because the 1st poke has clear body and the 2nd poke has choice scarf with swords dance For Steven Mismagius skillswap Alolan-Dugtrio memento Chandelure memento Then it will have -4 attack and -4 special attack Empoleon feather dance knock off and stealth rock Therefore -6attack and it would just tickle Mew even crits Mew all do the baton pass +stat Haxorus all do the sweeping [spoiler=Speed of the boss pokes] This guide could also be if you want to make your own team so that you will know what speed to outspeed them. The guide also have warnings of some bosses that have a lead with moves like nasty plot, swords dance, dragon dance, etc. and abilities like clear body, etc. Also, ignore the column of THIS IS FOR MY POKES and STEALTH NEEDED. I just added it there for those bosses who need stealth rock. If there will be update in bosses in the future, I will also update the link. Have fun :) Here is the link to the guide of every boss speed SPEED OF EVERY BOSS [spoiler=BOSSES GUIDE ATTACK PATTERN] DOING IN EXCEL RIGHT NOW SINCE THE GUIDE IS ALL ON MY PHONE'S NOTEPAD [spoiler=BATTLE TOWER GUIDE ATTACK PATTERN] DOING IN EXCEL RIGHT NOW SINCE THE GUIDE IS ALL ON MY PHONE'S NOTEPAD
-
[spoiler=Natural Site]POKEMON Combee Burmy Venipede Karrablast Ferroseed Budew Shroomish Tangela ITEMS Big Mushroom Revival Herb Heal Powder Energy Powder [spoiler=Historical Site]POKEMON Heracross Phanpy Riolu Croagunk Hawlucha Scraggy Machop Baltoy ITEMS Nugget Revival Herb Heal Powder Energy Powder [spoiler=Feral Site]POKEMON Pawniard Absol Deino Darumaka Torkoal Growlithe Vulpix Cubone ITEMS Rare Bone Revival Herb Heal Powder Energy Powder [spoiler=Haunted Site]POKEMON Sableye Honedge Rotom Yamask Duskull Gastly Shuppet Misdreavus ITEMS Tiny Mushroom Energy Powder Heal Powder (not found, but probably there) Revival Herb (not found, but probably there) [spoiler=Mineral Site]POKEMON Larvitar Beldum Drilbur Aron Bronzor Solrock Lunatone Onix ITEMS Stardust Revival Herb Heal Powder Energy Powder [spoiler=Glacial Site]POKEMON Sneasel Corphish Mantyke Shellder Piplup Swinub Snorunt Bergmite ITEMS Pearl Heal Powder Energy Powder Revival Herb (not found, but probably there) [spoiler=Wondrous Site]POKEMON Porygon Flabebe Clefairy Spoink Klefki Sigilyph Snubbull Marill ITEMS Star Piece Revival Herb Heal Powder Energy Powder [spoiler=Briny Site]POKEMON Alolomola Carvanha Clamperl Buizel Slowpoke Shellos Mudkip Feebas ITEMS Pearl Energy Powder Energy Powder Revival Herb (not found, but probably there) [spoiler=Draconic Site]POKEMON Dratini Gible Skrelp Trapinch Horsea Rhyhorn Goomy Noibat ITEMS Big Nugget Heal Powder Energy Powder (not found, but probably there) Revival Herb (not found, but probably there) If someone is interested in the full data used (with fossils found and excavation ranks...) here is a full list: (items and pokemon are only listed once even they my have been found more than once)[spoiler=Data] 4000+ discoveries Natural Combee Heal Powder Burmy Big Mushroom Budew Shroomish Historical Scraggy Heal Powder Machop Revival Herb Chimchar Nugget Phanpy Heracross Feral Darumaka Heal Powder Pawniard Energy Powder Growlith Revival Herb Torkoal Vulpix Cubone Haunted Yamask Tiny Mushroom Misdreavus Duskull Shuppet Gastly Drifloon Wondorus Clefairy Heal Powder Spoink Porygon Snubbull Marill Cottonee Mineral Bronzor Revival Herb Lunatone Heal Powder Onix Stardust Baltoy Glacial Snorunt Energy Powder Sneasel Pearl Swinub Shellder Piplup 3500+ discoveries Natural Combee Big Mushroom Burmy Revival Herb Tangela Budew Historical Baltoy Energy Powder Machop Heal Powder Phanpy Nugget Heracross Feral Site Growhlite Heal Powder Cubone Torkoal Vulpix Absol Haunted Site Shuppet Tiny Mushroom Sableye Rotom FLED Misdreavus Gastly Duskull Mineral Site Onix Stardust Beldum Heal Powder Bronzor Energy Powder Solrock Beldum FLED Wondrous Site Snubbull Heal Powder Marill Star Piece Flabebe Spoink Glacial Swinub Heal Powder Shellder Pearl Mantyke Snorunt Bergmite 2500+ discoveries Natural Combee Energy Powder Tangela Heal Powder Jaw Fossil SMASHED Shroomish Burmy Historical Phanpy Nugget Machop Heracross Meditie Baltoy Feral Vulpix Rare Bone Torkoal Cubone Growlithe Absol Haunted Sableye Tiny Mushroom Shuppet Gastly Rotom FLED Duskull Misdreavus Mineral Bronzor Energy Powder Lunatone Stardust Solrock Skull Fossil BROKEN Glacial Snorunt Heal Powder Shellder Pearl Swinub Energy Powder Mantyke 10000+ discoveries Briny Buizel Energy Powder Clamperl Heal Powder Slowpoke Carvanha Lunatone Natural Combee Revival Herb Budew Energy Powder Ferroseed Heal Powder Tangela Big Mushroom Shroomish Historical Heracross Energy Powder Machop Nugget Baltoy Phanpy Feral Torkoal Heal Powder Growlithe Revival Herb Darumaka Claw Fossil Vulpix Energy Powder Cubone Deino Haunted Gastly Jaw Fossil Shuppet Tiny Mushroom Duskull Energy Powder Sableye Claw Fossil Rotom Honedge Misdreavus Yamask Mineral Onix Stardust Bronzor Solrock Lunatone Aron Larvitar Wondrous Site Spoink Star Piece Clefairy Energy Powder Snubbull Marill Flabebe Draconic Site Rhyhorn Heal Powder Dratini Horsea Trapinch Skrelp Glacial Snorunt Pearl Mantyke Swinub Bergmite Shellder Corphish
-
So here is a thing that many players might find difficult to do and that is bossing. So after 2500 hours in game, i have experienced battling many bosses using different strategies and there are many that work well even on hard mode. Now as most bosses have been reworked, they dont allow items so you cant use revives or potions etc. So in these tricks, i will explain how to minimize the chances of crits and ohko by them. (Since the idea of making a bossing guide came to my mind after i did all my bosses, i will make a video explaining how it works after they cool down) Now the tricks are : 1. After gale wings talonflame was nerfed, it might have been kinda useless in pvp but still it is one of the best pokemons for bossing (and yes i used only talonflame for shary shaui). In order to use talonflame as a boss counter, you need one with adamant nature, max attack and hp/speed evs cuz here only attack will matter. Moveset you can keep whatever you want just fly is a must. And item you need on it is lagging tail. Now what happens here is fly gives talonflame priority in first turn and lagging tail makes it go second in second turn. For example: if i am fighting shaui shaymin with my talon then it will go like: 1st turn: talonflame used fly, shaymin used airslash but missed 2nd turn: shaymin used airslash but missed (as talonflame has lost priority due to lagging tail) , talonflame used fly, ITS SUPEREFFECTIVE!!!! This trick works on all bosses as nothing touches it unless they have a good physical wall (like steelix) that resists fly. Another thing that counters talonflame is noguard machamp (makes stoneedge hit even when talonflame is flying up) and thunder (cuz it hits pokemon with fly) and hurricane So make sure to bring counters for such pokemons. 2. Boldcarona: Boldcarona or bold volcarona has always been my favourite boss killer because it can ohko after setup unlike talonflame that spams fly and kills pokemons in 3-4 turns normally. For using volcarona there are many ways like: a) Setup screens from klefki and then switch to volcarona b) (my fav) Here another nerfed pokemon comes handy and that is none other than digtrio!!! Due to massive speed, it outspeeds many boss leads (you can give it scarf too, or run with sash) and you just use it for memento that harshly lowers opponent's attack and special attack stat providing easy setup for volcarona c) Third trick is for bosses that gift us a chance to setup volca (like suicune guardian, shamac on his 3rd pokemon, birch when lead with mightyena) In case of these bosses, as birch if lead with mightyena just spams suckerpunch on volca providing easy setup chance, and bosses like suicune guardian (kyurem lead) and shamac(3rd poke goodra) use dracometeor on volcarona, so all you have to do is bring volcarona against their dragon and switch to a special wall (not fairy ofc) so that it uses dracometeor and lowers his spatk , then you can easily switch to volca and setup as after spatk is harshly lowered, their crits won ohko your pokemon. For using volcarona i suggest bold nature with max def and hp evs and moveset quiverdance bugbuzz flamethrower and roost. Item you can run is leftovers on most or even can go weakness policy against bosses like pewdie who use surf on volca. But make sure to provide an easy chance for volca to setup by any method above. Like talon, volcarona is also countered by bosses that use rocktype pokemons like brock so you cant setup against him. 3. Slowbro: This physical tank can be annoying in pvp as well as to bosses as its high defense provides it with easy chance to setup . Slowbro works really well against bosses like brock, battle boss(on dock), nikola and many more. For setting up slowbro, you just need pne with bold nature, and hidden ability is suggested but others can work too. For moveset you go, iron defense, calmmind, scald and slackoff It is countered by pokemon leading with good spatk move to counter it or its set makes it weak to pokemons like unaware quagsire. 4. Clefable: This little fairy might prove a nightmare in pvp and it is not less than onr in bossing too. Access to cosmicpower and calmmind, softboiled for recovery and moonblast as stab makes it unstoppable unless you are facing a good steel type while setting up or you get a critical hit. Bold clefable with magicguard, holding leftover (you can burn or poison your clefable before fighting bosses against wild pokemon so thst leftover can provide a second recovery option besides softboiled, but keep in mind it is banned in pvl that you cant put a status condition on your pokemon before match) Clefable is op unless countered by unaware pokemons or a dual type with 4x resistance to fairy (like heatran) or you are trying to setup on strong steel types then ofc clefable will fail there. 5. Snorlax: This big fat boi is a good counter to bosses as it can solo many alone with access to curse amnesia rest and a move to cripple down opponent's health. Training a careful snorlax boosts its spdef so you can easily setup against special sweepers (can use memento trick here too or screens ) 6. These pokemons have enough power to solo bosses alone but you can also take other pokemons that come handy in case your main sweeper dies and those are, blissey, ferrothorn, umbreon ,chesnaught etc. SO THESE ARE THE TRICKS I ALWAYS USE AND THEY WORK FOR ME EVERYTIME AND IF YOU GOT MORE TRICKS THEN YOU CAN SHARE HERE. THANKS FOR READING https://youtu.be/hySLEQszPRQ Here is a link for my boss video where u can see how to use talonflame trick as some users faced problems
-
Muy buenos días he estado viendo que no hay una guía en español de Johto solo de Kanto traducida, por lo cual voy a dar mi versión de una guía que hay en el foro en Inglés junto con algunas notas personales de como fui haciendo algunas cosas para que entre todos nos ayudemos. En el juego he visto a varios perdidos por algunas quest en especial las de Goldenroad y el Gimnasio de tipo fantasma, sin mas que añadir dejaré el link de la guía original en inglés por aquí. Y empezamos con este recorrido :0 Inicio NEW BARK TOWN Nada más al llegar iremos al laboratorio del profesor Elm, el cual se encuentra en la parte izquierda superior, justo al lado de nuestra casa en Johto, aquí no debemos hacer más que elegir a nuestro nuevo inicial. Cyndaquill de tipo fuego, Totodile de tipo agua o Chikorita de tipo planta. Ahora bien esta elección es a gusto personal, aunque si quieres tener una estadía fácil en Johto la mejor opción es Cyndaquill ofrece resistencia a la mayoría de gimnasios además de ser efectivo contra los gimnasios que pueden ser más complicados como son los tres finales. Si en cambio prefieres la ruta díficil Chikorita es vulnerable al primer gimnasio e incluso no tiene un gimnasio en el que sea eficaz de forma natural en esta región. Route 29 No hay mucho que destacar en esta ruta, simplemente sigue el camino hacia la izquierda hasta llegar a la otra ciudad, aquí puedes atrapar un Ratata el cual a niveles bajos puede ser útil al saber Quick Attack cuyo daño suele destrozar y además es un ataque de prioridad por lo cual siempre atacará primero. Otro interesante de esta ruta es Hoothoot que a niveles altos aprenderá ataques de tipo Psiquico. Cherry Grove City Lo más importante es ir al centro pokémon donde un anciano te detendrá y te dará pokeballs, pokeyenes y pociones sin tener que hacer nada ni pagar por todo esto. Ahora con la billetera llena y más pokeballs para seguir fortaleciendo a nuestro equipo debemos seguir a la izquierda y doblar hacia arriba. Route 30 y 31 Simplemente seguimos hacia el norte donde habrá varios entrenadores para ganar experiencia ya sea con nuestro inicial o los recién incorporados, hay un pequeño atajo que es salir del camino principal e ir por la hierba haciendo que uno de nuestros pokemon aprenda Cut para cortar el árbol que hay al final de esta y saldremos a la cueva que está justo al lado de una escalera. Tras bajar por esta escalera una anciana nos retará y siguiendo hacia la izquierda cortaremos el arbol para no tener que enfrentarnos a los entrenadores de abajo y así llegaremos a Violet City. Violet City Llegando al centro pokémon podremos hablar con un montañero que nos dará Smooth Rock que nos permite aumentar la duración de las tormentas de arena si la equipamos a un pokémon que sepa usar Sand Storm o tenga como habilidad chorro de arena. No podremos entrar al gimnasio por lo que debemos ir al norte hasta llegar a la Bellsprout Tower en donde nada más al entrar al costado izquierdo obtendremos un gastly completamente gratis (pokeball azul). Subir la torre es sencillo, si haz escogido a Cyndaquill será un paseo de xp ya que los monjes usarán a Bellsprout o Ratatas, si en cambio escogiste a Totodile o Chikorita será mucho más tedioso poder vencerles. Recomiendo ir con Pokémon de nivel 10-13 en especial voladores como Pidgey o Hoothoot ya que fácilmente podrás vencerles. El maestro tendrá un Raticate y un Weepinbell. Gimnasio de Violet City Tras derrotar al maestro de los sabios podrás entrar al gimnasio, recomiendo levear un poco en las afueras del pueblo hasta que nuestros pokemon alcancen el nivel 15-17 el líder usará pokémon de tipo volador por lo cual los pokémon de Tipo Bicho y Planta serán básicamente eliminados de un solo golpe. Lo recomendable es combatir con pokémon de tipo Volador o Roca (que puedes atrapar en la cueva oscura de la ruta 31). El equipo del líder consistirá de Pidgey, Spearow y Pidgeotto, tras ganarle nos dará la primer medalla y el hombre de la entrada nos venderá Tailwind por 10,000. Route 32 Seguimos avanzando al salir del gimnasio nos dirigiremos al sur hasta que veamos un centro pokémon, cabe destacar que aquí podremos capturar un Mareep que nos vendrá bien contra el entrenador que bloquea el camino a la cueva ya que este usará los mismos pokémon que el líder de gimnasio pero bastante más fuertes. Union Cave La cueva es bastante sencilla, simplemente debemos ir hacia el sur para encontrar la salida sorteado a los entrenadores que encontremos. Route 33 Nada interesante más que algunos entrenadores para levear, simplemente seguimos a la izquierda hasta llegar a Azalea Town. Azalea Town El gimnasio estará bloqueado por un Slowpoke, por lo cual debemos ir hasta la entrada del pueblo donde habrá un pozo con una escalera, al entrar nos enfrentaremos a varios Rockets que usarán pokémon de tipo Veneno y Volador por lo que un pokémon tipo roca nos facilitará la tarea. Al llegar al final nos enfrentaremos a Christina que tendrá un Lapras, un Golbat y un Ariados por lo que un pokémon de tipo electrico podrá hacer una tarea bastante sencilla en su contra. Gimnasio de Azalea Town El gimnasio es de tipo bicho por lo cual Cyndaquill vuelve a ser de mucha utilidad, también los pokémon de tipo volador o roca. Bugsy tendrá en su equipo a Pinsir, Parasect y Scyther, es recomendable rondar el nivel 25 o 27 para este gimnasio aunque si tienes a Cyndaquill podrás pasarlo al nivel 24 incluso. Tras derrotarle tendremos una nueva medalla. Accediendo a Ilex Forest Tras salir del gimnasio hablamos con la chica rubia que bloquea el camino hacia la parte izquierda donde nos desafiará a una batalla sus pokémon rondarán el nivel 24 pero con un pokémon tipo roca para su Doduo y nuestro inicial bien entrenado no tendremos problemas. Ilex Forest Tras ingresar iremos hacia el norte donde un hombre nos pedirá que encontremos a su pokémon, simplemente vamos hacia la derecha hasta llegar al Farfetch'd en la parte superior derecha del mismo bosque, debemos derrotarle para continuar, este pequeño boss puede ser algo complicado a un nivel bajo por lo cual recomiendo que todo tu equipo ronde el nivel 20 a este punto usando un pokémon de tipo electrico o roca para debilitarlo rápidamente. Tras derrotarle el pokémon volverá con su dueño, simplemente debemos regresar y hablarle para que se corra del camino, utilizamos corte en el arbusto que bloqueaba el paso y tras ver a Celebi seguiremos hacia el norte bordeando el lago por la derecha y yendo siempre al norte hasta poder solamente doblar a la izquierda donde llegaremos al final de este bosque. Route 34 Una ruta sencilla en la que iremos hacia el norte hasta llegar a la ciudad, no hay mucho de importancia simplemente algunos entrenadores que derrotar. Este lugar puede ser buena fuente de leveo para las quest de Goldenroad. Goldenroad City Al ingresar cerca del centro pokémon hay un motero que nos cambiará su Machop por un Drownzee un cambio conveniente debido a que el próximo gimnasio es tipo normal, además este Machop tiene el Macho Brace que permite subir los EV del pokémon más rápido. Seguiremos hasta la torre de radio donde comenzará la Quest principal, debemos decirle al guardia que le ayudaremos. Acto seguido nos enviará al subterraneo donde debemos hablar con el npc viejo que bloquea la puerta del mismo, tras esto hablaremos con el guardia que nos encomendó la misión. Debemos ir a la pequeña casa que queda a la derecha del centro comercial y hablar con Michael, tras esto es muy importante tener un butterfree, bellsprout (a nivel 13 y con sleep pownder) o un paras (nivel 20 con spore). Vamos al centro comercial y bajamos al piso BF1 donde hablaremos con el policia.
- 1 reply
-
- 5
-

-
Requirements 1. Just one Wobbuffet 2. 6 Revival herbs What to do? Against Cynthia use wobbuffet at first slot. Use counter if misses then use mirror coat ( wobbuffet can't get faint in 1st move ). Now after you use counter / mirror coat the first poke of Cynthia will faint. After , take out any of your poke and use revival herb to wobbuffet. Again use counter / mirror coat after 2nd poke faint again revive it. Do again and again. At last Cynthia poke will faint. I'll add screenshot later when I play. Tell me it worked or not
-
WELCOME TO MY JOHTO E4 GUIDE ----------------------------------------------------------------------------------------------------------------------------- Introduction : since this guide is intended for one pokemon to solo the whole elite 4, gyarados of lv 100 is used/tested. A level 95+ may also be possible but is untested. If anybody managed to beat e4 with a lower level please inform me in the comments so that I can update the requirements. A decent iv of 20+ for both atk and spd are to be considered as well. Other than these stats, you may need about 5 leppa berries. No potions or revives required. Required Pokémon [spoiler=requirements] lv 100 adamant leftover 5-6 leppa berries max ev training on atk and spd [spoiler=move set] dragon dance ice fang crunch aqua tail ELITE 4 Will move : dragon dance and crunch all the way through. Koga 1. Skuntank : dragon dance , aquatail/ice fang 2. Venomoth : aquatail/ice fang 3. Toxicroak : ice fang (aquatail is unusable as it has dry skin ability) 4. Muk : aqua tail/ice fang/crunch 5. Mega Beedril : aqua tail/ice fang/crunch 6. Crobat : ice fang Bruno 1. Hitmontop : Dragon dance , Aqua tail/ice fang 2. Hitmonlee : Aqua tail/ice fang 3. hitmonchan : Aqua tail/ice fang 4. Hariyama : Aqua tail 5. Mega Lucario : Aqua tail 6. Machamp : Aquatail/ice fang Karen 1. Weavile : Dragon dance , Aqua tail 2. Absol : Aqua tail/ice fang 3. Spiritomb : Aqua tail/ice fang 4. Mega houndoom : Aquatail 5. Honchkrow : Ice fang 6. Umbreon : Aqua Tail/ice fang Lance 1. Charizard : Dragondance, Aqua Tail 2. Gyarados : Ice Fang/Crunch 3. Garchomp : Ice Fang 4. Altaria : Ice Fang 5. Salamence : Ice Fang 6. Dragonite : Ice Fang Note : still a work in progress
-
Feel free to post in here or send me a message if you have any informations regarding reworked spawns. To find a specific Pokemon or Item just open up the spoilers and use CTRL+F search function. 1. Fossils/Rare Pokemon: 2. Kanto: 3. Johto: 4. Sinnoh: 5. Sevii Islands:
-
Welcome to SideLines "Cheap pokemon boss guide" The purpose of this is to show how to beat bosses with pokemon that are very easy to find and level up. I have seen many boss guides that have become very helpful to me and other people, however finding these required pokemon, especially with my luck, had become a pain since I was spending hours on end looking for one Tier 9 just for a sync fail or terrible IVs, or for the guide to tell me something that should happen, and doesn't happen. So this is my guide on how I beat certain bosses with pokemon that are very easy to find. 1). Disclaimer 2). Pokemon Guide 3). Leveling up pokemon guide 3). Particular Boss Strategies. [spoiler=Needed Pokemon] 1). Pelipper This is the staple in this team, and by far will be the most used pokemon, this started off as a backup to when I followed other boss guides, and whenever they went wrong I ended up using pelipper and sweeping the boss, ever since this has pretty much done most bosses and is a very easy to get pokemon. This pokemon as you probably know is very easy to find, It took me like 5 wingulls to catch a decent one. I recommend running what playstyle you suite, I prefer offensive playstyles so I went with quiet nature, however bold, calm, modest are also viable options. With EVs I went 252 DEF and 252 SPATK however with other natures switching SPATK and HP Is also a decent setup, or maybe only EV training DEF and SPDEF, however be careful, because you might not be as hard hitting. The moveset is pretty standard, Roost for healing, Stockpile is probably the most used move, as it is used for setting up, Hurricane for STAB move and Surf for STAB move. 2). Gliscor Gliscor is one of our star players due to its typing and its access to Roost. As soon as I got this pokemon, I actually started to beat bosses, again this is required for the team and I will constantly repeat how useful its typing is. This may seem as if it is difficult to find, but get a pokemon with headbutt, go to route 11, 27, 46 have an impish sync natu, and just headbutt all the trees, this was the first one I found out of 8, amd its IVs arent even that great however it still sweeps, honestly isn't hard to find, and if you fail to find one, it is only a days wait. With gliscor impish is pretty much mandatory because swords dance when setting up covers the attack stat enough to be able to sweep. Left overs is again used just so we counteract the small amount of damage done to us, this could be enough to allow us to use a roost if we get to low. Earthquake destroys bosses and acrobatics is a very good stab move ( Wing attack is also very good but it is an egg move which requires beating naero). Anyway this is a golden player. 3). Clefable Clefairy is what I like to call a multitool, this thing is honestly a truck, and hits like 4 of them, you probably know yourself how well this thing does due to its SPDEF and its move pool. This took me the longest to find and unfortunately even though the IVs are good, I wont be able to use it in PvP so thats kind of a bummer, however I can destroy bosses with it. This is a tier 2 pokemon in route 115 (the route above rustboro) so I caught two boxes of them and sifted through the good ones and bad ones. As you can tell leftovers is my favourite item and is very useful. The moveset is moonblast for attacking, calm mind and cosmic power for setting up, and soft-boiled for self healing. The only downside to Clefable is that it takes 12 turns to setup, this means its more likely for a crit to hit, and for Clefable to die, because crits in pro ignore setup moves, other than that this thing is a beast. [spoiler=Side Pokemon] These pokemon although aren't in the required section, they are most likely necessary due to backups and sweeping with pokemon that might be more effective. 1). Seaking This is very common in defeating bosses and you probably already know why we would use a seaking (THIS COPIES OTHER GUIDES IK) Goldeen is tier 1 pretty much everywhere but Tohjo Falls it is the only thing you can find, bring a modest sync and an electric type to test if its hidden ability or not, I found it being much quicker and I ended up finding like 5 in half an hour, you also don't need good IVs at all, thats what the setup agility and lightning rod is for. This obviously baits out the oponent to use electric type moves just for it not to have an effect on us, and boost our SPATK so we end up sweeping. Signal beam is for coverage against grass types various other types, Surf for STAB, Agility to setup us and get us up to MK 6 speed, and icebeam for coverage, also it should be holding a nevermelt ice, which can be found on swinubs, to boost ice beam. 2). Yanmega Yanmega is a very recommended sweeper to have on the team, as we will be using it to stall on bosses to max our speed, or just gradually outspeed things if we can't stall Yanma is tier 3 in sinnoh safari area and tier 4 in route 35, however the best way to do it is headbutt on routes 3,15, 28 and 34 with a timid sync. This pokemon because of speed boost becomes a sweeper, and is very recommended to have, and is very useful because of this feature for starting of and finishing. The only problem with Yanmega is that it is frail. Run Bug Buzz for stab, Air slash for stab, aincient power for coverage against fire and psyhcic to get rid of posion types and ghost types, however you can switch psychic with what you wish, you can run roost if you want, however if you get hit you are most likely going to get K.O'd. This pokemon here is defintely a valuable sideline. 3). Alakazam Alakazam is an OKAY alternative to yanmega as it gets good speed of the bat straight away however it is also extremely frail and a very big risk to whether you will outspeed or not. Abra is tier 6 in most places which is higher than Yanma, it is also a lot more frail on the defensive side. I would run Shadow Ball, Focus Blast, Energy Ball and psyhcic this pokemon is really only my plan B when it comes to bosses, and more of a gamble to whether it will be effecient or not, I will rarely talk about this pokemon but none the less, if you have an Alakazam already I wouldnt worry about getting a Yanmega. 4). Azumarill Azumarill can be very important if you have one, as it is quite easy to obtain and has access to very good setup moves Marill ranges from tier 4 to tier 6, but mainly is around tier 5, so they might be a little harder to find, I would recommend sitting there with a adamant sync and grass type pokemon waiting for it to say it has Sap Sipper. Then you would want to run Surf for STAB, Play Rough for STAB, Defense Curl and Amnesia for setting up. This thing acts as a "bait pokemon" just like Seaking and lightning rod ability, it encourages bosses to use grass type moves on Azumarill, which only benefits us, I won't use azumarill often but when we do it's because its the only way. [spoiler=Harder To Get Pokemon] These pokemon are a little harder to get but by chance if you already have them or are willing enough to put a little more time into getting them, they will definitely help out alot in this guide. 1). Honchkrow This pokemon is an absolute knife in bosses because of its high attack stat, and very useful moveset. Murkrow is tier 6 inside Old Chateau Dining Room in sinnoh's eterna forest, it took me around half an hour to get a h.a one, I sat in their with an adamant sync and a pokemon that has hypnosis, and tried on each murkrow a couple of times and if it fell asleep it means it didn't have insomnia, this means that it could have h.a. I would run Sucker Punch, Assurance, Wing Attack and Brave Bird, (This is the pic before I got brave bird) Honestly if you don't have this I wouldn't bother but it will make some bosses a lot easier, also the Battle Boss - This is necessary 2). Rotom-wash/heat This pokemon is a static encounter at this point of making the video, you just need to have beaten sinnoh. Both these Rotoms are very good and can handle a lot of bosses on their own, however their moveset is very poor and I only mention this for a last resort pokemon. The way to get this static encounter is here. The moveset recommended is Hydro Pump, Thunderbolt, Charge and the third is up to you (This is not the final moveset in the picture) Tbh Rotoms moveset doesn't allow for much freedom with bosses, if it were able to learn any moves that allow setup then it would be good, but other than that this thing is a last resort tank. I only recommend Wash and Heat versions because they get the best moves upon levelling up compared to the other rotoms. 3). Weavile Weavile is a one hit pokemon where it is very rare that you will get more than one hit out on a pokemon before dying, we only use it for final hits as we have a pretty much guarantee outspeed with its very high speed. Sneasel is tier 6 in mt. silver exterior, and it did not take me long to find, I would recommend a jolly sync, mine failed however and I didnt want to wast these IVs. A life orb is also recommended for this pokemon. So Moveset is Ice punch, Ice Shard, Low Kick or Brick break and knock off. This pokemon is extremely frail so I only recommend it if we are super effective against it or for a final blow on a pokemon. BOSS GUIDE
- 1 reply
-
- 1
-

-
Welcome to SideLines "Cheap pokemon boss guide" The purpose of this is to show how to beat bosses with pokemon that are very easy to find and level up. I have seen many boss guides that have become very helpful to me and other people, however finding these required pokemon, especially with my luck, had become a pain since I was spending hours on end looking for one Tier 9 just for a sync fail or terrible IVs, or for the guide to tell me something that should happen, and doesn't happen. So this is my guide on how I beat certain bosses with pokemon that are very easy to find. 1). Disclaimer 2). Pokemon Guide 3). Leveling up pokemon guide 3). Particular Boss Strategies. [spoiler=Needed Pokemon] 1). Pelipper This is the staple in this team, and by far will be the most used pokemon, this started off as a backup to when I followed other boss guides, and whenever they went wrong I ended up using pelipper and sweeping the boss, ever since this has pretty much done most bosses and is a very easy to get pokemon. This pokemon as you probably know is very easy to find, It took me like 5 wingulls to catch a decent one. I recommend running what playstyle you suite, I prefer offensive playstyles so I went with quiet nature, however bold, calm, modest are also viable options. With EVs I went 252 DEF and 252 SPATK however with other natures switching SPATK and HP Is also a decent setup, or maybe only EV training DEF and SPDEF, however be careful, because you might not be as hard hitting. The moveset is pretty standard, Roost for healing, Stockpile is probably the most used move, as it is used for setting up, Hurricane for STAB move and Surf for STAB move. 2). Gliscor Gliscor is one of our star players due to its typing and its access to Roost. As soon as I got this pokemon, I actually started to beat bosses, again this is required for the team and I will constantly repeat how useful its typing is. This may seem as if it is difficult to find, but get a pokemon with headbutt, go to route 11, 27, 46 have an impish sync natu, and just headbutt all the trees, this was the first one I found out of 8, amd its IVs arent even that great however it still sweeps, honestly isn't hard to find, and if you fail to find one, it is only a days wait. With gliscor impish is pretty much mandatory because swords dance when setting up covers the attack stat enough to be able to sweep. Left overs is again used just so we counteract the small amount of damage done to us, this could be enough to allow us to use a roost if we get to low. Earthquake destroys bosses and acrobatics is a very good stab move ( Wing attack is also very good but it is an egg move which requires beating naero). Anyway this is a golden player. 3). Clefable Clefairy is what I like to call a multitool, this thing is honestly a truck, and hits like 4 of them, you probably know yourself how well this thing does due to its SPDEF and its move pool. This took me the longest to find and unfortunately even though the IVs are good, I wont be able to use it in PvP so thats kind of a bummer, however I can destroy bosses with it. This is a tier 2 pokemon in route 115 (the route above rustboro) so I caught two boxes of them and sifted through the good ones and bad ones. As you can tell leftovers is my favourite item and is very useful. The moveset is moonblast for attacking, calm mind and cosmic power for setting up, and soft-boiled for self healing. The only downside to Clefable is that it takes 12 turns to setup, this means its more likely for a crit to hit, and for Clefable to die, because crits in pro ignore setup moves, other than that this thing is a beast. [spoiler=Side Pokemon] These pokemon although aren't in the required section, they are most likely necessary due to backups and sweeping with pokemon that might be more effective. 1). Seaking This is very common in defeating bosses and you probably already know why we would use a seaking (THIS COPIES OTHER GUIDES IK) Goldeen is tier 1 pretty much everywhere but Tohjo Falls it is the only thing you can find, bring a modest sync and an electric type to test if its hidden ability or not, I found it being much quicker and I ended up finding like 5 in half an hour, you also don't need good IVs at all, thats what the setup agility and lightning rod is for. This obviously baits out the oponent to use electric type moves just for it not to have an effect on us, and boost our SPATK so we end up sweeping. Signal beam is for coverage against grass types various other types, Surf for STAB, Agility to setup us and get us up to MK 6 speed, and icebeam for coverage, also it should be holding a nevermelt ice, which can be found on swinubs, to boost ice beam. 2). Yanmega Yanmega is a very recommended sweeper to have on the team, as we will be using it to stall on bosses to max our speed, or just gradually outspeed things if we can't stall Yanma is tier 3 in sinnoh safari area and tier 4 in route 35, however the best way to do it is headbutt on routes 3,15, 28 and 34 with a timid sync. This pokemon because of speed boost becomes a sweeper, and is very recommended to have, and is very useful because of this feature for starting of and finishing. The only problem with Yanmega is that it is frail. Run Bug Buzz for stab, Air slash for stab, aincient power for coverage against fire and psyhcic to get rid of posion types and ghost types, however you can switch psychic with what you wish, you can run roost if you want, however if you get hit you are most likely going to get K.O'd. This pokemon here is defintely a valuable sideline. 3). Alakazam Alakazam is an OKAY alternative to yanmega as it gets good speed of the bat straight away however it is also extremely frail and a very big risk to whether you will outspeed or not. Abra is tier 6 in most places which is higher than Yanma, it is also a lot more frail on the defensive side. I would run Shadow Ball, Focus Blast, Energy Ball and psyhcic this pokemon is really only my plan B when it comes to bosses, and more of a gamble to whether it will be effecient or not, I will rarely talk about this pokemon but none the less, if you have an Alakazam already I wouldnt worry about getting a Yanmega. 4). Azumarill Azumarill can be very important if you have one, as it is quite easy to obtain and has access to very good setup moves Marill ranges from tier 4 to tier 6, but mainly is around tier 5, so they might be a little harder to find, I would recommend sitting there with a adamant sync and grass type pokemon waiting for it to say it has Sap Sipper. Then you would want to run Surf for STAB, Play Rough for STAB, Defense Curl and Amnesia for setting up. This thing acts as a "bait pokemon" just like Seaking and lightning rod ability, it encourages bosses to use grass type moves on Azumarill, which only benefits us, I won't use azumarill often but when we do it's because its the only way. [spoiler=Harder To Get Pokemon] These pokemon are a little harder to get but by chance if you already have them or are willing enough to put a little more time into getting them, they will definitely help out alot in this guide. 1). Honchkrow This pokemon is an absolute knife in bosses because of its high attack stat, and very useful moveset. Murkrow is tier 6 inside Old Chateau Dining Room in sinnoh's eterna forest, it took me around half an hour to get a h.a one, I sat in their with an adamant sync and a pokemon that has hypnosis, and tried on each murkrow a couple of times and if it fell asleep it means it didn't have insomnia, this means that it could have h.a. I would run Sucker Punch, Assurance, Wing Attack and Brave Bird, (This is the pic before I got brave bird) Honestly if you don't have this I wouldn't bother but it will make some bosses a lot easier, also the Battle Boss - This is necessary 2). Rotom-wash/heat This pokemon is a static encounter at this point of making the video, you just need to have beaten sinnoh. Both these Rotoms are very good and can handle a lot of bosses on their own, however their moveset is very poor and I only mention this for a last resort pokemon. The way to get this static encounter is here. The moveset recommended is Hydro Pump, Thunderbolt, Charge and the third is up to you (This is not the final moveset in the picture) Tbh Rotoms moveset doesn't allow for much freedom with bosses, if it were able to learn any moves that allow setup then it would be good, but other than that this thing is a last resort tank. I only recommend Wash and Heat versions because they get the best moves upon levelling up compared to the other rotoms. 3). Weavile Weavile is a one hit pokemon where it is very rare that you will get more than one hit out on a pokemon before dying, we only use it for final hits as we have a pretty much guarantee outspeed with its very high speed. Sneasel is tier 6 in mt. silver exterior, and it did not take me long to find, I would recommend a jolly sync, mine failed however and I didnt want to wast these IVs. A life orb is also recommended for this pokemon. So Moveset is Ice punch, Ice Shard, Low Kick or Brick break and knock off. This pokemon is extremely frail so I only recommend it if we are super effective against it or for a final blow on a pokemon. BOSS GUIDE
-
Once speaking to him he will congratulate the player for being Kanto Champion and ask the player to help him in the research of Mega Evolution. He will require the following: After obtaining these requirements and speak to him again. He will give you a Mega Bracelet. Congratulations you are one step closer to Mega Evolving! , and and Still a work in progress. Special thanks to Gifting for lending me his Scizor, Bhimoso for encouraging me to make this guide even though some were already made and Ichi for some amazing Mega Stone images. Aswell as Yerk and Norex for some important information for Wave 2. Hope you enjoy it and it can useful.
-
Welcome everyone to the Newbie Walkthrough Guide on How to beat Kanto! This guide will be aimed towards NEWBIE PLAYERS who struggle getting through Kanto and to start building teams, capturing stuff and how to complete the game, enjoy it and unlock extra areas, quests and obtain all optional stuff to make their PRO stay fun and long. This guide can also help out experienced players, but it's not the intention here. I wanted to write a guide for Newbies that includes: What pokemon you should get, why you should get them, what items could you get, what specific strategies you can use (5 Geodudes and 1 Magnemite vs Giovanni, for example), why should you go to this place and not this other one, and more. I will go IN DEPTH to help newbies get through the game and obtain anything that can be helpful for them. This guide will NOT be just a "go to this place, beat Brock using Water types, then go to the east, beat Mt Moon" and so on. It will have detailed info on what pokemon to use, when or not to evolve your pokemon, what stuff you can buy from shops to help you out and will also have links to other forum guides to help out. WELCOME TO POKEMON REVOLUTION ONLINE! If you're reading this guide, it means you've just started playing PRO and you've checked forum guides for help or someone has redirected you from the official discord (WHICH YOU SHOULD JOIN, BECAUSE IT HAS VERY IMPORTANT TOOLS AND HELP AND A SUPPORT CHANNEL TO HELP YOU OUT, A BOT THAT GIVES YOU A LOT OF INFO TO PLAY THE GAME AND ANNOUNCEMENTS FOR THE GAME, AND IF I WRITE THIS IN CAPS IT'S BECAUSE I'M HIGHLIGHTING HOW IMPORTANT IT IS. JOIN IT: https://discord.gg/98pMNxq ) Before you begin, make sure to read PRO's rules: https://pokemonrevolution.net/forum/forum/161-pro-rules/. The most important rules that you need to remember now are: -Do not use an inappropriate username, IN ANY LANGUAGE. -Do not be toxic nor antagonistic towards other users. -Do not troll in any chat. -Speak English in all chats EXCEPT Other chat (it's called like that lol). -Do not use third party software such as keyboard macros or bot programs. And there are more rules you should definitely check out. Please make sure you read ALL rules before you begin playing. For example, don't enter trade chat or participate in trades without reading Trade Rules. These are some of the most important ones you should remember for now. Important tips during your adventure: -Evolving your pokemon will make them require way more experience to level up than their preevolved forms. Some pokemon function differently than their preevolutions. Some change their main attacking side, some go from defensive to offensive. Some pokemon's movesets become really bad upon evolving, some become really good. Check the pokedex data and ask for opinions before you evolve your pokemon. In some extreme cases, people avoid evolving your pokemon until level 90 or above, so that you level your pokemon extremely fast during your adventure, and then you Rare Candy the last levels to 100. However, as a newbie, you will find many situations where you'll have to evolve early to beat a specific fight (for example, evolving Metapod into Butterfree will let you gain access to new moves that can beat Brock. However, you might struggle to level up Butterfree since it requires more experience. Here's a few examples: Clefairy learns incredible moves via level up, but Clefable barely learns anything good. Learn all the important moves before you evolve it. You can unlock a preevolution move tutor in the mid to lategame to not have to worry about evolving too early. Magikarp does not learn any good moves via level up, but its evolution Gyarados learns amazing moves. However, Gyarados is very hard to level up. due to its EXP requirement. Trapinch is a very slow but hard hitting attacker. However, Vibrava becomes much faster but loses attack until it evolves again into Flygon. Dusclops is a very strong tank, but once it evolves, it becomes a way less tanky physical attacker that deals much more damage. -Rare Candies are items you should never waste before levels 90 or above, where the experience to level up is really, REALLY high. Keep them for that time because they are also very valuable to sell. There are other valuable items such as PP Up and PP Max that are really valued for the late stages of the game. If you're not sure if spending an item early in the game is worth it, ask for second opinions. -Don't be afraid to use small healing items during story (Potion, Antidote). However, don't buy them from any shops. They are not worth the investment. A single Escape Rope will teleport you to your last visited pokecenter for 550 pokedollars and will also fully heal your team. Buy a few, spend some training time in any place you'd like and then use an Escape Rope to heal. -While it is true that Story's difficulty is nothing compared to the lategame, try to find good natures, abilities and decent IVs for your pokemon as you progress through it. Many of the pokemon you find can be later recycled to sell them in Trade Chat, use them against Bosses or if lucky enough, even in PvP. -Using pokemon with bad natures, abilities and IVs instead of hunting for better pokemon will just make your life harder. Why should you settle with bad pokemon if it's going to make your Story adventure harder? You might have to spend entire days training a single trash pokemon for a single fight than hunting a new one in just a few minutes that might require just an hour to train from scratch. Never settle for bad pokemon, it will just make you lose time and waste hours on pokemon you will never use again. -Don't be afraid to ask for help, but if you ask for help, make sure to ask multiple people and not just one person. If possible, look for experienced PvE and PvP players. Some PvE players can know PvE strats that PvP players don't know and viceversa. Pokemon such as Wigglytuff have incredible PvE movesets and usages that PvP players don't know about. Some pokemon are only viable in PvP and some are only viable in PvE. Make sure to ask multiple people when you need help. -Join a newbie friendly guild in forums that will help you throughout your adventure. Don't be afraid to ask for help. If someone is not willing to help you, find someone who does. At the same time, don't expect everyone to spoonfeed you throughout every single step in story. You're supposed to grow up and learn by yourself too. Nobody will be your parent here and hold your hand every five minutes. You're not a baby. -Try to not rush through the story just to get to the Lategame or you will burn out and drop the game. There's activities to do throughout the entire game's story that are repeatable content. There's also events. This is an MMORPG you can start and stop and continue whenever you want. Take your time and enjoy things. -Capture all kinds of pokemon and experiment with them. Many pokemon have multiple usable sets, moves, utilities that you can only find out if you try them out. Arbok, for example, is an amazing PvE pokemon for both the Early game and for Bossing. However, it's seen as useless in PvP. Many pokemon that are often ignored by PvP players will help in your PvE adventure. Furthermore, many quests in the game ask you to fill up your Pokedex data to obtain legendary pokemon and complete certain tasks. Let's begin! But, what exactly is PRO? PRO is a Pokemon MMORPG based on the original Pokemon games with new additions (and by new, I mean that there's so much stuff to do you will get lost wandering around. You will play through the four initial regions (Kanto, Johto, Hoenn, and Sinnoh), and then there's dozens of places to explore that are sidequest related or extras, such as Sevii Islands, Eumi Islands, Breezy Waterfalls, Eriyadu, Vulcan Island... you get the point. PRO is a gigantic MMORPG. For now, we will stick to Kanto, since it's what this guide aims at. You just created your account and are ready to go! (if you have not, register your account here: https://pokemonrevolution.net/home ) You will now download the game and create the character you want to play as. (https://pokemonrevolution.net/download ). (and if you're unlucky and your internet goes off while you create your character, you start as a bald guy. Yes. It happened to me.) Choose whichever appearance you want! You'll get a prompt asking you if you're sure about this. You appear somewhere strange... what is this place? Well, your only way is to continue and interact with the pokemon and people you see (wow, a Mew? And some special trainers? What is going on?) Talk to Oak who is blocking your way and talk to the Red NPC that you will see to join a language chat (optionally). Now, go and check the trainer fight that is going on and when the event ends you'll be teleported to Pallet Town. The Beggining: your first steps! When you spawn in, you'll go downstairs in your house and talk to your mother. You'll then leave and try to leave the town but of course, you have no pokemon and that means you can't leave (unless you want to be beaten up by random trainers). You're forced to go to Oak's lab and pick up a pokemon. You can choose between four starters: Bulbasaur, Charmander, Squirtle or Pikachu. You can only choose Pikachu if you first talk to the three other starters in their pokeballs and choose NO. My opinion is: CHOOSE WHICHEVER YOU WANT TO HAVE FUN WITH. You're SUPPOSED TO HAVE FUN IN THIS GAME. However, choosing certain pokemon CAN make the game way harder, but there are ways to solve it. You'll also be able to obtain and hunt all starters way later in the game infinitely, so do not worry! Keep in mind you can hunt ALL starters in the wild in future areas. Do not worry about your choice: it will not have permanent consequences. If you refuse to choose all three starts by checking them and clicking the NO option, you will be able to pick Pikachu. The only benefit you get from picking Pikachu is the access to an extra mini-quest for Ash's hat. That's it. Nothing else. My opinion on each starter: Bulbasaur is, in my opinion, the best starter. However, it has its risks. Pokemon that can defeat Water, Ground and Rock types can be powerleveled easily in this MMORPG (during both Story and the Lategame). Bulbasaur defeats the first and second gym easily (however, Misty's Starmie can surprise you), it resists the third and fourth gyms (it does a decent job as Grass resists Grass and Electric), it is neutral in the fifth gym, but gets completely destroyed in the last three gyms. Bulbasaur is tanky, it learns Leech Seed, Sleep Powder and Poison Powder (which are amazing to capture pokemon early on), Vine Whip is a decent attack and it will get you through the first two gym as if they were nothing. The only bad things he has is his weaknesses (mother of god: flying, fire, ice, psychic, these kinda hurt), he's somewhat slow, but he is pretty tanky and fun to use. He is EXTREMELY easy to powerlevel (to absurd extents where you can level him up 10 to 20 extra levels if needed.) If you want information on natures (which are ESSENTIAL) click here: https://pokemonrevolution.net/forum/topic/152671-natures-abilities-ev-iv-and-stats-for-newbies-the-guide/?tab=comments#comment-840375 We won't talk about EV or IV yet in this topic, but just keep in mind: the higher these orange numbers in your pokemon are (From 1 to 31), the better it will be. It is generally advised to focus on pokemon with 20 or higher IVs in each important stat. Some pokemon require more stats to work than others. For example, Shuckle only requires high SPDEF, DEF and HP. Some pokemon like Gyarados require everything except SPATK. Some only require high HP like Ditto. It's all individual cases! Good natures for Bulbasaur's Story are: Rash, Mild (best, because Bulbasaur's moveset is both mixed: Special and Physical attacks. However, his moveset is better on the physical side), Lonely, Naughty (powers up physical moves more, but does not decrease special moves, which is Adamant's issue, and the opposite happens with a Modest nature). Relaxed and Sassy are acceptable since his speed is slow but his bulk is great, and he becomes tankier, which makes him survive a lot of battles he shouldn't be able to (and it will be easier to powerlevel him), Bold and Calm are also okay, since he becomes tankier, but he loses either physical or special attack. We don't want to lose too much damage either. Bulbasaur's useful moveset. Squirtle is the next option I think of. This is the safest starter and the safest choice. He's also my second favourite starter in Kanto in case you hadn't noticed Bulbasaur's presence above. Squirtle learns not super good moves, but still usable ones: Water Gun at level 7 (destroys Brock completely), Withdraw (to spam defense increases versus brock and other stuff), Bubble (why does he learn Water Gun at level 7 but Bubble at level 13? Questions science can't answer) and Bite at 16. His moves are... just okay. Nothing special, sadly. He's tanky, he destroys Brock, helps versus Misty since he resists Water but completely drowns in the third and fourth gym, which are his weaknesses. He does good in the seventh gym but is neutral on the others. He can also learn Water Type moves so you can travel around like Surf and similar stuff. The best natures for Squirtle are: Bold/Calm (These are the best natures. We want Squirtle to be a tank, his physical damage does not matter, we sometimes use Bite through story to flinch opponents, we don't care about its damage. We want it to be TANKY). Relaxed/Sassy (same reason as above, we sacrifice his slow speed even more to make him tanky and bite opponents harder). Timid/Modest/Quiet (sacrifice speed or physical attack for extra special attack, which will make you hit harder). All remaining natures are either bad or terrible. Squirtle's useful moveset... not so much though. Charmander is... the risky choice. He's the hardest hitting, but he's the hardest to train (BY FAR, BY A LARGE MARGIN, HE IS PAINFUL TO TRAIN), learns decent moves (he learns Dragon Rage at level 16, which steamrolls through the first gyms, but he's still godly awful at the beggining. You need to get him support pokemon to get through the first two gyms because he's TERRIBLE there. He will get oneshot by a single attack (unless you manage to overlevel him or get good ivs on him). He's just awful. However, after the first two gyms, he becomes a pokemon beating machine which steamrolls through the entire story (until you reach the Elite Four). If you're willing to go with Charmander, get the Dragon Rage TM in Viridian Maze. It's the only way to make him usable before the third gym. Charmander shares the same exact natures as Pikachu: Lonely/Naughty if you want to increase your physical damage and decrease one of your already pathetic defense stats (which don't matter since you'll get destroyed if you get hit even once), Rash/Mild if you want to increase your special damage output and also decrease one of your defenses, Modest/Adamant if you will go either the special or the physical attacking way, Hasty/Naive if you want to increase your speed to hit first and destroy while decreasing your defense and Jolly/Timid to increase your speed and sacrifice the physical or special attack stat you won't use. Any other natures are COMPLETELY USELESS for the two. Charmander can you learn something THAT IS NOT A FIRE TYPE MOVE, FOR THE LOVE OF GOD Pikachu is the last choice. I don't even know where to start with this guy. He's either the biggest garbage in pokemon starter existence (still better than Chikorita lol), or he's a super fast somewhat usable sweeper/support guy for Kanto story. Pikachu levels up fast, Thundershock is a nice leveling up move and he's extremely easy to powerlevel him when surfing or fighting Flying or Water pokemon while fishing. Quick Attack is also good, it just deals next to no damage. Electro Ball is an extremely overpowered move to level up and defeat slower pokemon, which is nice, but most Water types and Flying types are fast. Electro Ball's power increases if you're way faster than your pokemon but decreases if you're slow. Thunder Wave or Nuzzle are absolutely needed so he can paralyse wild pokemon to capture them or cripple anything annoying you face (*cough cough starmie in the second gym), and the next parts of his moveset are amazing in comparison to the other three (Charmander's and Bulbasaur's are acceptable, but Squirtle's is horrendous). For Pikachu natures, read the paragraph above. After that, he can also learn Double Team (which makes you annoyingly evasive, but if they hit you anyway you're dead because Pikachu's deffenses are GARBAGE. Spark is a good Thundershock upgrade and Nuzzle is the upgraded and OBLIGATORY version of Thunder Wave, since it always paralyses and deals damage. It helps a LOT to capture pokemon and to defeat trainers. Discharge and Thunderbolt are both amazing moves for him, Slam is useless and Wild Charge is a really strong move, but it will take some hp after every use. However, it's worth it. To summarise: His moveset is really good, but any ground type literally laughs at him while he can't do ANYTHING to them. His bulk is horrendous too. If you manage to get a Light Ball from a wild Pikachu in Viridian Forest (which is... dumb, because you could've just not chosen Pikachu as a starter and captured one there), you can equip it to DOUBLE his physical and special attack and make him a monster. He will then be usable. But we will cover this later. It has a 5% chance to hold it in Viridian Forest, so you can try and steal it with the move Thief or by capturing wild Pikachus. Good luck! Helo ma name is Pikachu im a cool mascot! I'M ALSO USELESS. Almost. We'll try to make him work, don't worry. We will not worry about their abilities for now. The battle will start once you try to leave the town with your pokemon. Jackson has an annoying Eevee which, if you have horrible luck (and this is likely to happen with Charmander and Pikachu, due to them having lower defensive stats), you'll faint and lose. If you win, you get a free level up which is GREAT for the first two routes. The result of the fight does not matter, the story will continue anyways. The issue is that losing makes you lose a LOT of money and the free level up. From now on, if you're going to 100% lose any fight against a NPC, LOG OUT WHILE IN BATTLE. You'll be teleported to the last visited pokecenter (or your mom's house) AND YOU WILL NOT LOSE ANYTHING. Logging out against a wild pokemon will not teleport you, you will appear in the same place and have completely avoided the fight. Use this to your advantage! So, now we have our starter pokemon! But what the hell are all those numbers? Jesus christ, THERE'S SO MUCH INFORMATION. (Note, this one is one I bought from trade chat, that is why it's level 14). So, let's go slowly one by one! First, we have the name of the pokemon: Bulbasaur. In PRO, you cannot rename your pokemon (for more than obvious reasons, imagine people naming them after racist terms). Afterwards, we directly have the gender of your pokemon. There is no breeding in PRO! Unfortunately (and fortunately), you cannot have 6x31 IV pokemon, which would completely ruin the economy, and you cannot breed easy shinies either. However, gender affects a few things: the ability Cute Charm, the move Attract and certain Pokemon can only evolve towards certain other pokemon if the gender is the right one. Next, we have the region of the pokemon. Big note: THIS IS WHERE THE POKEMON WAS CAUGHT, NOT WHERE THE POKEMON POKEDEX REGION IS! You CAN find other region pokemon in Kanto, and so on in other regions. This is important because if you are traded a pokemon from another region, you will be completely unable to use them until you unlock that region. Next to it we have the pokemon's ID. This ID is used by PRO to identify a pokemon. This is often used to be able to find a lost pokemon! To the right we also find an empty box. This empty box is the Held Item! Pokemon can hold items. These items can provide passive or active bonuses to your pokemon. Next we have the ability. We can check the effects of abilities in the pokedex (or in Bulbapedia). Abilities are passive or active bonuses our pokemon can have. MOST abilities are very good or useful in a lot of situations, but there's also really, REALLY bad abilities (Truant, for example). Next is the Nature. Natures grant a 10% boost to one stat and a 10% decrease to another stat. This mechanic is one of the easiest bonuses to farm for and to look for in your pokemon. You'll always prioritise good natures when you hunt for pokemon! We also have the EXP indicator. The Current EXP you have is the EXP you've earned up to that point. To be honest, that stat is pretty useless and pointless, because what we must focus for is in the "Till Next": the EXP we need to reach the next level! We also have the OT indicator. This shows who is the player that originally caught that pokemon. Close to it we also have the pokemon's types. There are 18 types (if we exclude the Shadow Type) a pokemon can have. Each type has their own resistances, weaknesses and immunities. It is important you learn the type chart to take full advantage of your pokemon and to not immediately lose fights you could otherwise win easily! If you ever have doubts on which natures and abilities you should use on your pokemon, you can also use this guide I made! If you want to take some time and read about the basics of pokemon (what do these numbers mean, what's the blue, orange, white number, what's an ability, a nature, and so on), please read this guide. For now, we have nothing else to do in Pallet Town, so we will head onto route 1. We will come back later! Route 1 has the first pokemon of the game. Look behind some of the trees in the route: some of them have hidden items! Ironically, we are only interested in two pokemon: Sentret (Which spawns in the morning and day time but not night time, who are very common and we need to capture one for a mission), and Rattata. We need to ignore Rattatas for now, they do not give us any benefits. I suggest you use the Reborn Bot from Discord (https://discord.com/invite/98pMNxq) to know what pokemon spawn in each area. If you write ^s Route 1 , you'll get a list of all the pokemon that spawn in Route 1, at what time, what method (grass, headbutt, surfing, fishing), rarity (the higher the tier, the rarer they are: tier 1 is the easiest to find, tier 9 is the hardest), their level range, their MS requirement (if it says NO, it means you don't need a membership active in your account to find them, and if they hold any items). My recommendation is that you actually try and hunt all possible pokemon (for fun, enjoy the game! Catch them all! Having different pokemon will help you out in the lategame as some side areas and quests require that you've completed a lot of your Pokedex). Capture some Sentret, Rattata and beat some of the pokemon you find. Try to level up to level 7 or 8, and heal up constantly in Viridian Pokecenter. Grab all berries in the route! As you can see in the picture below, you have some information to see: At the top left you have your Team. Your team is formed by up to 6 pokemon that you can change whenever you want by visiting any Pokecenter (or Daycare, and there are some buildings where you can access a PC). Talk to any PC to change your team composition. At the bottom left you have five tabs: PvP The PvP Tab has the section where you can choose to fight people in Ranked PvP or Unranked PvP. Ranked PvP is the mode where almost everyone participates with competitive PvP Teams. You must follow the https://pokemonrevolution.net/forum/topic/31283-ranked-pvp-rules/ Unranked PvP is the same as Ranked PvP. However, Unranked PvP HAS NO RULES. This is a for fun queue you can use to practice with friends or whoever wants to practice before getting into Ranked PvP. Beware that these two modes require you to have 6 level 100 pokemon. If you want to battle anyone with your low level pokemon, it is indeed possible! There are other ways you can battle anyone, even as soon as you get your initial starter. Backpack This is your classic Pokemon Backpack. There are different sections in your Backpack. The Misc tab is the section where most items go to. They can be really different: Move enhancing items like Gems, Type enhancers (Black Belt, Blackglasses), Plates, PvP items (Choice Items, Assault Vest, etc), Diggable items (Evolution Stones, Fossils). The next section is the Balls bag section (this sounds so wrong lol). Here you can find your desired balls. To your most loved Pokeballs, to the expensive Ultraballs, to Greatballs, Lureballs, Moonballs, Netballs... and so on. This is where all Balls go to. Each ball has different effects when you use them to capture a pokemon. For now, you must only know that Pokeballs are, by far, the best for newbies, the more cost effective, the easiest to pay and obtain and the ones that will help you the most. Use your Balls wisely, don't waste them on something that is not worth it! If you want to read more about each Ball and their individual effects. The next section is the Medicine collection: All healing and consumable items go here. These items can be used on your pokemon to heal them, level them up (Rare Candies) increase their PP (Leppa Berries, Ethers, Elixirs, PP Ups and so on). They're the healing items. You should always try to carry a LOT of berries and pick them all up, because sooner or later they'll be useful. While Leppa Berries may seem incredibly common, they will be extremely useful in some parts of the game (Get ready for Mt Pyre lol). Next we have the TMs/HMs section. Here we have to do some mentions: The TMs work like in the first 4 generations. Once you use it, it is consumed and it will disappear from your bag. You can purchase TMs, find them in the overworld, purchase them from Tutors and so on. They are like in the original games. While you do not have to worry much as you will always be able to buy extra copies of a TM, you have to worry about the fact that they're consumed upon usage. Thus, think really carefully if you want to teach a TM to a pokemon before you use it! The HMs in PRO are infinite AND removable. Thus, you can change HMs anytime, You do not need to worry about going to any tutors anymore! You can just replace your HM move easily. The next section is the Key Items section. This section will have both Key Items (Bicycle, Old Rod, and so on) from the original games, new Key Items and additionally, the Tools you buy from other players or directly from the Coin Shop. For example, the Battering Ram, which will allow you to Headbutt Trees without having a pokemon with Headbutt in your party. The Mounts and cosmetics section is the second to last one. This one will hold all custom items that you can use for better transportation and to dress up properly. The last section is the Eggs section. However, since there's no Eggs section, this feature just doesn't exist. (I wonder why it was never removed). Pokedex The Pokedex displays a lot of information about each individual pokemon: -Information on the Pokemon's Base Stats. This highlights at what is each individual pokemon good at. For example, Gengar is very good at being a fast Special Attacker. Golem is a very slow physical attacker with a high defense stat. In the picture above you can see the ATK, DEF, SPDEF, SPATK, SPDEF, HP base stats of Bulbasaur. These are based on a hidden formula that tells the game how much their stats will normally grow level by level. You can make these strats increase by training them accordingly. Thus, it's up to you what each pokemon becomes! Pokemon like people are naturally at some things and some others they're terrible at. Analyse each pokemon individually! -The Height and Weight of the pokemon. These can be important for sidequests and for specific moves like Low Kick which depend on your Weight. -Their name -Their abilities. Each ability in the game has a different function. Some pokemon share the same ability. Some have unique abilities. Each ability is different and there are only a few that do exactly the same. The abilities in blue are the pokemon's normal abilities. The orange one is their hidden ability. Finding a pokemon with a hidden ability is Rare, compared to its common abilities. -Their level up moveset. Each pokemon learns moves at different levels. Each pokemon learns moves in a different way than others. Some pokemon require tutors for the same moves another pokemon would just learn by level up. -Their spawn locations and where they can be hunted + what methods do you need to use to find them. Note that there are special mechanics such as Dig Spots, Headbutts and Excavations where you can find these pokemon alternatively. -On the left, you have the Owned data (this means you had that pokemon atleast once in your PC OR did a specific quest that gave you that pokemon's data. This is indicated with the Pokeball. The seen data (means you fought against this pokemon once against an NPC or in the wild) Evolved (this means you evolved a specific pokemon into their evolution atleast once in the past). This is indicated by a star. Trainer Card As you can see, your Trainer Card is like your real life ID. It shows your: -Ingame name -Guild -Playtime -Registration date -Total pokemon you have in your boxes -If you have an active or inactive membership -Your Doctor Quest rank -Your Excavation Quest rank -The amount of badges you have -Your cosmetics -Your Pokedollars -Your PvP and PvE coins. Social The Social Tab is where all your friends can be found. Here you also have some Emotes you can use so your character reacts with them, your guild, the members of your guild, your guild management options and your ignore list! Let's begin our adventure! Viridian City Missions, catching useful pokemon and getting to Pewter! Once you reach Viridian City, there are a lot of new tasks to do. Once you've caught the pokemon above, you can show Sentret to the policeman so you get a bit of extra money. After that, go to the southwest of the city. You'll see a bridge there. Cross the bridge and grab the pokeball to obtain a Rare Candy. This item makes your pokemon level up once every time you use it. DO NOT USE IT. KEEP IT IN YOUR BAG. We will use this way later in the game to either become rich or level up your pokemon. Rare Candy here. After that, we have a lot to do: our access to route 2 is blocked until we defeat or lose against Jackson in the Pokemon Academy in Viridian. If you only go with your starter at level 8, you'll get destroyed. We will now check the poketime before we do anything: The poketime is at the top right of your screen, and it also shows the time in real life. Five minutes of poketime equals to one minute in real life, so a minute of poketime equals to twelve seconds in real life. (QUICK MATHS BRO). We COULD capture a Pidgey with both IVS in Atk and Speed higher than 15 to trade it for an Oddish, but it's a complete waste of pokeballs. You need to get lucky, instead of just going straight and capturing one in Viridian Forest. If you want, try your luck and capture a Pidgey with atleast 15 IV in Attack and Speed and give it to Madeline. You can find them in Route 1. I do not recommend this because you can just catch Oddish in Viridian Forest during Night time instead. I recommend Bold, Calm, Modest, Timid, Rash, Mild, Relaxed or Sassy natures for Oddish for story and PVE. If it's day or morning in poketime, we will catch Nidoran Male and Nidoran Female in Route 22. If it's night time, we will catch Poliwag. The best natures for both Nidorans are: Lonely, Naughty, Hasty, Naive. Adamant and Jolly are also usable, but we want Nidoking or Nidoqueen to be able to Surf later on, and they will decrease your spatk a bit. Timid and Modest should be avoided for now. All other natures are less usable. For Poliwag, it depends: If you want Poliwrath, a tanky physical attacker which is also a fighting type (he's terrible, but I love the dude), you need Adamant, Jolly, Relaxed, Sassy, Impish or Careful. If you want to go for Politoed natures: Modest, Timid, Calm or Bold. Route 22 entrance. Keep in mind that, from now on, I do NOT suggest you evolve ANY pokemon unless they're completely useless otherwise (Abra, Magikarp, Beldum) until you have access to TMs or Tutors way later in the game. If you evolve a pokemon, they will need an absurd amount of experience. You could level a Gastly from 50 to 100 in the same time you'd level a Gengar from 90 to 100. The different is absurd. You can powerlevel them faster without evolving them and then evolving them at level 90+. Their rapid growth will compensate their terrible stats. If you want to have fun, however, and you REALLY want that cool sweet Charizard burning everything, then evolve it and have fun. It's just my recommendation. Have fun and try whatever you want! I also would evolve really bad pokemon with bad natures (but why would you train them in the first place when you can hunt better pvpable or super good versions later on?). Route 22. Poliwag, Nidorans here. After you've caught one of each, train them until level 8. Go to Viridian Academy and face Jackson. His Eevee hits really hard and is tanky, so I suggest using Poison Sting with the Nidorans to poison it, Leer to lower its defense and destroy it afterwards, Growl to reduce its attack to pathetic levels, and if you trained your Nidorans enough, you can Double Kick it hard. If you win, you'll be able to go to Route 2. If you lost, you can go and talk to his mother in Pallet Town, and it will unlock the way to Pewter City. If you feel you're still struggling with the Early Game, I suggest you go back to Route 22 and catch a Psyduck, a Slowpoke, a Mankey and multiple Natu with the ability Synchronise. The ability Synchronise makes it so that, once you place the pokemon with this ability in the first slot of your party, 50% of the wild pokemon will share the same nature as your Synchronise pokemon. This can be used early in Kanto to hunt for PvP and very good story pokemon early on in your adventure. Here you have all the natures a pokemon can have and why they are good or not: +SPEED: Timid, Naive, Hasty, Jolly. These natures are incredibly good and used for fast attackers or fast support pokemon. +ATK: Adamant, Lonely, Naughty, Brave. These natures are very good, used for either fast physical, mixed or slow attackers. +SPATK: Quiet, Rash, Mild, Modest. These natures are also very good, used for special, mixed, fast or slow attackers. +DEF: Bold, Impish, Relaxed. These natures are very good, used for defensive pokemon. +SPDEF: Calm, Careful, Sassy. Also very good natures, used for defensive pokemon. NOT GOOD NATURES UNDER ANY CIRCUMSTANCE: Lax, Gentle: these increase a defensive stat and decrease the other one. On an offensive pokemon this is completely useless because it doesn't increase your power output or the damage you deal. On a defensive or support pokemon, they are useless because you just gain defense on one side to lose it on the other. Hardy, Serious, Quirky, Bashul, Docile: these natures do not increase any stats. These bring no bonuses. While they're acceptable for story, why would you settle for this instead of finding a nature that actually boosts a stat? It is important that you try to get decent to good natures for your pokemon. Each pokemon specialises in something different, remember that. Some are physical attackers, some are special attackers, some are support pokemon. Check the base stats of a pokemon to guide yourself on what they are good for. There are only very few exceptions to this rule. Mankey requires Lonely, Naughty, Adamant, Hasty, Naive or Jolly. Slowpoke requires Bold, Relaxed, Calm or Sassy. Psyduck requires Timid, Modest, Naive, Hasty, Rash or Mild. These three are very good examples. Psyduck is a special attacker that is also an utility pokemon. Slowpoke is a tank that uses special attacks and is an utility pokemon. Mankey is a physical fast attacker. Mankey is clearly a physical attacker. Psyduck is a fast special attacker and utility pokemon. Slowpoke is a great tank and slow special attacker. Beware that, even though Slowpoke has a lower SPATK than ATK, when it evolves it gains a ton of SPATK. Let's go back to Viridian School now. School After you've done this, talk to the police woman in Viridian. Tell her you want the Thief mission (after you've completed the Sentret one), to gather Rattata hair. Teach Thief to one of the Nidorans (preferably, the male one), and go to route 1. You need your Nidoran to have NO ITEMS equipped. Use Thief against wild Rattatas. Sometimes, you'll steal a Rattata Hair. You can defeat the Rattatas with Thief, it will always steal the item if they have it, no matter if they are fainted or not by your attack. When you get a Rattata Hair, click on your pokemon on the top left (Where your pokemon list is) and click on the item it is holding. The hair will go into your bag. Then, keep hunting Rattatas until you have stolen three Rattata Hair by using thief on all of them. Bring the Rattata hair to the Officer Jenny in Viridian to get a huge reward. It's time to move onto the forest! Officer Jenny wants to give you work for FREE EASY MONEEEEY Route 2, Viridian Forest, Missions and Pewter City, defeating Brock. Route 2 sadly has nothing of interest for us (for now, it will later on!). We will come back to headbutt some pokemon for a quest in Pewter. You can use this route to train vs Kakuna and Metapod for some really high exp. Catching a Snubbull during night time is optional, he can help you later on in the game. He learns the elemental fangs and has some nice moves. Try to catch it with a Brave, Adamant, Lonely or Naughty natures. All other natures for it are a bit disappointing. Additionally, if you can, you should catch a few Hoppip with the natures Timid, Jolly, Hasty or Naive. This pokemon is an extremely good lategame tool that is used to catch wild pokemon with Stun Spore, Sleep Powder, but is also used to level up other pokemon with Toxic, Leech Seed and Memento, but is also a great boss and NPC debuffer with Flash, Cotton Spore, Worry Seed, Stun Spore, and is also an amazing story pokemon as it has access to physical, special and utility moves with decent stats. We will now go north and enter Viridian Forest. We have some stuff to tackle here: defeat Bug Catcher Gerald for the mission in Viridian. Viridian Exit to Route 2 (finally the old man stopped harassing us.) With this, all Viridian quests will be done. You'll have obtained a good chunk of money which we'll save for the bycicle. In Viridian Forest, we want to hunt a single Budew in the morning and day times (he's a bit hard to find) which we will use for the first and second gyms. In the night time, we'll hunt for an Oddish. We also will hunt a Pikachu (if it was not our starter. Check the first section for Pikachu natures!). We want a Modest, Rash, Mild, Timid, Hasty or Naive Budew. Oddish can also work with these natures, but he can also run Bold and Calm, since its evolution Vileplume can benefit from them. We need the Pikachu for a mission in Pewter City. Note here: if you are bored enough and hunt for Pikachu, with the natures mentioned at the beggining of this guide, there is a small chance that you find a Light Ball in one of the wild Pikachu in Viridian Forest. It is VERY recommended that you equip this item to Pikachu because it will DOUBLE its ATK and SPATK stats in battle. This makes Pikachu an absolute monster in story (whenever he doesn't suck). If you find a Light Ball, be sure to equip it to a good Pikachu you find. Route 2 Bug Trainer Gerald for the quest. He hides, afraid of us T-Posing and ASSERTING DOMINANCE to win against him and get some money. Our other interest place here is the gigantic maze. The maze is found in the top left of the entrance from Route 2 south (so, from Viridian). It's a big tree with a fat hiker on its front. Behind the tree on its left, there's a Rare Candy. We will enter the tree and fight the rocket dude that is inside. Then, we will go to the left and down to teach Headbutt to our Nidoran who we also taught Thief before. This will give us the prize of another mission in Pewter City. After this, we can fight our way until we reach Pewter City, if we have done all previous steps. It's just a long way of being poisoned by trainers and Weedles (these damn Weedles). BIG NOTE HERE: Carry ONE Escape Rope in case you accidentally get lost in the maze. At this stage in the game you don't have access to the TM Flash and it is very easy to get lost inside. I'll leave the map linked if you dare enter it, but you may never escape it. Entrance to the Maze. To the left of where I stand, there's a hidden Rare Candy. Press spacebar when you're looking at it to grab it. We will ignore the Pokestops for now. We cannot use them until we get our 4th badge. Headbutt Tutor to the bottom left. 2000 pokedollars per usage. Where the Headbutt Tutor is there will be a Rocket Grunt you can defeat when you get here for the first time. The chat hides the entrance to the Maze. We found the way to Pewter! Jenny ready to give us SOME MORE MONEEEEY in exchange for... weird tasks. It's time to face Brock. If you chose Pikachu or Charmander, you can investigate the Viridian Maze to its depths to find an abandoned pokemon in a pokeball which contains either a Horsea (nice to have, pretty useful too), Bellsprout (just decent grass pokemon) or Growlithe (amazing pokemon, but terrible for the first two gyms). Otherwise, use any of the mentioned pokemon that we have found in the routes before that can help us: Psyduck, Slowpoke, Poliwag (Water types), Hoppip, Budew, Oddish (Grass types), Mankey (Fighting type), Nidoran Male and Female (while they are Poison type and Poison is weak to Ground, Brock uses NO Ground type attacks. Furthermore, Nidorans learn Double Kick which wrecks Brock). You can also teach the TM for Dragon Rage to Charmander. However, there's an issue: Brock's pokemon, Geodude and Onix, have a chance to have Sturdy as their ability. Dragon Rage deals a fixed amount of damage: it will always lower the opponent's hp by 40. So, no matter if you were level 5 and your opponent was level 100, if they have 40 hp or less and you use Dragon Rage, you'll defeat them. The issue is that Sturdy prevents the opponent from defeating you in a single hit. If you use dragon rage when Geodude or Onix have their hp bar completely full, THEY WILL SURVIVE. And they will destroy you with a Rock Tomb move. If you will use Charmander, first use a pokemon to lower their hp, and then use Dragon Rage to finish them off. Pikachu has no way of doing anything in this fight, don't even bother. The only thing Pikachu can do in this fight is to use Tail Whip to reduce Geodude and Onix's defensive stats. Bulbasaur and Squirtle can spam moves and still win. Use Stun Spore, then Leech Seed, then Synthesis to heal and spam Vine Whip with Bulbasaur. Repeat this strategy against the two. With Squirtle, use Withdraw a few times, heal it up, proceed to spam Water Gun. Level 10 to 12 should be more than enough for this gym. Don't overlevel too much, try it at level 10! Recommended types of attacks you should use for this gym: Water - Water types are extremely effective here. Geodude and Onix (both of Brock's pokemon) are 4 times weak to Water. Rock is weak to Water, so is Ground. Geodude and Onix are double type pokemon, which means they have 2 types, not just one. If a pokemon shares a weakness in both of their types, the damage is quadrupled (4 times the normal damage). Slowpoke, Psyduck, Poliwag and Squirtle will have a really easy time in this gym. Grass - Grass types are extremely effective too. For the same reasons, both Geodude and Onix are very weak to Grass. Grass is very effective against Ground and Rock types. Not only that, but Rock types in generally have pretty bad Special Defense. Grass is mainly a Specially oriented attacking type and also a defensive type at the same type. It completely wrecks Brock. Budew, Oddish, Bulbasaur, Paras and Hoppip can easily beat this gym. Keep in mind that Paras is both Grass and Bug. Bug is weak to Rock. Also beware that Hoppip is Grass and Flying. Flying is weak to Rock. Fighting - On a more secondary type, Fighting also beats Rock super effectively, but is neutral against Ground. It's still a very good type to use! For this fight, I can recommend Mankey and both Nidoran. They learn Fighting type attacks that are very useful. Keep in mind Rock types have really big Physical Defensive stats and your attacks might not damage them much! This is the basic type chart. It follows very simple logic. Water beats the Ground because it floods it. Water also breaks Rocks by eroding them. Grass grows from the Ground and breaks its way through, same with Rocks. Very strong fighters can easily break rocks! CONGRATULATIONS, YOU JUST BEAT THE FIRST GYM! Talk to the police woman and receive the last mission reward. We will heal up in Pewter, talk to the policeman for the Headbutt and Pikachu rewards. Then, we will talk to her again and ask her if we can take the Headbutt quest again to hunt for a Silcoon. We will headbutt Viridian City, Viridian Forest, Route 2 and Route 1 trees to find a Silcoon. Hello lady Silcoon! Headbutting in Route 1 To Headbutt, your pokemon needs to have atleast 150 happiness. This action also happens in other moves such as Dig. All pokemon are captured with 70 base happiness. You gain 1 happiness every time you defeat a wild pokemon and 5 happiness every time you level up the pokemon. You lose 5 happiness if your pokemon faints. You can check the happiness of a pokemon by writing /happy and the number of the position of the pokemon in your team in the chat and pressing enter. If your nidoran is in the first place, you'll write: /happy 1. If your Nidoran is in the third place of your team, you'll write /happy 3. (without the ., obviously). We want Nidoran to reach 150 happiness by defeating wild pokemon and leveling it up until it reaches 150 happiness (remember not to forget headbutt or thief or you'll have to pay a lot of money to get them back). Headbutt the trees in the zones indicated above until you find a Silcoon, catch it and go get your reward! You will also need to have defeated the First Badge in Kanto! Write the command as in the picture and press enter. Now, we will backtrack to Pallet Town. Headbutt these trees (there are more in the Town). You can get all three starters to spawn from these trees. This is an amazing way to get the other starters in the game before the second gym badge. You can also get Exeggcute which is a really strong Grass type that also knows Psychic type moves and has a lot of utility moves to help you out through your adventure. We will then try headbutting in route 1 to try and find Pinsir, an incredibly powerful bug type pokemon (in fact, one of the strongest in the game) which will steamroll through anything in the early game. His abilities: Hyper Cutter makes its attack not be lowered. If it has Mold Breaker, it will IGNORE Geodude's and Onix's ability Sturdy, and thus, you will be able to defeat them in a single hit. If it has Moxie, it will gain a physical attack boost every time it defeats a pokemon. This one is the best ability, but the other two are also amazing for him. At level 8 he learns Seismic Toss, which deals the same damage to the opponent as your level. Thus, if he is level 12, he will always deal 12 health to your opponent. At level 15 he learns Revenge, which is a Fighting type move that doubles its damage if you have received a hit before. He has really good moves and learns a lot of useful stuff! You can also try headbutting in Route 22 for evolved pokemon forms, Viridian City and Route 2 for other rare pokemon and some useful support stuff like Venonat, Viridian Forest to get a Heracross (if you find one, it's a gift from the gods), and Pewter City for an early Golbat. Keep in mind that evolved or pokemon that cannot evolve need more experience to level up in order to compensate for their overpowered stats. I was lucky Route 3, Mt Moon and getting to Cerulean City. So here we are in route 3, finally advancing! We finished the long grind versus Brock, we can continue onwards onto our big adventure! If you finished the first two cities missions, of course, and picked up all the stuff I mentioned in this guide (you don't need to capture all the pokemon I mentioned, they're just options, however, completing the Pokedex is essential for many sidequests later in the game). The wild pokemon here are... forgettable, to say the least. We have a certain option which has very big drawbacks: the only interesting pokemon here is Arbok. Of course we can go and catch all other pokemon in the previous routes too for fun (we'll eventually need to fill the entire pokedex for sidequests). The first noticeable spot are the Dig spots just below the route's entrance from Pewter. These Dig spots respawn every 72 hours and you can dig them to obtain prizes such as Nuggets, other monetary items, healing items, fossils, evolution stones... They are absolutely necessary to progress through PRO and maintain your economy to get through the game. I will link my own money guide here so you can understand how important they are. Dig Spots in Kanto are found in Route 3, Mt Moon, Rock Tunnel, Diglett Tunnel and Routes 14 and 15. Talk to the rock in the picture to obtain a stardust, sellable later for some nice money. These dig spots were already dug, and this stone has a Stardust. Remember to use dig on these spots every 3 days! They'll appear as cracks in the ground. Arbok spawns frequently and he knows the elemental fangs, which are extremely overpowered moves combined with an evolved pokemon. The drawback? He's not very strong, but he's still useful. If you want to include him in your team as a last resort, capture him with a Adamant, Naughty or Lonely, Hasty, Naive or Jolly nature. He can hit hard and he can help out with a lot of coverage thanks to these fangs. We can relearn all of these level 1 moves in the move relearner in Cerulean. We want our Arbok to ALWAYS have Intimidate and the moves Ice Fang, Thunder Fang, Fire Fang and Crunch. After fighting our way to the Mt Moon Pokecenter, we can finally find a place to rest! We can now heal up here. Don't forget to interact with the small hole to the left of the Pokecenter! The route was disappointingly empty, in my opinion, but whatever. We can buy a Magikarp from the salesman here! However, each one costs 2.5k... this is not really worth it at all. You're also running on luck to get a good one. We can catch any Magikarp with just one pokeball, which is 200 pokedollars. We can get 12 Magikarps for the same price. However, this one can have a special attack. Show the Magikarp you bought and he will give it a special move. As you can see, my Magikarp is complete garbage, not worth the pokedollars AT ALL, and it got Dragon Rage, which is really nice, but pokemons will now start surviving the 40 fixed damage Dragon Rage deals. We will now enter Mt Moon. There's a lot to investigate, so we will start slowly. Right when we enter, we can find these Dig Spots. We will grab them later on in the game. Above this hiker, there's a pokeball, you can pick it up! We're now going to check out the wild pokemon spawns here, as there are some interesting things to capture. We willl keep the Dig Spawns outside of the question since we can't dig for now. Our interests are: Four Geodudes with Sturdy (yes, FOUR. We will use a cheese strategy with them later in the game). Different pokemon appear in each floor, but we will first focus on Mt Moon 1F, the entrance. One of them should/must be Adamant, Brave or Naughty. Acceptably, we can also get an Impish or Relaxed one. Careful or Sassy can also work. However, we really want an Adamant, Brave or Naughty one. They must all have Sturdy. To know if they have Sturdy, we have to hit them with a really strong attack. If they would normally faint, a text will pop up saying that the pokemon survived with 1 HP thanks to Sturdy. We want four of them with Sturdy and we will include one in our party with the correct nature. We must hit Geodude hard enough to normally faint it in a single hit from full HP. If we see this message and he survives, it means he has Sturdy. We will capture this one. If it's bad, we will keep it in our PC for way later. If it's good, we'll put it in our party. We also really, REALLY want a Paras. This will be our other HM Slave aside from Nidoking and it will aid us in the future. We want a Brave/Quiet Paras, Relaxed, Sassy also work. Modest could be acceptable, but not Adamant. Even if his moveset is mostly physical, it is way easier to train him with special attacks. Effect Spore is its best ability, but it is not obligatory. It sometimes might accidentally poison an enemy we don't want to poison. The move Spore is the only move in the game that will make an opponent fall asleep with 100% accuracy. We will make Paras learn Absorb (to level up fast against rock and ground types such as Geodude or against water types, then Cut, Flash and Spore. When Paras is fully leveled, we will substitute Absorb with False Swipe. We have three more optional pokemon to capture. (we could also capture Zubat, but we'll go back later to these low level zones and capture all the missing pokemon). The first one is Sandshrew. He is a really bulky, tanks physical hits like a truck, and has an insanely varied movepool. He is also a pure ground type which makes him only slightly weak to grass and water. His movepool is absurd for store: Poison Sting as a reliable poison condition to wear down enemies, Rollout as a Rock type attack that increases in power each turn (and since he's so bulky, he will for sure tank some hits), Fury Cutter (this move is absolutely disgusting in the early game. Each time you use it successfully, it doubles in power. It will start oneshotting pokemon after the fourth move.) which also counters grass pokemon, and Magnitude at level 14, which is an absurdly hard hitting Ground type move. We also want him because at level 30 he learns the move Dig for free, which we can show to the police officer in Cerulean to get a reward from a quest. He also learrns Sand Tomb which traps enemies (useful for catching Abra) and deals % damage each turn, Gyro Ball, a Steel type move that hits harder if you're slow (and boy is Sandshrew slow), Swords Dance (I have no idea why does it learn this move, but it makes your attack skyrocket), Sandstorm (DARUDE just kidding, it activates your abilities when used and summons sandstorm) and finally, Earthquake This guy is an absolute UNIT of a pokemon. He's a BOSS. However, he does not have Sturdy (the most overpowered ability in PVE together with Mold Breaker), and his abilities do NOT work UNLESS sand is on the field. If you want to capture one and use one, try the natures Adamant, Brave, Relaxed, Impish, Sassy or Careful. Try not to use Lonely or Naughty because they lower its bulk. We want one that can stay for a long time in the field while hitting hard. The next optional pokemon is an absolute MONSTER and UNIT of a pokemon. TBhimhis pokemon is Onix. His physical defense stat reaches absurd points for this stage in the game, he's a bit fast (surprisingly) and he learns really good utility moves. If you find a level 10 to 12 Onix, it might have Curse, which will boost its physical damage and physical resistance to insane levels. You NEED to capture it with the Sturdy ability. It's the same reasoning as Geodude: having a free turn to do anything you want (unless you get fainted by a mold breaker or multi hit move) is insanely advantageous. At level 16, you learn Stealth Rock, which is an amazing setup move for some gyms and specific battles (Stealth Rocks will destroy the 7th gym and Lance and Lorelei in the Elite Four). He also learns cool support moves: Gyro Ball is nice for Steelix when it evolves (by the way, who is a godly physical tank), Smack Down is cool since it's the only Rock type attack that has 100% accuracy, Dragonbreath is... pathetic, but the paralyse chance is appreciated. Screech is a nice defense lowering move, and he also will learn other powerful moves upon level-up. However, he has a big issue: he does not learn ANY ground type moves until you level him up a lot. Thus, Geodude outclasses him heavily to beat the third gym easily. If we catch an Onix, we want to catch one with the natures Relaxed or Impish. Brave or Adamant are also viable, however, we want him to focus on being an absolute immortal tank. Careful and Sassy are also usable to make it impossible to defeat. All other natures are bad. The last pokemon we will want to capture is the ABSOLUTE DEGENERACY. This pokemon is called Clefairy. It might look like a cute pokemon, but let me just tell you: this guy is a complete degenerate, he's toxic, he's obnoxious to play against and his moveset is so insane that you can never know what he will do. He has so many options it's not even funny. His evolution, Clefable, is a monster in the PvP battles in PRO. He's just that good that, if you happen to come across it, you should ALWAYS try your luck and find it. The natures for this guy are: Bold/Calm (if you get one of these two, you hit the jackpot), Relaxed/Sassy (amazing for story, not usable for PvP), or Modest (if you feel like trolling a bit). The point of this guy is to be an immortal tank that spams Cosmic Power and then has useful support moves (healing ones like Wish) and a few specially oriented attacking moves while equipped with Leftovers. This guy can solo almost everything in any place by just spamming six Cosmic Powers (so both his defenses are maxed out) and he is just unstoppable. His moveset is also insane, try teaching any TM because he learns ALMOST EVERYTHING possible. You can only encounter him in the Night time (20:00 to 04:00 in Poketime). This is one of the pokemon that introduces you to poketime cycles to learn how to hunt a pokemon in specific times. One minute in real life equals to five minutes in poketime. Do the maths yourself to see if you can wait until morning or night or you'd rather wait for another moment! Let's now investigate! Dig spots when we enter Mt Moon. They're to the bottom left of the entrance. (Onix what are you looking at, bruh?) We will go down the next stairs in the picture below. This is an optional route where we can find a Star Piece (VERY IMPORTANT, THIS GIVES US A LOT OF MONEY. PICK IT UP, IT'S IN A POKEBALL), and some Dig Spots at the end. Below these stairs, there's also a pokeball with an Escape Rope. We can pick it up, optionally. The Star Piece will be found here, in front of my character. It's in a pokeball. Below it, there's a pokeball with a Water Gun TM (this would've been useful for the first gym...). Dig spots in the same place as the Star Piece, just go below and grab the ladder. It's just to show them, we can't use them right now. We will now go back to the ladder we climbed down from and go to the northeast. We'll find more Dig Spots and an old man there. We will now find the next ladder. This one is also optional and brings us to another optional zone with Dig Spots which we'll visit way later in the game. Last Dig Spots in Mt Moon. We'll finally reach this point. We can now only continue from here! The next small part is just a straightforward line. Oh, there's a Rocket Grunt! What are they doing here? Let's fight them and move on! We have to beat them all! The way is just straightforward towards the left now. We finally made it here... We have defeated the second Rocket Grunt here after clearing the optional ones. We have this Super Nerd blocking the way. He wants to take the fossils, oh, no! WE NEED TO SAVE LORD HELIX! WE MUST FACE THE WRATH OF THE INFIDEL DOME SEEKERS! In my opinion, both fossils are great, but do not worry. We can get them later on via dig spots infinitely, so do not worry about which one you choose. We can't even revive them until the seventh badge so... who cares? Generally, Omanyte is better than Kabutops due to how broken Shell Smash is, but Kabutops is also really nice. Choose whichever you want! I chose Helix. Be careful, this fight can be hard! Yes, we're out! Finally! Interact with that small hole in the wall and talk to the Cleffa to obtain its dex data. We'll use that hole to travel back later on. We will now get to Cerulean City but we will backtrack to Mt Moon to pick up something pretty special. This is optional. However, this pokemon is one of the best pokemon in PRO, and if we can, we should try our luck and get a good one: Bronzor. If you're willing to spend some time trying to find it and praying to the lord that you get lucky enough, try to hunt it. It appears in Mt. Moon B1F all day long. You can see the floor and area where you are just below the poketime, on the top right of your screen. Bronzor is an amazing tank with an incredible typing which can also have an ability that either removes one weakness entirely (Levitate) or makes him tank fire type hits better (Heatproof). Then there's Heavy Metal, which we won't use at all because it's borderline useless on him. If we capture Bronzor, we want it to have Confuse Ray, Iron Defense (optionally, this will make him undefeatable), an attacking move (anything works, Psywave for example) and Hypnosis. We will use him for multiple fights later on and we will also use him in the lategame as a Boss Screen Setter and as an immortal obnoxious tank. We will later on change his moveset. We want him to have the following natures: Bold, Impish, Relaxed, Calm, Careful or Sassy. If you get one, almost all gyms in Kanto will be way easier to deal with. Second Gym, Misty's Starmie, Grinding and Routes 24-25 Yay, we finally made it to Cerulean! The cave was long and very annoying and filled with a lot of annoying Rock types and Zubats. We now heal up in Cerulean and set out sight onto the second gym. So, how do we tackle it? The second gym is the Water gym. The Rock gym had a glaring weakness to both Water and Grass since almost all the pokemon there also had the Ground type. In this Water gym, we can find different typings: Water is the most common type in all of Pokemon. Water can be followed by almost any type. In Kanto, we already have a lot of combinations: Poliwrath is Water Fighting, Tentacruel is Water Poison, Slowbro Water Psychic... you get the point. Misty can be a problem, and we have two options: we either go to Route 24 and 25 and we grind, or we grind before we go there and we train hard for it. Since Water is only weak to Electric and Grass, our options are severely limited. There's many things we should explore: -Routes 24 and 25 have many cool useful options. Route 24 is used to EV train your pokemon. EV training allows you to train the specific stats of a pokemon to your liking depending on what your pokemon needs and the pokemon you fight. I only recommend that you EV train good pokemon whose IVs are high, have the right natures and abilities and that you'll use throughout the Story and other regions. For now, you should forget about EV training unless you accidentally come across a very good pokemon. Here's the link for the EV stats and total stats explanation. Here's another useful guide for EVs. Route 25 has a few interesting pokemon (Grass types, Bug types, Abra + Kadabra). -Headbutts in past areas and in new areas. Some of the pokemon can be extremely useful for your adventure. -Officer Jenny Quests -New pokemon to be hunted (Route 4 too!) -2nd gym: Misty's Water Type gym. Let's go over the most important things first: -Officer Jenny -Headbutts (quick rundown) -Route 4, Route 24 and Route 25 -Misty's Gym Since at this point we're poor, we might as well make some money! We'll start with Officer Jenny's missions. Jenny has three missions to offer us. -Effort train a pokemon. Following what I said just above, you can complete this mission once you have trained one of the stats of one of your pokemon until 50 EVs into a single stat or above. In your pokemon description, one of its blue numbers must be atleast 50 or above. This can be accomplished by defeating wild pokemon over and over. This mission can be a bit boring and slow. To make it worth it, I suggest you train a Water or Grass type in Mt Moon against Sandshrew, Sandslash, Geodude, Graveler and Onix so you are prepared for Misty. All of these award Defense EV points, useful for some of the pokemon inside! In exchange, she will give you 5000 pokedollars. -Teach a pokemon the move Dig (part 1) and show her 2 Gems (part 2). This quest cannot be done until you've beaten Misty (unless you catch a Sandshrew in Mt Moon and level it up until it learns Dig, but you cannot use this move outside of battle until you've beaten the third badge). After you beat the Cerulean Gym, similar to the original games, you'll be given the TM for Dig. In this game, Dig is used to dig up diggable patches which give you money items, pokeballs, repels, gems and also spawn rare pokemon. You can buy the TM in any Department Store or you can train a Sandshrew or Diglett so they learn the move. She will give you pokedollars once you show her a pokemon that has learned this move AND once you show her a few gems you have obtained through Dig Spots. -Show her a Clefairy with Cute Charm. These can easily be found in Mt Moon. Bring one to her to obtain 7500 pokedollars! Additionally, there is a Moon Stone in the entrance from Route 3, at the top left corner. You can evolve Clefairy, Nidorino or Nidorina very early in PRO if you feel you need a big hitter early in the game! You will be given additional pokedollars if you show the Clefairy to Laila in Vermillion's City Library, after you have beaten the 2nd badge. Going back to Headbutts, we now have access to multiple new things. You should really go back to Pallet Town and Headbutt from there: Pallet Town, Routes 1, 2, 22, 3, and 4. Bug Types can be useful for Misty's gym to defeat her Starmie, but also Exeggcute, which is a Grass type and also a Psychic type, so it resists both of Starmie's Water Pulse and Psyshocks. As a famous philosopher would say: The topic is now eggs. -Route 4, Route 24 and Route 25 Let's explore each area by turns.
- 43 replies
-
- 13
-




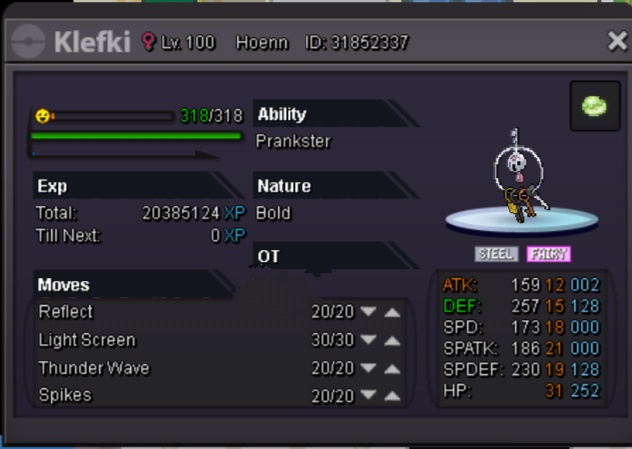
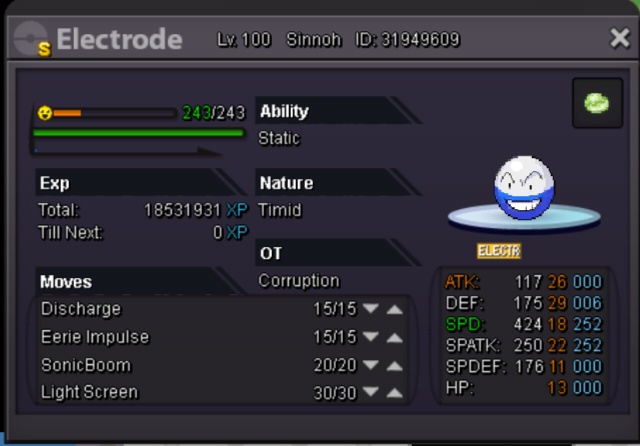
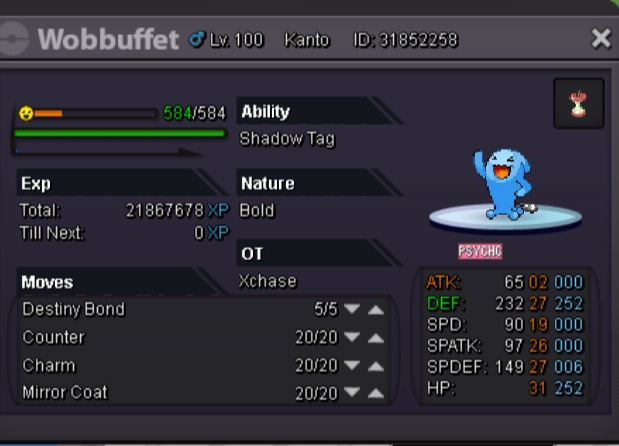
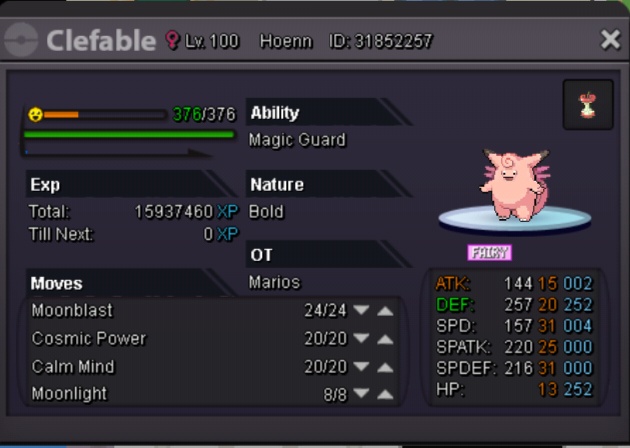

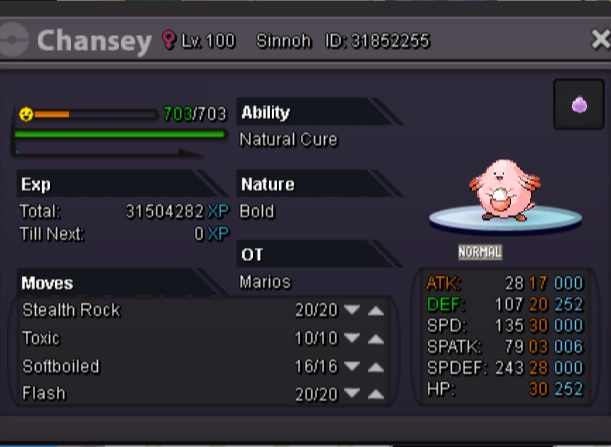
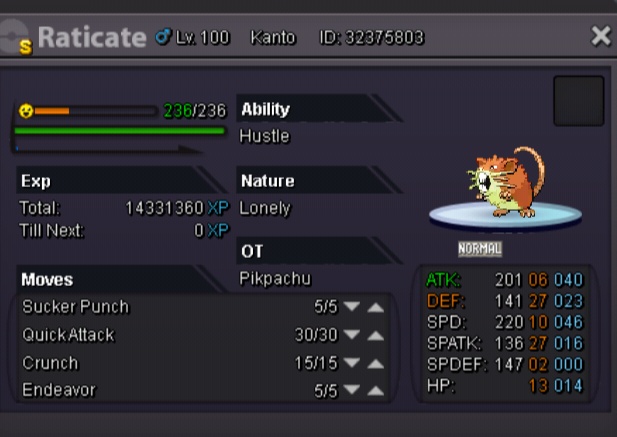

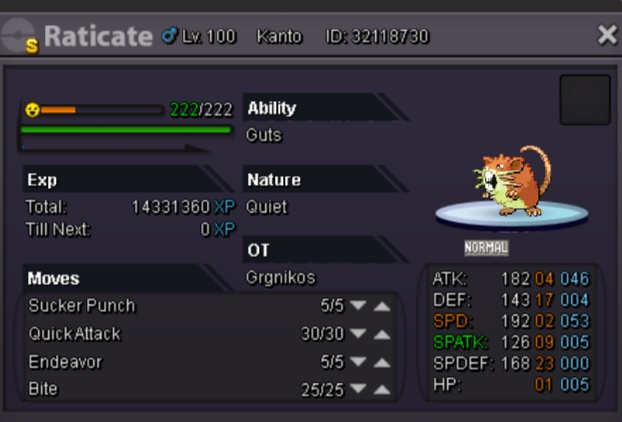
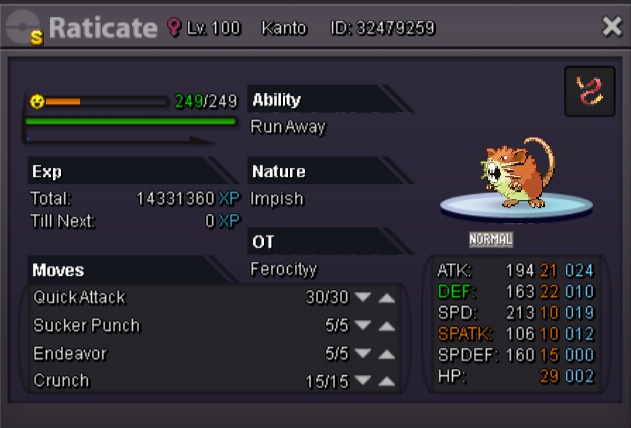
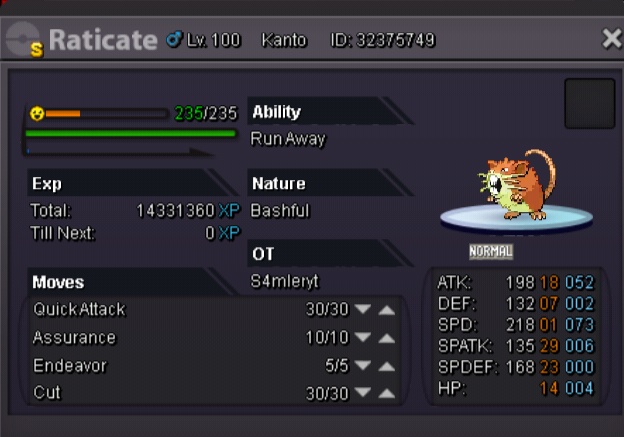
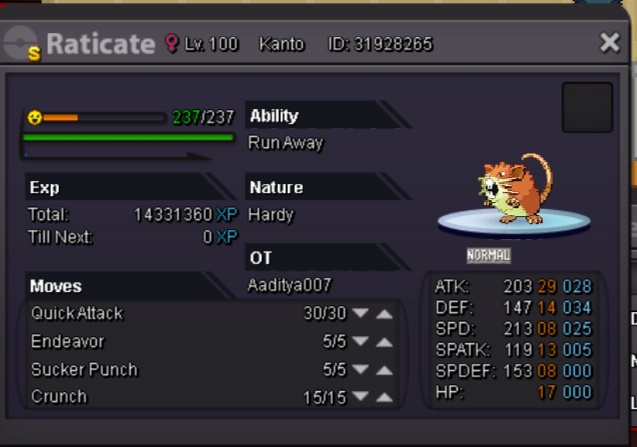
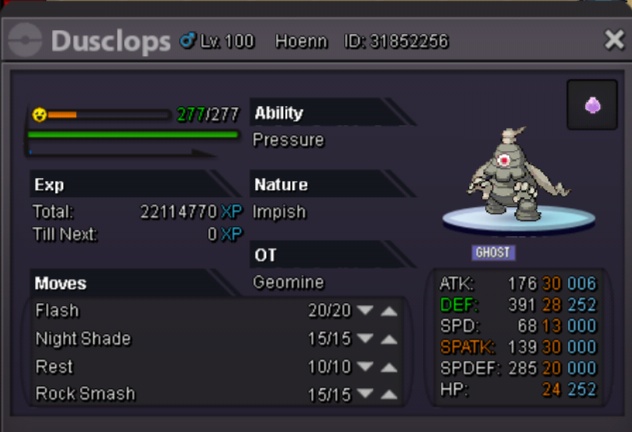
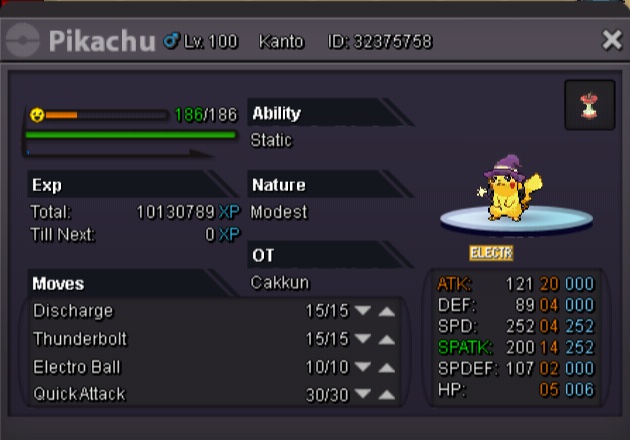
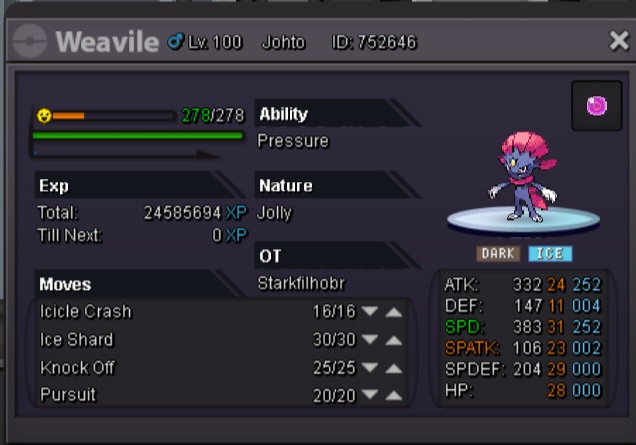


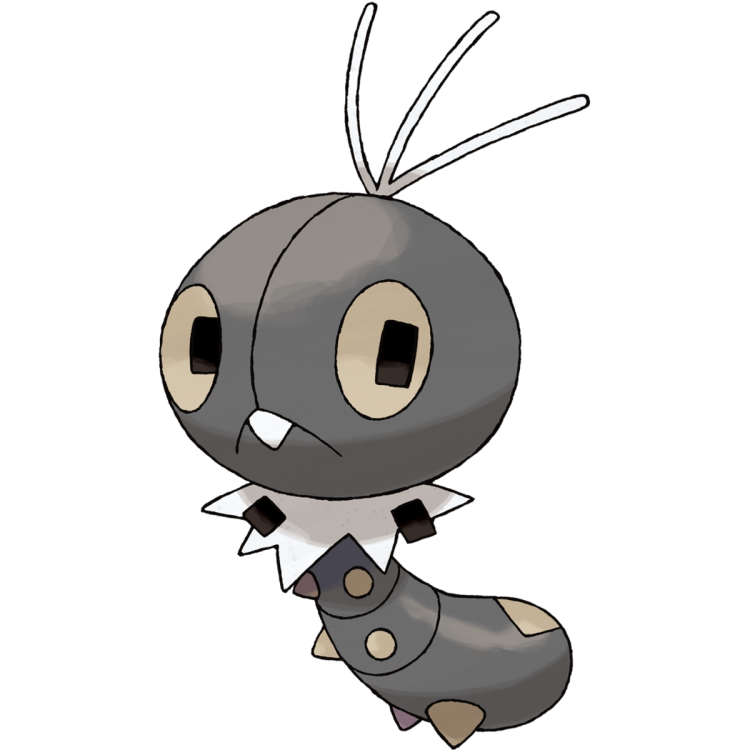

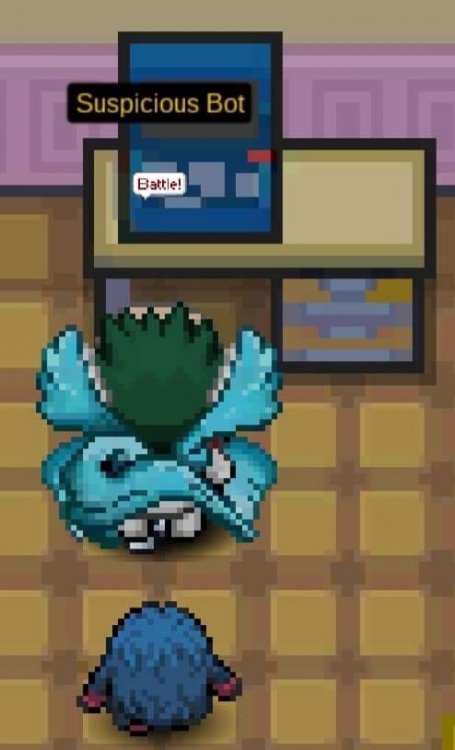
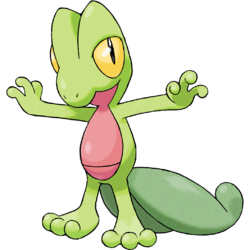




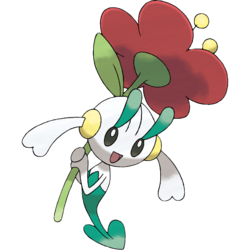
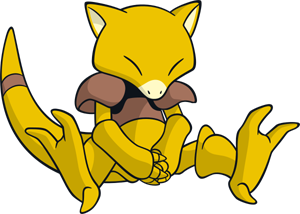



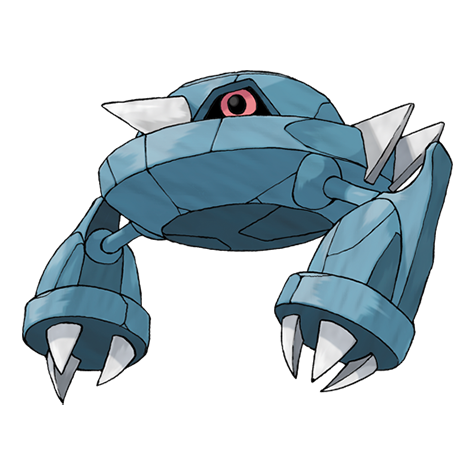
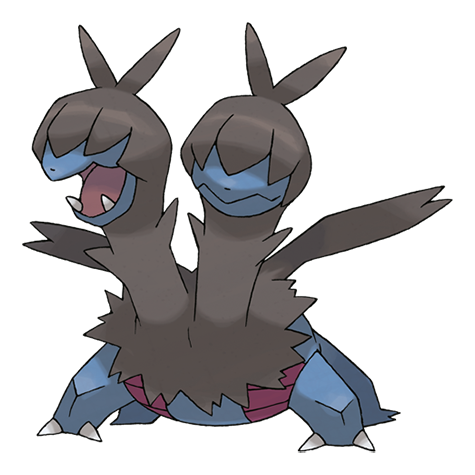

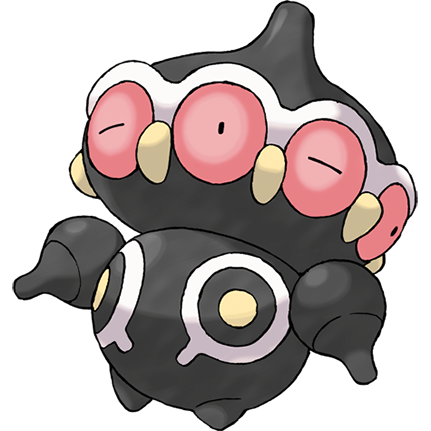
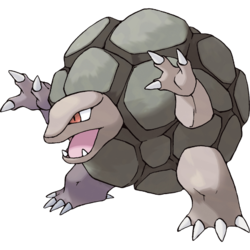
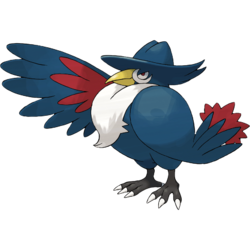


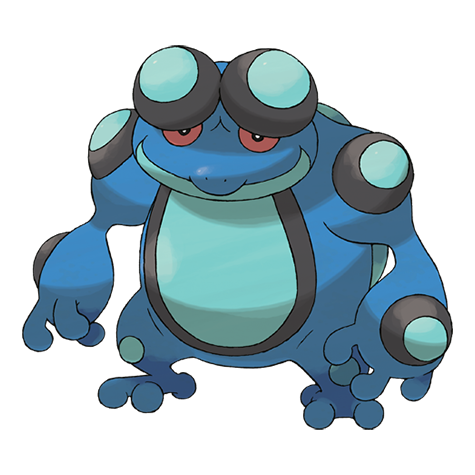
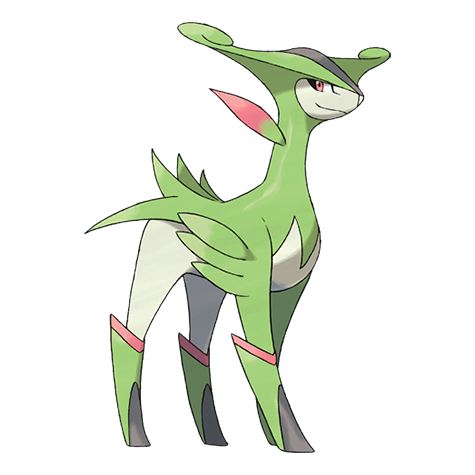

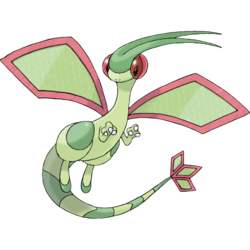
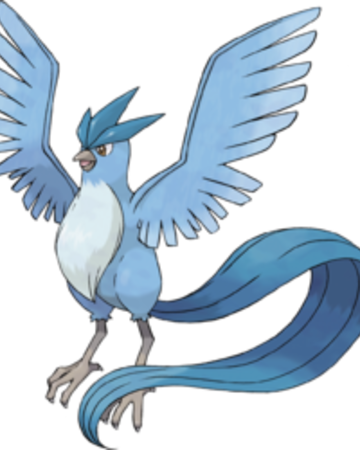
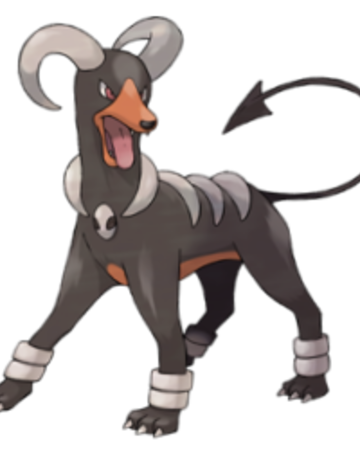
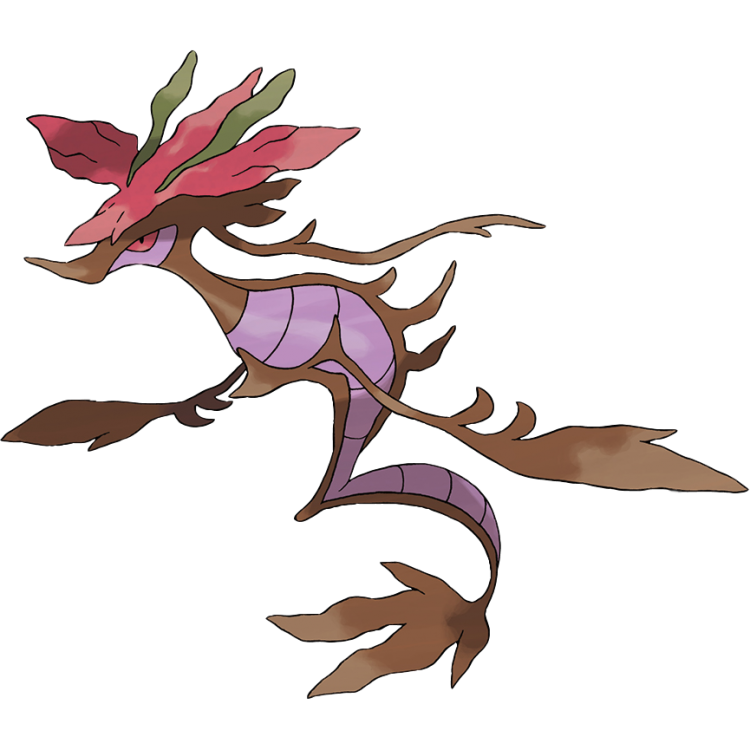
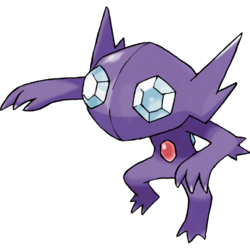
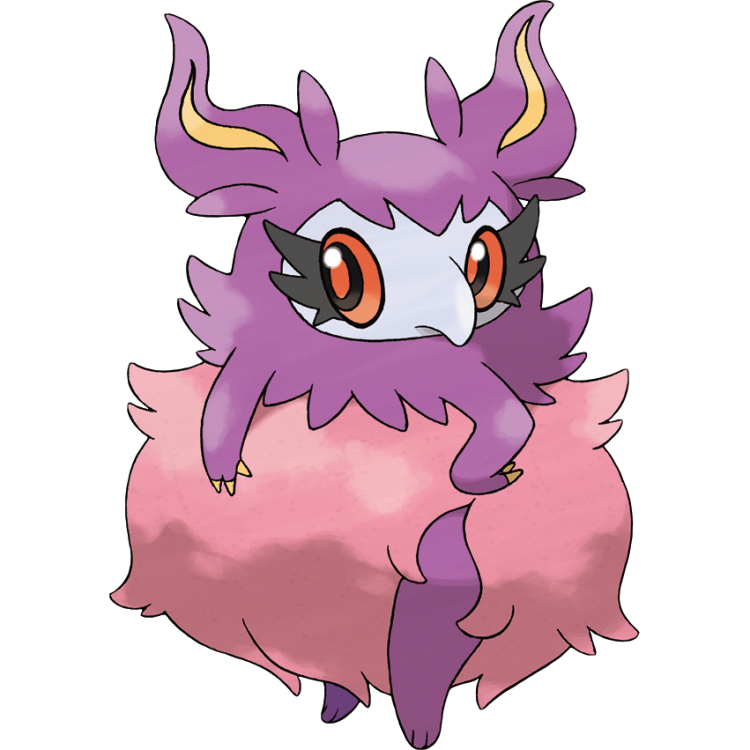

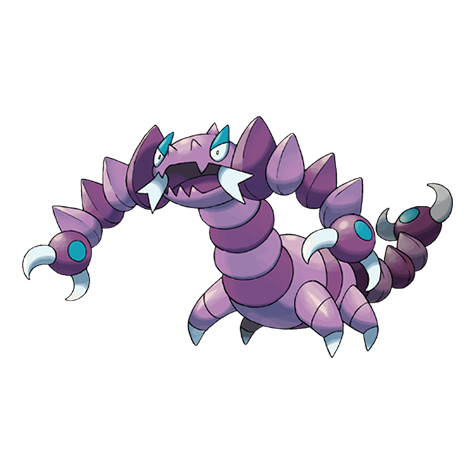
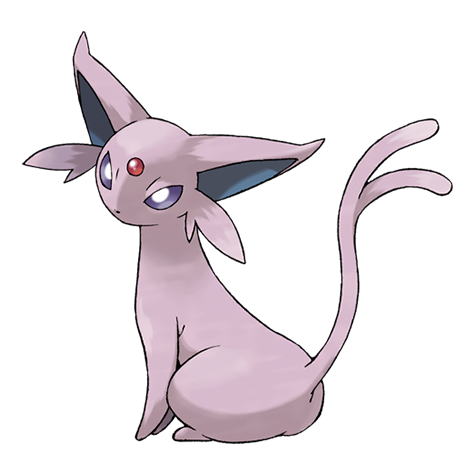

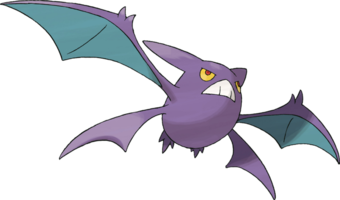


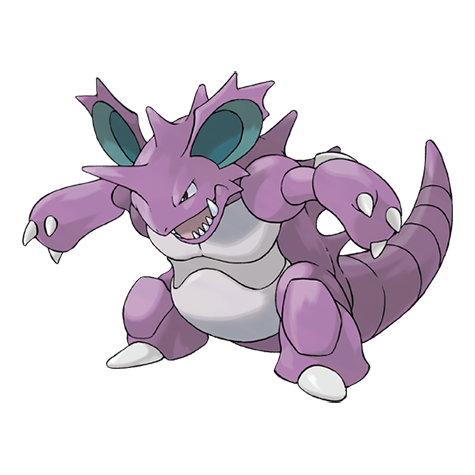

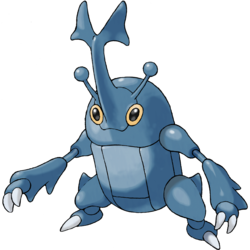


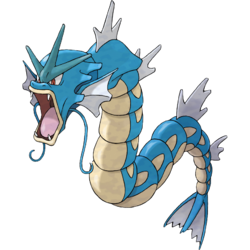
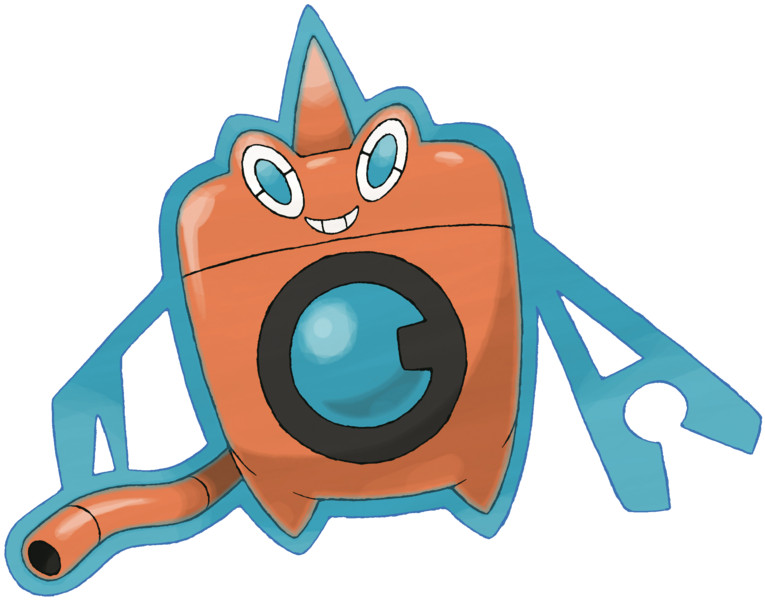
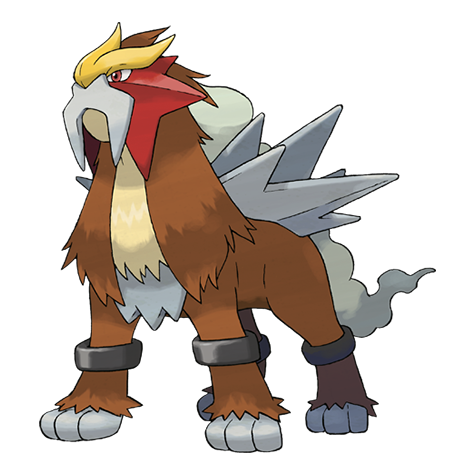
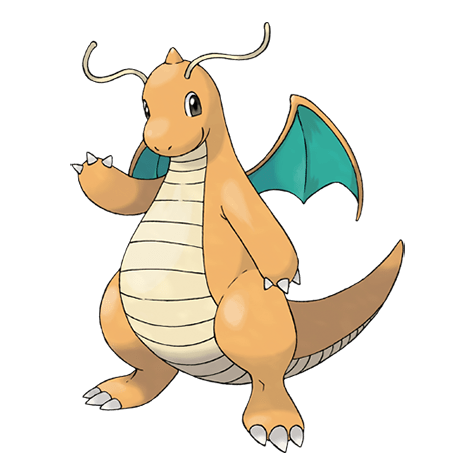

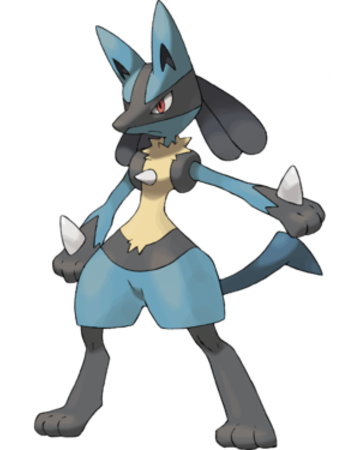


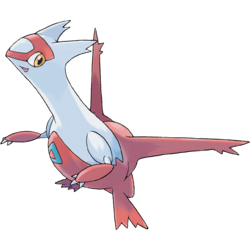
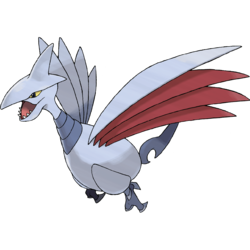
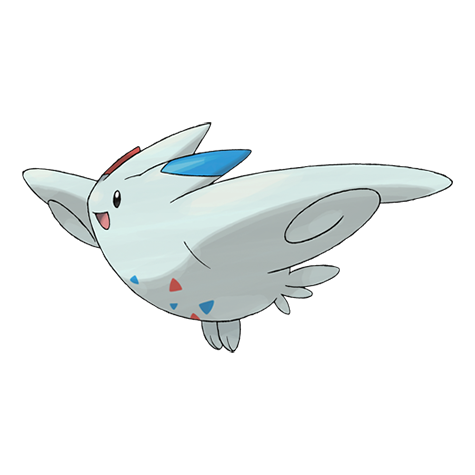


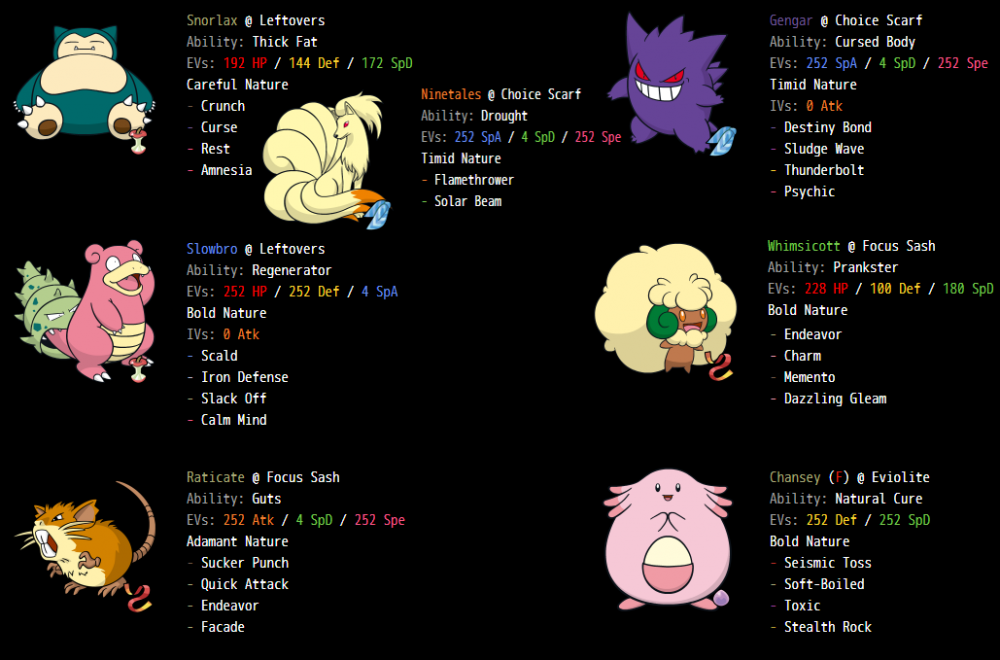







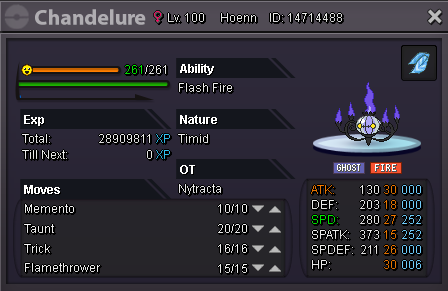
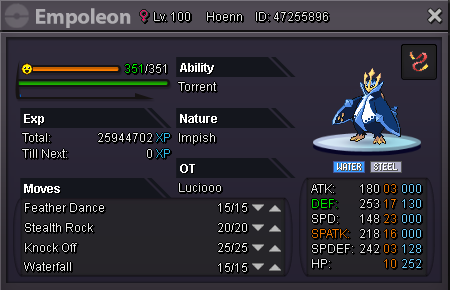
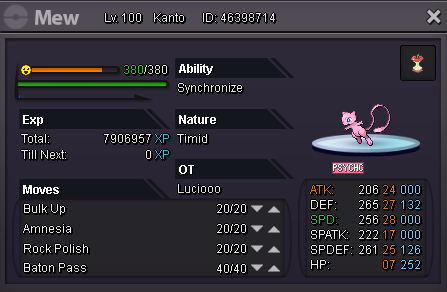
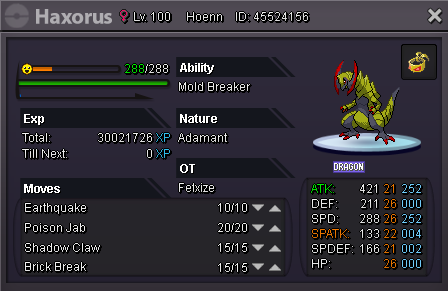
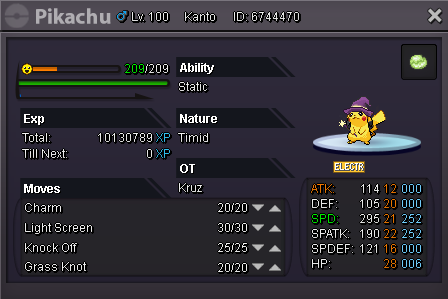

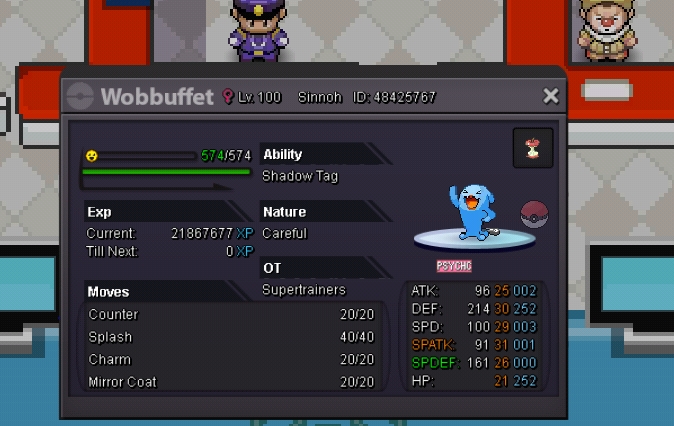



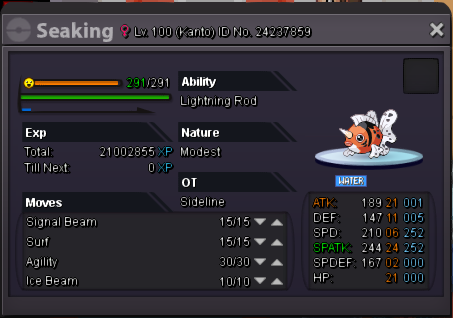
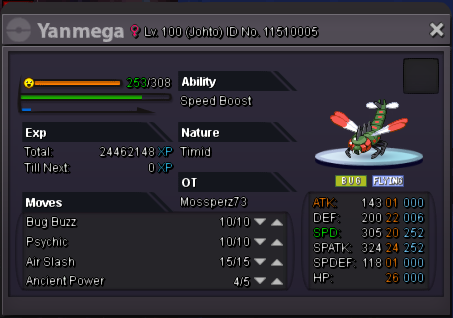
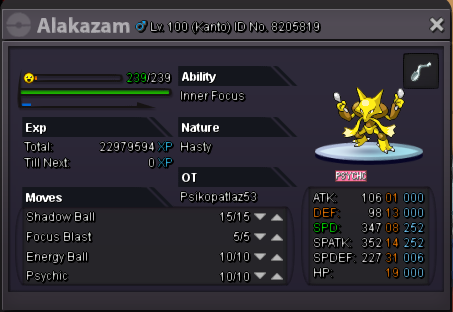


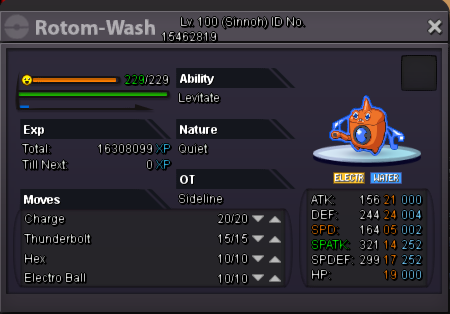
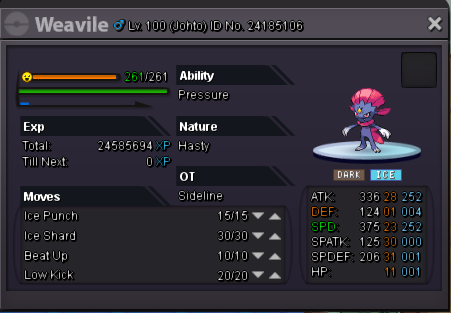
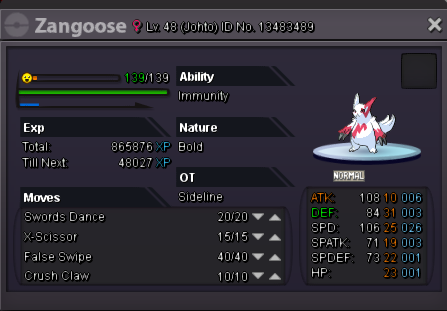












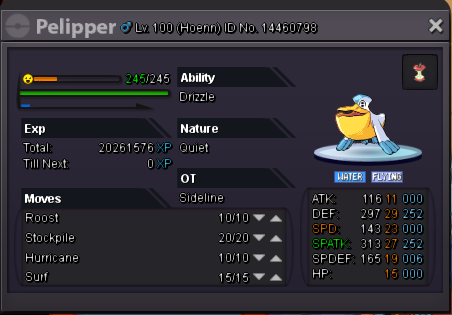
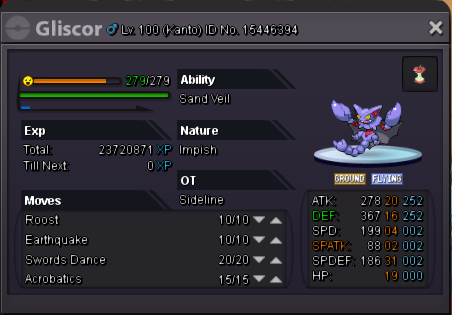
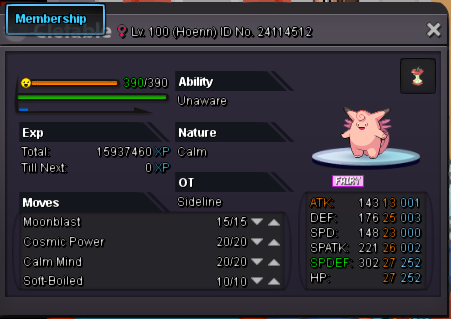


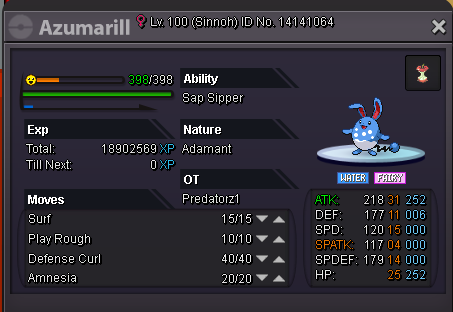
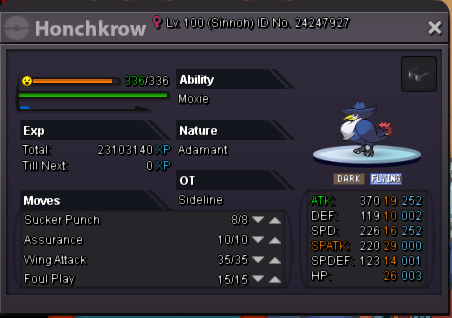









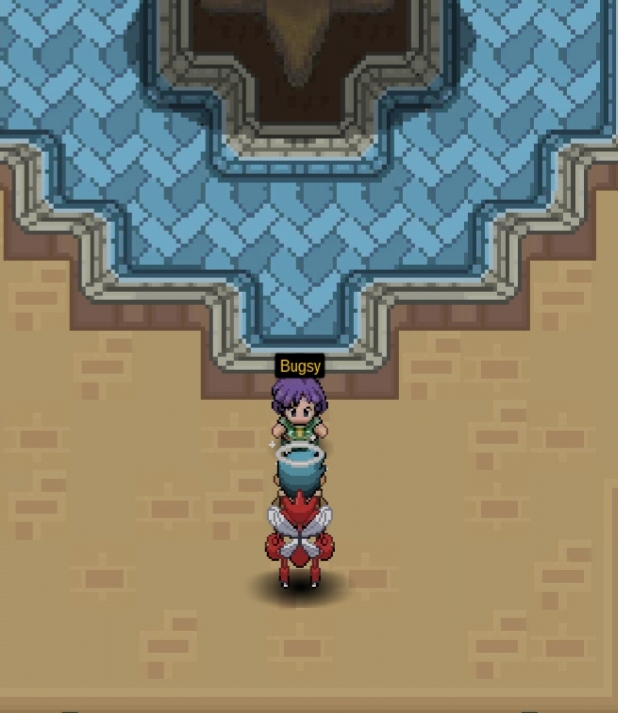






.png.dd024c662a088158387ec48c8c7a542b.png)


