


Titaniaplayz
-
Posts
1885 -
Joined
-
Last visited
-
Days Won
31
Posts posted by Titaniaplayz
-
-
-
Welcome to my guide;;
This guide is basically for those who doesn't have discord OR those who have discord but doesn't have access. for some time.
____________________________________
REQUIREMENTS
1. Have completed at-least 2 regions ( Kanto & Johto )
___________________________
I am also adding Alternative Place for those whose best location is not in kanto and johto.
These alternative locations will have GREEN colour.
__________________________________
For those pokes who can be caught by repel I will add one more section but pokes who can't be repeled I will only add best spawn area.
________________________________________
NOTE - This Guide doesn't Contain any event map / Area.
____________________________________
For Repelable Pokes the details will be written with yellow colour whereas for non repels details will be written in orange colour.
____________________________________
As this guide may contain minor mistakes , feel free to contact me if you found any. You can contact in forum DMs or in discord ( Superb#3564).
_________________________
GEN - 2
________________________
CHIKORITA
Best Area - Route 226
Alt. Area - Safari Johto Grass Area
________________________
CYNDAQUIL
Best Area - Safari Johto Mountain Zone
______________________________
TOTODILE
Best Area - Safari Johto wet zone
____________________________
SENTRET / FURRET
Best Area - Route 1 ( Both )
____________________________
HOOTHOOT / NOCTOWL
Best Area - Route 119 A/Route 210 North
Best alt. - Route 37(M/N) /
Route 8 (N)
______________________________
LEDYBA / LEDIAN
Best Area - Forest Pit / BCC
______________________________
SPINARAK / ARIADOS
Best Area - Route 1 / BCC
______________________________
CROBAT
Best Area - Dragons Den
______________________________
CHINCHOU / LANTURN
Best Area - Pallet Town / Route 40
______________________________
PICHU
Best Area - Love island
______________________________
CLEFFA
Best Area - Mt. coronet
Alt. Area - Secret Nap Area
______________________________
IGGLYBUFF
Best Area - Moon 1F
Alt. Area - Love Island
______________________________
TOGEPI / TOGETIC
Best Area - Route 5 / Sendoff Spring
Repel Area - Route 210 ( 22-26 )
Alt. Repel area - Route 5 (18-23) ( M/D)
______________________________
NATU
Best Area - Route 28
______________________________
MAREEP / FLAAFY / AMPHAROS
Best Area - Route 43/Route 43 / Route 120
______________________________
BELLOSSOM
Best Area - Love Island
______________________________
MARILL/AZUMARILL
Best Area - Route 104 / Route 114
Alt. Area - Lake Cave / Route 31
______________________________
SUDOWOODO
Best Area - Route 26
______________________________
POLITOAD
Best Area - Fuchsia City
Repel Area - Route 120 ( 27-30 )(M)
______________________________
HOPPIP / SKIPLOOM
Best Area - Route 33 / Route 14
______________________________
AIPOM
Best Area - Route 44
Repel Area - Route 33 (12-17 level )
______________________________
SUNKERN
Best Area - Forest Pit
______________________________
YANMA
Best Area - Route 35
______________________________
WOOPER / QUAGSIRE
Best Area - Violet City / Route 10
______________________________
UMBREON
Best Area - Safari Exclusive
______________________________
MURKROW
Best Area - Lost Cave
Repel Area - Route 18 (M/N)(27-32)
______________________________
SLOWKING
Best Area - Dragon Shrine
______________________________
MISDREAVUS
Best Area - Mt. Silver 3F
______________________________
UNOWN
Best Area - Ruins Of Alph Puzzle - 1
______________________________
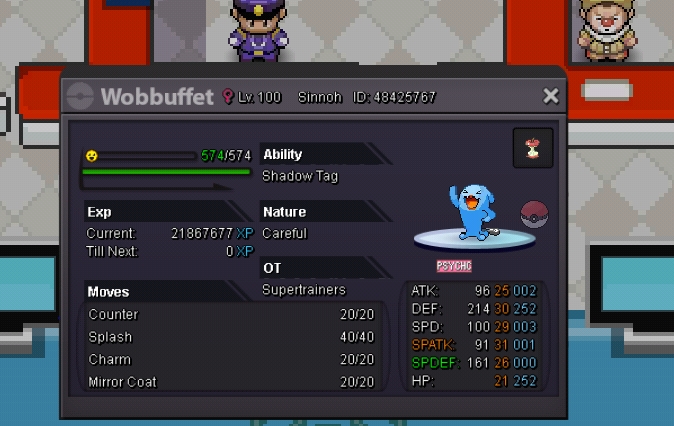
WOBBUFFET
Best Area - Lave Valor
______________________________
GIRAFARIG
Best Area - Route 43
______________________________
PINECO
Best Area - Route 48
Repel Area - Route 43 ( 21-25 )
______________________________
DUNSPARCE
Best Area - Forest Pit
______________________________
GLIGAR
Best Area - Route 45
Repel Area - Route 45 ( 37-42 )
______________________________
STEELIX
Best Area - Mt. silver 2F
Repel Area - Mt. Mortar northern (23-30)
______________________________
SNUBBULL
Best Area - Leev town Port
Alt. Area - Route 2 (N)
______________________________
QWILFISH
Best Area - Route 12
______________________________
SHUCKLE
Best Area - Cianwood city
______________________________
HERACROSS
Best Area - Route 47
Repel Area - Route 33 (12-17)
_________________________________________
SNEASEL
Best Area - Mt. Silver exterior
_________________________________________
TEDDIURSA / URSARING
Best Area - Rock tunnel 2 / Acuity Lakefront
Alt. Area Ursaring - Mt. Silver expert Belt
_________________________________________
SLUGMA / MAGCARGO
Best Area - Route 18 / Route 113
_________________________________________
SWINUB
Best Area - Ice Path 1F
_________________________________________
CORSOLA
Best Area - Route 14
_________________________________________
REMORAID / OCTILLERY
Best Area - Route 44 / Route 222
_________________________________________
DELIBIRD
Best Area - Ice Path 1F
_________________________________________
MANTINE
Best Area - Route 40
_________________________________________
SKARMORY
Best Area - Route 45
Repel Area - Route 113 ( 19-24 )
_________________________________________
HOUNDOUR
Best Area - Route 7
Repel Area - Route 7 ( 21-26 )
_________________________________________
KINGDRA
Best Area - Dragons Den
_________________________________________
PHANPY / DONPHAN
Best Area - Route 45 / Mt. Silver lower mountainside
Repel Area - Route 46 (M) (7-9)
_________________________________________
STANTLER
Best Area - Hoenn Safari Zone area 5
Alt. Area - Route 36 (N)
_________________________________________
SMEARGLE
Best Area - Route 212 North
Alt. Area - Amazon Forest
Repel Area - Ruins Of Alph ( 26-33 )
_________________________________________
TYROGUE
Best Area - Route 112
Alt. Area - Mt. Mortar B1F
_________________________________________
SMOOCHUM
Best Area - Seafoam Island B2F
_________________________________________
MAGBY
Best Area - Fiery Path
_________________________________________
MILTANK
Best Area - Route 39
_________________________________________
LARVITAR / PUPITAR
Best Area - Forest Pit / Mt. Silver Expert Belt
Repel Area - Mt. Silver expert belt ( 55-59 ) ( For both )
_________________________________________
If you want to hunt in pair of two pokes with
Same sync and can be used in PvP
You may check This guide.
Hope this Guide will help you;
Thanks for taking a look here.
-
 2
2
-
-
-
@MomoT No , Bro the poke must be available at least 2 of day time (M/D)(D/N)(N/M). Or 3 day time. So that those guys who aren't able to play more can hunt also.it should be easy + at least available in 2 day time. There are many users who can play upto 1-2 hrs per day.
If you got the reason tell me yes or no here. Also feel free to ask more questions.
-
1
-
-
@Allsmell thanks ; It's fixed it is misclick.
-
Welcome to my guide;;
This guide is basically for those who doesn't have discord OR those who have discord but doesn't have access. for some time.
____________________________________
REQUIREMENTS
1. Have completed at-least 2 regions ( Kanto & Johto )
___________________________
I am also adding Alternative Place for those whose best location is not in kanto and johto.
These alternative locations will have GREEN colour.
__________________________________
For those pokes who can be caught by repel I will add one more section but pokes who can't be repeled I will only add best spawn area.
________________________________________
NOTE - This Guide doesn't Contain any event map / Area.
____________________________________
For Repelable Pokes the details will be written with yellow colour whereas for non repels details will be written in orange colour.
____________________________________
As this guide may contain minor mistakes , feel free to contact me if you found any. You can contact in forum DMs or in discord ( Superb#3564).
_________________________
GEN - 1
_________________________
BULBASAUR
Best Area - Safari Area 2 ( Kanto )
____________________________________
CHARMANDER
Best Area - Cinnebar Mention 3F
____________________________________
SQUIRTLE
Best Area - Vermilion City
____________________________________
CATERPIE / METAPOD / BUTTERFREE
Best Area - Route 2 / Route 2 / Bug catching Area
____________________________________
WEEDLE / KAKUNA / BEEDRILL
Best Area - Route 2 / Route 2 / Amity Square
Beedrill ( Alt ) - Viridian Forest
____________________________________
PIDGEY / PIDGEOTTO
Best Area - Route 2 / Route 13
____________________________________
RATTATA / RATICATE
Best Area - Route 3 / Tohjo falls
____________________________________
SPEAROW / FEAROW
Best Area - Route 45 / Route 45
____________________________________
EKANS / ARBOK
Best Area - Mt. Summer exterior / Cerulean cave 1F
____________________________________
PIKACHU
Best Area - Viridian Forest
BEST REPEL AREA - Power plant 1F ( M ) ( 23-26 level )
____________________________________
RAICHU
Best Area - Cerulean Cave 1F
____________________________________
Sandshrew / Sandslash
Best Area - Mt. Moon 1F / Desert Lagoon
____________________________________
NIDORAN-F / NIDORINA / NIDOQUEEN
Best Area - Route 10 / Route 13 / Safari Efford Ward - 2
____________________________________
NIDORAN-MALE / NIDORINO / NIDOKING
Best Area - Route 10/Route 13 / Route 120
____________________________________
CLEFAIRY/CLEFABLE
Best Area - Mt. Coronet B1F / Moon
____________________________________
Vulpix
Best Area - Mt. Pyre Exterior
Alt Area - Route 7
____________________________________
JIGGLYPUFF / WIGGLYTUFF
Best Area - Secret Nap Area / Cerulean Cave 2F
Alt. Area - Route 4 / Moon 1F
____________________________________
ZUBAT / GOLBAT
Best Area - Mt. Moon 1F / Dragons Den enterance
____________________________________
ODDISH / GLOOM / VILEPLUM
Best Area - Route 25/Route 119A / Safari effort Ward 2
Gloom Alt. - Route 15 (M/N)
____________________________________
PARAS / PARASECT
Best Area - Mt. Moon. 1F / Mt. silver 2F
_________________________________________
Venonant / Venomoth
Best Area - Route 13 / Cerulean cave B1F
____________________________________
DIGLETT / DUGTRIO
Best Area - Digglets Cave ( Both )
____________________________________
MEOWTH // PERSIAN
Best Area - Route 39 / Route 7(N)
____________________________________
PSYDUCK / GOLDUCK
Best Area - Cerulean Cave ( Both )
____________________________________
MANKEY / PRIMAPE
Best Area - Route 9 ( Both )
____________________________________
GROWLITHE
Best Area - Route 7
____________________________________
Poliwag / Poliwhirl / Poliwrath
Best Area - Ecruteak City / Cerulean Cave 1F / Safari Efford Wald 2
____________________________________
ABRA / KADABRA
Best Area - Granite Cave B2F / Cerulean Cave 1F
Repel Area - Route 25 ( 15 - 17 level ) [ For both ]
____________________________________
Machop / Machoke / Machamp
Best Area - Fiery Path / Route 227 / Victory Road Kanto 2F
Alt. For machoke - Mt. Silver 2F
____________________________________
BELLSPROUT / WEEPINBELL / VICTREEBELL
Best Area - Route 12 / Route 12 / Safari Effort Wald 1
____________________________________
TENTACOOL / TENTACRUEL
Best Area - Route 11 / Pallet town
____________________________________
GEODUDE / GRAVELER
Best Area - Route 46 / Victory Road 1F
_________________________________________
PONYTA / RAPIDASH
Best Area - Route 22 / Mt. Silver exterior
_________________________________________
SLOWPOKE / SLOWBRO
Best Area - Fuschia City / Cerulean cave B1F
_________________________________________
MAGNEMITE / MAGNETRON
Best Area - New Mauville / Cerulean Cave 2F
Magnemite Alt. - Route 6
_________________________________________
FARTHFETCH
Best Area - Route 14
_________________________________________
DODUO / DODRIO
Best Area - Route 17 / Route 26
_________________________________________
SEEL / DEWGONG
Best Area - Seafoam B1F / Sinnoh victory road B1F deep
_________________________________________
GRIMER / MUK
Best area - Cinnebar mension 1F ( Both )
_________________________________________
SHELLDER
Best Area - Route 126
_________________________________________
GASTLY / HAUNTER
Best Area - Vermilion Graveyard / Bell tower
_________________________________________
ONIX
Best Area - Mt. silver lower mountainside
_________________________________________
DROWSEE
Best Area - Route 34
_________________________________________
HYPNO
Best Area - Route 11
_________________________________________
KRABBY
Best Area - Ecruteak City
_________________________________________
VOLTORB / ELECTROD
Best Area - Route 10 / Power Plant
_________________________________________
EXEGGUTE
Best Area - Route 39
_________________________________________
CUBONE / MAROWAK
Best Area - Iron island 1F / Iron island 1F
Repel Area - Rock tunnel ( 26-30 ) / Route 10 ( 24-27 )
_________________________________________
HITMONLEE
Best Area - Mt. Silver lower mountainside
Repel Area - Mt. silver lower mountainside ( 53-58 )
_________________________________________
HITMONCHAN
Best Area - Mt. Silver lower mountainside
Repel Area - Mt. Silver lower mountainside ( 56-59 )
_________________________________________
LICKITUNG
Best Area - Route 144
_________________________________________
KOFFING / WEEZING
Best Area - Amazon Forest / Eumi island Burned tower
_________________________________________
RHYHORN / RHYDON
Best Area - Cerulean cave 1F ( Both )
_________________________________________
CHANSEY
Best Area - Route 13
Repel Area - Safari Exclusive ( 26-31 )
_________________________________________
TANGELA
Best Area - Mt. silver exterior
_________________________________________
KANGASKHAN
Best Area - Safari Area 1
_________________________________________
HORSEA / SEADRA
Best Area - Route 20 / Cerulean Cave 1F
_________________________________________
GOLDEEN / SEAKING
Best Area - Cerulean City / Tohjo falls
_________________________________________
STARYU
Best Area - Route 19
_________________________________________
MR. MIME
Best Area - Route 21
_________________________________________
SCYTHER
Best Area - Safari Exclusive
Repel Area - Safari Area 1 ( 33-34 )
_________________________________________
JYNX
Best Area - Ice Path B1F
Repel Area - Safari johto snow zone ( 24-26 )
_________________________________________
ELECTABUZZ
Best Area - Route 10
Repel Area - Power Plant (24-26) (N)
_________________________________________
MAGMAR
Best Area - Fuego Ironworks
Alt. - Mt. Ember
_________________________________________
PINSIR
Best Area - Route 229
Repel Area / Alt. - Kanto Safari Area 2 (29-32 )
_________________________________________
TAUROS
Best Area - Route 39
_________________________________________
MAGIKARP
Best Area - Route 4
_________________________________________
GYARADOS
Best Area - Route 213
Alt. - Route 20
_________________________________________
LAPRAS
Best Area - Seafoam B4F
Repel Area - Union Cave B2F ( 11-15 )
_________________________________________
DITTO
Best Area - Route 13
Repel Area - Route 8 ( 23-27 )
_________________________________________
EEVEE
Best Area - Kanto Safari Area 3
Repel Area - Kanto Safari Area 3( 23-24 )
_________________________________________
SNORLAX
Best Area - Route 12
Repel Area - Route 11 ( 19-20 ) ( D )
_________________________________________
DRATINI
Best Area - Guild Island
Repel Area - Love island ( 18-22 ) (N)
_________________________________________
DRAGONAIR
Best Area - Dragons Den
_________________________________________
If you want to hunt in pair of two pokes with
same sync and can be used in PvP
You may check This guide.
Hope this Guide will help you;
Thanks for taking a look here.
-
5
-
-
Welcome to my guide
This Guide will help you out to find Best place to hunt Pokemon.
Also if you are free , then which poke you should hunt?
__________________________________
Good Luck for Hunting ;;
As this guide may contain minor mistakes , feel free to contact me if you found any. You can contact in forum DMs or in discord ( Superb#3564).
__________________________________
NOTE -
1. - Red named poke means it require MS.
2. M/D/N means Morning/Day/Night it's mentioned for all pokes. If not mentioned it means All day.
3.T means tier of the poke.
__________________________________
Route - 13
1. Chansey ( T8)- All day + Ditto(T6)
Recommended Sync - Bold
__________________________________
Route 28
Heracross ( T9) + Sneasel ( T7)(N)
Sync - Jolly
__________________________________
Route 33
Shinx (T9)+ Heracross(T9) + Aipom(T6)
Sync - Ada / Jolly
__________________________________
Route 34
Pineco (T8)(N) + Togepi ( T8)
Sync - Bold
__________________________________
Route 39
Shinx ( T9) + Tauras ( T6)
Sync - Ada / jolly
__________________________________
Route 42
Aipom(T6) + Heracross ( T9) (M/D)
Sync-Ada / jolly
__________________________________
Route 45
Skarmory ( T9) + Gligar (T6)
Sync - Impish , Careful
__________________________________
Caves , Tunnel and Mt. Silver
______________________________
Cerulean cave
1. 1F
Wobbuffet + Yamask (T8 both)
Sync - Bold , Calm , Sassy , Relaxed
2. 2F
Marowak + Skorupi (T8 both)
Sync - Ada
__________________________________
Victory Road
2F
Drilbur + Marowak ( T8 both)
Sync - Ada
__________________________________
Rock Tunnel
1. Rock tunnel 1F
Kangaskhan(T8) + Cubone(T6)
Sync - Ada
__________________________________
Mt. Silver
1. Mt. Silver lower mountainside
Larvitar (M)(T8) + Aipom(T6)
Sync - Ada / Jolly
2.Mt. Silver expert belt
Larvitar + Pupitar ( T8 both)
Sync - jolly / ada / Impish / Sassy / Relaxed / Careful
3.Mt. Silver 3F
Absol (T9) + Larvitar (T8)(D)
Sync - Ada/jolly
4.Mt. Silver exterior
Zangoose (T7) + Sneasel (T6)
Sync - Jolly
5. Donphan(T5) + Skarmory (M/D)(T9)
Sync - Impish/Careful
__________________________________
Trainers Valley
1. Unknown Place
Zangoose ( T9) + Sneasel ( N)(T7)
Sync - Jolly
__________________________________
Sinnoh Region
_________________________________
__________________________________
Route 207
Gligar(T8)(N) + Phanphy(T6)
Recommended Nature - Impish / Careful
__________________________________
Route - 209
Gastly(T1) + Ralts(T9)
Recommended Nature - Timid
__________________________________
Route 211
Swablu(T9)(D) + Meditate(T8)
Recommended Nature - Ada / Jolly
__________________________________
Route 213
Shellos(T7) + Pelliper(T3)
Recommended Nature - Bold / Calm
__________________________________
Route 214
Gliagar(T7) + Hippopotas(T8)
Recommended Nature - Impish / Careful
__________________________________
Route - 215
Helioptile(T9) + Houndour(T6)+Kadabra(T8)+Abra(T5)
Recommended Nature - Timid/Modest
__________________________________
Route 216
Cubchoo + Sneasel (T8 both)
Recommended Nature - Jolly
__________________________________
Route 223
Mantyke (T6) + Wingull(T2)
Recommended Nature - Bold/Calm
__________________________________
Route 224
Buizel(T6) + Hawluchaa (T8)
Recommended Nature - Ada / Jolly
__________________________________
Route 227
Skarmory(T9) + Gligar (T8)
Recommended Nature - Impish/Careful
_________________________________
Route - 228
Beldum(T9) + Rhydon(T6)
Recommended Nature - Ada
__________________________________
Route-229
Scyther(T8) + Pinsir(T8)
Recommended Nature - Ada/Jolly
__________________________________
Route - 230
Togepi(D)(T9) + Shellos(M/N)(T9)
Recommended Nature - Bold/Calm
__________________________________
Route 210 North
Bagon(T8) + Scyther(T8)+Swablu(D)(T9) + Meditate(T8)
Recommended Nature - Ada/Jolly
__________________________________
Acuity lakefront
Meditate(T8) + Sneasel(T6)(D)
Recommended nature - Jolly
__________________________________
Amity square
Buneary(T6) + Shroomish(T7)
Recommended Nature - Ada/jolly
__________________________________
Cave of justice
Absol (T8) + Growlithe(T4)
Recommended Nature - Ada/Jolly
__________________________________
Etherna forest
Buneary(M/D)(T7) + Whirlipede(T8)
Recommended Nature - Ada/Jolly
__________________________________
Fuego ironworks
Luxio(T8) + Shinx(T7)
Recommended Nature - Ada / Jolly
__________________________________
Victory Road - Sinnoh
1. 1F
Medichamp(T8) + gabite (T9)
Recommended Nature - jolly / ada
2. B1F
Medichamp(T8) + Mienfoo(T8)
Recommended Nature - Ada/Jolly
__________________________________
Pal park
Riolu(T8)(M) + Croagunk(T8
Recommended Nature - Ada/Jolly
__________________________________
@ Hoenn Region @
__________________________________
Route - 105
Wailmer ( T6 ) + Pelliper (T6)
Recommended Sync - Calm/Bold/Modest
___________________________________
Route 106
Clauncher ( T8 ) + Wailmer (T6)
Recommended Sync - Modest
For Clauncher Timid also works.
___________________________________
Route 109
1.
Clauncher (T8) + Wailmer(T6)
Recommended Sync - Modest
2.
Magikarp/Gyaradose(T5) + Shellder(T6)
Recommended Sync - Ada/Jolly
___________________________________
Route 110
Plusle(T8) + Minun(T8) + Electrike(T6)
Recommended Sync - Timid/Modest
___________________________________
Route 114
Skorupi (T8) + Swablu(T9) + Zangoose (T9)
Recommended Sync - Ada / Jolly
___________________________________
Route 116
Abra(T6) + Joltik(T9)
Recommended Sync - Timid/Modest
___________________________________
Route 117
Tympole (T8) + Togepi(T8)
Recommended sync - Modest/Bold
___________________________________
Route 118
Absol (T9) + Aipom(T6)
Recommended sync - Ada/Jolly
=========
Manetric(T8) + Electrike(T6)
Recommended Sync - Timid
___________________________________
Route 119 ( A )
Carvanha(T5) + Sharpedo(T8)
Recommended Sync - Ada( Jolly for boss)
___________________________________
Route 119 ( B )
Feebas(T7) + Pelliper(T5)
Recommended Sync - Calm / Bold/Modest
___________________________________
Route - 126
Shellder(T5) + Magikarp(T2) + Clamperl(T6)
Recommended Sync - Ada/Jolly
___________________________________
Route - 134
Alomomola (T6) + Wailmer (T6)
Recommended Sync - Bold / Calm
__________________________________
Victory Road ( Hoenn )
1) 1F
Aron(T8) + Lairon(T9)
Recommended Sync - Ada , Brave , Impish , careful , relaxed , sassy
2. B1F
Aron (N)(T9) + Mauwile (T8)
Recommended Sync - Ada
___________________________________
Granite cave
1. B1F
Aron(D) + Axew (M/N)
(T8 Both)
Recommended Sync - Ada
___________________________________
Moon
Clefairy(T3) + Clefable(T8) + Togepi(T9)
Recommended Sync - Calm/Bold
_________________________________________
Thanks for visiting
_________________________________________
Special THANKS of this
 ❤️"> guide to
BHIMOSO
-
5
-
-
@SocksGunner32 it will be here by next 4-8 days.
-
1
-
-
Well nice suggestion were made here ; +1
-
1
-
-
Takes longer time but easy win just wait until video come.
And in real I haven't seen his pokes using dragon dance or any other non damaging move. I just sweep it using wobu.
-
@SocksGunner32 if you have problem with me then ignore me. That's it. No need for commenting here for nothing
-
As I already said my battle tower cooldown needs time ( 4 day ) I'll make video soon. So just wait. @g3n3r4l
-
Yeah I'll improve it.
@SocksGunner32 all doesn't have budget to buy the best pokes to beat Cynthia. Wobu isn't too hard to get. Just repel it. For this trick it doesn't care what other pokes are but exception is the 3rd set skarmory one.
I'll contact you for some help ( how to improve guides ) @Bhimoso
-
What? Video guide will be here for 2 sets except skarmory one. Check it and learn from me how to beat? Is that clear?
@SocksGunner32 I also apologise for wrong thread name. Sorry I understand what you want to say for skarmory.
It will be here in next 8 days.
-
Hellow ,
I apologise , this guide is only valid for the 2 sets except skarmory one.
If you got skarmory as first Pokemon then this trick isn't going to work.
I apologise again
-
@Norex I only get 1 set 2 times. And I beater him. That's depends on luck.
-
Actually @Bhimoso I already know no one will believe how 1 wobu can beat Cynthia. I want to add proofs actually I got disconnected during battle in room 1. So I can't add images just wait in next 4-5 days video will be here as proof.
-
-
Haha I will give you all proof
-
@SocksGunner32 it's easiest method it doesn't depend what other pokes are. You only need to get wobu. Do you want me to make video and show you? It will take time tho
-
Requirements
1. Just one Wobbuffet
2. 6 Revival herbs

What to do?
Against Cynthia use wobbuffet at first slot. Use counter if misses then use mirror coat ( wobbuffet can't get faint in 1st move ).
Now after you use counter / mirror coat the first poke of Cynthia will faint.
After , take out any of your poke and use revival herb to wobbuffet.
Again use counter / mirror coat after 2nd poke faint again revive it.
Do again and again. At last Cynthia poke will faint.
I'll add screenshot later when I play.
Tell me it worked or not
-
1
-
-
Hellow trainers,
I am Vicky from india. Today I am organizing a ' Bid and Win ' Event which is fully originated from IPL ( Indian premiere league). In this event you can get 50% chance to give less and win more.
Note - This event will only take place if staff agrees. Permission is to be taken.
Before requesting staff for permission I'd like to know how many players are interested for this? ( I'm launching details now ). If you are interested please like the thread and reply ' agree '
Requirements
1. - Must have good knowledge of IPL or cricket.
2. Must be able to watch match or check score.
3. Discord active.
When it will start?
from 19 September to 10 November ( final )
Note - Matches to be played per day.
weekend - 2 matches
What to do?
You need to submit money to me for bid your team ( both server ). You will guarented get double the money you have if the tram you bidded wins but in case , if it lists you will lose your money.
E.G- Let first match is MI v/s CSK. Then you have bid on your team ( any which you think will won ). If one player bidded CSK ( 100k ) and if CSK wins he will get rewarded 200k. But in case if CSK lose , he will lost his money.
The process will be followed for all matches.
For staff - Staff can bid for fun. It's up to staff if they want to spread some money.
Rules
1. Without money no joining.
2. Min bid - 10k
Max - 100k
( May change for finals )
3. Take screenshots when you give me money for bid on your team as proof.
FAQ
1. Why this type of event is taking place?
A- It will increase excitement for matches.
2. Can any country player can take part?
A- Yes
3. What if I don't get money?
A- You need to wait 7 days after that inform me.
______________________________
Looking for some player who can work as staff (this event) until 10th November
______________________________
Requirements-
1. Must speak English at an good level
2. Able to play PRO to take money from player in my absence sometimes.
3. Must be able to make discord server.
4. Good knowledge of IPL or cricket
5. Not from india.
To apply send these details to me in forum PMs
1. Country
2. IGN
3. Playtime
4. Real name / age ( optional )
5. Which server you pay on
For bidding a discord server will be made soon and will release publically by 25th August.
Support capitals
-
Nice idea ;; +1
-
Hello @Glasnost
You need a poke with storm drain ability with 100+ IVs ( Need to be OT ) to catch tornados. Do you have it?
-
1
-
.jpeg.49e4a98ad4f0c8e9df972a2df68a1b60.jpeg)

[GEN3] Best Place to hunt Pokes (+ Repel Trick ) All Pokes {T1-T9}
in Game Data
Posted · Edited by supertrainers
Welcome to my guide;;
This guide is basically for those who doesn't have discord OR those who have discord but doesn't have access. for some time.
____________________________________
REQUIREMENTS
1. Have completed at-least 3 regions ( Kanto Johto & Hoenn)
___________________________
I am also adding Alternative Place for those whose best location is not in kanto and johto.
These alternative locations will have GREEN colour.
__________________________________
For those pokes who can be caught by repel I will add one more section but pokes who can't be repeled I will only add best spawn area.
________________________________________
NOTE - This Guide doesn't Contain any event map / Area.
____________________________________
For Repelable Pokes the details will be written with yellow colour whereas for non repels details will be written in orange colour.
____________________________________
As this guide may contain minor mistakes , feel free to contact me if you found any. You can contact in forum DMs or in discord ( Superb#3564).
_________________________
GEN - 3
________________________
TREECKO
Best Area - Petalburg Woods
_______________________
TORCHIC
Best Area - Hoenn Safari Zone Area 6
________________________
MUDKIP
Best Area - Hoenn Safari Zone Area 5
________________________
POOCHYENA / MIGHTYENA
Best Area - Eumi Island Town / Route 121
________________________
ZIGZAGOON / LINOONE
Best Area - Route 101 / Route 119A
________________________
WURMPLE / SILCOON / BEAUTIFLY
Best Area - Petalburg Woods / Petalburg Woods / Route 229
________________________
CASCOON / DUSTOX
Best Area - Petalburg Woods / Eterna Forest
________________________
LOTAD / LOMBRE
Best Area - Route 204 ( For both )
Alt. Area - Route 102 / Route 31
________________________
SEEDOT / NUZLEAF
Best Area - Route 101 / Route 114
________________________
TAILOW / SWELLOW
Best Area - Route 101 ( Heatbutt ) / Route 115
________________________
WINGULL / PELIPPER
Best Area - Route 104. ( Both )
________________________
RALTS / KIRLIA
Best Area - Route 102 / Route 212 North
Repel Area - Route 102
(5-7)
________________________
SURSKIT
Best Area - Route 102
________________________
SHROOMISH
Best Area - Petalburg Woods
Repel Area - Amity Square ( 21-24 )
________________________
SLAKOTH
Best Area - Pal Park
Alt. Area - Petalburg Woods
________________________
NINCADA
Best Area - Route 116
________________________
WHISMUR / LOUDRED
Best Area - Rusturf Tunnel / Victory Road Hoenn B2F
________________________
MAKUHITA / HARIYAMA
Best Area - Oreburg Gate 1F
Alt. Area - Granite Cave 1F / Victory Road Hoenn B2F
________________________
AZURILL
Best Area - Jura Cave
________________________
NOSEPASS
Best Area - Granite Cave B2F
________________________
SKITTY
Best Area - Eumi Island Theme Park 1
________________________
SABLEYE
Best Area - Sky Piller 1F
Repel Area - Jura Cave (M/D) (25-29)
________________________
MAWILE
Best Area - Iron Island B2F L
Alt. Area / Repel Area - Hoenn Victory Road B1F (49-54)
________________________
ARON / LAIRON
Best Area - Victory Road Hoenn 1F ( Før Both )
Repel Area - Victory Road Hoenn 1F (49-55)
________________________
MEDITITE / MEDICHAMP
Best Area - Mt. pyre exterior / Iron Island B1F L
Alt. Area - Victory Road Hoenn B1F ( Only medichamp )
________________________
ELECTRIKE / MANECTRIC
Best Area - Route 110 / Route 118
Repel Area - Route 110 (16-19)
________________________
PLUSLE / MINUN
Best Area - Route 15 (Both)
Repel Area - Route 29 (5-7)
Note - For Minun Repel trick is only works on Morning and for plusle it works only on Day and Night.
________________________
VOLBEAT / ILLUMISE
Best Area - Route 229 (Both)
Alt. Area - Route 117 (Both)
________________________
ROSELIA
Best Area - Route 221
Alt. Area - Route 117
________________________
GULPIN
Best Area - Route 3
________________________
CARVANHA / SHARPEDO
Best Area - Jura Cave / Mossdeep City
Repel Area - Love Island (D) (18-22)
________________________
WAILMER / WAILORD
Best Area - Route 123 / Route 223
Alt. Area - Route 129
( For Wailord Only )
________________________
NUMEL / CAMERUPT
Best Area - Fiery Path / Eumi island burner tower
________________________
TORKOAL
Best Area - Fiery Path
________________________
SPOINK
Best Area - Jagged Pass
________________________
SPINDA
Best Area - Route 113
________________________
TRAPINCH / VIBRAVA
Best Area - Route 111 Desert / Route 228
Repel Area - Route 111 Desert (25-29) / Route 228 (57-65) (M/N)
________________________
CACNEA / CACTURNE
Best Area - Route 111 Desert / Route 228
________________________
SWABLU
Best Area - Nap Shore
Repel Area - Route 115 (27-42)
_________________________
ZANGOOSE
Best Area - Mt. Silver Exterior
_________________________
SEVIPER
Best Area - Route 114
_________________________
LUNATONE
Best Area - Moon
_________________________
SOLROCK
Best Area - Moon
_________________________
BARBOACH / WHISCASH
Best Area - Mt. Coronet South / Etherna City
Alt. Area - Route 114 / Victory Road Hoenn B2F
_________________________
CORPISH / CRAWDANT
Best Area - Dragons Den / Route 123
Repel Trick - Route 40
(22-24) / Route 123
(34-39)
___________________________
BALTOY / CLAYDOL
Best Area - Route 111 Desert / Sky Piller 3F
___________________________
FEEBAS
Best Area - Route 119B
Repel Area - Jura Cave (25-29)
___________________________
CASTFORM
Repel Area - Route 111 Desert
___________________________
KECLEON
Best Area - Route 123
Repel Area - Route 119B (23-28)
___________________________
SHUPPET / BANETTE
Best Area - Mt. Pyre Summit / Route 226
Alt. Area - (for banette)
Sky Piller 1F
___________________________
DUSKULL / DUSCLOPS
Best Area - Mt. Pyre Summit / Sky Piller 5F
Repel Area - Trainers Valley (N)(51-56)
___________________________
TROPIUS
Best Area - Route 119A
Repel Area - Route 119A (23-28)
___________________________
CHIMECHO
Best Area - Mt. Pyre Summit
___________________________
ABSOL
Best Area - Cave Of Justice
Repel Area - Route 213 (N)(29-33)
Alt. Area - Route 118
___________________________
WYNAUT
Best Area - Love Island
Repel Area - Lake Verity (6-9)
___________________________
SNORUNT
Best Area - Low Tide Enterence Room
Repel Area - Acuity Lakefront (M)(36-39)
___________________________
SPHEAL / SEALEO
Repel Area - Route 125 / Route 226
Alt. Area ( for sealeo ) - High Tide Enterence Room
___________________________
CLAMPERL
Best Area - Amity Square
___________________________
RELICANT
Best Area - Route 126
___________________________
LUVDISC
Best Area - Ever Grande City
___________________________
BAGON / METANG
Best Area - Route 228 / Hoenn Safari Zone Area 2
Repel Area ( Only For Metang ) - Hoenn Safari Zone Area 2 (33-36)
___________________________
If you want to hunt in pair of two pokes with
Same sync and can be used in PvP
You may check This guide.
Hope this Guide will help you;
Thanks for taking a look here;