


New Trade Zone
Trade Zone is now live
Use the new Trade Zone for auctions and instant-price trades so Pokemon and item offers are easy to find.
Leaderboard


Popular Content
Showing content with the highest reputation on 07/02/19 in all areas
-
2 pointsSCARLET ABOUT US Scarlet is an aspiring PvP-guild in the silver server, founded in July 2018. Our guild consists of an active guild base that aims to reach the guildladder in every PvP season. Besides that, the guild focuses on bringing together individuals who are willing to PvP and invest their efforts into not only making it fun but to also cultivate competitiveness. In order to promote earnest PvPing we host in-guild PvP-tournaments, provide a considerable library of lendable PvP-relevant Pokemon and encourage having a plethora of Pokemon by hosting hunting events. We also help each other with teambuilding and provide advice when one asks for it. Outside of PvP, we occupy and enjoy a number of PvE-activities such as fighting bosses, participating in in-game /events and hunting. BENEFITS LENDING SYSTEM There is one obstacle in the way of every aspiring PvP-player: the lack of options when it comes to PvPing. Be it that you don't have the Pokemon with their desired IV-stats. Be it that you don't have time to hunt the Pokemon that you need in order to realize quirky ideas. Maybe you simply just don't have the money to buy the most high-end Pokemon in terms of stats. It all boils down to lack of time. There is one thing that you have: the will to genuinely and earnestly get good at PvP-ing. Scarlet provides a unique system in which PvP-players can thrive. We have made an effort to collect a magnificent library of Pokemon that are PvP-relevant, gucci in stats and ready to use. DEX SERVICE We own an account with all Pokemon that you can currently catch in-game. This will help you to complete certain quests and catch your legendary Pokemon. APPLICATION REQUIREMENTS Completed all regions in-game and have interest in PvP Basic knowledge about PvP, aspects such as IV, EV, nature etc. Be active on Discord QUESTIONS Please make sure to be as honest as you can with your answers, so we can have a better understanding of who you are. Be elaborate with your answers as there is a voting system within' the guild and each one of our members will vote if you can join or not. How old are you and where are you from? Why would you like to join Scarlet? What do you want to achieve in PRO? (except the obvious having fun). How did you find out about Scarlet? What is your discord ID? (makes it easier for us to contact you) Please provide a screenshot of your trainer card. Discord Server Link
 2 points
 -
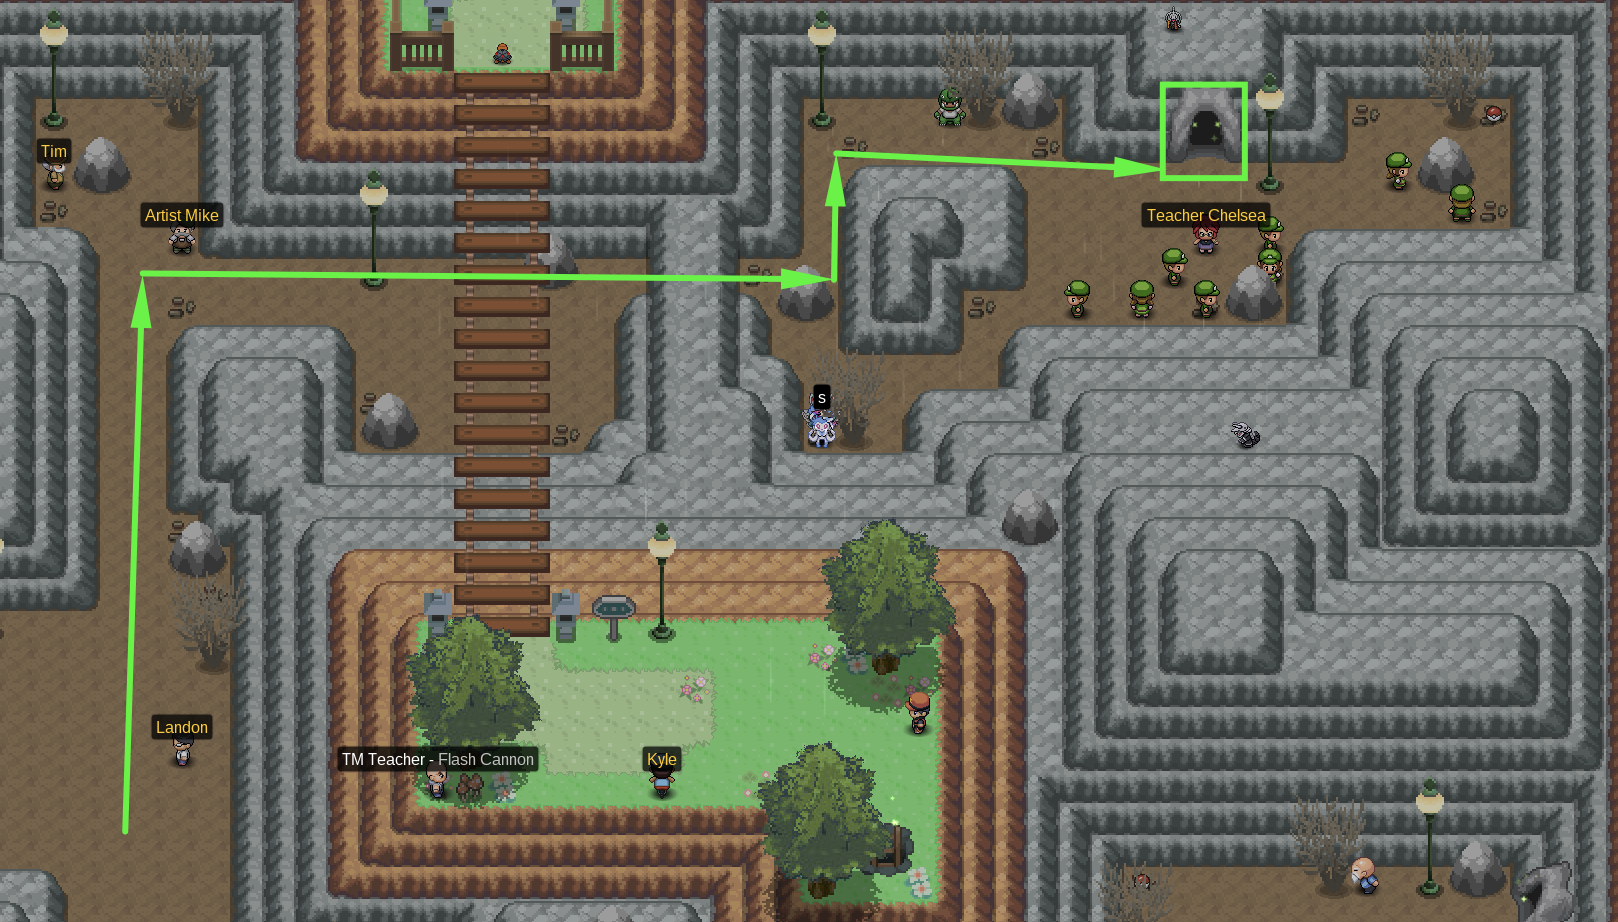
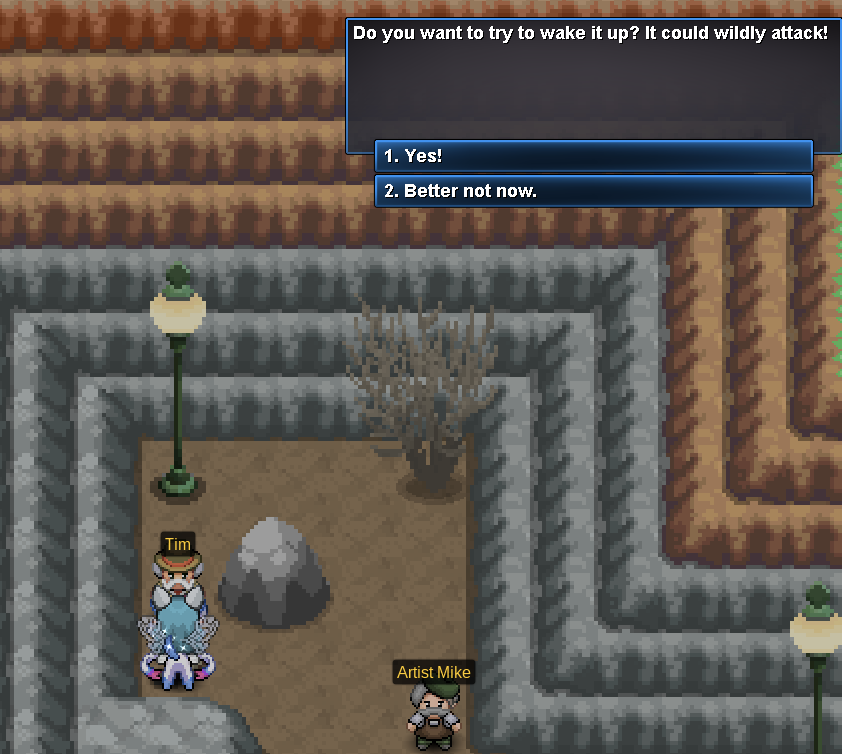
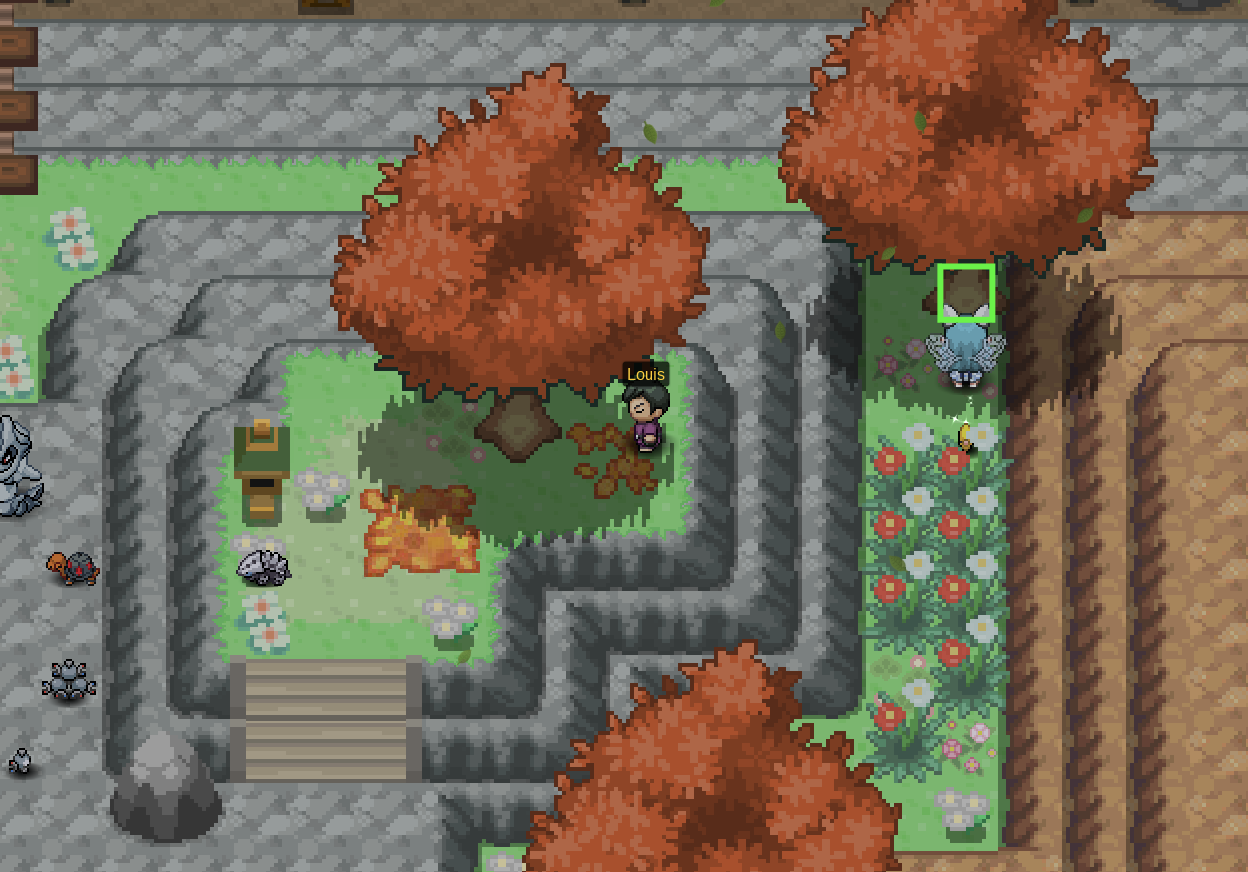
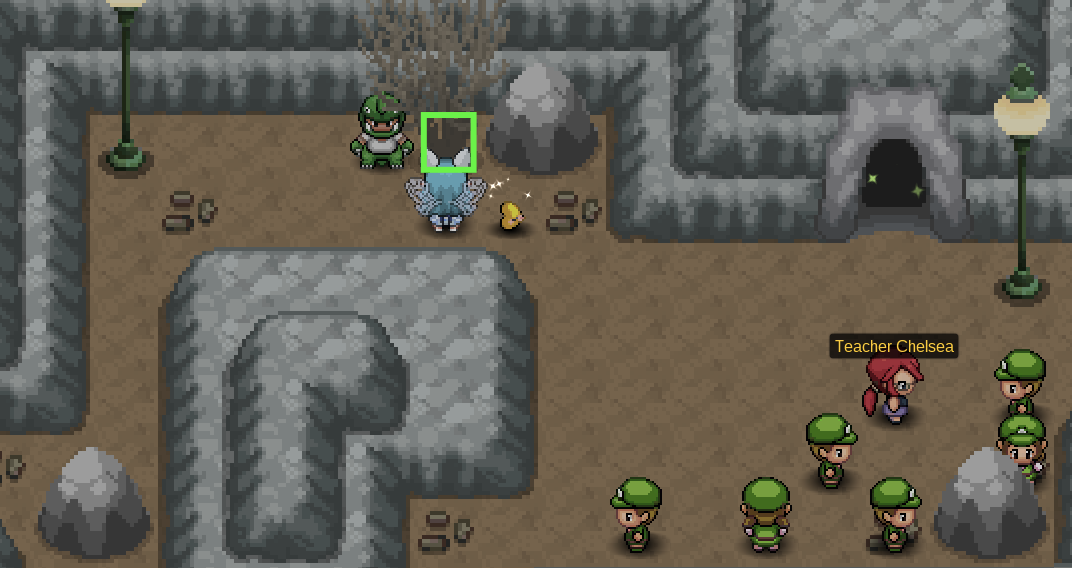
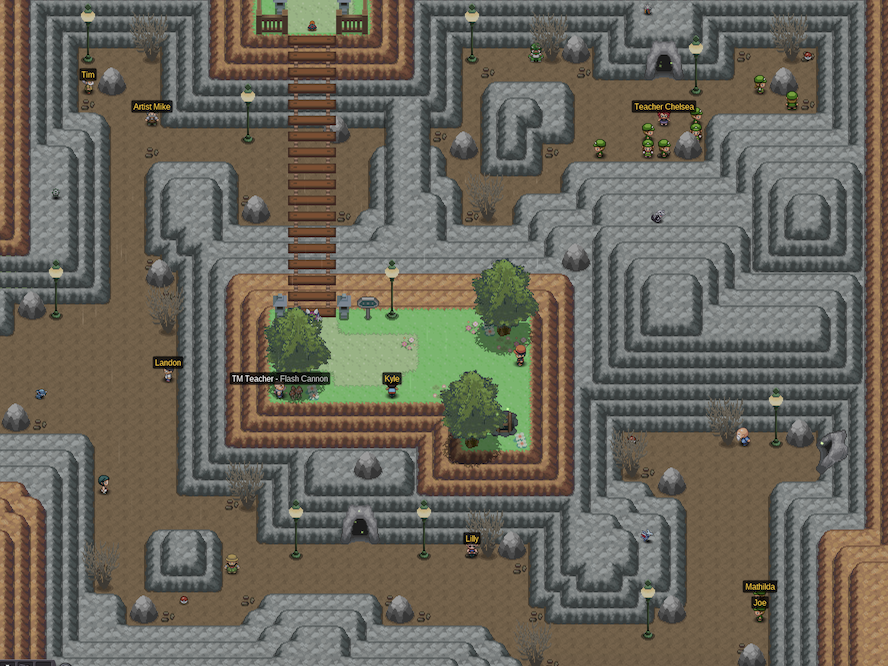
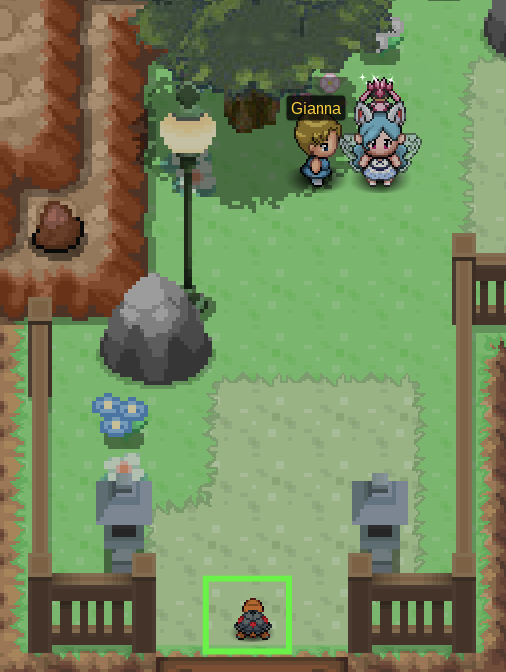
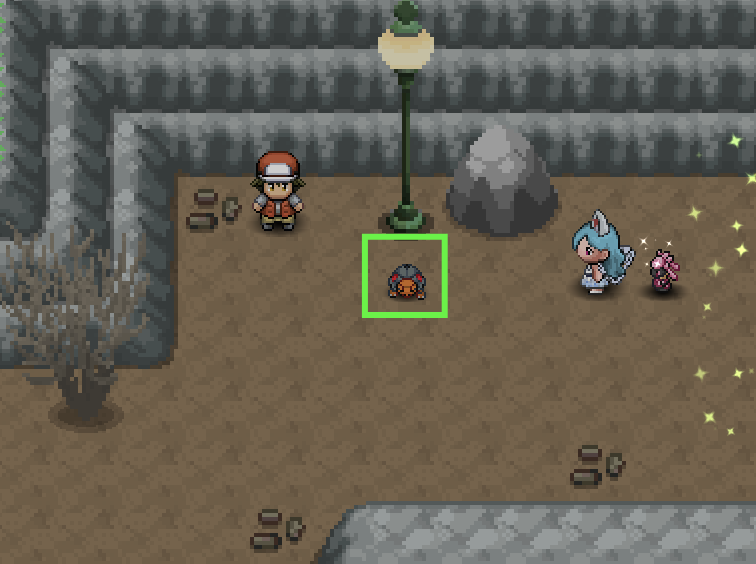
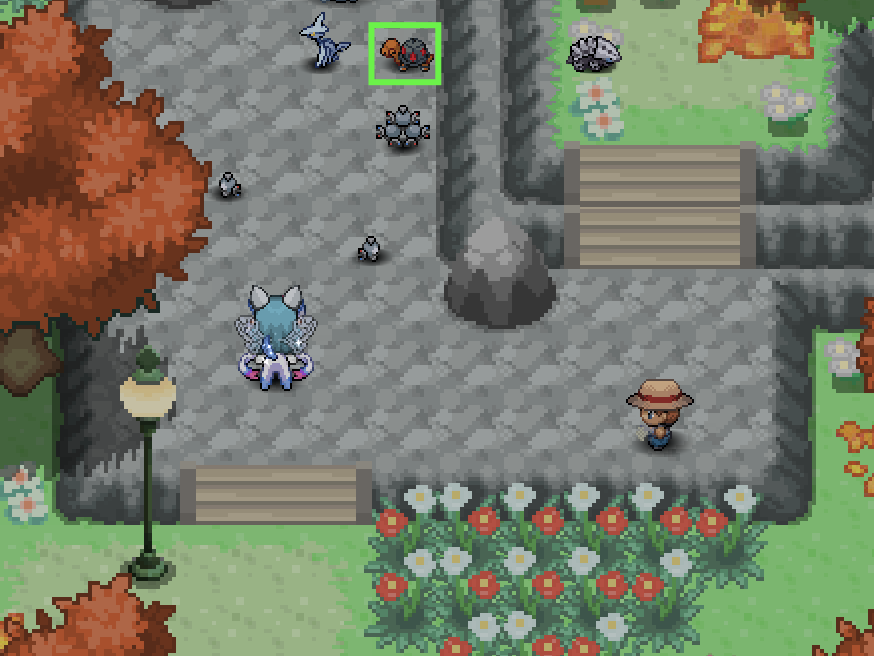
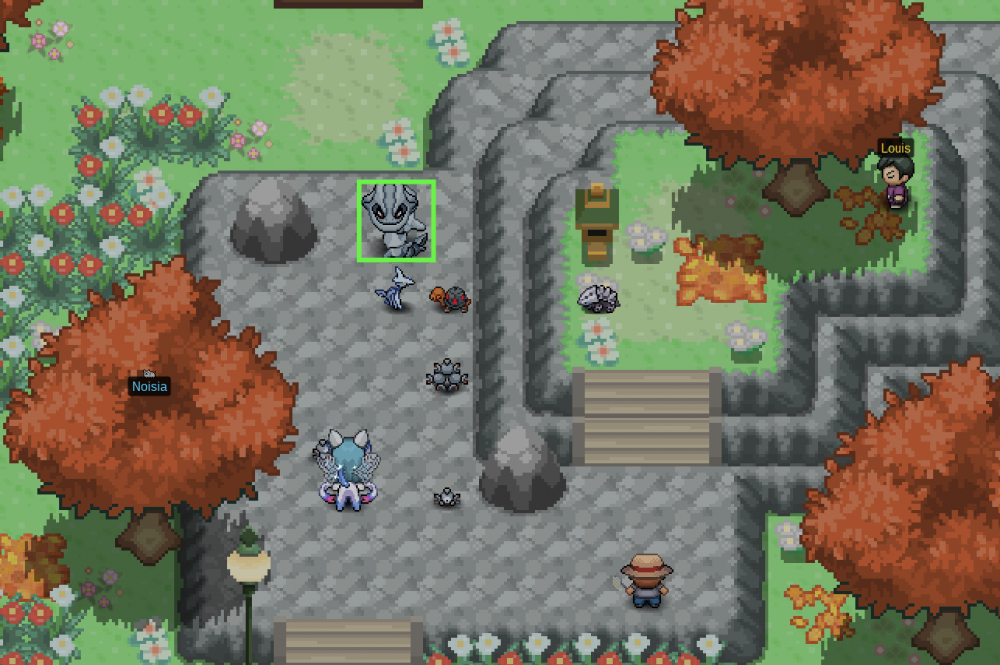
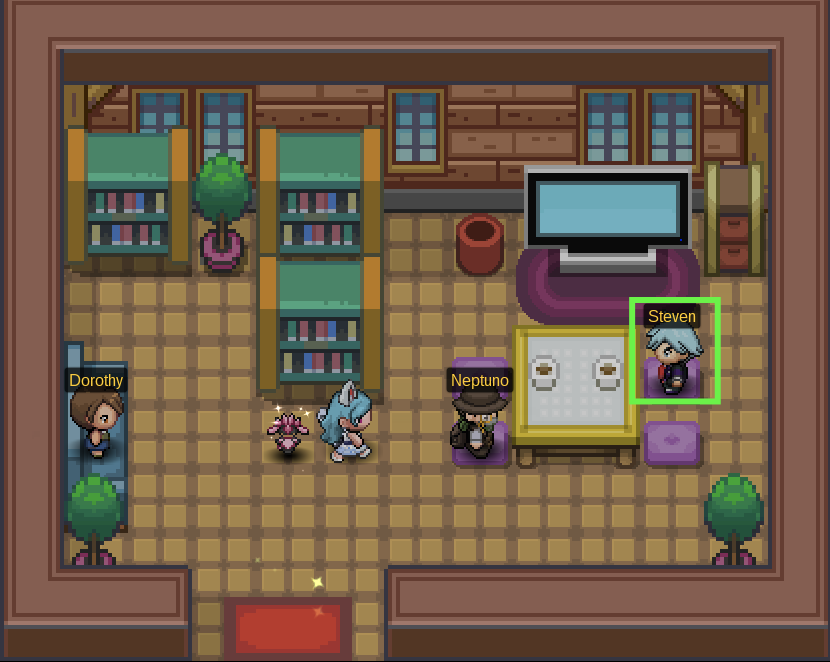
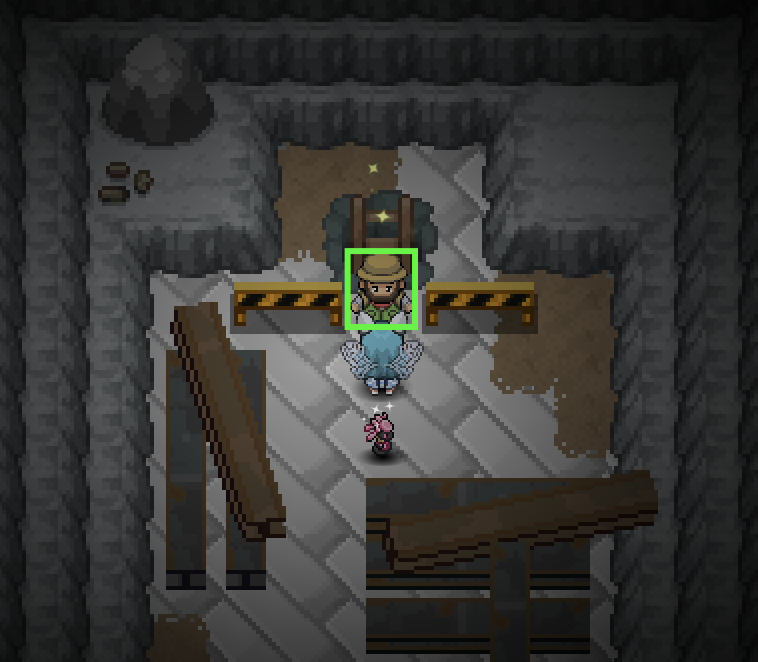
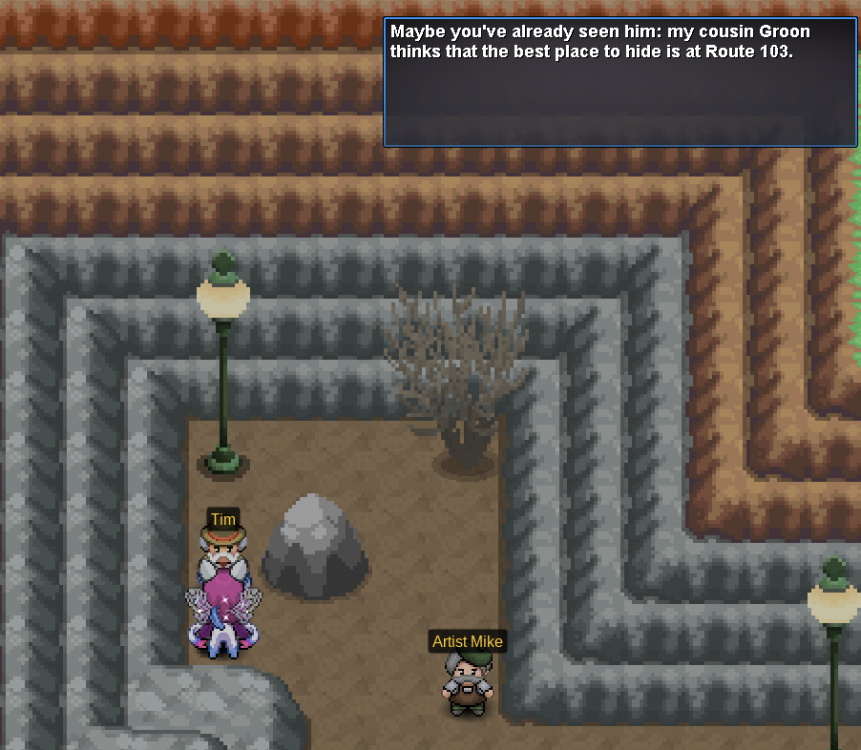
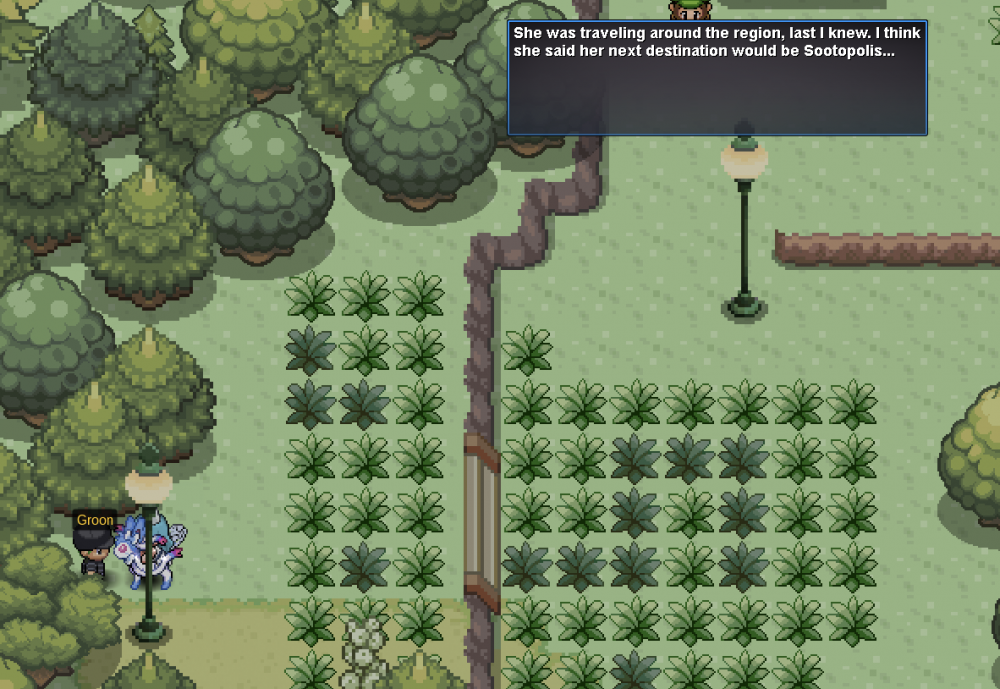
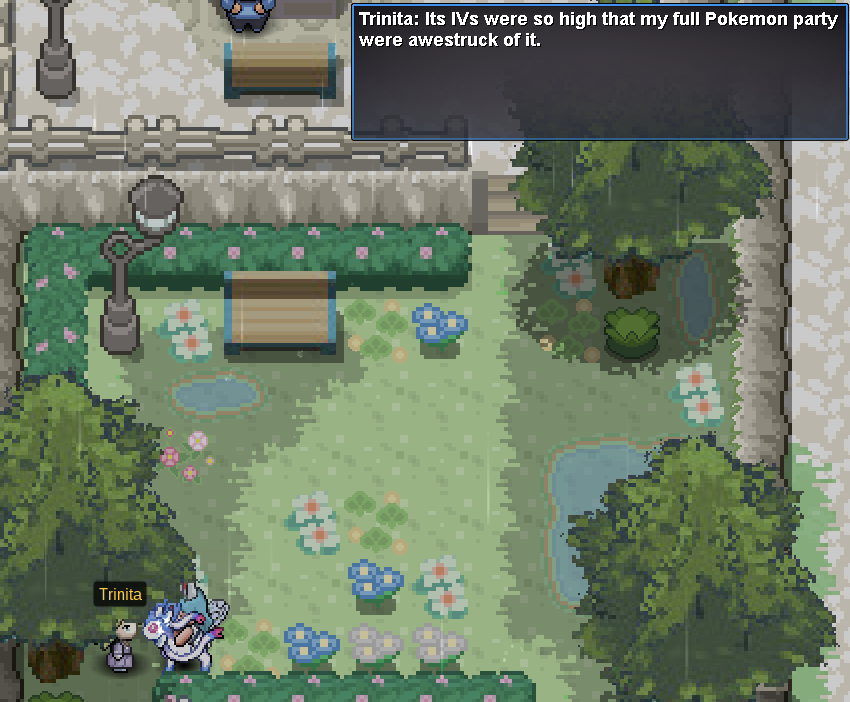
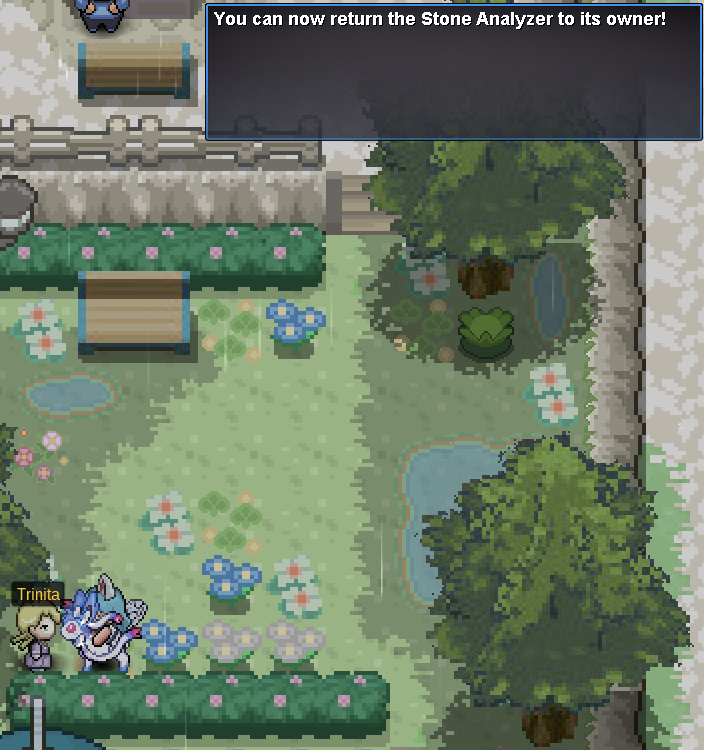
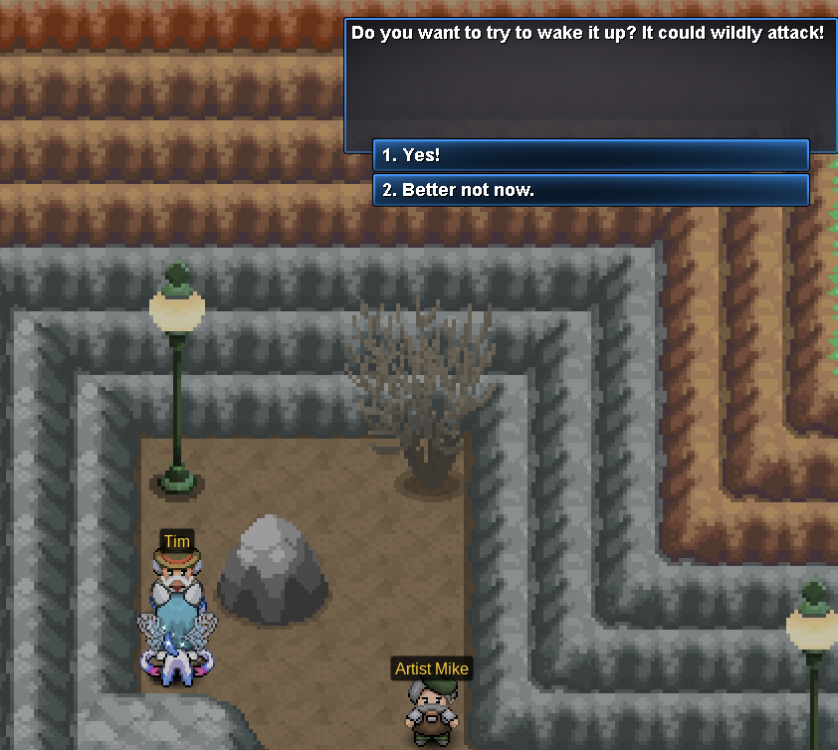
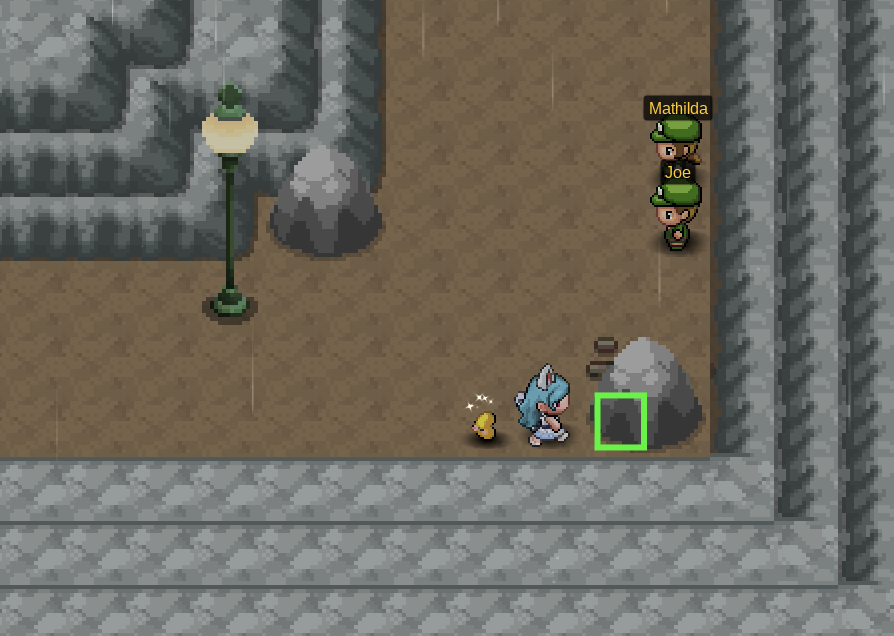
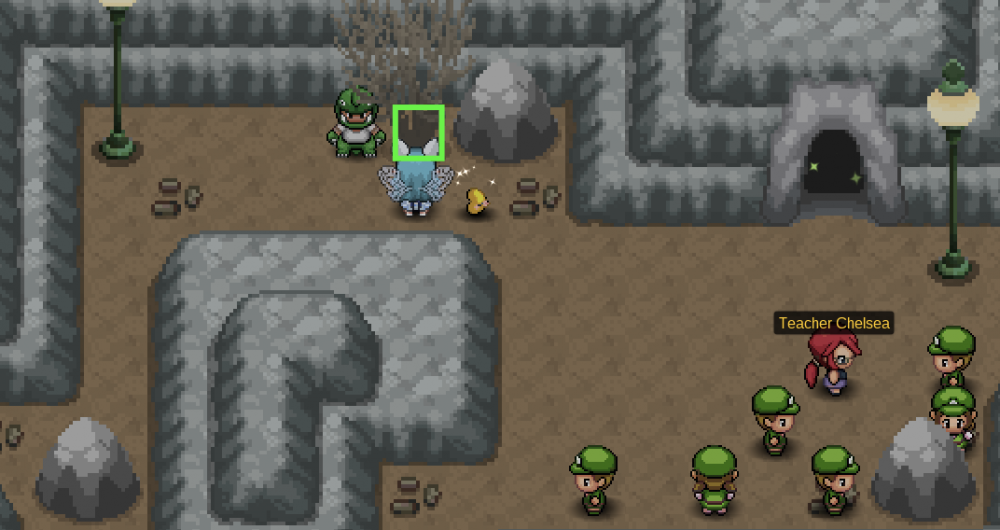
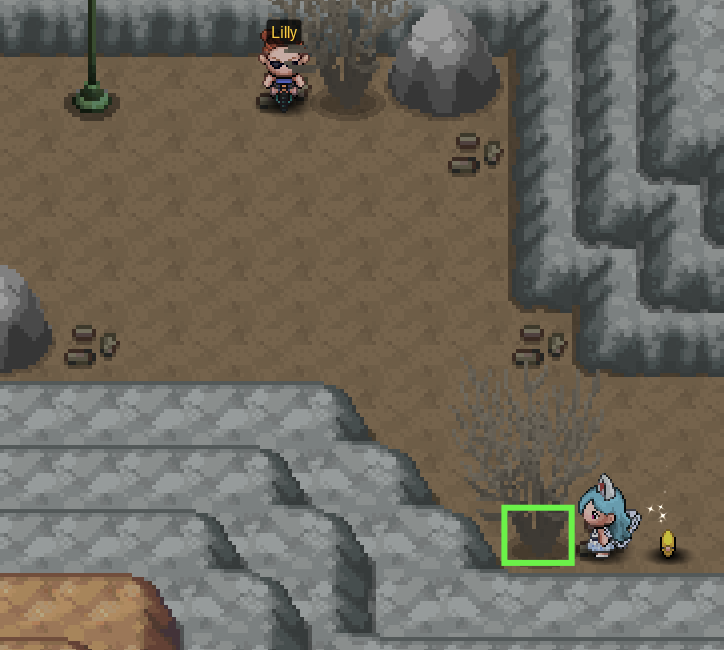
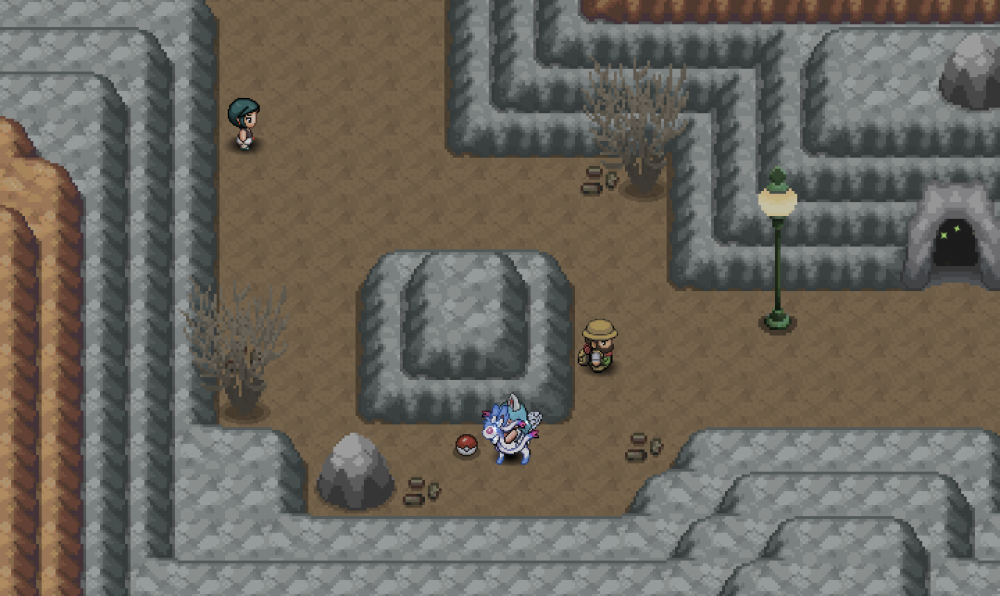
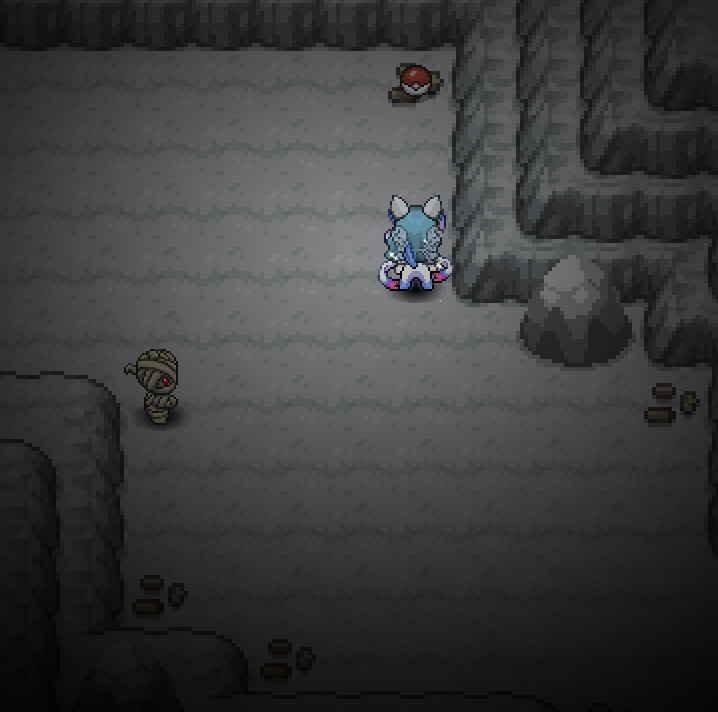
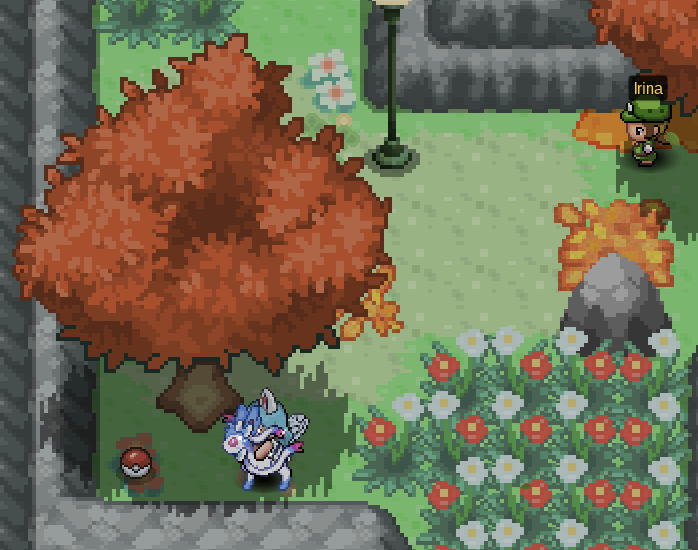
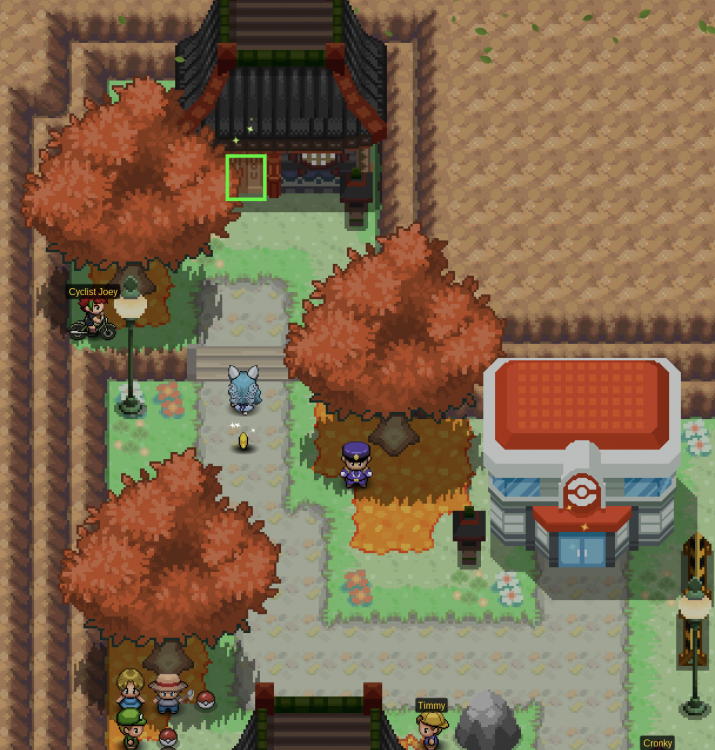
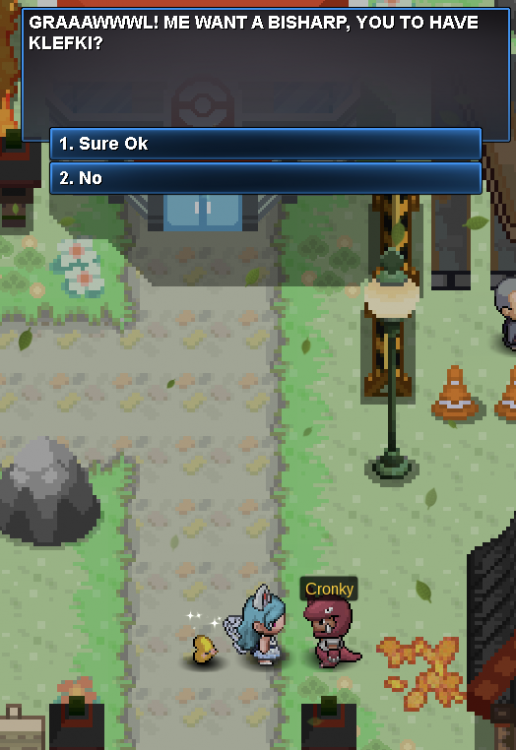
1 pointHi there and welcome to the Valley of Steel Guide! This Guide will help you accomplish the quests in the Valley of Steel. It will also provide you with the locations of the different items in the valley. Requirements: Hoenn Champion Fee: 5,000 Pokedollars per entry Region: Hoenn City: Lavaridge Town Access Point: Guard South of Lavaridge Town [spoiler=Valley of Steel ] Step 1: Talk to the Torkoal upon entering the Valley of Steel. [spoiler=Step 1] Step 2: Talk to the Torkoal upon entering Valley of Steel Western Peak. [spoiler=Step 2] Step 3: Battle the pokemon South of the Town at the Western Peak, across the bridge. The Torkoal will ask to join you after you interact with it. [spoiler=Step 3] Step 4: Go to Steven in Valley of Steel Eastern Peak, House 3. It's the house furthest back. [spoiler=Step 4] Step 5: Go back to the area where you found the Torkoal and battle the Steelix. [spoiler=Step 5] Step 6: Go back to Steven, and he'll go to the Valley of Steel Underground. [spoiler=Step 6] Step 7: Talk to the Hiker in the cave and you now have access to the underground and Boss Steven. [spoiler=Step 7] Boss Requirements: ✦ 1 Steel-Type Pokemon ✦ A Pokemon with Iron Defense ✦ 201 hours playtime Boss Team: Armaldo (X-Scissor, Rock Blast, Crush Claw, Slash) Bisharp (Night Slash, Iron Head, Guillotine, Swords Dance) Mawile (Iron Head, Spit Up, Swallow, Stockpile) Aggron (Automize, Double Edge, Metal Burst, Heavy Slam) Klinklang (Hyper Beam, Zap Cannon, Metal Sound, Lock-On) Mega Metagross (Meteor Mash, Hammer Arm, Thunder Punch, Ice Punch) Step 1: Talk to Tim in the Valley of Steel. [spoiler=Step 1] Step 2: Talk to Groon in Route 103. He'll tell you to go to Sootopolis. [spoiler=Step 2] Step 3: Talk to Trinita in Sootopolis City. She will require an Oddish with 146+ IVs. [spoiler=Step 3] Step 4: Turn in the Oddish with 146+ IVs. [spoiler=Step 4] Step 5: Go back to Tim and you'll get a chance to catch a Pawniard! [spoiler=Step 5] Description: Neptuno will give you a quest each day. This can be either be a Battle Quest or an Item Quest. Take note that if you leave the valley, you can no longer complete the quest. Location: Valley of Steel Eastern Peak, House 3 Cooldown: 1 Day Rewards: You will be rewarded with a certain amount of steel coins after completing each quest. You can turn in and check your steel coin balance with Dorothy. ✦ 5 Heal Powder: 20 Steel Coins ✦ 9 Ultra Balls: 12 Steel Coins ✦ 45 Pokeballs: 12 Steel Coins ✦ 3 Revives: 25 Steel Coins ✦ 1 Electirizer: 110 Steel Coins Battle Quests: ✦ Tufo at Western Peak ✦ Tefe at Eastern Peak ✦ Tofu at Western Peak ✦ Tifa at Cave of Steel 1F ✦ Tafi at Cave of Steel 2F Item Quests: You will have to find a certain number of each an item. Below are the locations for each. [spoiler=Tree Sap Locations]✦ Tree by the entrance of Valley of Steel ✦ Tree next to the Flash Cannon Tutor, Center of Valley of Steel ✦ Tree towards the side; across the bridge, South of Western Peak ✦ Tree next to a Eastern House 2, Valley of Steel Eastern Peak [spoiler=Steel Strand Locations]✦ Rock under the bridge, North of Valley of Steel ✦ Rock next to Joe and Mathilda, East of Valley of Steel [spoiler=Dry Branch Locations]✦ Dead bush next to Underground Cave, North of Valley of Steel ✦ Dead bush near Lilly, South of Valley of Steel ✦ Dead bush near Lilly, South of Valley of Steel Trade: Bisharp for Klefki Location: Valley of Steel Eastern Peak Location: Valley of Steel Cost: 12, 000 Pokedollars CAVE OF STEEL 1F (Towards Eastern Peak) CAVE OF STEEL 2F (On your way down to Valley of Steel) VALLEY OF STEEL WESTERN PEAK VALLEY OF STEEL EASTERN PEAK VALLEY OF STEEL


 1 point
 -
1 point*To use Dig outside of battle. Your pokemon must have 150+ Happiness. This can be viewed with the command /happy 1-6 being written in a chat for example /happy 1 for the pokemon in the first slot of your party. *Dig Spots have a 3 day cooldown *The Dig TM (TM28) can be acquired from: • FREE Cerulean House 6 • Celadon Mart - $3,500 • Route 36 Smuggler - $5,000 • Lilycove Mart - $4,000 • FREE Route 114 Pink-colored names denote that this Spawn or Area is exclusively active membership users. Area: Digletts Cave (Northwesternmost and Southeasternmost trench of the basement floor) Patches:8 Items: [TABLE] [TR] [TH][/TH] [TH]Item[/TH] [TH]Rarity[/TH] [/TR] [TR] [TD]alt=Pokéball.pnghttps://prowiki.info/images/b/b1/Pok%C3%A9ball.png[/img][/TD] [TD]Pokéball[/TD] [TD]Common[/TD] [/TR] [TR] [TD][/TD] [TD]Flying Gem[/TD] [TD]Common[/TD] [/TR] [TR] [TD]alt=Potion.pnghttps://prowiki.info/images/7/7a/Potion.png[/img][/TD] [TD]Potion[/TD] [TD]Uncommon[/TD] [/TR] [TR] [TD]alt=Fresh Water.pnghttps://prowiki.info/images/1/1e/Fresh_Water.png[/img][/TD] [TD]Fresh Water[/TD] [TD]Uncommon[/TD] [/TR] [TR] [TD]alt=Dawn Stone.pnghttps://prowiki.info/images/d/d3/Dawn_Stone.png[/img][/TD] [TD]Dawn Stone[/TD] [TD]Intermediate[/TD] [/TR] [TR] [TD]alt=Sun Stone.pnghttps://prowiki.info/images/0/0a/Sun_Stone.png[/img][/TD] [TD]Sun Stone[/TD] [TD]Intermediate[/TD] [/TR] [TR] [TD]alt=Level Ball.pnghttps://prowiki.info/images/5/5b/Level_Ball.png[/img][/TD] [TD]Level Ball[/TD] [TD]Intermediate[/TD] [/TR] [TR] [TD]alt=Carbos.pnghttps://prowiki.info/images/f/fe/Carbos.png[/img][/TD] [TD]Carbos[/TD] [TD]Rare[/TD] [/TR] [TR] [TD]alt=Helix Fossil.pnghttps://prowiki.info/images/d/d2/Helix_Fossil.png[/img][/TD] [TD]Helix Fossil[/TD] [TD]Intermediate[/TD] [/TR] [TR] [TD]alt=Dome Fossil.pnghttps://prowiki.info/images/5/52/Dome_Fossil.png[/img][/TD] [TD]Dome Fossil[/TD] [TD]Intermediate[/TD] [/TR] [TR] [TD][/TD] [TD]Icicle Plate[/TD] [TD]Very Rare[/TD] [/TR] [/TABLE] Pokemon: [TABLE] [TR] [TH][/TH] [TH]Pokémon[/TH] [TH]Rarity[/TH] [/TR] [TR] [TD]alt=50Icon.pnghttps://prowiki.info/images/b/b9/50Icon.png[/img][/TD] [TD]Diglett[/TD] [TD]Uncommon[/TD] [/TR] [TR] [TD]alt=51Icon.pnghttps://prowiki.info/images/5/5b/51Icon.png[/img][/TD] [TD]Dugtrio[/TD] [TD]Rare[/TD] [/TR] [TR] [TD]alt=529Icon.pnghttps://prowiki.info/images/d/d4/529Icon.png[/img][/TD] [TD]Drilbur[/TD] [TD]Very Rare[/TD] [/TR] [/TABLE] Area:Route 3 (Southwest and Southeast trench) Patches:8 Items: [TABLE] [TR] [TH][/TH] [TH]Item[/TH] [TH]Rarity[/TH] [/TR] [TR] [TD]alt=Pokéball.pnghttps://prowiki.info/images/b/b1/Pok%C3%A9ball.png[/img][/TD] [TD]Pokeball[/TD] [TD]Common[/TD] [/TR] [TR] [TD][/TD] [TD]Bug Gem[/TD] [TD]Common[/TD] [/TR] [TR] [TD]alt=Nugget.pnghttps://prowiki.info/images/f/f0/Nugget.png[/img][/TD] [TD]Nugget[/TD] [TD]Uncommon[/TD] [/TR] [TR] [TD]alt=Hyper Potion.pnghttps://prowiki.info/images/2/23/Hyper_Potion.png[/img][/TD] [TD]Hyper Potion[/TD] [TD]Uncommon[/TD] [/TR] [TR] [TD]alt=Sun Stone.pnghttps://prowiki.info/images/0/0a/Sun_Stone.png[/img][/TD] [TD]Sun Stone[/TD] [TD]Intermediate[/TD] [/TR] [TR] [TD]alt=Hard Stone.pnghttps://prowiki.info/images/5/59/Hard_Stone.png[/img][/TD] [TD]Hard Stone[/TD] [TD]Intermediate[/TD] [/TR] [TR] [TD]alt=Leftovers.pnghttps://prowiki.info/images/7/7f/Leftovers.png[/img][/TD] [TD]Leftovers[/TD] [TD]Intermediate[/TD] [/TR] [TR] [TD]alt=Iron.pnghttps://prowiki.info/images/4/45/Iron.png[/img][/TD] [TD]Iron[/TD] [TD]Rare[/TD] [/TR] [TR] [TD]alt=Old Amber.pnghttps://prowiki.info/images/f/fc/Old_Amber.png[/img][/TD] [TD]Old Amber[/TD] [TD]Intermediate[/TD] [/TR] [TR] [TD]alt=Helix Fossil.pnghttps://prowiki.info/images/d/d2/Helix_Fossil.png[/img][/TD] [TD]Helix Fossil[/TD] [TD]Intermediate[/TD] [/TR] [TR] [TD][/TD] [TD]Pixie Plate[/TD] [TD]Very Rare[/TD] [/TR] [/TABLE] Pokemon: [TABLE] [TR] [TH][/TH] [TH]Pokémon[/TH] [TH]Rarity[/TH] [/TR] [TR] [TD]alt=74Icon.pnghttps://prowiki.info/images/e/e8/74Icon.png[/img][/TD] [TD]Geodude[/TD] [TD]Uncommon[/TD] [/TR] [TR] [TD]alt=111Icon.pnghttps://prowiki.info/images/0/0d/111Icon.png[/img][/TD] [TD]Rhyhorn[/TD] [TD]Rare[/TD] [/TR] [TR] [TD]alt=304Icon.pnghttps://prowiki.info/images/3/31/304Icon.png[/img][/TD] [TD]Aron[/TD] [TD]Very Rare[/TD] [/TR] [/TABLE] Area:Route 14 (The Ditch behind Kiri and Jan) Patches:4 Items: [TABLE] [TR] [TH][/TH] [TH]Item[/TH] [TH]Rarity[/TH] [/TR] [TR] [TD]alt=Pokéball.pnghttp://prowiki.info/images/b/b1/Pok%C3%A9ball.png[/img][/TD] [TD]Pokeball[/TD] [TD]Common[/TD] [/TR] [TR] [TD][/TD] [TD]Fighting Gem[/TD] [TD]Common[/TD] [/TR] [TR] [TD]alt=Potion.pnghttp://prowiki.info/images/7/7a/Potion.png[/img][/TD] [TD]Potion[/TD] [TD]Uncommon[/TD] [/TR] [TR] [TD]alt=Fresh Water.pnghttp://prowiki.info/images/1/1e/Fresh_Water.png[/img][/TD] [TD]Fresh Water[/TD] [TD]Uncommon[/TD] [/TR] [TR] [TD]alt=Dawn Stone.pnghttp://prowiki.info/images/d/d3/Dawn_Stone.png[/img][/TD] [TD]Dawn Stone[/TD] [TD]Intermediate[/TD] [/TR] [TR] [TD]alt=Sun Stone.pnghttp://prowiki.info/images/0/0a/Sun_Stone.png[/img][/TD] [TD]Sun Stone[/TD] [TD]Intermediate[/TD] [/TR] [TR] [TD]alt=Level Ball.pnghttp://prowiki.info/images/5/5b/Level_Ball.png[/img][/TD] [TD]Level Ball[/TD] [TD]Intermediate[/TD] [/TR] [TR] [TD]alt=Carbos.pnghttp://prowiki.info/images/f/fe/Carbos.png[/img][/TD] [TD]Carbos[/TD] [TD]Rare[/TD] [/TR] [TR] [TD]alt=Helix Fossil.pnghttp://prowiki.info/images/d/d2/Helix_Fossil.png[/img][/TD] [TD]Helix Fossil[/TD] [TD]Intermediate[/TD] [/TR] [TR] [TD]alt=Dome Fossil.pnghttp://prowiki.info/images/5/52/Dome_Fossil.png[/img][/TD] [TD]Dome Fossil[/TD] [TD]Intermediate[/TD] [/TR] [TR] [TD][/TD] [TD]Sky Plate[/TD] [TD]Very Rare[/TD] [/TR] [/TABLE] Pokemon: [TABLE] [TR] [TH][/TH] [TH]Pokémon[/TH] [TH]Rarity[/TH] [/TR] [TR] [TD]alt=74Icon.pnghttp://prowiki.info/images/e/e8/74Icon.png[/img][/TD] [TD]Geodude[/TD] [TD]Uncommon[/TD] [/TR] [TR] [TD]alt=75Icon.pnghttp://prowiki.info/images/1/14/75Icon.png[/img][/TD] [TD]Graveler[/TD] [TD]Rare[/TD] [/TR] [TR] [TD]alt=328Icon.pnghttp://prowiki.info/images/a/af/328Icon.png[/img][/TD] [TD]Trapinch[/TD] [TD]Very Rare[/TD] [/TR] [/TABLE] Area:Route 15 Patches:5 Items: [TABLE] [TR] [TH][/TH] [TH]Item[/TH] [TH]Rarity[/TH] [/TR] [TR] [TD]alt=Pokéball.pnghttp://prowiki.info/images/b/b1/Pok%C3%A9ball.png[/img][/TD] [TD]Pokeball[/TD] [TD]Common[/TD] [/TR] [TR] [TD][/TD] [TD]Fire Gem[/TD] [TD]Common[/TD] [/TR] [TR] [TD]alt=Revival Herb.pnghttp://prowiki.info/images/4/45/Revival_Herb.png[/img][/TD] [TD]Revival Herb[/TD] [TD]Uncommon[/TD] [/TR] [TR] [TD]alt=Super Potion.pnghttp://prowiki.info/images/8/8f/Super_Potion.png[/img][/TD] [TD]Super Potion[/TD] [TD]Uncommon[/TD] [/TR] [TR] [TD]alt=Reaper Cloth.pnghttp://prowiki.info/images/d/d5/Reaper_Cloth.png[/img][/TD] [TD]Reaper Cloth[/TD] [TD]Intermediate[/TD] [/TR] [TR] [TD]alt=Level Ball.pnghttp://prowiki.info/images/5/5b/Level_Ball.png[/img][/TD] [TD]Level Ball[/TD] [TD]Intermediate[/TD] [/TR] [TR] [TD]alt=Nest Ball.pnghttp://prowiki.info/images/a/a6/Nest_Ball.png[/img][/TD] [TD]Nest Ball[/TD] [TD]Intermediate[/TD] [/TR] [TR] [TD]alt=Calcium.pnghttp://prowiki.info/images/f/f5/Calcium.png[/img][/TD] [TD]Calcium[/TD] [TD]Rare[/TD] [/TR] [TR] [TD]alt=Helix Fossil.pnghttp://prowiki.info/images/d/d2/Helix_Fossil.png[/img][/TD] [TD]Helix Fossil[/TD] [TD]Intermediate[/TD] [/TR] [TR] [TD]alt=Dome Fossil.pnghttp://prowiki.info/images/5/52/Dome_Fossil.png[/img][/TD] [TD]Dome Fossil[/TD] [TD]Intermediate[/TD] [/TR] [TR] [TD][/TD] [TD]Fire Plate[/TD] [TD]Very Rare[/TD] [/TR] [/TABLE] Pokemon: [TABLE] [TR] [TH][/TH] [TH]Pokémon[/TH] [TH]Rarity[/TH] [/TR] [TR] [TD]alt=74Icon.pnghttp://prowiki.info/images/e/e8/74Icon.png[/img][/TD] [TD]Geodude[/TD] [TD]Uncommon[/TD] [/TR] [TR] [TD]alt=95Icon.pnghttp://prowiki.info/images/2/22/95Icon.png[/img][/TD] [TD]Onix[/TD] [TD]Rare[/TD] [/TR] [TR] [TD]alt=436Icon.pnghttp://prowiki.info/images/e/e6/436Icon.png[/img][/TD] [TD]Bronzor[/TD] [TD]Very Rare[/TD] [/TR] [/TABLE] Area:Mt. Moon (Southwestern and Northeastern segment of 1F) Patches:8 Items: [TABLE] [TR] [TH][/TH] [TH]Item[/TH] [TH]Rarity[/TH] [/TR] [TR] [TD]alt=Pokéball.pnghttp://prowiki.info/images/b/b1/Pok%C3%A9ball.png[/img][/TD] [TD]Pokeball[/TD] [TD]Common[/TD] [/TR] [TR] [TD]alt=Dark Gem.pnghttp://prowiki.info/images/f/f0/Dark_Gem.png[/img][/TD] [TD]Dark Gem[/TD] [TD]Common[/TD] [/TR] [TR] [TD]alt=Stardust.pnghttp://prowiki.info/images/6/65/Stardust.png[/img][/TD] [TD]Stardust[/TD] [TD]Uncommon[/TD] [/TR] [TR] [TD]alt=Rare Candy.pnghttp://prowiki.info/images/a/a2/Rare_Candy.png[/img][/TD] [TD]Rare Candy[/TD] [TD]Uncommon[/TD] [/TR] [TR] [TD]alt=Hard Stone.pnghttp://prowiki.info/images/5/59/Hard_Stone.png[/img][/TD] [TD]Hard Stone[/TD] [TD]Intermediate[/TD] [/TR] [TR] [TD]alt=Moon Stone.pnghttp://prowiki.info/images/3/35/Moon_Stone.png[/img][/TD] [TD]Moon Stone[/TD] [TD]Intermediate[/TD] [/TR] [TR] [TD]alt=Sun Stone.pnghttp://prowiki.info/images/0/0a/Sun_Stone.png[/img][/TD] [TD]Sun Stone[/TD] [TD]Intermediate[/TD] [/TR] [TR] [TD]alt=Carbos.pnghttp://prowiki.info/images/f/fe/Carbos.png[/img][/TD] [TD]Carbos[/TD] [TD]Rare[/TD] [/TR] [TR] [TD]alt=Old Amber.pnghttp://prowiki.info/images/f/fc/Old_Amber.png[/img][/TD] [TD]Old Amber[/TD] [TD]Intermediate[/TD] [/TR] [TR] [TD]alt=Helix Fossil.pnghttp://prowiki.info/images/d/d2/Helix_Fossil.png[/img][/TD] [TD]Helix Fossil[/TD] [TD]Intermediate[/TD] [/TR] [TR] [TD][/TD] [TD]Draco Plate[/TD] [TD]Very Rare[/TD] [/TR] [/TABLE] Pokemon: [TABLE] [TR] [TH][/TH] [TH]Pokémon[/TH] [TH]Rartity[/TH] [/TR] [TR] [TD]alt=74Icon.pnghttp://prowiki.info/images/e/e8/74Icon.png[/img][/TD] [TD]Geodude[/TD] [TD]Unommon[/TD] [/TR] [TR] [TD]alt=111Icon.pnghttp://prowiki.info/images/0/0d/111Icon.png[/img][/TD] [TD]Rhyhorn[/TD] [TD]Rare[/TD] [/TR] [TR] [TD]alt=679Icon.pnghttp://prowiki.info/images/1/12/679Icon.png[/img][/TD] [TD]Honedge[/TD] [TD]Very Rare[/TD] [/TR] [/TABLE] Area:Mt. Moon (Northernmost and Middlemost chamber of B2F) Patches:8 Items: [TABLE] [TR] [TH][/TH] [TH]Item[/TH] [TH]Rarity[/TH] [/TR] [TR] [TD]alt=Pokéball.pnghttp://prowiki.info/images/b/b1/Pok%C3%A9ball.png[/img][/TD] [TD]Pokeball[/TD] [TD]Common[/TD] [/TR] [TR] [TD][/TD] [TD]Dragon Gem[/TD] [TD]Common[/TD] [/TR] [TR] [TD]alt=Rare Candy.pnghttp://prowiki.info/images/a/a2/Rare_Candy.png[/img][/TD] [TD]Rare Candy[/TD] [TD]Uncommon[/TD] [/TR] [TR] [TD]alt=Revive.pnghttp://prowiki.info/images/1/13/Revive.png[/img][/TD] [TD]Revive[/TD] [TD]Uncommon[/TD] [/TR] [TR] [TD]alt=Moon Stone.pnghttp://prowiki.info/images/3/35/Moon_Stone.png[/img][/TD] [TD]Moon Stone[/TD] [TD]Intermediate[/TD] [/TR] [TR] [TD]alt=Moon Ball.pnghttp://prowiki.info/images/b/b0/Moon_Ball.png[/img][/TD] [TD]Moon Ball[/TD] [TD]Intermediate[/TD] [/TR] [TR] [TD]alt=Net Ball.pnghttp://prowiki.info/images/b/bb/Net_Ball.png[/img][/TD] [TD]Net Ball[/TD] [TD]Intermediate[/TD] [/TR] [TR] [TD]alt=Iron.pnghttp://prowiki.info/images/4/45/Iron.png[/img][/TD] [TD]Iron[/TD] [TD]Rare[/TD] [/TR] [TR] [TD]alt=Old Amber.pnghttp://prowiki.info/images/f/fc/Old_Amber.png[/img][/TD] [TD]Old Amber[/TD] [TD]Intermediate[/TD] [/TR] [TR] [TD]alt=Helix Fossil.pnghttp://prowiki.info/images/d/d2/Helix_Fossil.png[/img][/TD] [TD]Helix Fossil[/TD] [TD]Intermediate[/TD] [/TR] [TR] [TD]alt=Dread Plate.pnghttp://prowiki.info/images/4/43/Dread_Plate.png[/img][/TD] [TD]Dread Plate[/TD] [TD]Very Rare[/TD] [/TR] [/TABLE] Pokemon: [TABLE] [TR] [TH][/TH] [TH]Pokémon[/TH] [TH]Rarity[/TH] [/TR] [TR] [TD]alt=95Icon.pnghttp://prowiki.info/images/2/22/95Icon.png[/img][/TD] [TD]Onix[/TD] [TD]Uncommon[/TD] [/TR] [TR] [TD]alt=618Icon.pnghttp://prowiki.info/images/0/0e/618Icon.png[/img][/TD] [TD]Stunfisk[/TD] [TD]Rare[/TD] [/TR] [TR] [TD]alt=246Icon.pnghttp://prowiki.info/images/a/a8/246Icon.png[/img][/TD] [TD]Larvitar[/TD] [TD]Very Rare[/TD] [/TR] [/TABLE] Area:Rock Tunnel (Nearby the northern Route 10 entryway on 1F.) Patches:6 Items: [TABLE] [TR] [TH][/TH] [TH]Item[/TH] [TH]Rarity[/TH] [/TR] [TR] [TD]alt=Pokéball.pnghttp://prowiki.info/images/b/b1/Pok%C3%A9ball.png[/img][/TD] [TD]Pokeball[/TD] [TD]Common[/TD] [/TR] [TR] [TD][/TD] [TD]Electric Gem[/TD] [TD]Common[/TD] [/TR] [TR] [TD]alt=Nugget.pnghttp://prowiki.info/images/f/f0/Nugget.png[/img][/TD] [TD]Nugget[/TD] [TD]Uncommon[/TD] [/TR] [TR] [TD]alt=Rare Candy.pnghttp://prowiki.info/images/a/a2/Rare_Candy.png[/img][/TD] [TD]Rare Candy[/TD] [TD]Uncommon[/TD] [/TR] [TR] [TD]alt=Level Ball.pnghttp://prowiki.info/images/5/5b/Level_Ball.png[/img][/TD] [TD]Level Ball[/TD] [TD]Intermediate[/TD] [/TR] [TR] [TD]alt=Net Ball.pnghttp://prowiki.info/images/b/bb/Net_Ball.png[/img][/TD] [TD]Net Ball[/TD] [TD]Intermediate[/TD] [/TR] [TR] [TD]alt=Moon Ball.pnghttp://prowiki.info/images/b/b0/Moon_Ball.png[/img][/TD] [TD]Moon Ball[/TD] [TD]Intermediate[/TD] [/TR] [TR] [TD]alt=Carbos.pnghttp://prowiki.info/images/f/fe/Carbos.png[/img][/TD] [TD]Carbos[/TD] [TD]Rare[/TD] [/TR] [TR] [TD]alt=Old Amber.pnghttp://prowiki.info/images/f/fc/Old_Amber.png[/img][/TD] [TD]Old Amber[/TD] [TD]Intermediate[/TD] [/TR] [TR] [TD]alt=Helix Fossil.pnghttp://prowiki.info/images/d/d2/Helix_Fossil.png[/img][/TD] [TD]Helix Fossil[/TD] [TD]Intermediate[/TD] [/TR] [TR] [TD][/TD] [TD]Earth Plate[/TD] [TD]Very Rare[/TD] [/TR] [/TABLE] Pokemon: [TABLE] [TR] [TH][/TH] [TH]Pokémon[/TH] [TH]Rarity[/TH] [/TR] [TR] [TD]alt=50Icon.pnghttp://prowiki.info/images/b/b9/50Icon.png[/img][/TD] [TD]Diglett[/TD] [TD]Uncommon[/TD] [/TR] [TR] [TD]alt=75Icon.pnghttp://prowiki.info/images/1/14/75Icon.png[/img][/TD] [TD]Graveler[/TD] [TD]Rare[/TD] [/TR] [TR] [TD]alt=343Icon.pnghttp://prowiki.info/images/7/72/343Icon.png[/img][/TD] [TD]Baltoy[/TD] [TD]Very Rare[/TD] [/TR] [/TABLE] Area:Rock Tunnel (patches near the southernmost stairways on the basement floor.) Patches:8 Item: [TABLE] [TR] [TH][/TH] [TH]Item[/TH] [TH]Rarity[/TH] [/TR] [TR] [TD]alt=Pokéball.pnghttp://prowiki.info/images/b/b1/Pok%C3%A9ball.png[/img][/TD] [TD]Pokeball[/TD] [TD]Common[/TD] [/TR] [TR] [TD][/TD] [TD]Fairy Gem[/TD] [TD]Common[/TD] [/TR] [TR] [TD]alt=Star Piece.pnghttp://prowiki.info/images/6/6a/Star_Piece.png[/img][/TD] [TD]Star Piece[/TD] [TD]Uncommon[/TD] [/TR] [TR] [TD]alt=Revive.pnghttp://prowiki.info/images/1/13/Revive.png[/img][/TD] [TD]Revive[/TD] [TD]Uncommon[/TD] [/TR] [TR] [TD]alt=Hard Stone.pnghttp://prowiki.info/images/5/59/Hard_Stone.png[/img][/TD] [TD]Hard Stone[/TD] [TD]Intermediate[/TD] [/TR] [TR] [TD]alt=Moon Stone.pnghttp://prowiki.info/images/3/35/Moon_Stone.png[/img][/TD] [TD]Moon Stone[/TD] [TD]Intermediate[/TD] [/TR] [TR] [TD]alt=Leftovers.pnghttp://prowiki.info/images/7/7f/Leftovers.png[/img][/TD] [TD]Leftovers[/TD] [TD]Intermediate[/TD] [/TR] [TR] [TD]alt=Iron.pnghttp://prowiki.info/images/4/45/Iron.png[/img][/TD] [TD]Iron[/TD] [TD]Rare[/TD] [/TR] [TR] [TD]alt=Dome Fossil.pnghttp://prowiki.info/images/5/52/Dome_Fossil.png[/img][/TD] [TD]Dome Fossil[/TD] [TD]Intermediate[/TD] [/TR] [TR] [TD]alt=Helix Fossil.pnghttp://prowiki.info/images/d/d2/Helix_Fossil.png[/img][/TD] [TD]Helix Fossil[/TD] [TD]Intermediate[/TD] [/TR] [TR] [TD][/TD] [TD]Fist Plate[/TD] [TD]Very Rare[/TD] [/TR] [/TABLE] Pokemon: [TABLE] [TR] [TH][/TH] [TH]Pokémon[/TH] [TH]Rarity[/TH] [/TR] [TR] [TD]alt=436Icon.pnghttp://prowiki.info/images/e/e6/436Icon.png[/img][/TD] [TD]Bronzor[/TD] [TD]Uncommon[/TD] [/TR] [TR] [TD]alt=343Icon.pnghttp://prowiki.info/images/7/72/343Icon.png[/img][/TD] [TD]Baltoy[/TD] [TD]Rare[/TD] [/TR] [TR] [TD]alt=304Icon.pnghttp://prowiki.info/images/3/31/304Icon.png[/img][/TD] [TD]Aron[/TD] [TD]Very Rare[/TD] [/TR] [/TABLE] Area:Dark Cave South (northwesternmost patches from Route 46's entryway.) Patches:3 Items: [TABLE] [TR] [TH][/TH] [TH]Item[/TH] [TH]Rarity[/TH] [/TR] [TR] [TD]alt=Pokéball.pnghttps://prowiki.info/images/b/b1/Pok%C3%A9ball.png[/img][/TD] [TD]Pokeball[/TD] [TD]Common[/TD] [/TR] [TR] [TD][/TD] [TD]Ground Gem[/TD] [TD]Common[/TD] [/TR] [TR] [TD]alt=Soda Pop.pnghttps://prowiki.info/images/6/6a/Soda_Pop.png[/img][/TD] [TD]Soda Pop[/TD] [TD]Uncommon[/TD] [/TR] [TR] [TD]alt=Paralyze Heal.pnghttps://prowiki.info/images/d/d6/Paralyze_Heal.png[/img][/TD] [TD]Paralyze Heal[/TD] [TD]Uncommon[/TD] [/TR] [TR] [TD]alt=Reaper Cloth.pnghttps://prowiki.info/images/d/d5/Reaper_Cloth.png[/img][/TD] [TD]Reaper Cloth[/TD] [TD]Intermediate[/TD] [/TR] [TR] [TD]alt=Leftovers.pnghttps://prowiki.info/images/7/7f/Leftovers.png[/img][/TD] [TD]Leftovers[/TD] [TD]Intermediate[/TD] [/TR] [TR] [TD]alt=Lure Ball.pnghttps://prowiki.info/images/0/0a/Lure_Ball.png[/img][/TD] [TD]Lure Ball[/TD] [TD]Intermediate[/TD] [/TR] [TR] [TD]alt=Calcium.pnghttps://prowiki.info/images/f/f5/Calcium.png[/img][/TD] [TD]Calcium[/TD] [TD]Rare[/TD] [/TR] [TR] [TD]alt=Root Fossil.pnghttps://prowiki.info/images/7/7d/Root_Fossil.png[/img][/TD] [TD]Root Fossil[/TD] [TD]Intermediate[/TD] [/TR] [TR] [TD]alt=Claw Fossil.pnghttps://prowiki.info/images/3/3e/Claw_Fossil.png[/img][/TD] [TD]Claw Fossil[/TD] [TD]Intermediate[/TD] [/TR] [TR] [TD]alt=Meadow Plate.pnghttps://prowiki.info/images/2/2e/Meadow_Plate.png[/img][/TD] [TD]Meadow Plate[/TD] [TD]Very Rare[/TD] [/TR] [/TABLE] Pokemon: [TABLE] [TR] [TH][/TH] [TH]Pokémon[/TH] [TH]Rarity[/TH] [/TR] [TR] [TD]alt=95Icon.pnghttps://prowiki.info/images/2/22/95Icon.png[/img][/TD] [TD]Onix[/TD] [TD]Uncommon[/TD] [/TR] [TR] [TD]alt=299Icon.pnghttps://prowiki.info/images/d/d8/299Icon.png[/img][/TD] [TD]Nosepass[/TD] [TD]Rare[/TD] [/TR] [TR] [TD]alt=679Icon.pnghttps://prowiki.info/images/1/12/679Icon.png[/img][/TD] [TD]Honedge[/TD] [TD]Very Rare[/TD] [/TR] [/TABLE] Area:Mt. Mortar (The area from Route 42's eastern entryway on 1F, The allotment north of Route 42's centric entryway on 1F and The allotments north of the entryway near the berry-tree plants on Route 42.} Patches:11 Item: [TABLE] [TR] [TH][/TH] [TH]Item[/TH] [TH]Rarity[/TH] [/TR] [TR] [TD]alt=Pokéball.pnghttps://prowiki.info/images/b/b1/Pok%C3%A9ball.png[/img][/TD] [TD]Pokeball[/TD] [TD]Common[/TD] [/TR] [TR] [TD][/TD] [TD]Ice Gem[/TD] [TD]Common[/TD] [/TR] [TR] [TD][/TD] [TD]Star Dust[/TD] [TD]Uncommon[/TD] [/TR] [TR] [TD]alt=Revival Herb.pnghttps://prowiki.info/images/4/45/Revival_Herb.png[/img][/TD] [TD]Revival Herb[/TD] [TD]Uncommon[/TD] [/TR] [TR] [TD]alt=Lure Ball.pnghttps://prowiki.info/images/0/0a/Lure_Ball.png[/img][/TD] [TD]Lure Ball[/TD] [TD]Intermediate[/TD] [/TR] [TR] [TD]alt=Sun Stone.pnghttps://prowiki.info/images/0/0a/Sun_Stone.png[/img][/TD] [TD]Sun Stone[/TD] [TD]Intermediate[/TD] [/TR] [TR] [TD]alt=Dawn Stone.pnghttps://prowiki.info/images/d/d3/Dawn_Stone.png[/img][/TD] [TD]Dawn Stone[/TD] [TD]Intermediate[/TD] [/TR] [TR] [TD]alt=Protein.pnghttps://prowiki.info/images/d/d8/Protein.png[/img][/TD] [TD]Protein[/TD] [TD]Rare[/TD] [/TR] [TR] [TD]alt=Root Fossil.pnghttps://prowiki.info/images/7/7d/Root_Fossil.png[/img][/TD] [TD]Root Fossil[/TD] [TD]Intermediate[/TD] [/TR] [TR] [TD]alt=Claw Fossil.pnghttps://prowiki.info/images/3/3e/Claw_Fossil.png[/img][/TD] [TD]Claw Fossil[/TD] [TD]Intermediate[/TD] [/TR] [TR] [TD][/TD] [TD]Splash Plate[/TD] [TD]Very Rare[/TD] [/TR] [/TABLE] Pokemon: [TABLE] [TR] [TH][/TH] [TH]Pokémon[/TH] [TH]Rarity[/TH] [/TR] [TR] [TD]alt=74Icon.pnghttps://prowiki.info/images/e/e8/74Icon.png[/img][/TD] [TD]Geodude[/TD] [TD]Uncommon[/TD] [/TR] [TR] [TD]alt=618Icon.pnghttps://prowiki.info/images/0/0e/618Icon.png[/img][/TD] [TD]Stunfisk[/TD] [TD]Rare[/TD] [/TR] [TR] [TD]alt=529Icon.pnghttps://prowiki.info/images/d/d4/529Icon.png[/img][/TD] [TD]Drilbur[/TD] [TD]Very Rare[/TD] [/TR] [/TABLE] Area:Slowpoke Well (All Patches on 1F.) Patches:12 Items: [TABLE] [TR] [TH][/TH] [TH]Item[/TH] [TH]Rarity[/TH] [/TR] [TR] [TD]alt=Pokéball.pnghttps://prowiki.info/images/b/b1/Pok%C3%A9ball.png[/img][/TD] [TD]Pokeball[/TD] [TD]Common[/TD] [/TR] [TR] [TD][/TD] [TD]Ghost Gem[/TD] [TD]Common[/TD] [/TR] [TR] [TD]alt=Nugget.pnghttps://prowiki.info/images/f/f0/Nugget.png[/img][/TD] [TD]Nugget[/TD] [TD]Uncommon[/TD] [/TR] [TR] [TD]alt=Soda Pop.pnghttps://prowiki.info/images/6/6a/Soda_Pop.png[/img][/TD] [TD]Soda Pop[/TD] [TD]Uncommon[/TD] [/TR] [TR] [TD]alt=Fast Ball.pnghttps://prowiki.info/images/f/f8/Fast_Ball.png[/img][/TD] [TD]Fast Ball[/TD] [TD]Intermediate[/TD] [/TR] [TR] [TD]alt=Nest Ball.pnghttps://prowiki.info/images/a/a6/Nest_Ball.png[/img][/TD] [TD]Nest Ball[/TD] [TD]Intermediate[/TD] [/TR] [TR] [TD]alt=Leftovers.pnghttps://prowiki.info/images/7/7f/Leftovers.png[/img][/TD] [TD]Leftovers[/TD] [TD]Intermediate[/TD] [/TR] [TR] [TD]alt=Calcium.pnghttps://prowiki.info/images/f/f5/Calcium.png[/img][/TD] [TD]Calcium[/TD] [TD]Rare[/TD] [/TR] [TR] [TD]alt=Root Fossil.pnghttps://prowiki.info/images/7/7d/Root_Fossil.png[/img][/TD] [TD]Root Fossil[/TD] [TD]Intermediate[/TD] [/TR] [TR] [TD]alt=Claw Fossil.pnghttps://prowiki.info/images/3/3e/Claw_Fossil.png[/img][/TD] [TD]Claw Fossil[/TD] [TD]Intermediate[/TD] [/TR] [TR] [TD][/TD] [TD]Insect Plate[/TD] [TD]Very Rare[/TD] [/TR] [/TABLE] Pokemon: [TABLE] [TR] [TH][/TH] [TH]Pokémon[/TH] [TH]Rarity[/TH] [/TR] [TR] [TD]alt=74Icon.pnghttps://prowiki.info/images/e/e8/74Icon.png[/img][/TD] [TD]Geodude[/TD] [TD]Uncommon[/TD] [/TR] [TR] [TD]alt=618Icon.pnghttps://prowiki.info/images/0/0e/618Icon.png[/img][/TD] [TD]Stunfisk[/TD] [TD]Rare[/TD] [/TR] [TR] [TD]alt=524Icon.pnghttps://prowiki.info/images/c/cc/524Icon.png[/img][/TD] [TD]Roggenrola[/TD] [TD]Very Rare[/TD] [/TR] [/TABLE] Area:Slowpoke Well (All Patches on L1.) Patches:8 Items: [TABLE] [TR] [TH][/TH] [TH]Item[/TH] [TH]Rarity[/TH] [/TR] [TR] [TD]alt=Pokéball.pnghttps://prowiki.info/images/b/b1/Pok%C3%A9ball.png[/img][/TD] [TD]Pokeball[/TD] [TD]Common[/TD] [/TR] [TR] [TD][/TD] [TD]Grass Gem[/TD] [TD]Common[/TD] [/TR] [TR] [TD]alt=Potion.pnghttps://prowiki.info/images/7/7a/Potion.png[/img][/TD] [TD]Potion[/TD] [TD]Uncommon[/TD] [/TR] [TR] [TD]alt=Paralyze Heal.pnghttps://prowiki.info/images/d/d6/Paralyze_Heal.png[/img][/TD] [TD]Paralyze Heal[/TD] [TD]Uncommon[/TD] [/TR] [TR] [TD]alt=Leftovers.pnghttps://prowiki.info/images/7/7f/Leftovers.png[/img][/TD] [TD]Leftovers[/TD] [TD]Intermediate[/TD] [/TR] [TR] [TD]alt=Dusk Stone.pnghttps://prowiki.info/images/3/39/Dusk_Stone.png[/img][/TD] [TD]Dusk Stone[/TD] [TD]Intermediate[/TD] [/TR] [TR] [TD]alt=Friend Ball.pnghttps://prowiki.info/images/3/30/Friend_Ball.png[/img][/TD] [TD]Friend Ball[/TD] [TD]Intermediate[/TD] [/TR] [TR] [TD]alt=Protein.pnghttps://prowiki.info/images/d/d8/Protein.png[/img][/TD] [TD]Protein[/TD] [TD]Rare[/TD] [/TR] [TR] [TD]alt=Root Fossil.pnghttps://prowiki.info/images/7/7d/Root_Fossil.png[/img][/TD] [TD]Root Fossil[/TD] [TD]Intermediate[/TD] [/TR] [TR] [TD]alt=Claw Fossil.pnghttps://prowiki.info/images/3/3e/Claw_Fossil.png[/img][/TD] [TD]Claw Fossil[/TD] [TD]Intermediate[/TD] [/TR] [TR] [TD][/TD] [TD]Iron Plate[/TD] [TD]Very Rare[/TD] [/TR] [/TABLE] Pokemon: [TABLE] [TR] [TH][/TH] [TH]Pokémon[/TH] [TH]Rarity[/TH] [/TR] [TR] [TD]alt=74Icon.pnghttps://prowiki.info/images/e/e8/74Icon.png[/img][/TD] [TD]Geodude[/TD] [TD]Uncommon[/TD] [/TR] [TR] [TD]alt=231Icon.pnghttps://prowiki.info/images/7/7f/231Icon.png[/img][/TD] [TD]Phanpy[/TD] [TD]Rare[/TD] [/TR] [TR] [TD]alt=449Icon.pnghttps://prowiki.info/images/4/45/449Icon.png[/img][/TD] [TD]Hippopotas[/TD] [TD]Very Rare[/TD] [/TR] [/TABLE] Area:Maniac Tunnel (East side of Maniac Tunnel located South of Veilstone City.) Patches:6 Items: [TABLE] [TR] [TH][/TH] [TH]Item[/TH] [TH]Rarity[/TH] [/TR] [TR] [TD]alt=Pokéball.pnghttps://prowiki.info/images/b/b1/Pok%C3%A9ball.png[/img][/TD] [TD]Pokéball[/TD] [TD]Common[/TD] [/TR] [TR] [TD][/TD] [TD]Normal Gem[/TD] [TD]Common[/TD] [/TR] [TR] [TD]alt=Ether.pnghttps://prowiki.info/images/3/3c/Ether.png[/img][/TD] [TD]Ether[/TD] [TD]Uncommon[/TD] [/TR] [TR] [TD]alt=Antidote.pnghttps://prowiki.info/images/7/71/Antidote.png[/img][/TD] [TD]Antidote[/TD] [TD]Uncommon[/TD] [/TR] [TR] [TD]alt=Ultra Ball.pnghttps://prowiki.info/images/3/34/Ultra_Ball.png[/img][/TD] [TD]Ultra Ball[/TD] [TD]Intermediate[/TD] [/TR] [TR] [TD]alt=Friend Ball.pnghttps://prowiki.info/images/3/30/Friend_Ball.png[/img][/TD] [TD]Friend Ball[/TD] [TD]Intermediate[/TD] [/TR] [TR] [TD]alt=Reaper Cloth.pnghttps://prowiki.info/images/d/d5/Reaper_Cloth.png[/img][/TD] [TD]Reaper Cloth[/TD] [TD]Intermediate[/TD] [/TR] [TR] [TD]alt=Zinc.pnghttps://prowiki.info/images/c/cb/Zinc.png[/img][/TD] [TD]Zinc[/TD] [TD]Rare[/TD] [/TR] [TR] [TD]alt=Jaw Fossil.pnghttps://prowiki.info/images/4/47/Jaw_Fossil.png[/img][/TD] [TD]Jaw Fossil[/TD] [TD]Intermediate[/TD] [/TR] [TR] [TD]alt=Sail Fossil.pnghttps://prowiki.info/images/1/1a/Sail_Fossil.png[/img][/TD] [TD]Sail Fossil[/TD] [TD]Intermediate[/TD] [/TR] [TR] [TD][/TD] [TD]Spooky Plate[/TD] [TD]Very Rare[/TD] [/TR] [/TABLE] Pokemon: [TABLE] [TR] [TH][/TH] [TH]Pokémon[/TH] [TH]Rarity[/TH] [/TR] [TR] [TD]alt=95Icon.pnghttps://prowiki.info/images/2/22/95Icon.png[/img][/TD] [TD]Onix[/TD] [TD]Uncommon[/TD] [/TR] [TR] [TD]alt=231Icon.pnghttps://prowiki.info/images/7/7f/231Icon.png[/img][/TD] [TD]Phanpy[/TD] [TD]Rare[/TD] [/TR] [TR] [TD]alt=246Icon.pnghttps://prowiki.info/images/a/a8/246Icon.png[/img][/TD] [TD]Larvitar[/TD] [TD]Very Rare[/TD] [/TR] [/TABLE] Area:Mt. Coronet Summit (South side of Mt. Coronet Summit.) Patches:5 Items: [TABLE] [TR] [TH][/TH] [TH]Item[/TH] [TH]Rarity[/TH] [/TR] [TR] [TD]alt=Pokéball.pnghttps://prowiki.info/images/b/b1/Pok%C3%A9ball.png[/img][/TD] [TD]Pokéball[/TD] [TD]Common[/TD] [/TR] [TR] [TD][/TD] [TD]Poison Gem[/TD] [TD]Common[/TD] [/TR] [TR] [TD]alt=Antidote.pnghttps://prowiki.info/images/7/71/Antidote.png[/img][/TD] [TD]Antidote[/TD] [TD]Uncommon[/TD] [/TR] [TR] [TD]alt=Ice Heal.pnghttps://prowiki.info/images/4/41/Ice_Heal.png[/img][/TD] [TD]Ice Heal[/TD] [TD]Uncommon[/TD] [/TR] [TR] [TD]alt=Everstone.pnghttps://prowiki.info/images/8/86/Everstone.png[/img][/TD] [TD]Everstone[/TD] [TD]Intermediate[/TD] [/TR] [TR] [TD]alt=Leftovers.pnghttps://prowiki.info/images/7/7f/Leftovers.png[/img][/TD] [TD]Leftovers[/TD] [TD]Intermediate[/TD] [/TR] [TR] [TD]alt=Soft Sand.pnghttps://prowiki.info/images/e/e9/Soft_Sand.png[/img][/TD] [TD]Soft Sand[/TD] [TD]Intermediate[/TD] [/TR] [TR] [TD]alt=Zinc.pnghttps://prowiki.info/images/c/cb/Zinc.png[/img][/TD] [TD]Zinc[/TD] [TD]Rare[/TD] [/TR] [TR] [TD]alt=Jaw Fossil.pnghttps://prowiki.info/images/4/47/Jaw_Fossil.png[/img][/TD] [TD]Jaw Fossil[/TD] [TD]Intermediate[/TD] [/TR] [TR] [TD]alt=Sail Fossil.pnghttps://prowiki.info/images/1/1a/Sail_Fossil.png[/img][/TD] [TD]Sail Fossil[/TD] [TD]Intermediate[/TD] [/TR] [TR] [TD][/TD] [TD]Stone Plate[/TD] [TD]Very Rare[/TD] [/TR] [/TABLE] Pokemon: [TABLE] [TR] [TH][/TH] [TH]Pokémon[/TH] [TH]Rarity[/TH] [/TR] [TR] [TD]alt=75Icon.pnghttps://prowiki.info/images/1/14/75Icon.png[/img][/TD] [TD]Graveler[/TD] [TD]Uncommon[/TD] [/TR] [TR] [TD]alt=343Icon.pnghttps://prowiki.info/images/7/72/343Icon.png[/img][/TD] [TD]Baltoy[/TD] [TD]Rare[/TD] [/TR] [TR] [TD]alt=529Icon.pnghttps://prowiki.info/images/d/d4/529Icon.png[/img][/TD] [TD]Drilbur[/TD] [TD]Very Rare[/TD] [/TR] [/TABLE] Area:Oreburgh Gate B1F. (West of Oreburgh city, enter to Oreburgh Gate B1F and surf to access to the Dig Spots.) Patches:5 Items: [TABLE] [TR] [TH][/TH] [TH]Item[/TH] [TH]Rarity[/TH] [/TR] [TR] [TD]alt=Pokéball.pnghttps://prowiki.info/images/b/b1/Pok%C3%A9ball.png[/img][/TD] [TD]Pokéball[/TD] [TD]Common[/TD] [/TR] [TR] [TD][/TD] [TD]Psychic Gem[/TD] [TD]Common[/TD] [/TR] [TR] [TD]alt=Elixir.pnghttps://prowiki.info/images/4/43/Elixir.png[/img][/TD] [TD]Elixir[/TD] [TD]Uncommon[/TD] [/TR] [TR] [TD]alt=Ice Heal.pnghttps://prowiki.info/images/4/41/Ice_Heal.png[/img][/TD] [TD]Ice Heal[/TD] [TD]Uncommon[/TD] [/TR] [TR] [TD]alt=Dawn Stone.pnghttps://prowiki.info/images/d/d3/Dawn_Stone.png[/img][/TD] [TD]Dawn Stone[/TD] [TD]Intermediate[/TD] [/TR] [TR] [TD]alt=Ultra Ball.pnghttps://prowiki.info/images/3/34/Ultra_Ball.png[/img][/TD] [TD]Ultra Ball[/TD] [TD]Intermediate[/TD] [/TR] [TR] [TD]alt=Net Ball.pnghttps://prowiki.info/images/b/bb/Net_Ball.png[/img][/TD] [TD]Net Ball[/TD] [TD]Intermediate[/TD] [/TR] [TR] [TD]alt=PP Up.pnghttps://prowiki.info/images/d/d2/PP_Up.png[/img][/TD] [TD]PP Up[/TD] [TD]Rare[/TD] [/TR] [TR] [TD]alt=Jaw Fossil.pnghttps://prowiki.info/images/4/47/Jaw_Fossil.png[/img][/TD] [TD]Jaw Fossil[/TD] [TD]Intermediate[/TD] [/TR] [TR] [TD]alt=Sail Fossil.pnghttps://prowiki.info/images/1/1a/Sail_Fossil.png[/img][/TD] [TD]Sail Fossil[/TD] [TD]Intermediate[/TD] [/TR] [TR] [TD][/TD] [TD]Toxic Plate[/TD] [TD]Very Rare[/TD] [/TR] [/TABLE] Pokemon: [TABLE] [TR] [TH][/TH] [TH]Pokémon[/TH] [TH]Rarity[/TH] [/TR] [TR] [TD]alt=618Icon.pnghttps://prowiki.info/images/0/0e/618Icon.png[/img][/TD] [TD]Stunfisk[/TD] [TD]Uncommon[/TD] [/TR] [TR] [TD]alt=299Icon.pnghttps://prowiki.info/images/d/d8/299Icon.png[/img][/TD] [TD]Nosepass[/TD] [TD]Rare[/TD] [/TR] [TR] [TD]alt=524Icon.pnghttps://prowiki.info/images/c/cc/524Icon.png[/img][/TD] [TD]Roggenrola[/TD] [TD]Very Rare[/TD] [/TR] [/TABLE] Area:Ravaged Path. (North of Jubilife city, enter to Ravaged Path and surf to access to the Dig Spots.) Patches:4 Items: [TABLE] [TR] [TH][/TH] [TH]Item[/TH] [TH]Rarity[/TH] [/TR] [TR] [TD]alt=Pokéball.pnghttps://prowiki.info/images/b/b1/Pok%C3%A9ball.png[/img][/TD] [TD]Pokéball[/TD] [TD]Common[/TD] [/TR] [TR] [TD][/TD] [TD]Rock Gem[/TD] [TD]Common[/TD] [/TR] [TR] [TD]alt=Stardust.pnghttps://prowiki.info/images/6/65/Stardust.png[/img][/TD] [TD]Stardust[/TD] [TD]Uncommon[/TD] [/TR] [TR] [TD]alt=Burn Heal.pnghttps://prowiki.info/images/1/10/Burn_Heal.png[/img][/TD] [TD]Burn Heal[/TD] [TD]Uncommon[/TD] [/TR] [TR] [TD]alt=Dusk Stone.pnghttps://prowiki.info/images/3/39/Dusk_Stone.png[/img][/TD] [TD]Dusk Stone[/TD] [TD]Intermediate[/TD] [/TR] [TR] [TD]alt=Soft Sand.pnghttps://prowiki.info/images/e/e9/Soft_Sand.png[/img][/TD] [TD]Soft Sand[/TD] [TD]Intermediate[/TD] [/TR] [TR] [TD]alt=Net Ball.pnghttps://prowiki.info/images/b/bb/Net_Ball.png[/img][/TD] [TD]Net Ball[/TD] [TD]Intermediate[/TD] [/TR] [TR] [TD]alt=HP Up.pnghttps://prowiki.info/images/1/1e/HP_Up.png[/img][/TD] [TD]HP Up[/TD] [TD]Rare[/TD] [/TR] [TR] [TD]alt=Jaw Fossil.pnghttps://prowiki.info/images/4/47/Jaw_Fossil.png[/img][/TD] [TD]Jaw Fossil[/TD] [TD]Intermediate[/TD] [/TR] [TR] [TD]alt=Sail Fossil.pnghttps://prowiki.info/images/1/1a/Sail_Fossil.png[/img][/TD] [TD]Sail Fossil[/TD] [TD]Intermediate[/TD] [/TR] [TR] [TD][/TD] [TD]Zap Plate[/TD] [TD]Very Rare[/TD] [/TR] [/TABLE] Pokemon: [TABLE] [TR] [TH][/TH] [TH]Pokémon[/TH] [TH]Rarity[/TH] [/TR] [TR] [TD]alt=27Icon.pnghttps://prowiki.info/images/c/cf/27Icon.png[/img][/TD] [TD]Sandshrew[/TD] [TD]Uncommon[/TD] [/TR] [TR] [TD]alt=231Icon.pnghttps://prowiki.info/images/7/7f/231Icon.png[/img][/TD] [TD]Phanpy[/TD] [TD]Rare[/TD] [/TR] [TR] [TD]alt=304Icon.pnghttps://prowiki.info/images/3/31/304Icon.png[/img][/TD] [TD]Aron[/TD] [TD]Very Rare[/TD] [/TR] [/TABLE] Area:Route 209. (South of Soleceon Town) Patches:5 Items: [TABLE] [TR] [TH][/TH] [TH]Item[/TH] [TH]Rarity[/TH] [/TR] [TR] [TD]alt=Pokéball.pnghttps://prowiki.info/images/b/b1/Pok%C3%A9ball.png[/img][/TD] [TD]Pokéball[/TD] [TD]Common[/TD] [/TR] [TR] [TD][/TD] [TD]Steel Gem[/TD] [TD]Common[/TD] [/TR] [TR] [TD]alt=Nugget.pnghttps://prowiki.info/images/f/f0/Nugget.png[/img][/TD] [TD]Nugget[/TD] [TD]Uncommon[/TD] [/TR] [TR] [TD]alt=Burn Heal.pnghttps://prowiki.info/images/1/10/Burn_Heal.png[/img][/TD] [TD]Burn Heal[/TD] [TD]Uncommon[/TD] [/TR] [TR] [TD]alt=Everstone.pnghttps://prowiki.info/images/8/86/Everstone.png[/img][/TD] [TD]Everstone[/TD] [TD]Intermediate[/TD] [/TR] [TR] [TD]alt=Great Ball.pnghttps://prowiki.info/images/4/45/Great_Ball.png[/img][/TD] [TD]Great Ball[/TD] [TD]Intermediate[/TD] [/TR] [TR] [TD]alt=Repeat Ball.pnghttps://prowiki.info/images/7/75/Repeat_Ball.png[/img][/TD] [TD]Repeat Ball[/TD] [TD]Intermediate[/TD] [/TR] [TR] [TD]alt=PP Up.pnghttps://prowiki.info/images/d/d2/PP_Up.png[/img][/TD] [TD]PP Up[/TD] [TD]Rare[/TD] [/TR] [TR] [TD]alt=Jaw Fossil.pnghttps://prowiki.info/images/4/47/Jaw_Fossil.png[/img][/TD] [TD]Jaw Fossil[/TD] [TD]Intermediate[/TD] [/TR] [TR] [TD]alt=Sail Fossil.pnghttps://prowiki.info/images/1/1a/Sail_Fossil.png[/img][/TD] [TD]Sail Fossil[/TD] [TD]Intermediate[/TD] [/TR] [TR] [TD][/TD] [TD]Mind Plate[/TD] [TD]Very Rare[/TD] [/TR] [/TABLE] Pokemon: [TABLE] [TR] [TH][/TH] [TH]Pokémon[/TH] [TH]Rarity[/TH] [/TR] [TR] [TD]alt=27Icon.pnghttps://prowiki.info/images/c/cf/27Icon.png[/img][/TD] [TD]Sandshrew[/TD] [TD]Uncommon[/TD] [/TR] [TR] [TD]alt=299Icon.pnghttps://prowiki.info/images/d/d8/299Icon.png[/img][/TD] [TD]Nosepass[/TD] [TD]Rare[/TD] [/TR] [TR] [TD]alt=328Icon.pnghttps://prowiki.info/images/a/af/328Icon.png[/img][/TD] [TD]Trapinch[/TD] [TD]Very Rare[/TD] [/TR] [/TABLE] Area:Route 210 North. (East of Celestic Town) Patches:5 Items: [TABLE] [TR] [TH][/TH] [TH]Item[/TH] [TH]Rarity[/TH] [/TR] [TR] [TD]alt=Pokéball.pnghttps://prowiki.info/images/b/b1/Pok%C3%A9ball.png[/img][/TD] [TD]Pokéball[/TD] [TD]Common[/TD] [/TR] [TR] [TD][/TD] [TD]Water Gem[/TD] [TD]Common[/TD] [/TR] [TR] [TD]alt=Elixir.pnghttps://prowiki.info/images/4/43/Elixir.png[/img][/TD] [TD]Elixir[/TD] [TD]Uncommon[/TD] [/TR] [TR] [TD]alt=Awakening.pnghttps://prowiki.info/images/b/b7/Awakening.png[/img][/TD] [TD]Awakening[/TD] [TD]Uncommon[/TD] [/TR] [TR] [TD]alt=Oval Stone.pnghttps://prowiki.info/images/2/24/Oval_Stone.png[/img][/TD] [TD]Oval Stone[/TD] [TD]Intermediate[/TD] [/TR] [TR] [TD]alt=Dawn Stone.pnghttps://prowiki.info/images/d/d3/Dawn_Stone.png[/img][/TD] [TD]Dawn Stone[/TD] [TD]Intermediate[/TD] [/TR] [TR] [TD]alt=Soft Sand.pnghttps://prowiki.info/images/e/e9/Soft_Sand.png[/img][/TD] [TD]Soft Sand[/TD] [TD]Intermediate[/TD] [/TR] [TR] [TD]alt=PP Max.pnghttps://prowiki.info/images/2/23/PP_Max.png[/img][/TD] [TD]PP Max[/TD] [TD]Rare[/TD] [/TR] [TR] [TD]alt=Jaw Fossil.pnghttps://prowiki.info/images/4/47/Jaw_Fossil.png[/img][/TD] [TD]Jaw Fossil[/TD] [TD]Intermediate[/TD] [/TR] [TR] [TD]alt=Sail Fossil.pnghttps://prowiki.info/images/1/1a/Sail_Fossil.png[/img][/TD] [TD]Sail Fossil[/TD] [TD]Intermediate[/TD] [/TR] [TR] [TD]alt=Big Nugget.pnghttps://prowiki.info/images/d/d9/Big_Nugget.png[/img][/TD] [TD]Big Nugget[/TD] [TD]Very Rare[/TD] [/TR] [/TABLE] Pokemon: [TABLE] [TR] [TH][/TH] [TH]Pokémon[/TH] [TH]Rartity[/TH] [/TR] [TR] [TD]alt=27Icon.pnghttps://prowiki.info/images/c/cf/27Icon.png[/img][/TD] [TD]Sandshrew[/TD] [TD]Uncommon[/TD] [/TR] [TR] [TD]alt=231Icon.pnghttps://prowiki.info/images/7/7f/231Icon.png[/img][/TD] [TD]Phanpy[/TD] [TD]Rare[/TD] [/TR] [TR] [TD]alt=449Icon.pnghttps://prowiki.info/images/4/45/449Icon.png[/img][/TD] [TD]Hippopotas[/TD] [TD]Very Rare[/TD] [/TR] [/TABLE] Area:Route 211 (Dig Spots divided in 2 sides: East of Eterna City and West of Celestic Town.) Patches:6 Items: [TABLE] [TR] [TH][/TH] [TH]Item[/TH] [TH]Rarity[/TH] [/TR] [TR] [TD]alt=Pokéball.pnghttps://prowiki.info/images/b/b1/Pok%C3%A9ball.png[/img][/TD] [TD]Pokéball[/TD] [TD]Common[/TD] [/TR] [TR] [TD]alt=Rare Candy.pnghttps://prowiki.info/images/a/a2/Rare_Candy.png[/img][/TD] [TD]Rare Candy[/TD] [TD]Common[/TD] [/TR] [TR] [TD]alt=Full Heal.pnghttps://prowiki.info/images/9/9c/Full_Heal.png[/img][/TD] [TD]Full Heal[/TD] [TD]Uncommon[/TD] [/TR] [TR] [TD]alt=Full Restore.pnghttps://prowiki.info/images/c/c3/Full_Restore.png[/img][/TD] [TD]Full Restore[/TD] [TD]Uncommon[/TD] [/TR] [TR] [TD]alt=Oval Stone.pnghttps://prowiki.info/images/2/24/Oval_Stone.png[/img][/TD] [TD]Oval Stone[/TD] [TD]Intermediate[/TD] [/TR] [TR] [TD]alt=Great Ball.pnghttps://prowiki.info/images/4/45/Great_Ball.png[/img][/TD] [TD]Great Ball[/TD] [TD]Intermediate[/TD] [/TR] [TR] [TD]alt=Repeat Ball.pnghttps://prowiki.info/images/7/75/Repeat_Ball.png[/img][/TD] [TD]Repeat Ball[/TD] [TD]Intermediate[/TD] [/TR] [TR] [TD]alt=PP Max.pnghttps://prowiki.info/images/2/23/PP_Max.png[/img][/TD] [TD]PP Max[/TD] [TD]Rare[/TD] [/TR] [TR] [TD]alt=Jaw Fossil.pnghttps://prowiki.info/images/4/47/Jaw_Fossil.png[/img][/TD] [TD]Jaw Fossil[/TD] [TD]Intermediate[/TD] [/TR] [TR] [TD]alt=Sail Fossil.pnghttps://prowiki.info/images/1/1a/Sail_Fossil.png[/img][/TD] [TD]Sail Fossil[/TD] [TD]Intermediate[/TD] [/TR] [TR] [TD]alt=Macho Brace.pnghttps://prowiki.info/images/9/9a/Macho_Brace.png[/img][/TD] [TD]Macho Brace[/TD] [TD]Very Rare[/TD] [/TR] [/TABLE] Pokemon: [TABLE] [TR] [TH][/TH] [TH]Pokémon[/TH] [TH]Rarity[/TH] [/TR] [TR] [TD]alt=75Icon.pnghttps://prowiki.info/images/1/14/75Icon.png[/img][/TD] [TD]Graveler[/TD] [TD]Uncommon[/TD] [/TR] [TR] [TD]alt=343Icon.pnghttps://prowiki.info/images/7/72/343Icon.png[/img][/TD] [TD]Baltoy[/TD] [TD]Rare[/TD] [/TR] [TR] [TD]alt=679Icon.pnghttps://prowiki.info/images/1/12/679Icon.png[/img][/TD] [TD]Honedge[/TD] [TD]Very Rare[/TD] [/TR] [/TABLE] Area:Sevii Island 6 (Water Path) Patches: 7 Items: [TABLE] [TR] [TH][/TH] [TH]Item[/TH] [TH]Rarity[/TH] [/TR] [TR] [TD]alt=Pokéball.pnghttps://prowiki.info/images/b/b1/Pok%C3%A9ball.png[/img][/TD] [TD]Pokeball[/TD] [TD]Common[/TD] [/TR] [TR] [TD]alt=Rare Candy.pnghttps://prowiki.info/images/a/a2/Rare_Candy.png[/img][/TD] [TD]Rare Candy[/TD] [TD]Common[/TD] [/TR] [TR] [TD]alt=Full Restore.pnghttps://prowiki.info/images/c/c3/Full_Restore.png[/img][/TD] [TD]Full Restore[/TD] [TD]Uncommon[/TD] [/TR] [TR] [TD]alt=Full Heal.pnghttps://prowiki.info/images/9/9c/Full_Heal.png[/img][/TD] [TD]Full Heal[/TD] [TD]Uncommon[/TD] [/TR] [TR] [TD]alt=Everstone.pnghttps://prowiki.info/images/8/86/Everstone.png[/img][/TD] [TD]Everstone[/TD] [TD]Intermediate[/TD] [/TR] [TR] [TD]alt=Oval Stone.pnghttps://prowiki.info/images/2/24/Oval_Stone.png[/img][/TD] [TD]Oval Stone[/TD] [TD]Intermediate[/TD] [/TR] [TR] [TD]alt=Lure Ball.pnghttps://prowiki.info/images/0/0a/Lure_Ball.png[/img][/TD] [TD]Lure Ball[/TD] [TD]Intermediate[/TD] [/TR] [TR] [TD]alt=HP Up.pnghttps://prowiki.info/images/1/1e/HP_Up.png[/img][/TD] [TD]HP Up[/TD] [TD]Rare[/TD] [/TR] [TR] [TD]alt=Root Fossil.pnghttps://prowiki.info/images/7/7d/Root_Fossil.png[/img][/TD] [TD]Root Fossil[/TD] [TD]Intermediate[/TD] [/TR] [TR] [TD]alt=Sail Fossil.pnghttps://prowiki.info/images/1/1a/Sail_Fossil.png[/img][/TD] [TD]Sail Fossil[/TD] [TD]Intermediate[/TD] [/TR] [TR] [TD]alt=Macho Brace.pnghttps://prowiki.info/images/9/9a/Macho_Brace.png[/img][/TD] [TD]Macho Brace[/TD] [TD]Very Rare[/TD] [/TR] [/TABLE] Pokemon: [TABLE] [TR] [TH][/TH] [TH]Pokémon[/TH] [TH]Rarity[/TH] [/TR] [TR] [TD]alt=50Icon.pnghttps://prowiki.info/images/b/b9/50Icon.png[/img][/TD] [TD]Diglett[/TD] [TD]Uncommon[/TD] [/TR] [TR] [TD]alt=328Icon.pnghttps://prowiki.info/images/a/af/328Icon.png[/img][/TD] [TD]Trapinch[/TD] [TD]Rare[/TD] [/TR] [TR] [TD]alt=524Icon.pnghttps://prowiki.info/images/c/cc/524Icon.png[/img][/TD] [TD]Roggenrola[/TD] [TD]Very Rare[/TD] [/TR] [/TABLE] Area:Sevii Island 7 (Tanboy Key - Patches behind the Tyranitar) Patches:7 Items: [TABLE] [TR] [TH][/TH] [TH]Item[/TH] [TH]Rarity[/TH] [/TR] [TR] [TD]alt=Pokéball.pnghttps://prowiki.info/images/b/b1/Pok%C3%A9ball.png[/img][/TD] [TD]Pokeball[/TD] [TD]Common[/TD] [/TR] [TR] [TD]alt=Rare Candy.pnghttps://prowiki.info/images/a/a2/Rare_Candy.png[/img][/TD] [TD]Rare Candy[/TD] [TD]Common[/TD] [/TR] [TR] [TD]alt=Ice Heal.pnghttps://prowiki.info/images/4/41/Ice_Heal.png[/img][/TD] [TD]Ice Heal[/TD] [TD]Uncommon[/TD] [/TR] [TR] [TD]alt=Paralyze Heal.pnghttps://prowiki.info/images/d/d6/Paralyze_Heal.png[/img][/TD] [TD]Paralyze Heal[/TD] [TD]Uncommon[/TD] [/TR] [TR] [TD]alt=Everstone.pnghttps://prowiki.info/images/8/86/Everstone.png[/img][/TD] [TD]Everstone[/TD] [TD]Intermediate[/TD] [/TR] [TR] [TD]alt=Repeat Ball.pnghttps://prowiki.info/images/7/75/Repeat_Ball.png[/img][/TD] [TD]Repeat Ball[/TD] [TD]Intermediate[/TD] [/TR] [TR] [TD]alt=Dawn Stone.pnghttps://prowiki.info/images/d/d3/Dawn_Stone.png[/img][/TD] [TD]Dawn Stone[/TD] [TD]Intermediate[/TD] [/TR] [TR] [TD]alt=PP Max.pnghttps://prowiki.info/images/2/23/PP_Max.png[/img][/TD] [TD]PP Max[/TD] [TD]Rare[/TD] [/TR] [TR] [TD]alt=Helix Fossil.pnghttps://prowiki.info/images/d/d2/Helix_Fossil.png[/img][/TD] [TD]Helix Fossil[/TD] [TD]Intermediate[/TD] [/TR] [TR] [TD]alt=Sail Fossil.pnghttps://prowiki.info/images/1/1a/Sail_Fossil.png[/img][/TD] [TD]Sail Fossil[/TD] [TD]Intermediate[/TD] [/TR] [TR] [TD]alt=Macho Brace.pnghttps://prowiki.info/images/9/9a/Macho_Brace.png[/img][/TD] [TD]Macho Brace[/TD] [TD]Very Rare[/TD] [/TR] [/TABLE] Pokemon: [TABLE] [TR] [TH][/TH] [TH]Pokémon[/TH] [TH]Rarity[/TH] [/TR] [TR] [TD]alt=75Icon.pnghttps://prowiki.info/images/1/14/75Icon.png[/img][/TD] [TD]Graveler[/TD] [TD]Uncommon[/TD] [/TR] [TR] [TD]alt=343Icon.pnghttps://prowiki.info/images/7/72/343Icon.png[/img][/TD] [TD]Baltoy[/TD] [TD]Rare[/TD] [/TR] [TR] [TD]alt=246Icon.pnghttps://prowiki.info/images/a/a8/246Icon.png[/img][/TD] [TD]Larvitar[/TD] [TD]Very Rare[/TD] [/TR] [/TABLE] Major Credit goes out to Magic Bounce. Thank you for the help.

.png.a3fc3d928526d6fa1f418432cfa68c5d.png)


.png.b2bb8c4e0eb606e75877c831289d006a.png)


 1 point
 -
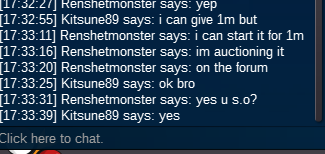
1 pointReply here in the thread for your offers or message me here or in game Starting offer will start the auction time Auction for 48 hours Accept cc for 300k Minimum raise is 100k Using coordinated universal time ========================= Starting offer at 800k Current offer at 1.6m (Celem), sold Current offer at 1.2M (Agresivity), sold Current offer at 800k (WollyTurtle), sold Current offer at 4M (Belzebel), sold

 1 point
 -
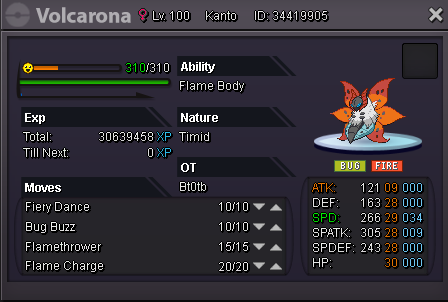
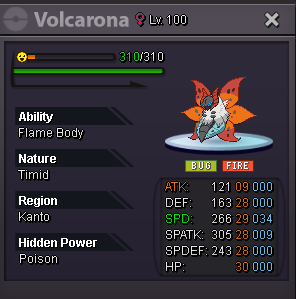
Hi, I'm selling Volcarona. I accept cc(300k), nature reroll (300k) and iv reroll (600k). Bid ends after 48 hours after the first offer. Fake offers will be reported. s.o : 2m min bid raise : 100k insta : 5m Good luck !


 1 point
 -
1 pointClefable and rotom auction are over allsmell please pm me for Clefable and maltesers for rotom1 point
-
1 point
-
1 point
-
Pseudo dans le jeu : TefaxGame Temps de jeu : 136Hr43Min Âge : 17 Quelques mots sur vous : Je suis un lycéen en Terminale S, j'ai sauté une classe et je souhaite m'orienter vers des études dans le commerce pourquoi pas. Je pratique le sauvetage ( oui, c'est un sport ) trois fois par semaine et je suis quelqu’un de très sociable, à l'écoute et toujours attentif à tous bons conseils ! Je fais attention à mon orthographe car IG, c'est la seule "image" que l'on peut renvoyer de soi même donc je pense que c'est important de la soigner, non? Avez-vous Discord (obligatoire) ? Yes, et mon identifiant est : Whust#9722 Où en êtes-vous dans l'aventure ? : J'ai terminé avec succès Kanto, Johto ainsi que Hoenn et je suis actuellement en quête de mon 7è badge de Sinnoh, accompagnée de mes fidèles compagnons d'aventure ! lvl70, lvl74, lvl75, lvl72 Quels sont vos objectifs dans le jeu (PVP, farm, collection de PKM) ? : Je suis là pour farm les pokémons épic, c'est vraiment mon objectif, et puis passer des heures à les EV ou les XP n'est pas un problème, je me développe également dans le PvP, même si j'ai un peu de mal avec la méta PRO, mais je pense que vous pourrez m'éclairer un peu plus sur ce domaine. Pourquoi devrions-nous vous choisir ? Je pense correspondre aux attentes d'une guilde française de "haut niveau", j'ai soif d'apprendre et j'en arrive à la fin de mon aventure, je serai donc prêt à farm à fond et composer mon équipe de génie x) Au plaisir de vous revoir sur PRO, TefaxGame !1 point
-
1 pointHello, If your account was banned, please refer to the Discipline Appeals Board for further clarification. Any inquiry regarding banned accounts will not be discussed out of that specific board. With that stated, this thread will be locked. Kind regards, Mercurius1 point
-
1 point
-
1 point
-
Changelog (7/2/2019): rotom-w a -> s ferrothorn a -> a+ skarmory a+ -> a- tyranitar a+ -> a togekiss a -> a+ heatran a+ -> a mew a -> b+ gengar a -> a+ staraptor a -> b+ infernape a -> a- suicune a -> b+ alakazam a- -> b crawdaunt a- -> b magnezone a- -> a serperior a- -> a starmie a- -> b+ darmanitan b+ -> b- milotic b+ -> b reuniclus b+ -> b- roserade b+ -> b- scizor b+ -> a- scolipede b+ -> a celebi b -> b- conkeldurr b -> a- metagross b -> b- aerodactyl b- -> b+ alomomola b- -> b haxorus b- -> c+ honchkrow b- -> c+ espeon b- -> c toxicroak b- -> b torkoal c- -> c xatu c- -> c marowak-alolan unr -> c+ ninetales-alolan unr -> b- sandslash-alolan unr -> d shaymin unr -> c+ manaphy unr -> a+1 point
-
1 point
-
1. Hmm, couldnt understand the first question properly. But, evolving pokemons at the end (level close to 100) is bc of the experience that it needs to gain a level increases when the pokemon is evolved. Every pokemon has its own base experience values. When the base experience value is higher it means you need more exp to level a certain pokemon. (The amount of exp you need to level up a pokemon is proportional to the base experience value) For example, bulbasaur, ivysaur, and venusaur has an base experience value of 64, 141, 208, respectively. You can see that the base experience value doubles each evolution, which means if you evolve the pokemon it would be harder to level up the pokemon. (For more info about experience systems in PRO check out the link. https://prowiki.info/index.php?title=Experience_System) 2. Yes, there is a way to reduce the Ev stats of a certain pokemon. It would be said if you can't reduce the Ev stats. There are Ev reductive berries inside the game. Since, there are 6 stats in pokemon games, there are 6 berries to reduce each stats. If the a certain pokemon consumes a berry the according Ev stat is reduced by 10. Pomeg : Hp | Kelpsy : Atk | Qualot : Def | Hondew : Spatk | Grepa : Spdef | Tamato : Spd You can obtain them from 3 different ways. First, collecting them from trees. Second, by winning the berry tower located in rt 13 Kanto, middle of vermillion and fushia, the reward are Ev reduction berries. Last is the berry shop. After beating the Pumpkin King boss in rt 6, you can access the berry shop located at goldenrod. (You can purchase each berries 3k/ea) 3. Sadly there are no other ways to level up without increasing your Evs other than rc, to gain exp you have to kill other pokemons and if you do you'll gain Evs. If you dont want to consume berries, I recommend you to first Ev train your mons. Since, the max Evs you can give each pokemon is 510. (252 max in each stats) So, if you already give 510 Evs to your pokemon it won't gain additional Evs. I hope this answered your questions well :3 GL playing PRO !! I wish you have fun in further games !!1 point
-
1 point
-
1 point+1 and i think we can go more then if you leave the guild. your new guild can't get your pvp point until the next season. This will be fair and stop this pay2win guildladder1 point
-
1 point
-
1 pointHello @Blessed , I'm sorry for the inconvenience. I would like to inform you that there are no faults/errors with the repel trick for Riolu and that it works properly/as intended with the lowest level being needed is 5, please note membership must be active for Riolu to spawn. Please understand that it is based on your luck and that means that there is no guarantee you will encounter your chosen Pokemon with a certain amount of repels. Do keep in mind the Pokemon's rarity tier is high (tier 8 ), meaning it has a less likelihood of spawning as often as lower tiers. For more information regarding repel tricks please take a look below. Repel Trick Guide If you need any further assistance please do not hesitate to ask
 1 point
 -
HOW TO LEVEL UP YOUR LOW LEVEL POKEMONS WITHOUT WASTING MONEY ON FOCUS SASHES : SO HERE IS A METHOD TO LEVEL UP YOUR LOW LEVEL POKEMONS FAST AND WITHOUT WASTING MONEY ON FOCUS SASHES (UNLESS YOU ARE TOO RICH :P) THIS METHOD DOESNT NEED A PRIORITY MOVE ON YOUR POKEMON TOO SO YOU DONT HAVE TO WASTE MONEY ON GETTING THEM A PRIORITY MOVE. SO WHATS THE TRICK: FOR THIS TRICK YOU NEED IS : 1. A LVL 100 BRELOOM WITH FALSE SWIPE AND LEECH SEED 2. A LOW LEVEL POKEMON THAT YOU WANT TO LEVEL UP HOW TO USE THIS TRICK: STEP 1: LEAD WITH YOUR BRELOOM AND USE FALSE SWIPE ON ANY HIGH LEVEL POKEMON. STEP 2: WHEN YOU ARE SURE THAT BRELOOM IS GONNA DIE BY NEXT HIT FROM OPPONENT, THEN PUT LEECH SEED ON IT. (FOR EXAMPLE: I AM FIGHTING A WILD GOLBAT LEVEL 50 WITH MY BRELOOM . I USED FALESWIPE TO BRING GOLBAT HP TO 1 AND GOLBAT USED AIR SLASH TO BRING MY BRELOOM HP DOWN TO 30% . NOW SINCE I KNOW MY BRELOOM WONT SURVIVE ANOTHER HIT FROM GOLBAT THEN I WILL PUT LEECH SEED IN NEXT TURN. SO ON NEXT TURN, I USE LEECH SEED AND GOLBAT USES AIRSLASH ON MY BRELOOM AGAIN AND KILLS IT. NOW I HAVE MY BRELOOM DEAD AND WILD GOLBAT IS AT 1 HP WITH LEECHSEED ON IT) STEP 3: BRING YOUR LOW LEVEL POKEMON, LEECH SEED WILL SAP GOLBATS 1 HP TO YOUR LOW LEVEL POKEMON AND BOOM IT WILL GET ALL EXP SO ITS A FAST METHOD TO LEVEL UP QUICKLY WETHER YOU WANT TO LEVEL UP FOR PVP, BOSSES OR FOR EVOLUTIONS. IT DOESNT COST YOU MONEY FOR LEARNING PRIORITY MOVES OR ANY FOCUS SASHES. AND ONE MORE THING: AS WHENEVER WE ARE ASKED ABOUT BEST PLACE TO LEVEL UP IN WILD MOST PEOPLE SAY CERULEAN CAVE AS IT HAS HIGHEST LEVEL 2ND EVOLUTION POKEMONS. IT IS UNDOUBTEDLY BEST PLACE BUT PROBLEM WITH CERULEAN CAVE IS THAT YOU NEED TO COME BACK TO PC IF YOUR POKEMON FAINTS. SO IF YOU DONT WANT TO GO BACK AGAIN AND AGAIN, THEN THERE IS ANOTHER PLACE CALLED MT STARK WHICH IS IN HEATRAN QUEST. THE BEST THING ABOUT MT STARK IS THAT THE GUY AT THE ENTRANCE OF CAVE WILL HEAL YOUR POKEMONS FREE OF COST AND AROUND HIM YOU WILL FIND MANY HIGH LEVEL (AROUND 56-60) POKEMONS THAT GIVE AROUND 65000-100000 EXP PER KILL WITHOUT MS AND MORE WITH MS. SO MT STARK IS A GOOD PLACE TO LEVEL UP AS EVEN THOUGH THE EXP THERE IS LITTLE LESS THAN IN CERULEAN CAVE, IT SAVES YOUR TIME GOING BACK TO PC AND HEALING POKEMONS THANK YOU FOR READING THIS ^-^ HOPE IT HELPS. IF YOU HAVE ANY OTHER DOUBTS YOU CAN POST HERE OR PING ME IN DISCORD (ANIMESH SINGH#5300)1 point