Leaderboard


Popular Content
Showing content with the highest reputation on 06/02/18 in all areas
-
Vulcan Island How to go to Vulcan Island Requirements Travel NPC's [*]Main questline How to reset your questline Magma variation Rewards (crowdsourced) Aqua variation Rewards (crowdsourced) [*]Rin Boss & Lime Boss [*]Challenger Rick (daily quest) Daily quest Rewards Speak with the Mayor Ahok, he is located in Vulcanic Town House 1 (the first house right of the Pokecenter) [*]Go to the Vulcan Forest, follow the path to Mt. Summer Exterior and speak with the Magma Grunt [*]Go to the Kalijodo Lake and speak with the Aqua Grunt [*]Fight your way through the Kalijodo Cave until you reach the Team Aqua Leader [*]Fight the Team Aqua Grunt Leader Politoed | Ludicolo | Swampert | Staraptor | Porgyon-z | Landorus [*]Find all 8 Gems in the Kalijodo Cave [*]Speak with the Magma Grunt outside of the Kalijodo Cave [*]Go back to the Vulcan Forest and follow the path to Mt. Summer Exterior [*]Fight your way up the Mt. Summer and talk to the Team Magma Grunt Leader [*]Go back and speak with the Mayor Ahko Team Magma Grunt Leader Team Magma Set Red/Black Summer clothes Green/Black Summer clothes White/Red Summer clothes White/Blue Summer clothes Mayor Ahko Feebas Hat Slowking Crown Shellos Hat Chinchou Hat Politoed Hat Magikarp Hat Qwilfish Hat Speak with the Mayor Ahok, he is located in Vulcanic Town House 1 (the first house right of the Pokecenter) [*]Go to the Kalijodo Lake and speak with the Team Aqua Grunt [*]Go to the Vulcan Forest, follow the path to Mt. Summer Exterior [*]Fight your way up to the Mt. Summer Summit [*]Defeat the Team Magma Grunt Leader Flareon | Camerupt | Raichu | Porygon 2 | Gardevoir| Heatran [*]Speak with the Aqua Grunt in Mt. Summer 4F2 and take the Mythical Core [*]Search for Mt. Summer Chamber R2 or R5 (unconfirmed if it is random or could be somewhere else and put your Mythical Core on the sacred stone [*]Talk to the Aqua Grunt in front of the Cave located in Mt. Summer Exterior [*]Find the Team Aqua Grunt Leader in Kalijodo Cave B2F [*]Go back and speak with the Mayor Ahko Team Aqua Grunt Leader Team Aqua Set Green/Black Summer Clothes Black/Red Summer Clothes Mayor Ahko Slowking Crown Whiscash Hat Chinchou Hat Rin Boss Location: Vulcan Island shore Team: Volcarona | (Bug Buzz, Flamethrower, Quiver Dance, Giga Drain) Mega Charizard X | (Dragon Claw, Wing Attack, Flare Blitz, Shadow Claw) Moltres | (Flamethrower, Ancient Power, Air Slash, Roost) Infernape | (Flare Blitz, Mach Punch, Thunder Punch, Acrobatics) Magnezone | (Thunderbolt, Tri Attack, Flash Cannon, Thunder Wave) Volcanion | (Hydro Pump, Flamethrower, Sludge Bomb, Earth Power) Rewards: 3 PVE coins, 80 summer points Cooldown: 3 days Lime Boss Location: Kalijodo Lake Team: Volcarona | (Bug Buzz, Flamethrower, Quiver Dance, Giga Drain) Mega Charizard Y | (Heat Wave, Air Slash, Dragon Pulse, Earth Power) Entei | (Sacred Fire, Stone Edge, Iron Head, Toxic) Blaziken | (High Jump Kick, Brave Bird, Flare Blitz, Knock Off) Magnezone | (Thunderbolt, Tri Attack, Flash Cannon, Thunder Wave) Reshiram | (Draco Meteor, Heat Wave, Psychic, Earth Power) Rewards: 3 PVE coins, 80 summer points, Wailmer Mount, 100 bonus summer points if you beat both bosses Cooldown: 3 days Summer Hats W-Sea Shellos Hat | 250 points E-Sea Shellos Hat | 250 points Chinchou Hat | 250 points Politoed Hat | 250 points Poliwhirl Hat | 250 points Wooper Hat | 250 points Qwilfish Hat | 250 points Whiscash Hat | 250 points Feebas Hat | 250 points Magikarp Hat | 250 points Slowking Crown | 300 points Consumables Rare Candy | 150 points Revive | 130 points Hyper Potion | 110 points Clothes Summer Clothes W-B | 350 points Summer Clothes W-R | 350 points Summer Clothes W-G | 350 points Summer Clothes B-R | 350 points Summer Clothes B-G | 350 points Summer Clothes B-B | 350 points
 3 points
 -
______________________________________________________________________________________________________________________________________________________ Hello to all competitive PRO PvPers! This year, PRO Staff have decided to launch the third Summer PvP Tournament, which is opened to everyone who meets the requirements to sign up and wishes to participate. This is our 3rd year hosting an annual PvP tournament! Are you ready to face off against the rest of your server to battle for bragging rights, and a unique reward to set you apart from the rest? ✖︎ Only one entry is allowed per user. (Any alternate accounts found registering will be rejected!) ✖︎ Must be able to record and upload matches to Youtube for evidence. These must be uploaded and submitted within 48 hours of the match taking place. You must display your FULL TEAM at the beginning of the video by clicking on each Pokemon from your party - this is to validate they are the same Pokemon that you registered with. Exceptions may be agreed to those who are unable to record, however must reach out to myself to approve and discuss - only special circumstances. ✖︎ You may only use Pokemon that have been registered by yourself. ✖︎ Ranked PvP Rules apply. Please review these if you have not already, as any violation of these in the tournament will result in disqualification and auto-win for your opponent. ✖︎ If you disconnect mid-battle, it will be counted as a loss unless your opponent agrees to a rematch. ✖︎ You are free to amend the movesets or held items of your Pokemon after registration, however the Pokemon itself must remain the same as the one registered. ✖︎ Any rule-breaking outside of the tournament will be dealt with as normal, which could result in you being unable to participate in a given round. No exceptions will be made for tournament participants. These rules are subject to change without prior notice if deemed necessary by Tournament Staff. Note: Any Tournament Rules violation or PRO Rules violation may result in automatic disqualification from the tournament! ✖︎ Registration opens 3rd June 00:00 GMT. ✖︎ Registration closes 22nd June 00:00 GMT. ✖︎ Tournament begins 1st July 00:00 GMT. ✖︎ You must be a Champion of all 4 regions: Kanto, Johto, Hoenn and Sinnoh. ✖︎ You can register up to 16 Pokemon. The minimum number of Pokemon you must register is 8. ✖︎ All registered Pokemon must be Level 100, and you must be the Original Trainer (OT) of AT LEAST 4 of your total registrants. ✖︎ You must have a minimum of 200 hours playtime. This is to prevent people registering for fun, then not actually attending the tournament. ✖︎ Create a post HERE for Silver or HERE for Gold in the PRO Tournament Registration forum. ✖︎ Upload a screenshot of your in-game Trainer Card for the account you wish to enter. It should display your username, playtime, and badges. ✖︎ Compile and submit your team of 8-16 Pokemon that you wish to register (screenshot the Pokemon Info screen) If you wish to compile an Imgur album, please look at this guide. ✖︎ Include your timezone in GMT offset (GMT±x). If you're unsure, search up your city on this website and report back the timezone and offset you are in. ✖︎ Players will be seeded into several separate groups, all to battle each other 1 time each (Silver) or 3 times each (Gold). ✖︎ Each win will equal one point. ✖︎ After all battles are completed, the top 2 from each group will progress to the knockout stages. ✖︎ Winner of group A, will fight runner-up of group B ✖︎ Runner-up of group A, will fight winner of group B ✖︎ Winner of group C, will fight runner-up of group D ✖︎ Runner-up of group C, will fight winner of group D, and so on. Finally, the bit you actually care about - the reward! So, what are you fighting for? This year's reward is an epic, PvP ready, shiny Manaphy and will be usable in PvP for the winning individual. This will be won on an "early access" basis, as the sea guardian Manaphy will be available to all players soon [spoiler=T's & C's]Pokemon will be won as displayed above, any request to change nature will require your own nature reroll ticket upon winning. 2nd. 3rd. I look forward to seeing some great battles! Good luck to everyone, The PRO Team2 points
-
_____________________________________________________________________________________________________________________________________ _____________________________________________________________________________________________________________________________________ ✦ Finding the keys ✦ Scanner & The Storage Unit ✦ Heading to Slateport Museum ✦ Hidden Items ✦ Contributions _____________________________________________________________________________________________________________________________________ To start the quest, you need to head to Route 108 and enter the Abandoned Ship. Upon entering, you'll notice that you're in the Abandoned Ship Exterior. There's nothing too special about this place except that there is an Aqua Tail Move Tutor. However, you notice the room on the top floor is locked and needs six keys in order to be unlocked. Start exploring the ship, battling trainers, and familiarizing yourself with the various rooms to look for the captain office keys. The specific locations for each key is shown below, with their map name included to help you find them: [spoiler=Locations of All Keys][spoiler=Abandoned Ship 1F Room 1] [spoiler=Abandoned Ship 1F Room 2] [spoiler=Abandoned Ship B1F]You need to interact with the stray Wingull in order to pick up this key. [spoiler=Abandoned Ship B1F Room 4] [spoiler=Abandoned Ship B1F Room 3] [spoiler=Abandoned Ship B1F Room 1] After finding all the keys, head up to the Captain's Office. Be ready to battle Captain Bickerstaff! His team is full of Lv40 Pokemon. Upon defeating Captain Bickerstaff, he'll reward you some money, give you the storage unit key and leave you with his Clamperl. _____________________________________________________________________________________________________________________________________ Before you started this quest, you may or may not have talked to Captain Stern in Slateport Museum 1F. Talking to him wasn't necessary to invoke the quest, but Captain Stern mentions that he needs a Scanner, hinting that Wendy has it. So, after completing 'Finding The Keys', we can now head to the Storage Unit in Abandoned Ship B1F. However, it's important to pick up the scanner from Sailor Wendy beforehand, as you cannot pick up the mossy blob otherwise. Yes, this is the Wendy that Captain Stern was talking about. Previously, the door was locked, but since Captain Bickerstaff gave us the key, we can enter it now. Upon entering, you notice a mossy blob on the floor. Weirdly enough, it reacts to the scanner! _____________________________________________________________________________________________________________________________________ Afterward, head back to Slateport Museum and talk to Captain Stern. He'll notice that you have the scanner and will ask for it in return of giving you whatever was in the mossy blob. For all players, it could either be a Deep Sea Tooth or a Deep Sea Scale. Personally, I got a Deep Sea Scale. These are evolutionary items done to evolve Clamperl into either a Huntail or Gorebyss. _____________________________________________________________________________________________________________________________________ Various items are scattered across the ship for the player to loot. After all, what's the point of exploring an abandoned ship without anything to grab? TM 13 - Ice Beam TM 68 - Rain Dance Revives Water Stone Great Ball Escape Rope _____________________________________________________________________________________________________________________________________ I'd like to thank NisseP for his original guide and locations of the keys. I'd also like to thank the Community Coordinators for reviewing this guide. If there's something I'm missing in the guide, such as an item location, feel free to let me know and I'll add it! I couldn't find the artist who drew the beautiful image I used in this guide, but I'd like to credit them as well. Let me know if you can find the artist.2 points
-
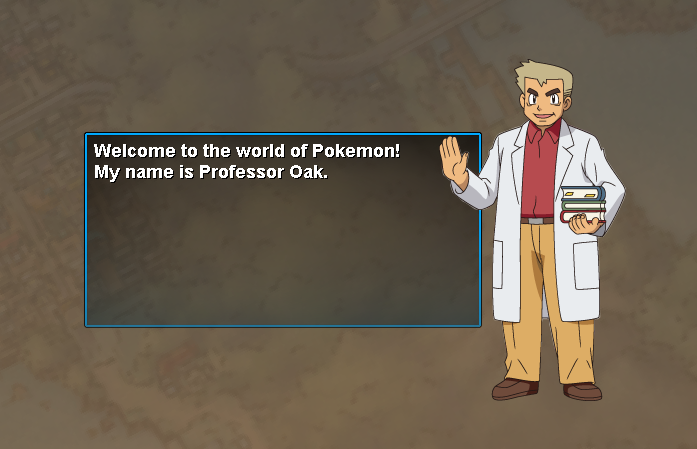
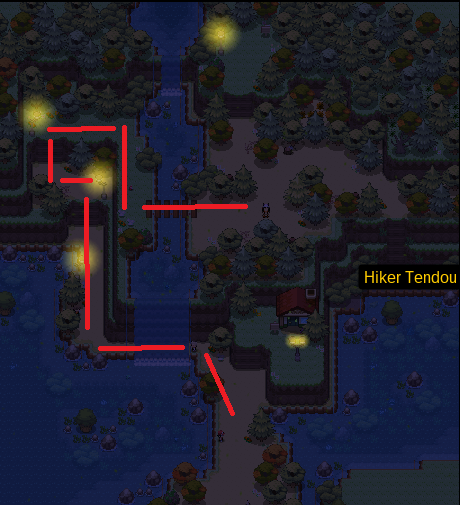
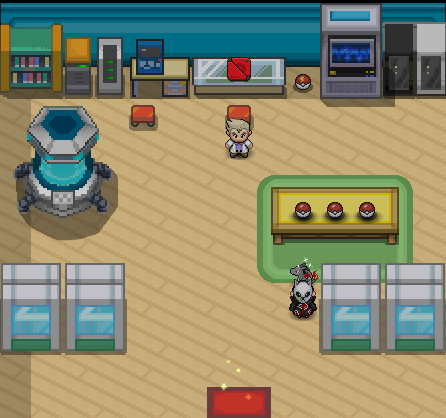
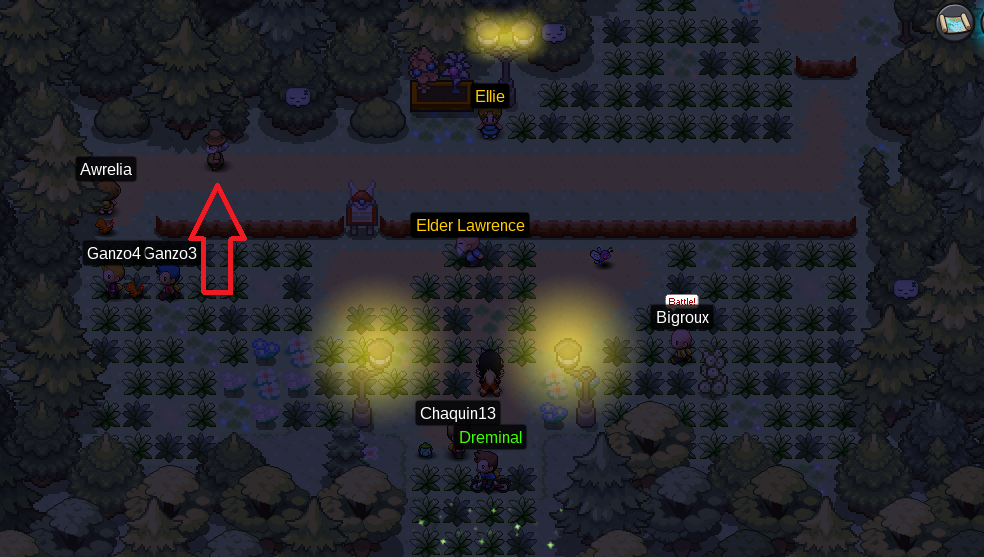
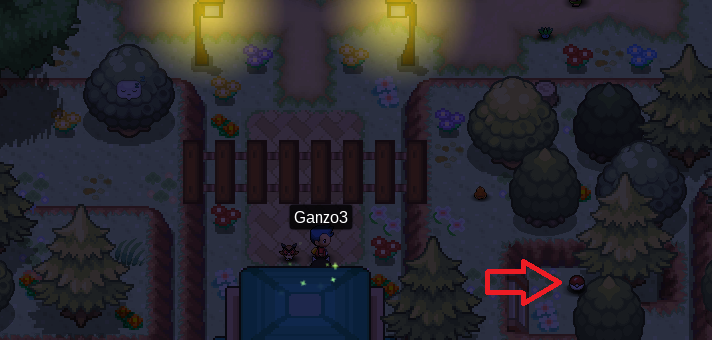
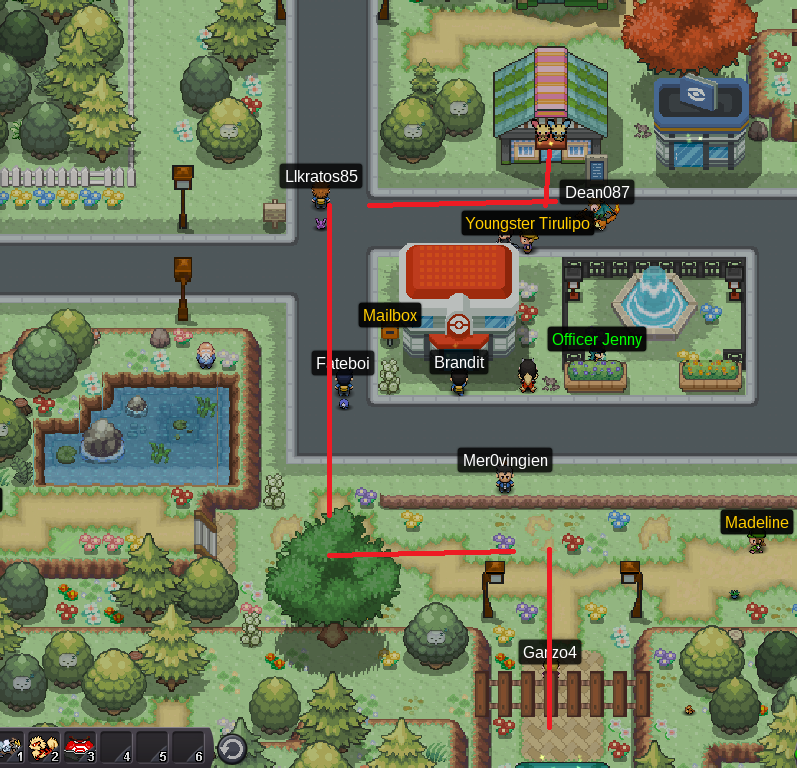
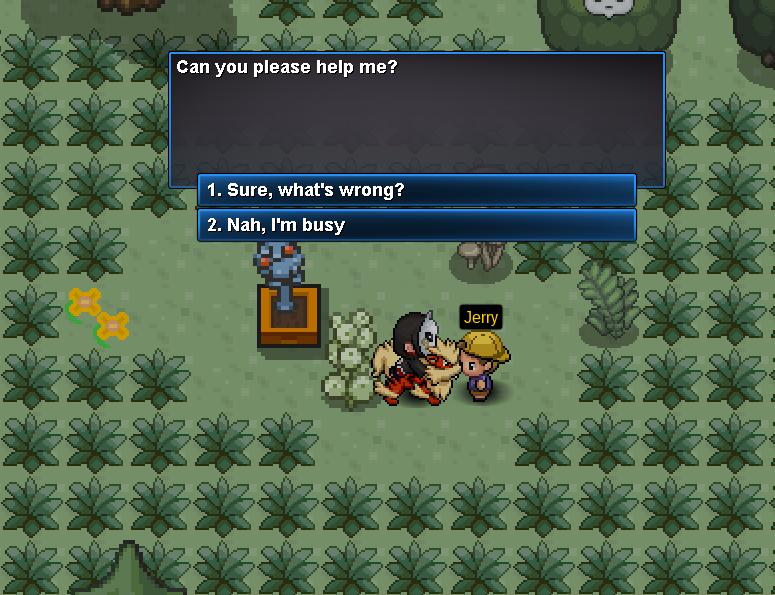
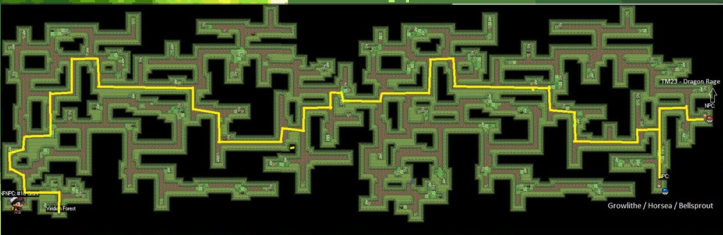
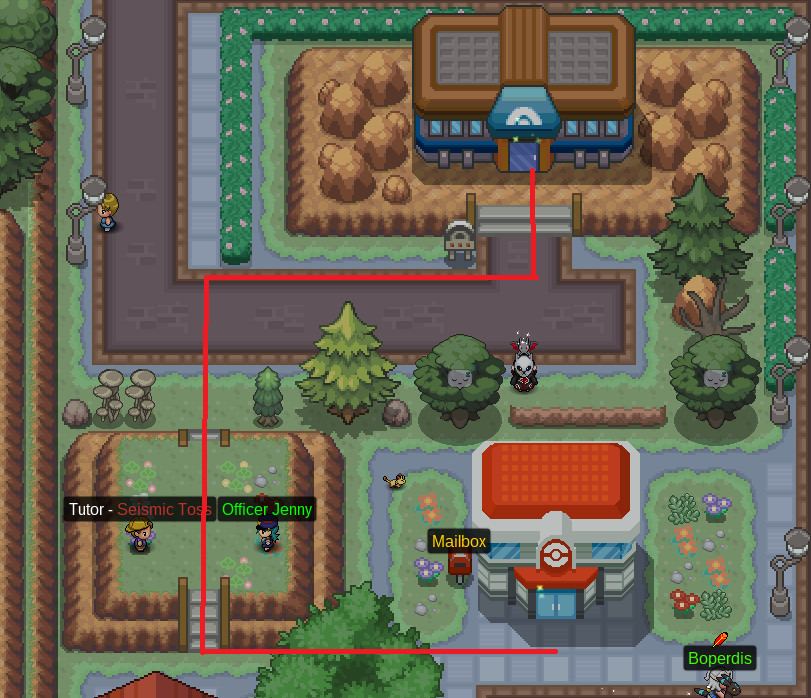
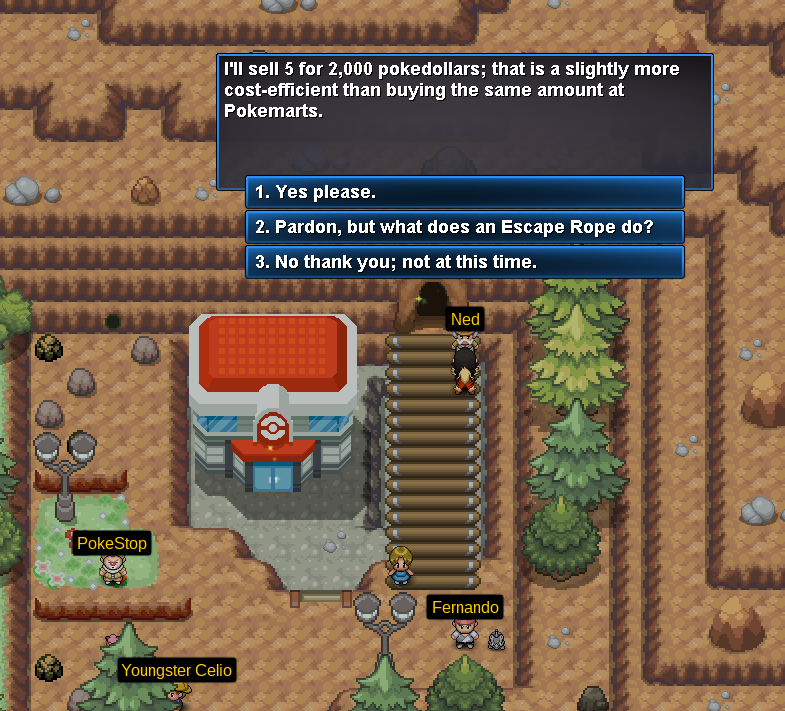
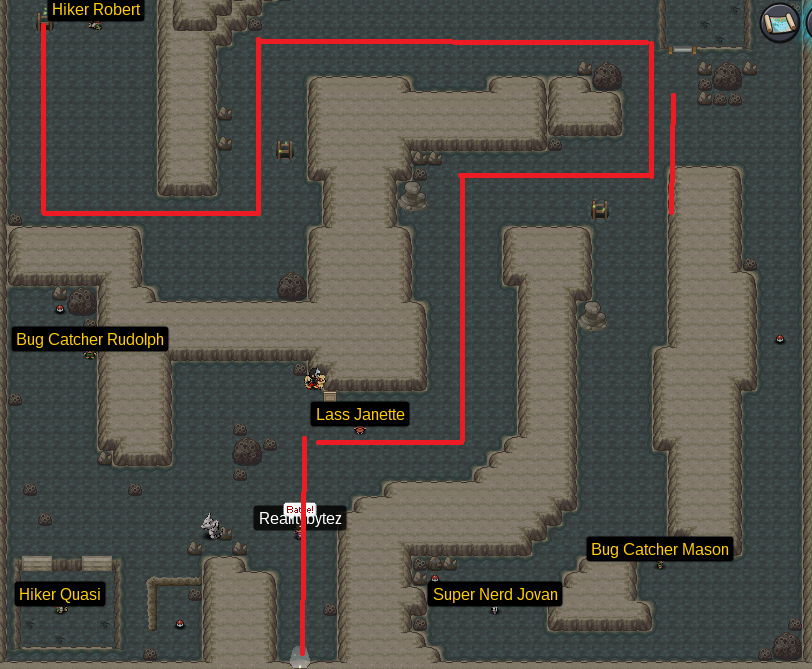
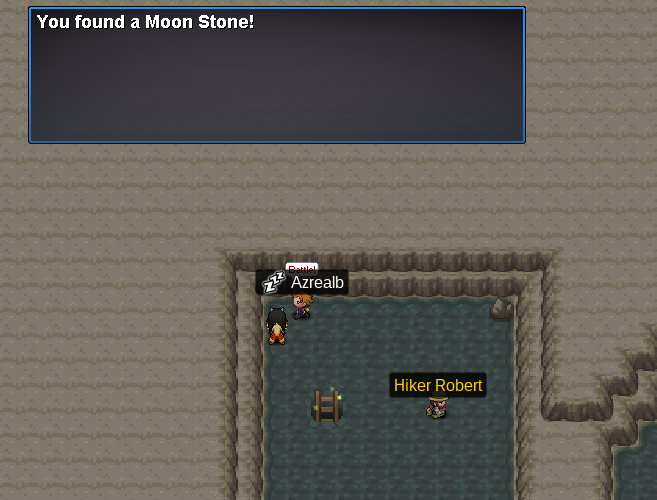
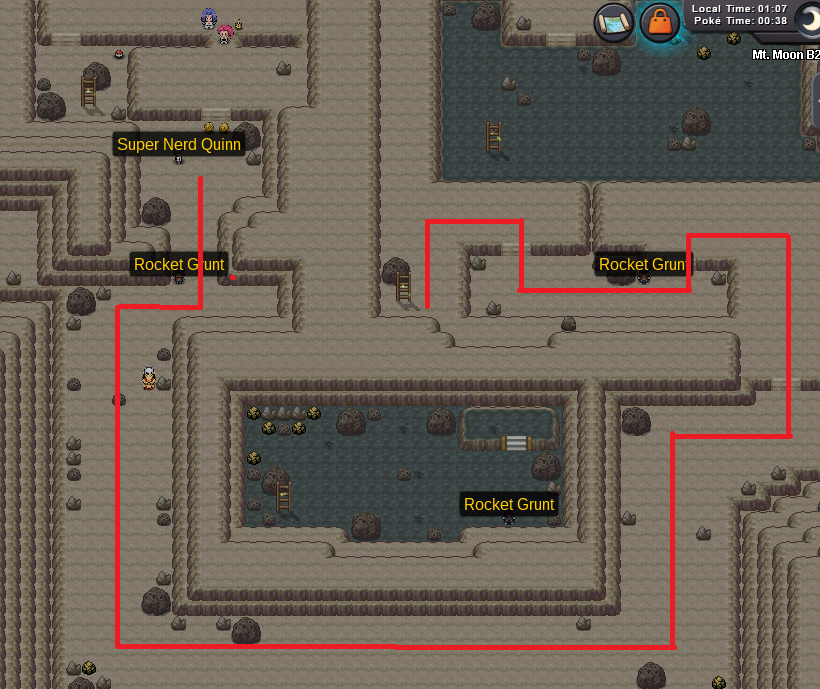
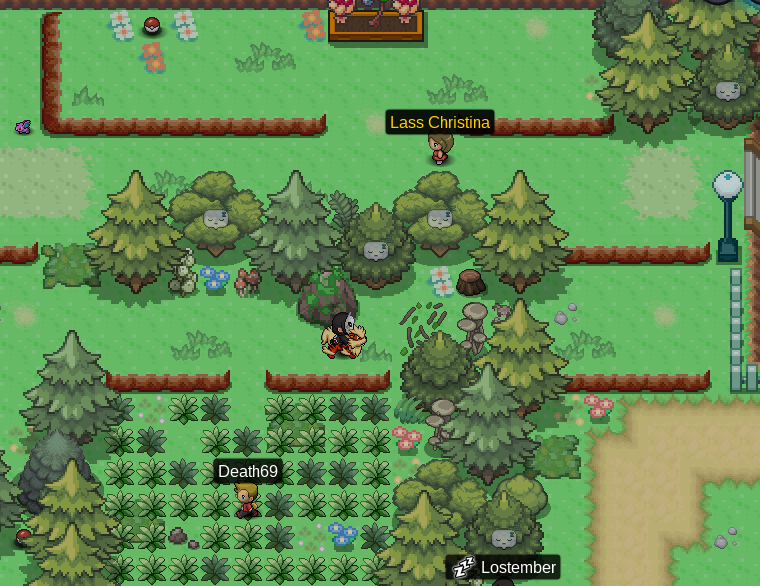
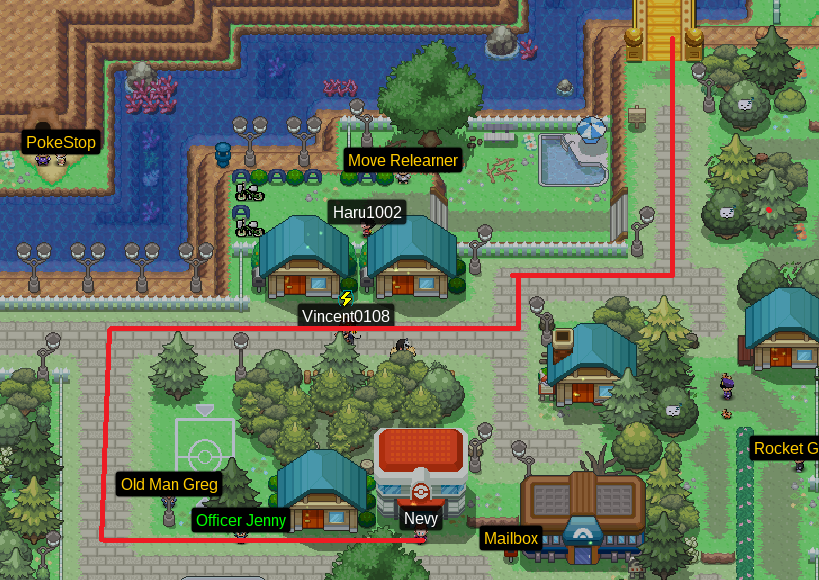
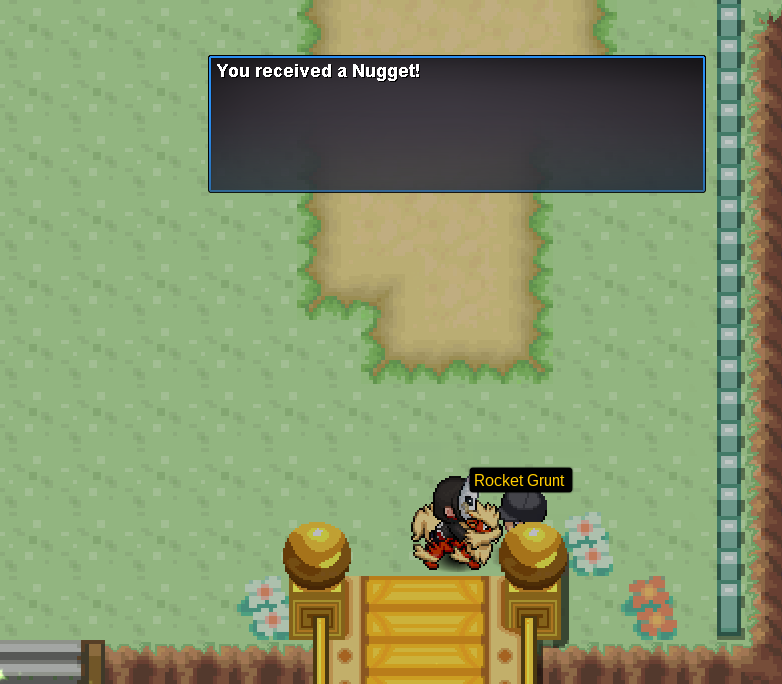
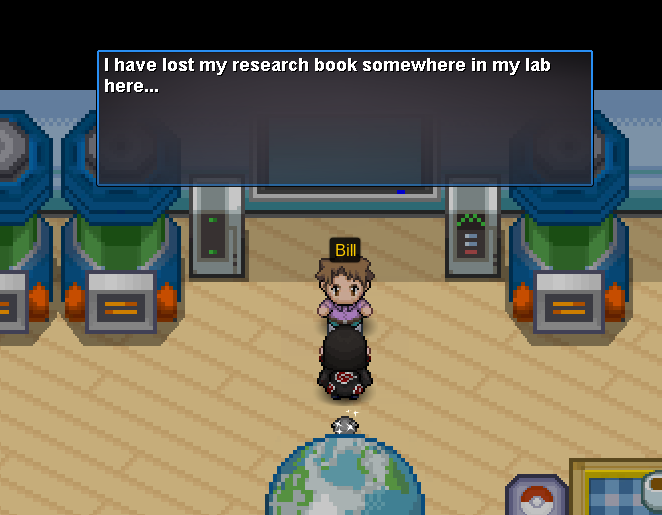
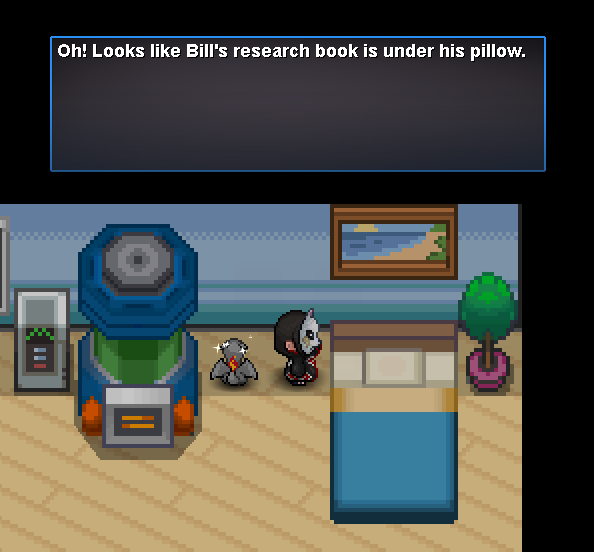
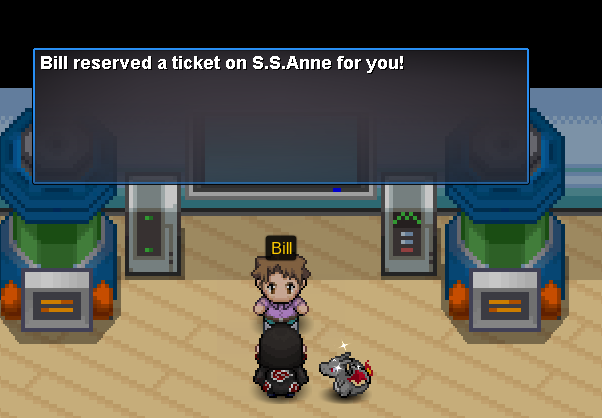
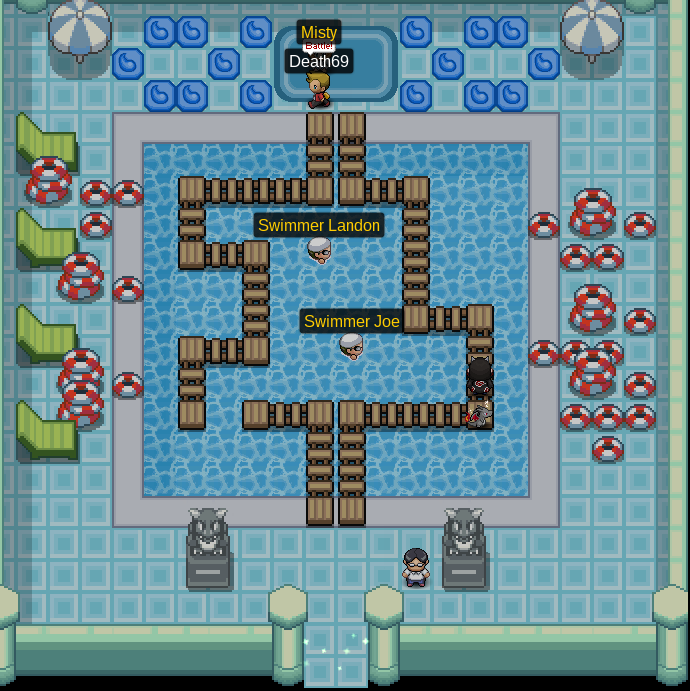
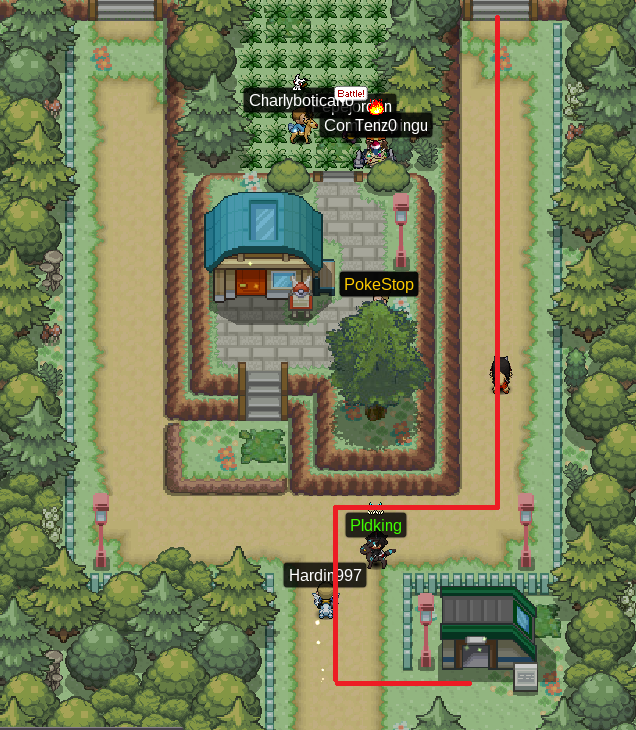
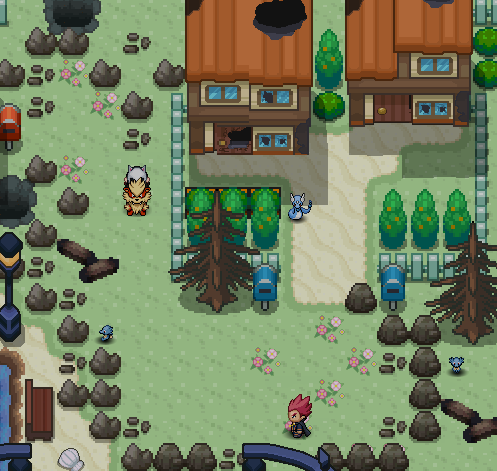
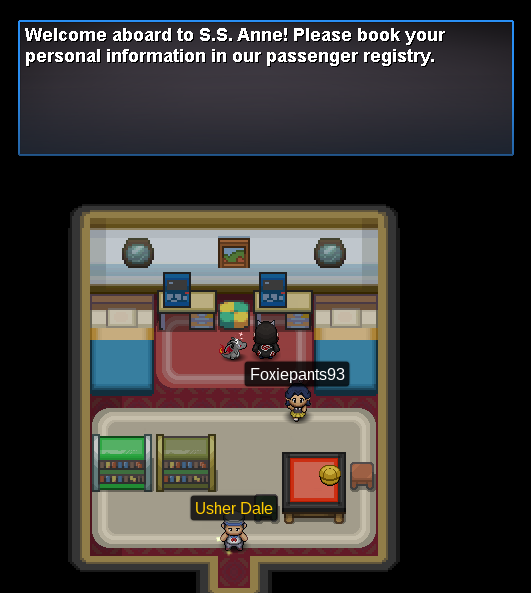
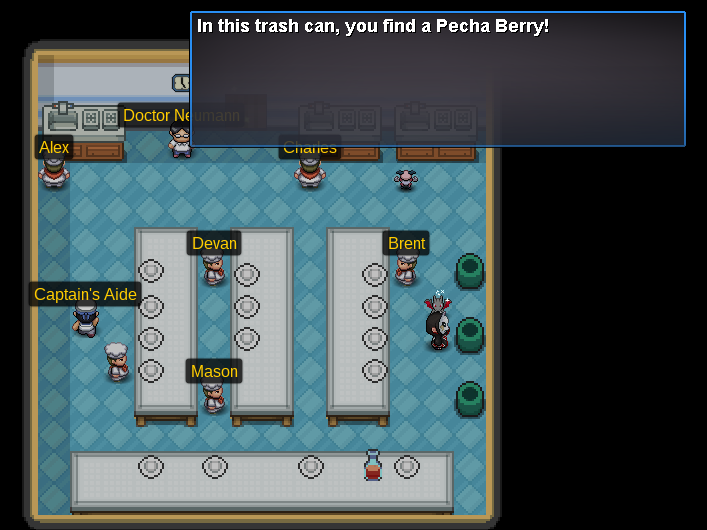
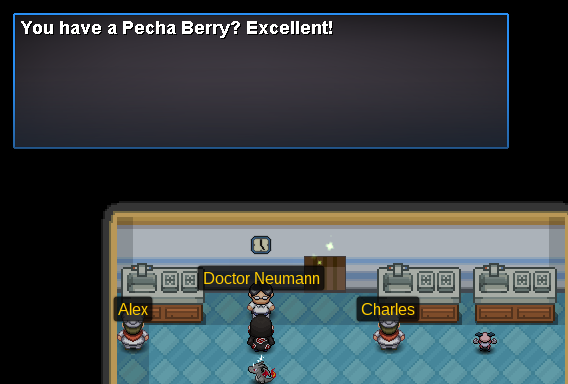
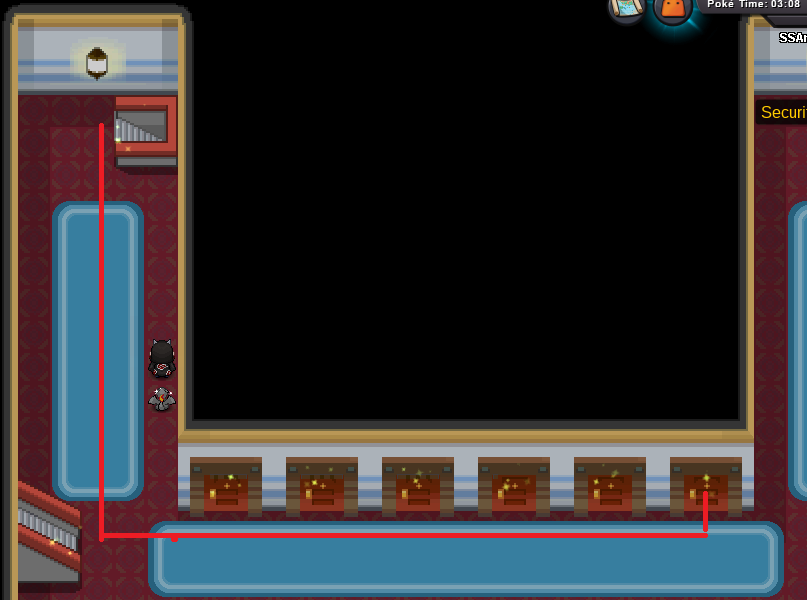
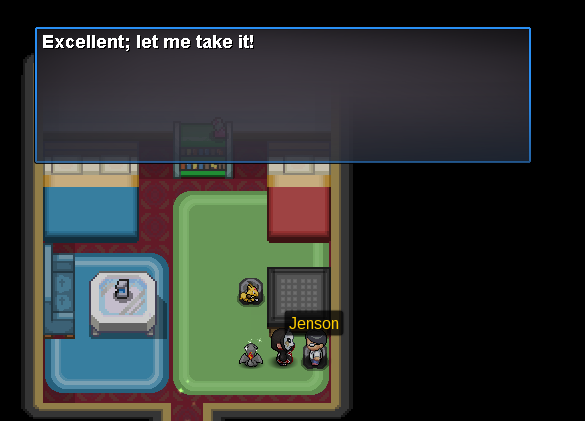
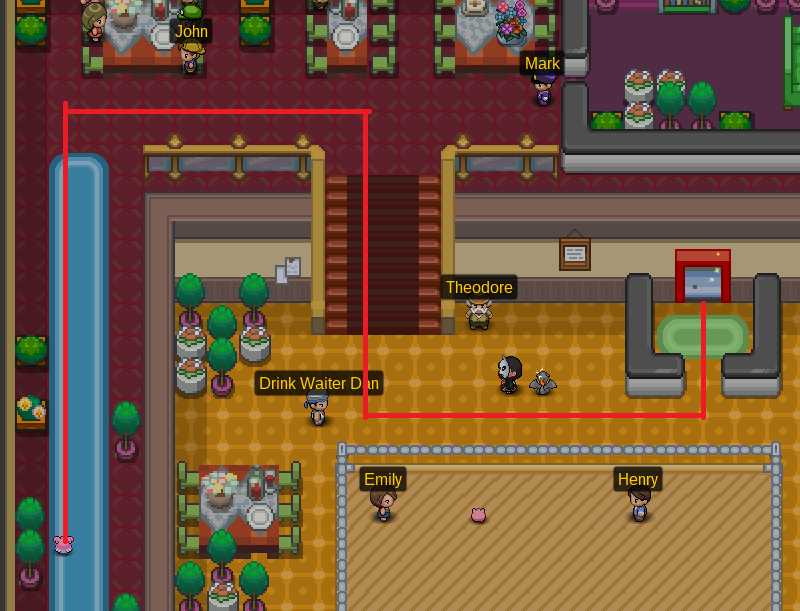
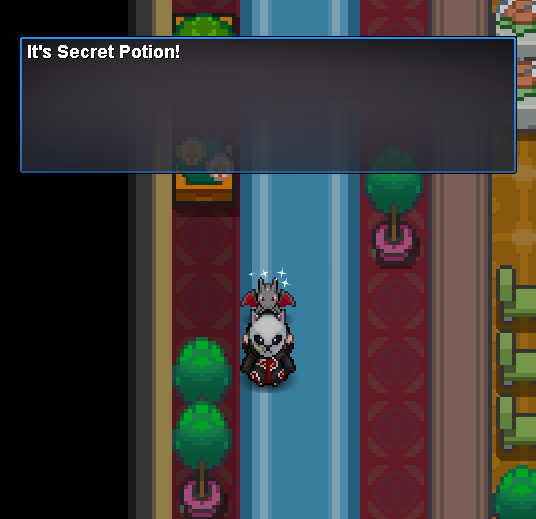
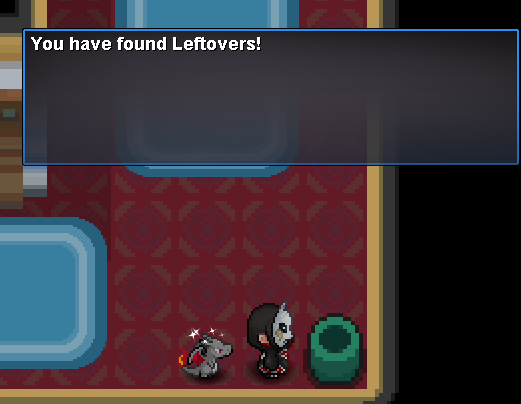
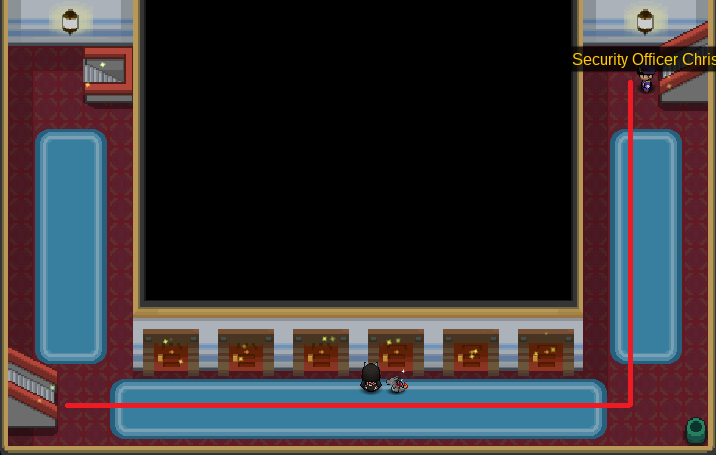
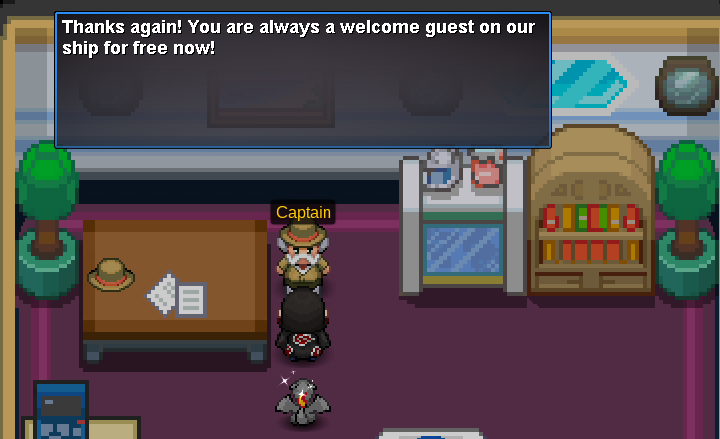
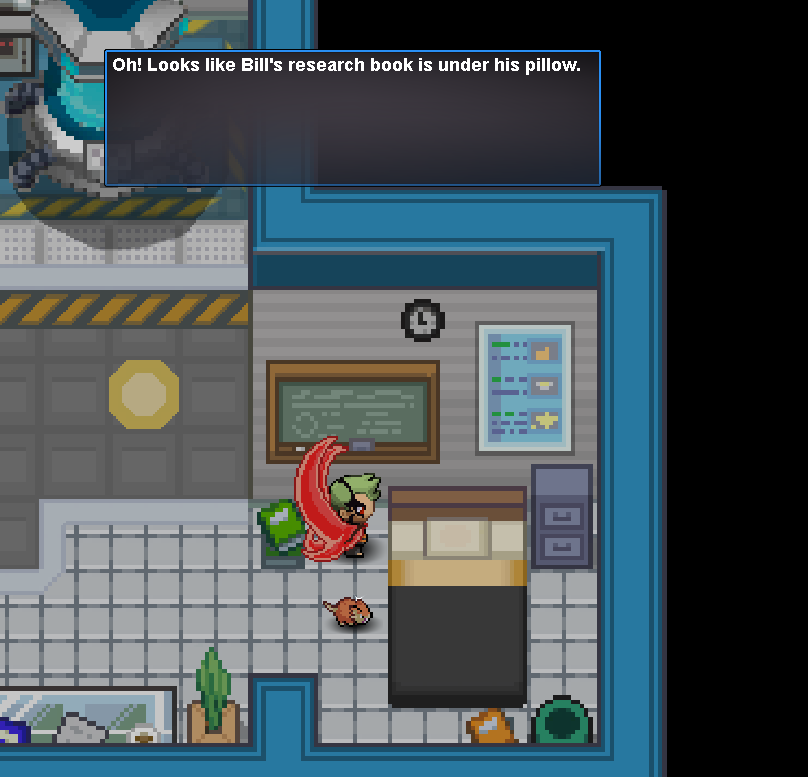
Complete Kanto Walkthrough Hello, I've created this guide to help out the newer players who may be struggling with progressing in the story. In this guide, I will go over how to beat the Kanto region's story; from the intro to the Elite 4. Hopefully, you can find use of it and it helps you Throughout the guide, I will be linking other guides for side quests or other peoples guides on certain story quests. This is because I believe it's important to credit the people who have already put in the effort to make helpful guides. Guides that I don't find a place for or guides that I feel are important to be included will be linked at the bottom of this post. For the users who have been wanting me to create a Johto guide, you can find it in the link provided below. Apologies for not creating it myself, sooner. I got burned out from the game and the guide was left half complete in my documents. Luckily, SugarRed9 has completed her own. It follows the same structure as this guide so everything should be familiar to the new players who are following along. Arielgg has also made the Hoenn and Sinnoh guides, so be sure to give a big thanks to her! Johto Guide Hoenn guide Sinnoh Guide To get the most out of this guide, please use CTRL+F to search for the part that you're looking for. The index A place of reference to help you better find what you're looking for. Introduction Pallet Town Route 1 Viridian City Viridian Forest Pewter City Route 3 Mt. Moon Route 4 Route 25 & 25 Cerulean City Route 5 & 6 SS Anne Vermilion City Diglett's Cave Rock Tunnel Route 8 & 9 Celadon City Lavender Town Route 12, 13, 14 & 15 Fuschia City Journey to Saffron Saffron City Journey to Cinnabar Cinnabar Island Viridian City Gym Victory Road Kanto Elite 4 Finishing Kanto and starting Johto The guide Introduction WELCOME TO PRO! Once you start a new game on any of the two servers, you will be greeted by Professor Oak. From here you can design your character; please note, you cannot change your character's appearance without buying the Magic Mirror from the coin shop. So chose wisely. Once you have chosen your character you will be spawned into the intro world. Follow the dirt path South until you reach Oak; talk to him then continue the path. Eventually, you will reach Mew, it will flee and you can continue the path. Once you reach your mother she will start crying about how much she will miss you, once her dialogue is over you will be teleported to Pallet Town. Pallet Town Once you spawn in Pallet Town you should leave your home and walk to Professor Oak's Lab, which is at the Southeast of your home. Once there you will be given the option to chose your starter Pokémon. You will also be given your Pokédex. When choosing your starter you have 4 options; Squirtle, Bulbasaur, Charmander and Pikachu. By choosing Pikachu you unlock an extra side quest where you are able to obtain Ash's hat. Link to guide. To chose Pikachu you must click "No." on all three starters. After choosing your starter you can exit Oak's Lab and return home. Talk to your mother then go upstairs and pick the two items on the floor. You will receive 5 Pokéballs and 5 Potions. Now, leave your house and walk outside. You will notice an Eevee with an orange name. Talk to it and you will trigger a scene with Jackson, your rival. Talk to Jackson to battle him. If you lose a battle you will drop 5% of your money. Once you finish the fight you should continue North to Route 1. Route 1 Now that you have left Pallet Town you must continue North, to Viridian City. On your way you can talk to the NPC with the brown coat for a free potion. There are also 3 hidden potions behind this tree. Viridian City Once you enter Viridian, the first thing you will see is a Rare Candy. This Rare Candy will respawn once every 7 days. There is also a trainer here who will trade her Oddish for a Pidgey that has 15 IVs or more in Speed and Attack. If you chose Charmander or Pikachu I recommend this trade as it will greatly help with the first gym. Before you continue the story I recommend training your Pokémon to around level 10. Use Route 22 to train your Pokémon. Once you are ready for Jackson, enter the school building and go to the lower floor. Confront Jackson and you will battle him. His Eevee is now level 8. Once you have battled Jackson, whether you win or lose, you can continue north to Viridian Forest! Viridian Forest When you're in Viridian Forest you will find Viridian Maze. The entire maze is pitch black so you will need HM Flash to go through it. Use this guide to help find your way. Link to guide. Outside of the maze is a boy who has lost his Pidgey to a Team Rocket Grunt. Accept his quest and go into the maze. After defeating the Rocket Grunt you can return to the boy and you will receive 15 Pokéballs and an Escape Rope as a reward. Go back into the maze and talk to the girl on a motorbike, she gives you the option to learn headbutt. You should do this as headbutt is quite useful for finding berries and rare Pokémon. Once you've done everything you can in the maze, start to make your way through the forest. Make sure to battle all the trainers as they're a good source of EXP. After you reach the end of the forest you will exit on Route 2. Use the tall grass here to train your Pokémon to level 15 if they aren't already. Pewter City There isn't much to do in Pewter City except for defeating the gym. Once you enter the city you will be greeted by Team Rocket outside of a Pokécenter. Talk to them then continue to the gym. Brock uses Rock Type so water, grass and fighting are your best options. He uses a Geodude and an Onix. I recommend you level your Pokémon to around level 15 for this gym. After beating Brock he will reward you with the Boulder Badge. By receiving the Boulder Badge you can now use Headbutt and Flash outside of battle if your Pokémon has 150 happiness or more. You also can buy TM34 - Bide from the man near the entrance. When you leave the gym you will talk to Red for the first time. Complete his dialogue and continue to Route 3. Route 3 Again, there isn't much to do on Route 3 except for fighting a load of trainers. Once you reach the Pokécenter at the other side you can enter it and purchase a Magikarp. Outside at the entrance to Mt. Moon, there is a salesman who will sell you 5 Escape Ropes for $2,000. You save $500 with this deal. Mt. Moon Mt. Moon can be a bit of a maze to newer players. When trying to get to the other side you should avoid the first 2 ladders as they only lead you to dig spots. Instead continue on the first floor until you reach the ladder at the end. There is also a free Moon Stone here which can be useful later on. Continue walking through until you reach Mt. Moon B2F, defeat the Rocket Grunts and talk to the scientist. He will battle you for the fossils that he found. After defeating him you are allowed to chose one to keep. On the left is the Helix fossil which gives you Omanyte and on the right is the Dome fossil which will give you a Kabuto. After you take a fossil you can walk forwards a little and battle Jesse and James. After you defeat them you can continue to the exit. Route 4 There isn't anything to do on Route 4 except for battling a few trainers and headbutting a few trees. Continue walking East until you reach Cerulean City. When you get to Cerulean City heal your Pokémon and walk North to Route 24. Route 24 & 25 Once you defeat them all you can progress to Route 25 where you will meet a team Rocket Grunt. Talk to him and you will receive a free Nugget (And a surprise battle :3) After beating him, start to walk East. Defeat the trainers and arrive at Bill's house. Once inside, talk to Bill and he will ask for your help. He has lost his research book and if you can find it for him he will reward you. You might get tired after looking through all his bookshelves and resort to help chat or this guide. His research book is under his pillow, take it and talk to Bill again to receive your reward; a ticket to the SS Anne. Cerulean City After you return to Cerulean City you should start to train your Pokémon to around level 25. Use the trainers from the nearby routes and the tall grass on Route 24 to help level them. Once you feel like your Pokémon are strong enough you can challenge the gym. Misty uses Water Type Pokémon so grass or electric types will work well against her. She uses a Poliwag, a Horsea and a Starmie. I recommend you level your Pokémon to around level 25 for this gym. After defeating her you will be rewarded with the Cascade Badge which gives you the ability to use HM Cut outside of battle. You can also purchase TM11 - Bubblebeam from the man at the front of the gym. Something to remember in Cerulean City is the bike shop. After you buy the bike ticket from Vermilion you can trade it for a bike here. Route 5 & 6 After defeating the Cerulean gym you should continue south to Route 5. On Route 5 you will find the daycare center however it's good to note that breeding is not in PRO. Instead, the daycare is used to teach your Pokémon egg moves after defeating the Naero boss. This is end game content and won't be covered in this guide, if you want to learn more about bosses then check out this guide: Boss Guide. At the end of Route 5, you will find this underground passage. Use it to travel to Route 6 where you can continue the story. Once you arrive at Route 6 you will be able to battle a few trainers. Make your way to the entrance to Vermilion and talk to Psychic Wade. He will teleport you to an alternate reality where Lance has destroyed Vermilion City. Confront Lance and you will be engaged into a battle with him. He will use his Dragonair which spams Hyper Beam; slowly eliminating each one of your Pokémon. After he beats you, you will be teleported to the Vermilion Pokécenter. Rush back to Wade and talk to him, after you finish talking to him you can progress to Vermilion City and the SS Anne. SS Anne To start the SS Anne quest you will first need to talk to Lt. Surge at the Vermilion Docks.He will return to his gym and you will be able to enter the cruise ship. If you didn't get the SS Anne ticket from Bill then you will have to walk all the way back to Route 25 and complete his quest. When you enter the SS Anne, talk to the usher and he will escort you to your room. Log in to the PC next to your bed and he will move from your doorway. Whenever your Pokémon need healing you should come back to your room and interact with your bed. As you continue you can go into each room of the ship and battle trainers. To maximize your EXP I recommend that you battle all of the trainers on the ship. Make your way to the first floor and enter the kitchen; located on the far left. Make sure you have a Pecha berry to give to the doctor, if you don't have one in your inventory then there will be one in a trash can. Talk to the doctor in the kitchen and offer to help him cure the captain. When you show him the Pecha berry he will tell you to go the second floor and meet Jenson.Go to the second floor and enter the room on the far right. In here you can talk to Jenson who will ask you to find his Blissey in the ballroom as it holds the secret potion. Make your way upstairs again. From there you have the option to beat Jackson again. You might as well as it's some free EXP and he probably deserves it. Continue to the ballroom and head to the upper floor where you will find Jenson's Blissey. Talk to it and it will disappear and leave you with the secret potion.Now you can return to the second floor and find the captain. On the way there you can pick up some leftovers from this trash can, Once you get to the captain's quarters you can give him the potion in return for HM Cut. You can now leave the SS Anne and fight the Vermilion gym.You cannot return to the SS Anne after leaving. Vermilion City Lt. Surge's gym puzzle is probably the most annoying one out of the Kanto gyms. Instead of having something cool like teleporters or... teleporters, he has a bunch of trash cans switches and two of those switches need to be activated in the correct order. When guessing the switches you will mostly see this: However, once you trigger the first switch you will see: You now have to find the second switch in the sequence by going through all the switches again. However, if you click the wrong switch then you'll have to start again, so you better remember where that first switch was. Once you finally find both correct switches you will be able to progress and battle Lt. Surge. Surge specializes in Electric Types so ground type Pokémon will be most effective against him. He uses a Voltorb, Pikachu, Electrode and Raichu. I recommend you level your Pokémon to around level 35 for this gym. Upon beating him you will be rewarded with the Thunder Badge and you'll be able to buy TM24 - Thunderbolt from the man at the entrance. When exploring Vermilion you can go inside this house and receive a free Old Rod. You will need to collect this in order to gain access to the Good Rod and eventually the Super Rod. You can also enter the house next to the Pokécenter and help the boy. Upon paying him $60,000 & giving him an OT Ditto, Samuel will thank you by giving you the bike voucher. You can trade this voucher in at the Cerulean Bike store to receive your bike and gain access to the bike route. Diglett's Cave After you are done in Vermilion, head East to Route 11. Here you can talk to a karate expert outside of Diglett's Cave and he will move out the way.Enter the cave and follow it through to Route 2. Once there you should head South to the stophouse. Talk to Oak's aide and he will check your Pokédex. You need to have caught 10 different species of Pokémon. You can check your caught data by going to your Pokédex and looking at the number next to "Owned." Now that you have HM Flash you can go back to Cerulean City and go East to Route 9. Rock Tunnel After travelling through Route 9 and beating the trainers there, you will have to enter Rock Tunnel. However, similar to Viridian Maze, Rock Tunnel is pitch black so you will have to teach one of your Pokémon HM Flash.To use Flash outside of battle you have to, first, click the Pokémon in your party and then click the move "Flash." Now your vision should be a lot better. Follow the cave through, it's mostly linear but if you are having issues finding the correct ladders then here they are in order. Once you escape Rock Tunnel, head South to Lavender Town. Upon arrival you will hear two guards talking about crime in Celadon City. Since you cannot do anything in Lavender Town yet you must go West to Route 8. Route 7 & 8 There are a lot of trainers on Route 8 which means there is a lot of EXP to be gained. There is also a hidden abandoned Growlithe behind this tree. After beating the trainers on Route 8 go to the underground tunnel and continue East to Route 7. There is nothing interesting on Route 7 so continue to Celadon City. Celadon City When you arrive at Celadon City the first thing you might notice is Sergeant Rick. Team Rocket has set up base in the Gamecorner and Rick needs help infiltrating it. To start the quest you need to offer your help. Enter the Gamecorner and talk to Greg. He will lead you downstairs. Once you are downstairs, talk to Greg again and he will leave. However, clumsily, he will forget his lift key. Pick it up and use the lift at the bottom of the hideout. Use the lift to go to B2F where you will meet Jackson. Fight him and defeat him in a battle. When you beat him he will get really upset and alert Team Rocket of your whereabouts. Walk around and you will be captured by Team Rocket. Whilst in this room you can use the crates to hoist yourself over the wall and attempt an escape. If a Team Rocket member sees you then you will be transported back to where you started. In B2F there is a large maze with some items scattered around it. Go through the maze, following the red arrows and exit the maze with the green arrow. Once you collect all the items go down the second flight of stairs to B3F and fight Greg. After you beat him go through the smaller maze and down the staircase. Once you're in B4F defeat the Supervisor to get the Card Key. Go back upstairs to B2F and through the large maze again. Take the lift to B4F and use the Card Key on the hidden door. Fight Giovanni and after you defeat him he will run from the building. You can now pick up the Silph Scope from Giovanni's table. You now need to look in each receptor for an Eevee. There are 2 receptors in Giovanni's room, 1 on the other side of B4F and 2 more on B3F. After you find the Eevee you can now leave the Gamecorner and talk to Sergeant Rick. He will reward you for your hard work with the Eevee that you just saved. Now that you've beaten Giovanni you can talk to these Team Rocket members and they will run from the city. You now have access to the Celadon gym. Heal your Pokémon and go challenge it. Erika specializes in Grass Type Pokémon so fire, poison, bug and ice type Pokémon will help you a lot. She uses 3 Pokémon, a Victreebell, an Ivysaur and a Vileplume. I recommend you level your Pokémon to around level 45 for this gym. After you beat her you are given the Rainbow Badge which gives you access to trading with other players. This opens the option to do evolutionary trades which can be useful later on. You can also buy TM21 - Mega Drain from the man at the front of her gym. Exit the gym and you will be put into a battle with Red. Just like Lance's Dragonair he is highly over-levelled compared to you so defeat is almost inevitable. Once the battle is over you can head back to Lavender Town. Lavender Town When you arrive at Lavender Town the first thing you should do is snoop around Mr. Fuji's house. There will be some notes on his desk; interact with them and continue to Lavender Tower. Enter Lavender Tower and work your way to the top floor. You won't need to worry about going back to heal your Pokémon as half way up there is a Nurse Joy. When you get to the 6th floor you will have to use the Silph Scope to reveal the spirit of a Marowak which is blocking your path. You can't catch it so once you KO it move on to the 7th and final floor. There you will have to defeat a few Team Rocket Grunts and save Mr. Fuji. Once you save him he will reward you with the Poké Flute. Leave the tower and return to Mr. Fuji's house and engage in some dialogue with him. When he is finished talking you can go South of Lavender Town to Route 12. Route 12, 13, 14 & 15 Follow Route 12 South until you find the sleeping Snorlax. Use the Poké Flute to wake it up and try you best to capture it. Once you either KO or capture it you can now use the stophouse to the left for a faster way to get to Vermilion City. In the upper floor of the Route 11 stophouse there is another Oak's aide who will give you Dig after you capture 30 different Pokémon. Continue South on Route 12 until you reach a small patch of grass. There is a hidden rare candy here that respawns once every 14 days. Pick it up and continue the wooden path to Route 13. On Route 13 there is a large maze with a lot of trainers in it and at the end of it, Berry Tower.You can battle in Berry Tower and win.. you guessed it, berries. If you don't need berries then continue the path South to Route 14. Once on Route 14 head Southwest to Route 15 then finally follow Route 15 West until you reach Fuschia City. Fuschia City Unlike some other cities, the first thing you should do in Fuschia is defeat the gym. Janine, the leader of the gym has many other lookalikes in her gym and you have to work your way through them and an invisible maze. Follow this route to battle each trainer and get to the gym leader. Janine uses Poison Type Pokémon so ground and psychic type Pokémon will easily take care of her. She uses a Crobat, 2 Weezings, an Ariados and a Venomoth. I recommend you level your Pokémon to around level 55 for this gym. After you beat her you will be rewarded with the Soul Badge. You can also buy TM6 - Toxic from the clerk at the front of her gym. When you leave the gym walk south until you meet Victor on the beach. Battle him and he will tell you where to find HM Surf. You can also teach any Pikachu Surf if and only if you chose Pikachu as your starter. Head to the North side of Fuschia and enter the Safari Building. Here you can pay $5,000 for 20 minutes of safari time. When you are teleported to the Safari Entrance follow these directions to get to Safari Area 3: East to Safari Area 1 -> North-East to Safari Entrance -> West to Safari Area 2 -> South to Safari Area 3 When you get there, enter this house and HM Surf will be waiting for you on the wooden table. From here you can also enter the Safari Exclusive Area if you bought a membership to PRO. More info on Membership only areas can be found here. Now that you have HM Surf you can either use up the rest of your safari time looking for rare Pokémon or you can use an escape rope to be teleported to your last used Pokécenter. Before you leave Fuschia City, make sure to visit the Fishing Guru's house where you can purchase the Good Rod for $15,000. You must have the Old Rod first in order to buy the Good Rod. Journey to Saffron From Fuschia City you can either head West to Route 18 and follow the Bike Route to Celadon City (Require the bike quest to be completed to enter this area) or head East and go back to Lavender Town When trying to enter Saffron you will be told by the stophouse guards that they will only let you pass if you give them some Lemonade. To get the Lemonade you will have to return to Celadon City and go to the Celadon Mart. Go to the top floor of the Mart and purchase one Lemonade from the vending machine. Before you leave the Celadon Mart you can talk to this Thief and complete hist side quest to unlock TM46 -Thief. Here is a link to a guide on the quest. Take the Lemonade to one of the stophouse guards and give it to him. He will tell the other guards to let you in in the future. Saffron City The first thing you should do is visit the Saffron Dojo. In there you can fight some trainers for some easy EXP and once you defeat Koichi you can take either Hitmonlee or Hitmonchan. After you are done here you can progress to Silph Co. When you arrive at Silph Co. your first impression might be that you have to spend 20 minutes spamming warp panels until you get it correct. However, this isn't the case as a matter of fact, you only need to use 2 warp panels to get to Giovanni. But I highly recommend taking your time and battling all the Team Rocket Grunts to gain as much EXP as you can. Once you feel that you are ready then go to the 3rd floor and take the first warp panel. Then take the next panel opposite the bed. Once you use those warp panels you will have to battle Blue to prove that you're ready to fight Giovanni. After beating Blue you can fight Giovanni. Make sure to be over-levelled or bring some potions as he seems to cause some issues for many players. After you beat Giovanni he will flee from the building and you can talk to the Silph Co. Director. As a reward, he will give you a Master Ball some Rare Candies. You're now finished with Silph Co. Make your way to the Pokécenter and heal your Pokémon for the 6th gym. To most the Saffron Gym puzzle can be both confusing and frustrating, it's almost as bad as Vermilion's puzzle. However, similar to the Silph Co. warp pads I've put together an image that shows you the fastest way to Sabrina. Simply follow these directions: Up -> Down -> Down -> Left. Sabrina is the Psychic Type gym leader. Bug, ghost and dark type Pokémon are recommended to ensure a victory. Sabrina uses a Hypno, Mr. Mime, Espeon and an Alakazam. I recommend you level your Pokémon to around level 65 for this gym. After beating it you will be rewarded with the Marsh Badge and you'll be able to purchase TM29 - Psychic from the man at the front of the gym. Journey to Cinnabar There are two ways that you can travel to Cinnabar Island from. You can surf either South from Pallet Town or Southwest from Fuschia. If you surf from Pallet Town then you'll encounter a few trainers and eventually arrive at the North side of Cinnabar. If you surf from Fuschia, however, you will have to go through the Seafoam Islands. You can also surf Southeast from Fuschia to start the free Arcanine mount quest. If you chose the Seafoam Route then you'll eventually surf to these islands. Enter through the cave entrance and walk East in the cave. There is no need to use any ladders unless you're looking to level your Pokémon. Just carry on East until you reach the exit. After you exit the islands, continue to surf West until you reach Cinnabar Island. Cinnabar Island Once you arrive at Cinnabar Island, if you talk to the guard outside the gym he will tell you that you need to bring him a key which is hidden in the Cinnabar Mansion. Enter the Mansion and go to the second floor. From there you should take the staircase at the North side of the second floor. When you reach the 3rd floor you are given the option to enter one of five doors. Each one will lead you to a different location in the mansion; some lead you outside of the mansion. When you find the correct door you should end up in B1F. Head to the west side of the room and interact with the bookshelves. You will pass through the wall and be able to take the Mansion Key. When you retrieve the key from Cinnabar Mansion you can talk to the guard outside of the gym and he will leave, allowing you to pass. Work your way through the gym and it's trainers until you reach the last trainer on the first floor. There will be a small scene between Lt. Surge and Blaine involving Mew. When Mew leaves you can go downstairs and find Blaine. Blaine is the Fire Type gym leader. Water, ground and rock type Pokémon will help you defeat him. He is the first gym leader to use 5 Pokémon. Those being Arcanine, Rapidash, Charizard, Ninetales and Magmar. I recommend you level your Pokémon to around level 75 for this gym. Defeating Blaine will give you the Volcano badge, you can also buy TM35 - Flamethrower from the man at the front of his gym. You also gain access to the fossil recovery room at the Cinnabar Research Lab. Finally, now that you've defeated the 7th gym you are allowed to enter the fossil recovery room at the Cinnabar Research Lab. From here you can revive any fossils that you pick up on your journey. In the lab, you can also talk to Davis and receive a free Porygon after you have 100 caught data on your Pokédex. Viridian City Gym When you're done at Cinnabar Island you can head North to go back to Pallet Town. From there continue to head North to Viridian City.If you were taking your time with the story that Rare Candy might've respawned. Anyways, go to the gym and enter it. Inside you will meet Blue and he'll tell you about how strong Giovanni really is. If you feel like you're prepared then continue. Despite Giovanni having 6 Pokémon with him, he will only use one. His Armoured Mewtwo; a Steel/ Psychic type. Dark, ground, ghost and fire type Pokémon will be extremely useful in this battle. I highly recommend you level your Pokémon to around level 85 before challenging this gym. By beating Giovanni you are rewarded with the Earth Badge and access to the Kanto Elite 4. You can also buy TM26 - Earthquake at the gym. Giovanni will now disband Team Rocket and never be seen again. Victory Road To get to Victory Road you will have to head West of Viridian City, through Route 22. Talk to the guards outside of the reception and they will let you pass. Once you're inside, head North and meet Red. He will battle you and probably completely destroy you again. After the battle is over he will move and you'll be free to go through Victory Road. Go through and beat all the trainers as you really need the EXP for the Elite 4. As you make your way through and come to the exit you will encounter Moltres. (You might not see it due to the mass amounts of players in the area, but it's right in front of the exit.) Interact with it to initiate a battle. Something to note is that you can not catch Moltres. Currently, the only legendary Pokémon that you can catch are Mew, Celebi, Jirachi, one of the Legendary Dogs (Suicune, Raikou, Entei), Heatran, one of the Legendary Lake Trio (Azelf, Uxie, Mespirit), one of the Eons (Latios, Latias), Phione and Genesect. After you KO it you can move through the exit and into the Indigo Plateau. Here you will see two building and Youngster Joey. As you're doing the Kanto Elite 4 you will need to go to the East building. As you walk there you will be congratulated by all the Kanto gym leaders as well as your mother. Now that you've beaten Victory Road it is time for you to train your Pokémon so they are ready for the Elite 4. Use the exit of Victory Road as a hotspot for EXP. Alternatively, you can travel back to Seafoam Islands and use the lower floors to level up your Pokémon. Once your Pokémon each reach around level 90 you will be ready for the Elite 4. Stock up on potions and revives and enter via the door at the back of the center. Kanto Elite 4 Lorelie is the first member of the Kanto Elite 4. She specializes in Ice and Water type Pokémon. Her party consists of a Dewgong, Slowbro, Lapras, Jinx and Cloyster. Electric type Pokémon can wipe this team with ease. After defeating her you will be allowed to progress to the next member of the E4. Continue to the room behind her where you will meet your next challenge. Bruno, the second member of the Elite 4 is a Rock and Fighting type expert. He uses an Onix, Hitmonchan, Hitmonlee, Machamp and another Onix. Using Psychic type Pokémon will aid you in this fight, however, Bruno is probably the easiest member of the Elite 4. By beating him you will be allowed to progress to the next member of the Elite 4, Agatha. Agatha is the third member of the Elite 4. She is a Poison and Ghost type trainer. She uses a Gengar, Crobat, Haunter, Arbok and a Mega Gengar. Similar to Bruno, using Psychic type Pokémon will help you greatly in this fight. Sucker Punch is also an easy way to take out her strong ghost Pokémon. After you beat her you can pass to Lance, the final member of the Elite 4. Lance is the final member of the Elite 4 and specializes in Dragon Type Pokémon. He uses his Gyarados, Dragonair, Dragonite, Aerodactyl, Tyranitar and Charizard. Four of which aren't dragon type Pokémon. Water and Electric type Pokémon can wipe this team off the face of the earth. Upon beating him he will allow you to pass to the Kanto Champion, where you will fight to become the champion of the region. Heal your Pokémon with the potions and revives that you bought and progress to the next room. So I've been calling him Blue this entire time. But his name is actually Gary? Anyways.. Gary is the champion of Kanto, he is a bit of a rebel and doesn't use a monotype team. Instead, he uses a Pidgeot, Alakazam, Rhydon, Arcanine, Mega Blastoise and an Exeggutor. You shouldn't have too much trouble beating him.After he is defeated, he will congratulate you on your victory. Walk behind him and talk to Professor Oak who will bring you back to Pallet Town. Finishing Kanto and starting Johto Now that you're the Kanto Champion you can access Johto. Go back to Oak's lab and talk to him, he will tell you of Johto and how to get there. Now go back to the Indigo Plateau Reception where you fought Red. Walk South and talk to the guards in front of the exit. They will allow you to pass. You can now travel through Route 26 to go to Johto. Continue walking South and you will eventually reach Route 27, from there you should walk West until your reach Tohjo Falls.If you surf North a little you will find an abandoned Crobat. Exit Tohjo Falls and carry on walking West. Start surfing and you will finally reach Johto. BEWARE: Once you enter Johto there is no turning back until you beat the 8th gym. All your Kanto Pokémon will be locked in you PC and you won't be able to use them unlit you beat the 8th gym. If you wanted to do anything in Kanto before you go to Johto you should do it now! If you are ready for Johto then click "Yes" and walk forwards. This concludes my Kanto Walkthrough. Thanks for reading
1 point
-
PolishOrder Witaj Nieznajomy (w rzadkim przypadku – Nieznajoma)! Skoro zawędrowałeś w tę część tego bajzlu zwanego też forum PRO, to znaczy, że czegoś szukasz… My to mamy! Jeżeli pragniesz sławy, bogactwa, potężnych sprzymierzeńców i niezapomnianych wrażeń, a przede wszystkim, dobrej zabawy. Jesteś człowiekiem (nie jest to jednak obowiązkowy punkt regulaminu) który potrafi odnaleźć się w gronie osób nieco spaczonych pokemonowym światem, czasem nawet pozytywnie spaczonych, jesteś w miarę koleżeński (lub koleżeńska) i znudziło Ci się odgrywanie Solo – zapraszamy do PolishOrder! Mamy na pokładzie swojego „Sokoła” prawdziwe rarytasy! Przekonaj się sam! Większość z nas zawsze (lub często) przyjdzie Ci z pomocą – poradzi, zmiesza z błotem i takie tam. Gwarantujemy Moc zabawy i świetlne uciechy! WYMAGANIA Jedyne czego oczekujemy to to, że będziesz grał aktywnie i zachowywał się przyzwoicie, jak na szanownego naszego Członka przystało – żadnego obrażania, żebrania no i co gorsza – spamowania! Bądź z nami po tej lepszej stronie Mocy. AUTOPROMOCJA Gildia PolishOrder powstała na fundamencie wieloletnich doświadczeń grupy zapalonych graczy pokemonowych. Gildia oferuje swoim Członkom właśnie to ogromne doświadczenie które procentuje w postaci szybkiego rozwoju w grze. Stawiamy na ambicje i dobrą zabawę! Sporo z nas krążyło po różnorakich odmianach PokeMMO, więc może nawet już się znamy? Sprawdź sam! KONTAKT Jeżeli chcesz zasmakować PokePrzygody razem z nami – wal śmiało! Użyj PMki i zachwyć nas swoją osobowością! Nie wiesz jak i do kogo? Pacz: W okienku czatu wpisujesz komendę /pm nick, gdzie pod „nick” podstawiamy pseudonim jednego z Oficerów lub nawet samego Lidera (nie radzę, okropny typ). Oto lista Oficerów, których możecie dorwać w grze: - KyloRen (Lider, jeżeli nie wiesz zbyt wiele o Star Wars to nie próbuj) - Paleo (szansa złapania online na poziomie trafienia shiny Aerodactyla) - mint996 (most wanted!) - Pokesnor (miły pan z sąsiedztwa) - Wojti9152 (warto spróbować) - Orionkaa (nocna zmiana) - Anusiak (kolekcjoner) - MrSebo (waleczna dusza) Ponadto w treści PMki zaleca się użycie magicznych sentencji: „Kajlo nie myje zębów!”; „Roszpi śmierdzą stopy :/” lub „Skałki najlepszymi pokami!” Po więcej informacji lub w celu złożenia reklamacji zapraszamy do kontaktu z naszymi konsultantami dostępnymi na gildyjnym Discordzie: Do zobaczenia w Giercy!
1 point
-
NoMercy is currently the oldest active guild within PRO with a deep and rich history. NoMercy was officially formed in the beginning of April, 2017 by @teerav with the special help of @Natryu , @vastik , @Benikisaki, and so many others. NoMercy was a guild created to foster a competitive experience for pvp players within the blue server. We found immediate success placing third during our first season, and we continue to succeed by finishing first place eight seasons. Today, NoMercy is a community with several guilds and gaming interests. We host weekly events and pride ourselves with having a light-hearted members willing to help anyone seeking it. Apply today and immediately gain access to some of the most veteran minds in PRO! Old Guild Pictures Guild Discord Invite Link Everyone is welcome to join our discord as a friend. https://discord.gg/DhDvbzpPKV NoMercy prides itself on events where you can earn content in the games you play as well as real world money! All of our events are hosted via our Discord. Most events are available to everyone, not just members! We do host member-only events as well. Guild Discord Invite Link Everyone is welcome to join our discord! https://discord.gg/DhDvbzpPKV
1 point
-
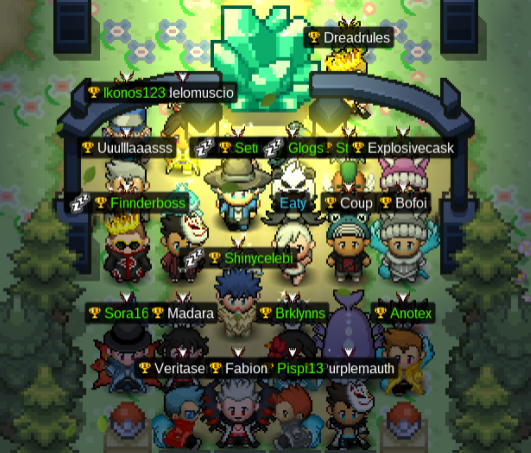
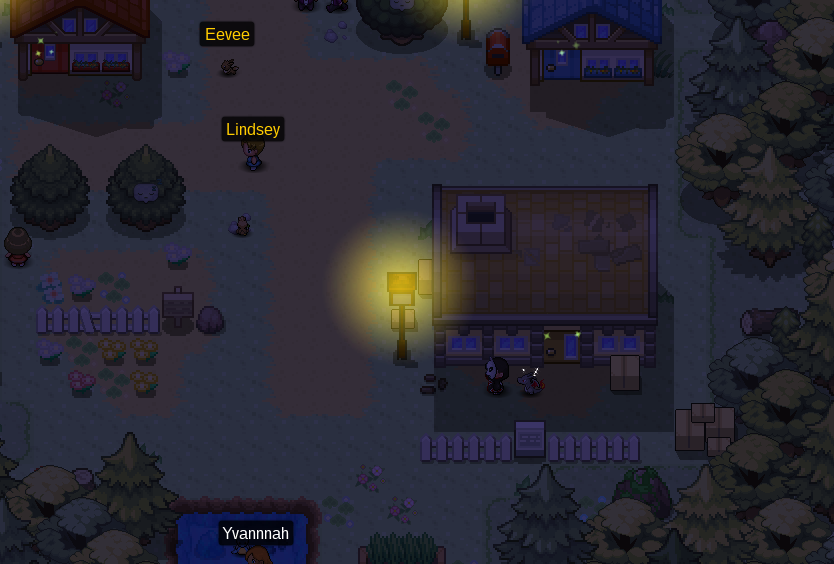
It emerges yet again! School is almost over, and that means one thing; summer is upon us, and with it, Pokemon Revolution Online's Vulcan Island! It has appeared yet again in PRO's seas and will stay for a limited time only. In Vulcan Island, you will be able to hunt complete some quests with cool rewards, fight bosses exclusive to the area, and hunt some rare Pokemon, including the Kalos starters! But that is not all, there's a rumor that some other rare Pokemon might appear there in the future! To access Vulcan Island, you need to talk to Sailor Dionisis in any of the port cities, and be the champion of the region you're accessing the map from: Dionisis will take you to Vulcan Island Shore, where you can start your summer adventure. Have fun, enjoy and good luck with your hunts!1 point
-
How are you guys? Did anything massively change in the almost 8 months I was gone?1 point
-
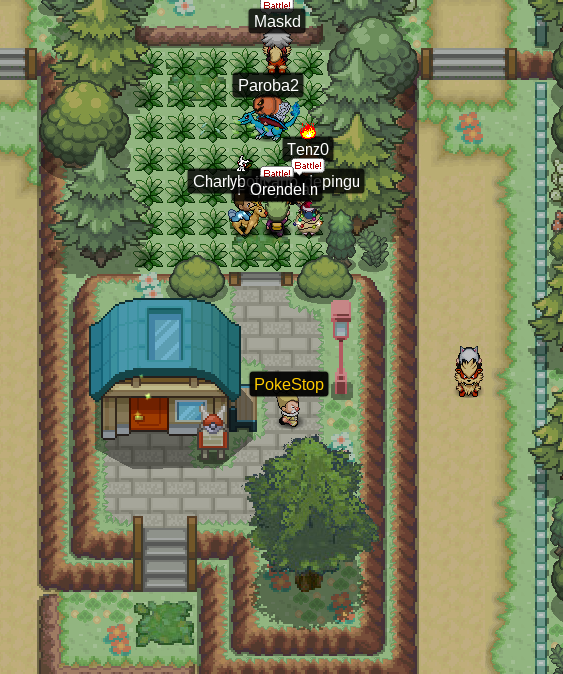
Hello, Video: I'm DrNerfariouz and I've made a 14 minute video showing how to quickly get through the dig / Pokestops. This is a very effective way of earning money in PRO but many people overlook it. I also cover the extra things you could and should do along this path to make your 3 daily dig run as productive as possible. If anyone has any ideas on how to do this more quickly, with or without transport, then let me know. Thanks a lot, enjoy.1 point
-
Yes if you can reset, do it1 point
-
yeah agreed1 point
-
Player name: buyshinynair Showdown name: buyshinynair Server: silver Rank on ladder: 201 point
-
Player name: theakalli Showdown name: Akalli Server: Silver Rank on ladder: 131 point
-
Nice! Glad I was able to help. :) Now, as the issue is solved, I will lock this topic. I wish you a great day. Regards Xylos1 point
-
1 point
-
+1 it gets pretty tiresome after a while.1 point
-
Hey there.Just looking at the trainer card I was thinking it would be nice to be able to see the amount of PvE coins we currently have.It would make it easier than going to battle tower everytime.Since we now have multiple ways of getting PvE coins,in different regions too,I think it would be nice.Here's an example on how I'd suggest it to be Just right under "PvP coins" we would have the same thing with PvE coins.I'm not good at photoshop so I unfortunately cant show it better but I think you get the idea. Thanks for reading!1 point
-
This has been forwarded to Shane and will hopefully be added soon(™?). Thanks for the suggestion.1 point
-
If you helped Team Magma, Mt Summer Exterior will turn into Mt Summer Exterior 21 point
-
Wow!!!! 8m start for dragalge????? :O damn if i wasnt broke... Good luck my friend!!1 point
-
Great job1 point
-
Isn't it 8m start offer? ^^1 point
-
Hello there! Please do note that the Red server has now merged with the Blue server to form the Silver server and the Yellow server has now been renamed as the Gold server. If you haven't updated your client you'll have to download the latest update here! If you played on the Red/Blue Server, you will also have to log onto the Dashboard and merge your accounts. Also, don't forget to select the correct server as your main server. Furthermore, please be sure to read the Merge FAQ for questions you may have as well as the Common Merge Errors:FAQ if you encounter issues whilst merging. If you played on the Yellow server, then you may simply log on the Gold server and should still have your items and continue your progress. Hope this helps and have a great day!1 point
-
Silver server = Red and Blue servers merged together, Gold server is Yellow server. More details about merging you see in these links below: https://pokemonrevolution.net/forum/topic/88616-url https://pokemonrevolution.net/forum...-before-making-a-merge-issue-thread-◀︎.90848/ https://pokemonrevolution.net/dashboard/1 point
-
I will try to1 point
-
@Maffz Hello! I'll send your discord invite right away. c: When in the discord please at an online officer or guild leader and they'll send your guild invite as soon as they're able!1 point
-
Your Discord Tag: Addiction#5722 Your Trainer Card: Are you an active player?: Yes , of course , i play PRO atleast 1 h a day almost everyday Are you of the age 16 years or up?: 17 in 1 month Do you meet the requirements to join this guild?: I do , you will find me online on discord everytime i play PRO Why do you feel you will be a good addition for this guild?: I like helping others and I will do anything to support my team What server did you make your first account on? (Blue, Red, Yellow, Gold, or Silver): On Red1 point
-
Hey [uSER=1414027]jolle18,[/uSER] it seems like you haven´t merged your account yet. The Blue and Red server were merged into one server and is called Silver now. The Yellow server stay´s alone but is called Gold from now on. To be able to play on the Silver server and continue your game, you have to merge your Red and Blue account profiles. For that, take a look at our merge FAQ. In case you should have any problems, take a look at our merge issue FAQ. Let me know if it works and you can continue your journey. Regards Xylos1 point
-
how come you worried to screenshot? just report that noob in report center, keep the pvp environment fair https://pokemonrevolution.net/forum/index.php?forums/report-center.39/1 point
-
While this is a cool idea, I don't think it's something that needs to be implemented. Quality of life =/= making things easier.1 point
-
mucha suerte!!! hay gente que me cae muy bien de la guild1 point
-
suena bien como me uno???1 point


.png.b89e9a4d5f0a82dfb1c4b91cec2357f9.png)