
Bhimoso
-
Posts
3183 -
Joined
-
Last visited
-
Days Won
55
Everything posted by Bhimoso
-

How to start hunting any pokemon: the Newbie Guide!
Bhimoso replied to Bhimoso's topic in Work In Progress
Fixed this guide too! 4 guides fixed, only 10+ to fix now :) -
Cannot login to silver server but can to gold
Bhimoso replied to Trouxa's topic in Resolved General Support
Your issue is probably caused as you may need to do a Server Merge. You will only need to merge your account's progress in the Dashboard, choose which Story Progress you want to keep and then reset your password. You should be able to continue then. https://dashboard.pokemonrevolution.net/auth/login First, log in here and merge your progress. You have more instructions below: https://pokemonrevolution.net/forum/topic/90465-everything-about-the-merge-general-faq-issue-faq-▶︎-read-before-making-a-merge-issue-thread-◀︎/ Then, you only have to reset your password in the Dashboard and you should be ready to go! -
After an entire year, the guide has been reworked and revisited. I still am unclear about the real Hidden Item locations for Sinnoh post Elite Four items. However, I now made the guide fun to read. I hope you enjoy it! :)
-
finished The Ultimate Boss Guide for Newbies! REWORKED AFTER UPDATES!
Bhimoso replied to Bhimoso's topic in Work In Progress
It's not your fault :) as the forums have been reworked, the Guide has become disorganised. I am now working on fixing it (funnily enough, I was editing it while you just answered). -
+1.
-
Guide has been edited and fixed. Only 14 more guides to fix now...
-
+1 :)
-
+1, but it isn't that hard to just grab the boat and buy it elsewhere, honestly. And the trip is kinda cheap.
- 1 reply
-
- 1
-

-
https://discord.gg/M8THAH2 Bump!
- 209 replies
-
- 16
-
-
Bump!
-
Wow, people get punished when they break rules? I thought moderators only gave them hugs :/
-
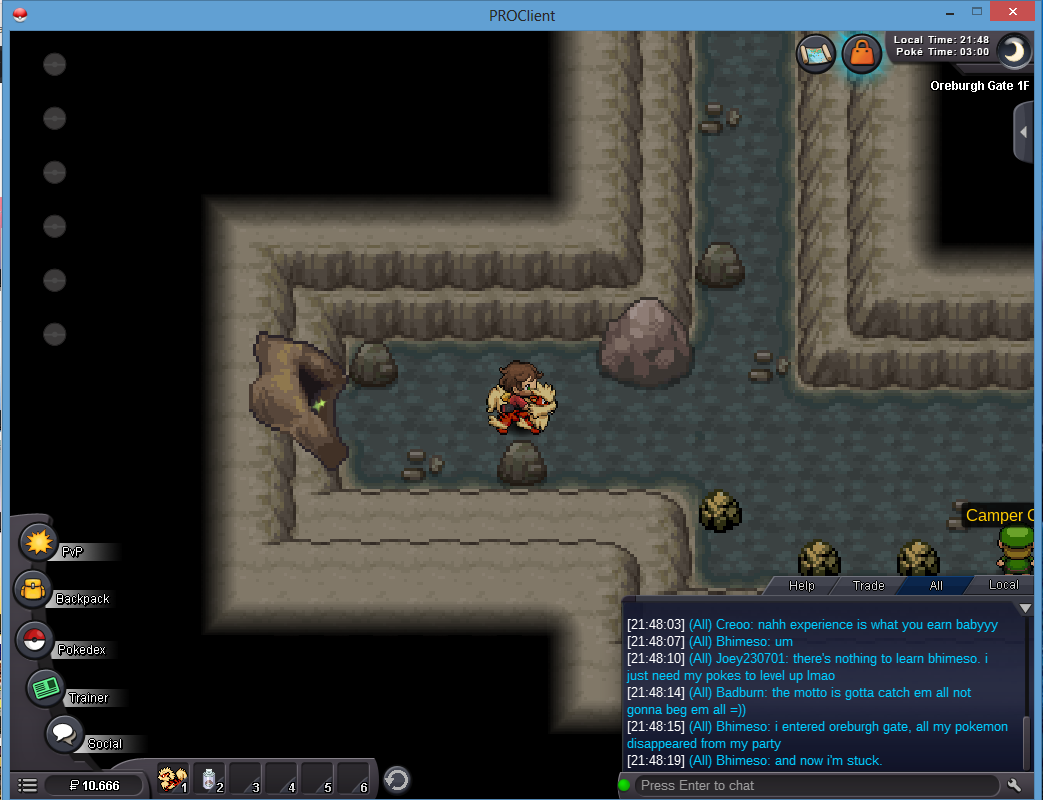
Quick report: I entered Oreburgh Gate 1F through the entrance from the left and it seems I encountered a battle or something. However, in the exact moment I found the battle, my entire team disappeared, there was no battle UI and I was stuck. I had no choice but to relog. I'll post the screenshot here. No idea how to reproduce it, honestly. Was just entering to get to the bottom floor and dig the dig spots.

-
- 1
-
-
I was checking Honedge's and his evolutions moveset. From what I've seen, for story: If you're in story (getting badges), I suggest the moves: Swords Dance, Fury Cutter, Shadow Sneak, Aerial Ace, Night Slash, Iron Head, Sacred Sword. Doublade (his evolution) has the same useful moves if we don't count tutor and TMs. These are good for Story Badges. For Elite 4, I recommend Shadow Sneak/Night Slash, Iron Head, Sacred Sword and Aerial Ace. This deals with most Elite 4 Stuff (in all of the 4) If you fully evolve it to Aegislash, I recommend that you use Sacred Sword, Iron Head, Night Slash and King's Shield/Swords Dance for Elite 4 and Story. These are example movesets he has. However, you can obtain the TM Shadow Ball in the Hall of Fame in Lavender Town (or ask that a friend purchases it in Lilycove Department Store) and teach it to him and substitute Night Slash for it. I hope this helps you :) For PVP, Aegislash (its final evolution) has like 5 sets and it's incredibly broken. It can do way too much stuff. So we don't tackle that here for now.
-
It's really good, tbh. I wish it had more def, it could sell to absurd extents (a similar one with way more def was sold today for 10 million pokedollars). This one is extremely good and I'd keep it and train it. It's a good alternative to Gengar for story. However, Gengar's just insane for everything (story, pvp, bosses). I firmly believe it's the most useful pokemon in all of PRO due to the roles it can fill. I'd suggest you also get a Gengar in the future to fill your team and to use it to beat the Elite Four easily. His moveset and capabilities are just insane.
-
As Zeyrion states: Below Vermillion Gym, cross the bridge there. You'll find it there :)
-
No, teaching any moves will not affect how much EXP he needs to level up. The only thing that will make it harder to level up is evolving it, so don't evolve it early or you will have a hard time leveling it up :)
-
I'd say -1. People come and people go. I've been playing on and off since 2015 and I'd be really annoyed if my account got deleted for being inactive for a few months just because someone else wanted to take my name.
-
It's an unbreedable legendary though, isn't it?
-
It's because they've been updated recently and they need an update in the Wiki. I'd help out update them myself but I've almost completed story on my 4 accounts :/
- 1 reply
-
- 1
-
-
relearn all prelearnt moves from move relearner
Bhimoso replied to Cloysterface's topic in Suggestions
My opinion is +1 If relearning each move costs the same as it originally costed. This would just save some traveling time (and avoid small money sinks) but also become a quick-access money sink move relearning NPC. This would be balanced in my opinion. If this costed only 2k per move, I'd say -1. -
What's the clue that you are being given? It's just hard to find normally. Can you post screenshots?
-
If no one adopts you in Silver, we will adopt you in Gold if you do a Server Transfer :) For now, stay in Silver and enjoy the experience! Free bump for you so a Guild Leader sees this.
-
Cute charmander <3 good luck with the auction!
-
Qué raro. ¿Puedes llegar hasta Snowpoint e intentar conseguir la séptima medalla y luego ayudar al rival justo al lado de Snowpoint, en el lago?
-
You're extremely lucky. Getting a Starter in one of the starting towns is extremely lucky when headbutting :) Also, F for the dead starter :(