


New Trade Zone
Trade Zone is now live
Use the new Trade Zone for auctions and instant-price trades so Pokemon and item offers are easy to find.
Leaderboard


Popular Content
Showing content with the highest reputation on 06/10/22 in all areas
-
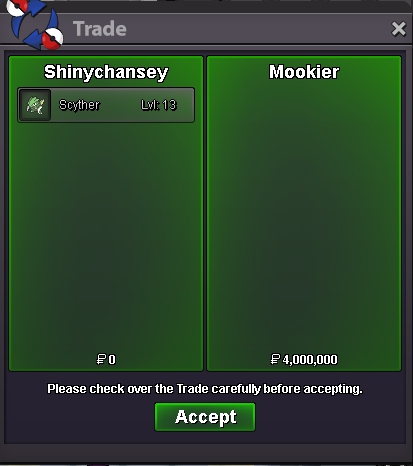
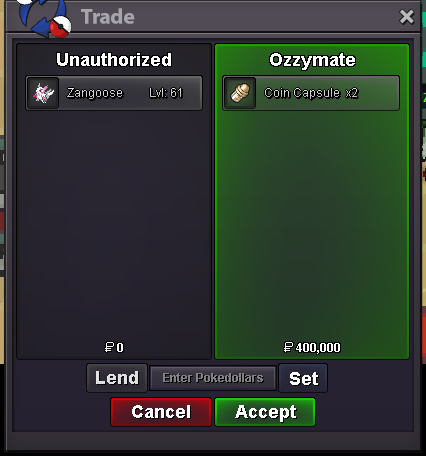
3 pointsStart : 11m Min bid : 200k Insta 15m Start : 15m Min bid : 200k Insta : 20m Start : 55m Insta : 65m Min bid : 500k All Time : 24h Accpect : Cc = 380k RR = 680k * If any player wins in gold server, I will transfer server after trading in silver server.


 3 points
 -
2 points
-
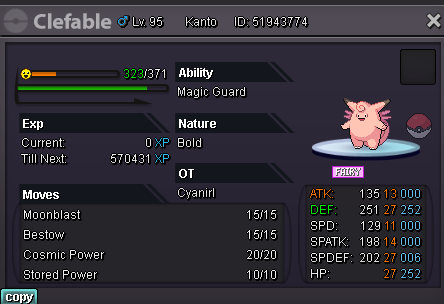
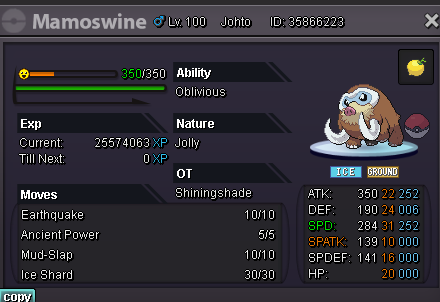
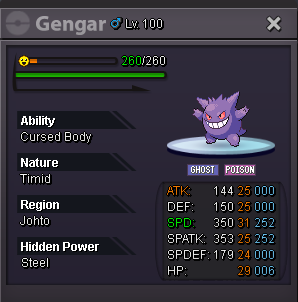
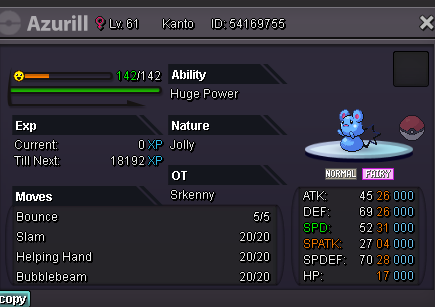
2 points2 points2 points2 pointsare there even any staffs in this forum ? any post i make never answer.....i am aklso still waiting for my choice specs which was removed in FEBRUARY together with my test XD001 even after 100 bumps nothing wil ever happen this will be forever bugged like this dragonkiller sword scam where i also didnt get a pve coin refund or fix after 100 posts -.-2 points2 points2 points2 pointsThere's no point in banning kyurem-Black. Right now it seems overly threatening to the metagame due to its versatility and the unfamiliarity of its use to the majority of the playerbase. Pro's metagame is similar to ORAS/Gen 6 with a few Gen 7 additions. There are plenty of checks and counters such as: Keldeo+Mega scizor, M Metagross+Keldeo, faster threats like mega lopunny, M medi, and latios and is constantly worn down by rocks. Although can argue that Magnezone+M scizor+Byu can threaten both m metagross and M scizor offensive cores with keldeo. Regardless, You're probably concerned by how Kyurem black threathens the popular defensive cores in the metagame such as: Amoongus Heatran and landorus, But the same argument can be made for the prominent wallbreakers that are currently being used such as Mega medicham, mega metagross. Ferrothorn, lando/chomp, zapdos core can handle both banded and LO sets without focus blast which will rarely be seen as they would either lose out on roost or substitute if they are using leftovers. As well as its unnecessity with the core of magne+Black Kyurem. An impish Mega Scizor with a 248 hp 16 def 244 spdef can effectively wall both sets of kyurem; which is why I believe there will be a rise in usage of ferrothorn in defensive cores and Mega scizors in offensive cores. People should be expected to adapt to the changes in the metagame as it will continuously evolve as the development progresses. Not to mention that Z moves are not in the game yet which would without a doubt, make Kyurem Black problematic. I'd honestly suggest releasing tapus and pex along with Z moves.2 pointsIf you got to this guide and have no goddamn idea on how Bosses work, before anything, read this Bible. I'll get straight to the point: I just finished my Boss Guide with Mega Slowbro, so now I will tackle Baton Passing against bosses. The following teams can be substituted by many different options, made quicker if needed (you could use a Baton Passer with Speed Boost and Evasion). I hope you enjoy it. Budget Option = ONLY JOHTO AND KANTO AREAS ARE ALLOWED. NO DAYCARE (because this requires beating two bosses), NO AWKWARD/EXTREMELY HARD TUTORS TO FIND. No Hidden Abilities required. Semi Expensive Option: Unlike Mega Slowbro Teams, which barely require ANY real effort to build (you can build a really strong team with just trash pokemon), Baton Pass requires SOME investment to be functional. In this section you'll see the midway point where we will allow Johto, Kanto areas and tutors, BUT ALSO DAYCARE OPTIONS (which opens a whole new world). Still no Hidden Abilities required. Expensive Option = All 4 Regions in the game allowed, anything allowed in general. The Team Cheap Version The Debuffers Jumpluff: 252 SPEED 252 HP EV. Timid/Jolly, Any ability, Brightpowder. Moveset: Cotton Spore, Worry Seed, Flash, Memento. Magnezone: 252 SPEED 252 HP, Timid, Sturdy. Lum Berry/Brightpowder. Moveset: Thunder Wave, Explosion, Flash, Iron Defense/Substitute Persian: 252 SPEED 252 HP, Jolly, Limber. Focus Sash. Moveset: Taunt, Roar, Flash, Knock Off/Switcheroo Dugtrio: 252 SPEED 252 HP, Jolly. Any Ability. Brightpowder. Moveset: Sand-Attack, Stealth Rock, any move here, Substitute ^îf you do not want to do the requirements for Trainer's Valley, you will have to use Switcheroo on Persian and won't be able to use Susbtitute. These four are the core that prepares our sweep. They are in charge of debuffing the first pokemon from the Boss so that our Baton Pass can set up easily. The Baton Passers It is very hard to find cheap versions of Baton Passers as most Baton Passers struggle not being able to Pass enough stats for you to work properly. We will have limited choices here unfortunately. For this guide, we will use the cheapest Baton Passer in the game: Furret. Unfortunately, since we mentioned we will not be using Daycare or any hard tutors to obtain in the game, we can ONLY resort to Furret. Not even Venomoth is an option. Furret: Leftovers, Impish/Careful, any ability. Impish 252 DEF EV, 252 HP. Careful 252 SPDEF EV, 252 HP. Agility, Coil, Substitute, Baton Pass. Note: you can also run it Jolly, 252 SPEED 252 HP. What this also means is that using budget options means you CANNOT Baton Pass onto SPATKers unless you atleast have the Daycare UNLOCKED with Venomoth. You can only use Physical Attackers with the current rules set in this guide for an actual budget team (Common Pokemon, Kanto/Johto only, no weird/hard to obtain tutors) The Sweepers On the Sweeper side, we are going to use extremely budget options since we clarified this is a budget team. This is mainly aimed to be KANTO ONLY if possible, or Johto Only as a maximum. My Budget teams aim to be available to newbies hunting between Kanto and Johto, the Expensive versions are always for midgame to lategame players. For a Sweeper, we are looking for any pokemon with: 50 or higher base Speed (NOTHING LOWER THAN THIS, I'LL EXPLAIN SHORTLY AFTERWARDS) 100 or base ATK or SPATK atleast (exceptions: pokemon with Adaptability, Huge/Pure Power, weather abilities like Drizzle/Drought that power up your moves, Sniper, Mold Breaker, any ability that powers you up, allows you to ignore other abilities, etc.) Easy to find and build movesets (Level up moves, TM moves, tutors easily accessible in Kanto/Johto). Explanation: assuming you use a 50 base speed pokemon, with 31 IV and no speed investment, you will reach around 136 speed. At +6 Speed you will be at 544 speed. While this number may seem absurd, remember that Hard Bosses have 400 EVs in all stats (including speed) with 31 IVs on each. There are some bosses which have + Speed natures and also have a Choice Scarf equipped (like Officer Jenny's Manectric). This means that she (and a few other bosses) are still capable of outspeeding your pokemon at +6 speed. If you are running a slow tanky attacker that deals massive damage under Baton Pass (the best examples are Azumarill and Conkeldurr), keep in mind that if you use a 252 ATK/SPATK and 252 HP spread, you MIGHT, VERY RARELY get outsped. If you use a pokemon with 40 base speed or below, there will be MANY more Boss pokemon with Choice Scarf that will outspeed you and if unlucky, they will crit and kill you. You'll lose the boss fight. Thus, please don't use any attackers with 50 Base Speed or below. Check Bulbapedia to see if their Base Speed stat is atleast 50. Remember that your boss sweeper should have 20+ IV in all important stats. On a similar note, using a pokemon with less than base 100 ATK or SPATK, unless you have an ability that makes your pokemon broken (like the ones mentioned above), makes you not hit hard enough even at +6 ATK or SPATK. I know it sounds weird that reaching over 1200 or so ATK or SPATK is not enough, but: +6 252+ Atk Talonflame Brave Bird vs. 252 HP / 252+ Def Shuckle: 241-285 (98.7 - 116.8%) -- 93.8% chance to OHKO ^there are pokemon in Bosses tanky enough to withstand the strongest attacks from below 100 base ATK or SPATK if you don't have an ability or item to support it. By the way, that's a MEDIUM Boss. A Hard Boss would be able to ALWAYS survive the hit and Stone Edge your Talonflame to death. Azumarill instead, with a base 50 ATK, thanks to its Huge Power ability: +6 252+ Atk Huge Power Azumarill Play Rough vs. 252 HP / 252+ Def Shuckle: 274-324 (112.2 - 132.7%) -- guaranteed OHKO Below I link a list of all possible Kanto / Johto Physical Sweepers that can help you. They are all COMMON rarity, hit hard enough and don't have really hard requirements. Their IVs should be 20+ except in the reduced stat (in this case, you will always ignore SPATK because all these sets are for physical attackers) Normal Raticate - Guts - Adamant - 252 ATK 252 SPEED Ursaring - Guts - Adamant - 252 ATK 252 SPEED Fighting Machamp - No Guard/Guts - Adamant - 252 ATK 252 SPEED ^yes, I know it's sad but there's not really another option, not even Primeape lol. Flying Literally none LOL Poison Beedrill Mega - Adamant - 252 ATK 252 SPEED - The Megastone for Beedrill is really easy to obtain, winning a few times in the Bug Catching Contest. Ground Dugtrio - any abi - Adamant - 252 ATK 252 SPEED Golem - Sturdy - Adamant - 252 ATK 252 HP Mamoswine - any abi - Adamant - 252 ATK 252 SPEED Rock Golem - Sturdy - Adamant - 252 ATK 252 HP Bug Beedrill Mega - Adamant - 252 ATK 252 SPEED Ghost There are NO Common Kanto or Johto pokemon whose main stat to attack is ATK. 😞 Steel The only Common Kanto or Johto pokemon that is a Steel Type is Magnezone, but it's a SPATK user. Fire There are no Common Fire Types in Kanto or Johto. Water Gyarados Mega - Adamant - 252 ATK 252 SPEED Gyarados non Mega - Adamant - 252 ATK 252 SPEED Kingler - any ability (all 3 are amazing for this dude) - Adamant - 252 ATK 252 SPEED/HP Grass Grass Type Physical Attackers are rare to find. There's no Common one available that is good enough. Electric No Common Electric Physically oriented pokemon are available in Kanto. Psychic No good physical Psychic attackers are common. Ice Mamoswine - Adamant - 252 ATK 252 SPEED Dragon All options here are atleast Rare or very rare. No. Dark The only budget option that is SOMEWHAT close would be Mightyena lmao. Fairy Granbull - Adamant - 252 ATK 252 HP/SPEED Semi Expensive Version (Kanto and Johto only, DAYCARE UNLOCKED. Uncommon Pokemon now allowed.) Trainer's Valley Unlocked for Knock Off (Persian) or don't unlock it and use Switcheroo. Note that Gengar can use either Giga Drain (obtainable in Kanto) or Energy Ball (obtainable in other regions) Note: The Debuffers are exactly the same. The Baton Passers and Sweepers gain new options thanks to Venomoth gaining access to Daycare and gaining Baton Pass. Below you have the sample team A (Furret - Physical Sweeper) and B (Venomoth - Special Sweeper) The Debuffers Jumpluff: 252 SPEED 252 HP EV. Timid/Jolly, Any ability, Brightpowder. Moveset: Cotton Spore, Worry Seed, Flash, Memento. Magnezone: 252 SPEED 252 HP, Timid, Sturdy. Lum Berry/Brightpowder. Moveset: Thunder Wave, Explosion, Flash, Iron Defense Persian: 252 SPEED 252 HP, Jolly, Limber. Focus Sash. Moveset: Taunt, Roar, Flash, Knock Off/Switcheroo Dugtrio: 252 SPEED 252 HP, Jolly. Any Ability. Brightpowder. Moveset: Sand-Attack, Stealth Rock, Memento (daycare), Substitute The Baton Passers It is very hard to find cheap versions of Baton Passers as most Baton Passers struggle not being able to Pass enough stats for you to work properly. We will have limited choices here unfortunately. With a higher budget we'd be able to explore more obscure options (Medicham, Leavanny, Lopunny) With the special addition of Daycare (it's so goddamn funny that literally ALL of the SPATK users you can use in Johto and Kanto are literally gatekept because the ONLY budget SPATK Baton Passer is Venomoth and Baton Pass is locked behind Daycare) we can add Venomoth to our options. Furret: Leftovers, Impish/Careful, any ability. Impish 252 DEF EV, 252 HP. Careful 252 SPDEF EV, 252 HP. Agility, Coil, Substitute, Baton Pass. Optionally: Jolly, 252 SPEED, 252 HP Venomoth (DAYCARE ONLY): Bold, any ability, 252 DEF 252 HP. Leftovers. Substitute, Baton Pass, Quiver Dance, Roost. With the addition of Venomoth, this opens up ALL good SPATK attackers that fit our really low budget (we're practically beggars in Vermillion at this point lmao). The Sweepers (The full explanation on why I chose these and not more pokemon is explained above) This is an improvisation. This will include: UNCOMMON rarity pokemon Still KANTO AND JOHTO ONLY However, we will also grant access to Daycare moves, opening our options. The other regions will still be ignored (also Rare pokemon or just unusable hot garbage). Normal Ambipom - Technician - Adamant - 252 ATK 252 SPEED Miltank - Scrappy - Adamant - 252 ATK 252 HP Pidgeot (Mega) - Modest - 252 SPATK 252 SPEED Raticate - Guts - Adamant - 252 ATK 252 SPEED Ursaring - Guts - Adamant - 252 ATK 252 SPEED Fighting Hariyama - Guts - 252 ATK 252 HP Machamp - No Guard/Guts - Adamant - 252 ATK 252 SPEED Flying Pidgeot (Mega) - Modest - 252 SPATK 252 SPEED Pelipper - Drizzle - Modest - 252 SPATK 252 SPEED Poison Beedrill Mega - Adamant - 252 ATK 252 SPEED Gengar - Cursed Body - Modest - 252 SPATK 252 SPEED Venomoth - Tinted Lens - Modest - 252 SPATK 252 SPEED Vileplume/Bellossom - any abi - Modest - 252 SPATK 252 HP Ground Donphan - Sturdy - Adamant - 252 ATK 252 HP Dugtrio - any abi - Adamant - 252 ATK 252 SPEED Golem - Sturdy - Adamant - 252 ATK 252 HP Mamoswine - any abi - Adamant - 252 ATK 252 SPEED Marowak - Rock Head - Adamant - 252 ATK 252 HP Rhyperior - Solid Rock - Adamant - 252 ATK 252 HP Rock Golem - Sturdy - Adamant - 252 ATK 252 HP Rhyperior - Solid Rock - Adamant- 252 ATK 252 HP Sudowoodo - Rock Head - Adamant - 252 ATK 252 HP Bug Beedrill Mega - Adamant - 252 ATK 252 SPEEDD Venomoth - Modest - Tinted Lens - 252 SPATK 252 SPEED Yanmega - Modest - Tinted Lens - 252 SPATK 252 SPEED Ghost Gengar - Cursed Body - Modest - 252 SPATK 252 SPEED Mismagius - Levitate - Modest - 252 SPATK 252 SPEED Steel Magnezone - Modest - Sturdy - 252 SPATK 252 HP/SPEED Fire Arcanine - Adamant - 252 ATK 252 SPEED Rapidash - Adamant - Flash Fire - 252 ATK 252 SPEED Water Azumarill - Adamant - Huge Power - 252 ATK 252 SPEED/HP Cloyster - Skill Link - Adamant - 252 ATK 252 SPEED/HP Gyarados Mega - Adamant - 252 ATK 252 SPEED Gyarados - Adamant - 252 ATK 252 SPEED Kingler - any ability (all 3 are amazing for this dude) - Adamant - 252 ATK 252 SPEED/HP Octillery - Modest - Sniper - 252 SPATK 252 HP/SPEED Pelipper - Modest - Drizzle - 252 SPATK 252 SPEED Starmie - Modest - 252 SPATK 252 SPEED Grass Exeggutor - Modest - 252 SPATK 252 HP Roserade - Natural Cure - Modest - 252 SPATK 252 SPEED Sunflora - Modest Solar Power/Chlorophyl - 252 SPATK 252 HP Electric Magnezone - Modest - Sturdy - 252 SPATK 252 SPEED Pikachu - Modest - 252 SPATK 252 SPEED Psychic Alakazam - Modest - 252 SPATK 252 SPEED Exeggutor - Modest - 252 SPATK 252 SPEED Jynx - Modest - Dry Skin/Oblivious - 252 SPATK 252 SPEED Starmie - Modest - 252 SPATK 252 SPEED Ice Cloyster - Adamant - Skill Link - 252 ATK 252 SPEED/HP Glaceon - Modest - 252 SPATK 252 SPEED Jynx - Modest - 252 SPATK 252 SPEED Mamoswine - Adamant - 252 ATK 252 SPEED Dragon ALL DRAGONS ARE RARE OR ABOVE. Dark Gyara Mega - Adamant - 252 ATK 252 SPEED ^yes, the only Uncommon or below Dark Type worth using isn't even a Dark Type LOL. It's just a Megaevo. Fairy Azumarill - Huge Power - Adamant - 252 ATK 252 SPEED Clefable - Magic Guard - Modest - 252 SPATK 252 HP/SPEED Granbull - Adamant - 252 ATK 252 HP/SPEED Expensive Version Alternative 1 Alternative 2 Alternative 3 Alternative 4 The Debuffers Whimsicott can immediately Cotton Spore or Switcheroo a Lagging Tail onto the boss lead. Prankster will give any status move +1 Priority. This ability is blocked by Dark Type pokemon. If you use a Status Move, it will always go first unless the opponent uses Bullet Punch or a similar move. This only happens in two bosses: Bugsy (Scizor uses Bullet Punch) and Pumpkin King (it starts with a Bisharp). You will almost always either give the opponent a Lagging Tail or reduce its speed in the first turn. You will Flash, Cotton Spore or Memento and debuff the opponent's lead before Golduck comes. Golduck should always Simple Beam then Flash. Afterwards, Magnezone/Shuckle/Dedenne/Chansey and Skarmory can finish Flashing to -6 Accuracy, reduce ATK or SPATK to -6, and use their respective moves to switch in to your Baton Passer safely. Skarmory/Shuckle has Stealth Rock to set them in whichever boss you need it. Skarmory also has access to Whirlwind for specific boss leads. The Baton Passers Shell Smashers: Huntail and Gorebyss Clamperl, Gorebyss or Huntail: They simply come in, Substitute, Shell Smash three times, Aqua Ring if needed, then Baton Pass it onto the sweeper. Note: Protect does the same function as Aqua Ring, letting you recover an extra turn. However, Aqua Ring is baton passed onto your Pangoro, so if you mess up against a boss who can hurt you and you still have your Sash up. Not only that, consecutive Protect turns can cause it to fail. Birch's Medicham will also faint itself quickly if you Switcheroo it and it fails many Hi Jump Kicks. Any Sweeper LITERALLY ANYTHING IN THE WHOLE GAME will work if your Baton Pass setup works. However, the most broken option in the entire game is Pangoro. I will first give you the Pangoro as the main sweeper that you will ALWAYS be using in an Expensive team (because you can afford it), then a long list of recommended sweepers of all types. Recommended: Pangoro. Pangoro, Adamant, 252 ATK 252 SPEED. Mold Breaker. Focus Sash/Lum Berry (depending on the boss). Moveset: Power Trip, Crunch, Storm Throw, Earthquake. Pangoro comes in with +6 stats on everything, clicks Power Trip and faints everything. Power Trip's base power is based on the amount of stat boosts you have. It powers up more the more stat boosts you have. Power Trip's maximum base power is 380. Yes, you read that right. 380. Pangoro gets Mold Breaker, which ignores the opponent's abilities. Sturdy? You faint in a single turn anyway. Unaware? Sorry, I bypass it and you get hit by a 380 attack move. Pangoro deals damage in the thousands, it is literally impossible to stop once it gets going. Pangoro is just broken to an extent that it should be banned. Ah, wanna know the best thing? Decreased stats don't affect Power Trip, so if you use Shell Smash, your decreased stats will not decrease Power Trip. After three Shell Smash, your base power is: 20 (base from the move) 20 x stat increase: 20x6 ATK increases + 20x6 SPATK increases + 20x6 SPEED increases. 20 + (20x6) + (20x6) + (20x6) = 380 base power. Before you count STAB, item choice and Pangoro's ATK. Congrats, this dude beats every single Boss Team in the game. Enjoy it I guess. Below I will drop the list of ALL possible good Boss Sweepers in the game (after being Baton Passed onto). Afterwards, I will analyse most bosses. Most bosses are copy and paste strategies, there is borderline no difference between them. Unlike Mega Slowbro, we will abuse the same strat over and over. Normal Ambipom - Skill Link / Technician - Adamant - 252 ATK 252 SPEED Bouffalant - Reckless - Adamant - 252 ATK 252 SPEED Braviary - Sheer Force - Adamant - 252 ATK 252 SPEED Lopunny (Mega) - Adamant - 252 ATK 252 SPEED Cinccino - Skill Link / Technician - Adamant - 252 ATK 252 SPEED Diggersby - Huge Power - Adamant - 252 ATK 252 SPEED Exploud - Scrappy - Modest - 252 SPATK 252 SPEED Fearow - Sniper - Adamant - 252 ATK 252 SPEED Kangaskhan (mega or not, I even forgot this gets a mega in gen 6 lol) - Scrappy - Adamant - 252 ATK 252 SPEED Miltank - Scrappy - Adamant - 252 ATK 252 HP Noctowl - Tinted Lens - Modest - 252 SPATK 252 SPEED Pidgeot (Mega) - Modest - 252 SPATK 252 SPEED Porygon Z - Adaptability - Modest - 252 SPATK 252 SPEED Raticate - Guts - Adamant - 252 ATK 252 SPEED Sawsbuck - Serene Grace - Adamant - 252 ATK 252 SPEED Snorlax - Immunity/Thick Fat - Adamant - 252 ATK 252 HP Staraptor - Reckless - Adamant - 252 ATK 252 SPEED Stoutlant - Scrappy - Adamant - 252 ATK 252 SPEED Swellow - Guts - Adamant - 252 ATK 252 SPEED Swellow - Scrappy - Modest - 252 SPATK 252 SPEED Ursaring - Guts - Adamant - 252 ATK 252 SPEED Zangoose - Toxic Boost - Adamant - 252 ATK 252 SPEED Fighting Blaziken (Mega or not) - Speed Boost - Adamant - 252 ATK 252 SPEED Breloom - Technician/Poison Heal - Adamant - 252 ATK 252 SPEED Conkeldurr - any abi - Adamant - 252 ATK 252 HP Emboar - Reckless - Adamant - 252 ATK 252 HP Gallade (mega or not) - Adamant - 252 ATK 252 SPEED Hariyama - Guts - 252 ATK 252 HP Heracross (mega or not) - Adamant - 252 ATK 252 SPEED Hitmonchan - Iron Fist - Adamant - 252 ATK 252 SPEED Hitmonlee - Reckless - Adamant - 252 ATK 252 SPEED Hitmontop - Technician - Adamant - 252 ATK 252 SPEED/HP Infernape - Iron Fist - Adamant - 252 ATK 252 SPEED Infernape - Blaze - Modest - 252 SPATK 252 SPEED Keldeo - Justified - Modest - 252 SPATK 252 SPEED Kommo-o - Bulletproof - Adamant - 252 ATK 252 SPEED Kommo-o - Bulletproof - Modest - 252 SPATK 252 SPEED Lopunny (Mega) - Adamant - 252 ATK 252 SPEED Lucario (Mega or not) - Adamant - 252 ATK 252 SPEED Lucario (Mega or not) - Modest - 252 SPATK 252 SPEED Machamp - No Guard/Guts - Adamant - 252 ATK 252 SPEED Medicham (Mega or not) - Pure Power - Adamant - 252 ATK 252 SPEED Mienshao - Reckless - Adamant - 252 ATK 252 SPEED Pangoro - Mold Breaker - Adamant - 252 ATK 252 SPEED Sawk - Sturdy/Mold Breaker - Adamant - 252 ATK 252 SPEED Throh - Guts/Mold Breaker - Adamant - 252 ATK 252 HP Flying Aerodactyl (Mega or not) - Rock Head - Adamant - 252 ATK 252 SPEED Altaria (Mega or not, but if possible Mega) - Adamant - 252 ATK 252 SPEED Braviary - Sheer Force - Adamant - 252 ATK 252 SPEED Fearow - Sniper - Adamant - 252 ATK 252 SPEED Noctowl - Tinted Lens - Modest - 252 SPATK 252 SPEED Pidgeot (Mega) - Modest - 252 SPATK 252 SPEED Staraptor - Reckless - Adamant - 252 ATK 252 SPEED Charizard (mega X if possible) - Blaze - Adamant - 252 ATK 252 SPEED Charizard (mega Y if possible) - any abi - Modest - 252 SPATK 252 SPEED Dragonite - Any abi - Adamant - 252 ATK 252 SPEED (I don't recommend the special version) Honchkrow - Super Luck - Adamant - 252 ATK 252 SPEED Landorus - Adamant - 252 ATK 252 SPEED Moltres - Modest - 252 SPATK 252 SPEED Pelipper - Drizzle - Modest - 252 SPATK 252 SPEED Salamance (mega or not) - Adamant - 252 ATK 252 SPEED Pinsir (mega) - Adamant - 252 ATK 252 SPEED Shaymin Sky - Modest - 252 SPATK 252 SPEED Sigylph - Magic Guard - Modest - 252 SPATK 252 SPEED Thundurus - Modest - 252 SPATK 252 SPEED Togekiss - Modest Super Luck/Serene Grace- 252 SPATK 252 SPEED Unfezant (why in the f...) - Super Luck - Adamant - 252 ATK 252 SPEED Zapdos - Modest - 252 SPATK 252 SPEED Poison Beedrill Mega - Adamant - 252 ATK 252 SPEED Drapion - Battle Armor/Sniper - Adamant - 252 ATK 252 SPEED Gengar - Cursed Body - Modest - 252 SPATK 252 SPEED Muk/Alo Muk - Poison Touch - Adamant - 252 ATK 252 HP Nidoking/Nidoqueen - Sheer Force - Modest - 252 SPATK 252 SPEED Roserade - Technician - Modest - 252 SPATK 252 SPEED Scolipede - any abi (Speed Boost is better) - Adamant - 252 ATK 252 SPEED Seviper - Infiltrator - Rash/Modest - 252 SPATK 252 SPEED Venomoth - Tinted Lens - Modest - 252 SPATK 252 SPEED Vileplume - any abi - Modest - 252 SPATK 252 HP Ground Diggersby - Huge Power - Adamant - 252 ATK 252 SPEED Donphan - Sturdy - Adamant - 252 ATK 252 HP Excadrill - Mold Breaker - Adamant - 252 ATK 252 HP Dugtrio - any abi - Adamant - 252 ATK 252 SPEED Garchomp - any abi - Adamant - 252 ATK 252 SPEED Golem - Sturdy - Adamant - 252 ATK 252 HP Golurk - No Guard - Adamant - 252 ATK 252 HP Hippowdown - Sand Stream - Adamant - 252 ATK 252 HP Krookodile - any abi - Adamant - 252 ATK 252 SPEED Mamoswine - any abi - Adamant - 252 ATK 252 SPEED Marowak - Battle Armor - Adamant - 252 ATK 252 HP Nidoking/Queen - Sheer Force - Modest - 252 SPATK 252 SPEED Rhyperior - Reckless/Solid Rock - Adamant - 252 ATK 252 HP Steelix Mega - Adamant - 252 ATK 252 HP Swampert/Mega - Adamant - 252 ATK 252 SPEED/HP Rock Aerodactyl/Mega - Rock Head - Adamant - 252 ATK 252 SPEED Aggron - Rock Head - Adamant - 252 ATK 252 HP Armaldo - Adamant - Battle Armor - 252 ATK 252 SPEED/HP Aurorus - Snow Warning - Modest - 252 SPATK 252 SPEED Barbaracle - Tough Claws/Sniper - Adamant - 252 ATK 252 SPEED/HP Carracosta - Sturdy - Adamant - 252 ATK 252 SPEED/HP Crustle - Shell Armor - Adamant - 252 ATK 252 SPEED/HP Diancie Mega - Rash - 252 SPATK 252 SPEED Gigalith - Sand Stream - Adamant- 252 ATK 252 HP Golem Alolan - Galvanise - Adamant - 252 ATK 252 SPEED/HP Kabutops - any abi - Adamant - 252 ATK 252 SPEED Lycanroc - any abi and form - Adamant - 252 ATK 252 SPEED Omastar - any abi - Modest - 252 SPATK 252 SPEED Rampardos - Mold Breaker - Adamant - 252 ATK 252 SPEED Relicanth - Adamant - Rock Head - 252 ATK 252 SPEED/HP Rhyperior - Reckless/Solid Rock - Adamant- 252 ATK 252 HP Sudowoodo - Rock Head - Adamant - 252 ATK 252 HP Tyranitar (mega or not) - Sand Stream - Adamant - 252 ATK 252 SPEED/HP Tyrantrum - Rock Head/Strong Jaw - Adamant - 252 ATK 252 SPEED Bug Accelgor - any abi - Modest - 252 SPATK 252 SPEED Armaldo - Adamant - Battle Armor - 252 ATK 252 SPEED/HP Crustle - Shell Armor - Adamant - 252 ATK 252 SPEED/HP Beedrill Mega - Adamant - 252 ATK 252 SPEED Butterfree - Modest - Tinted Lens - 252 SPATK 252 SPEED Escavalier - Adamant - Shell Armor - 252 ATK 252 HP Heracross (mega or not) - Adamant - 252 ATK 252 SPEED Leavanny - any abi - Adamant - 252 ATK 252 SPEED Pinsir - Mold Breaker - Adamant - 252 ATK 252 SPEED Pinsir - Mega - Adamant - 252 ATK 252 SPEED Scizor (Mega or not) - Adamant - Technician - 252 ATK 252 SPEED/HP Shedinja (DON'T RELY ON THIS THING, BUT IT'S GOOD TO CHEESE ABUSING ITS ABILITY) - Adamant - 252 ATK 252 SPEED Venomoth - Modest - Tinted Lens - 252 SPATK 252 SPEED Yanmega - Modest - Tinted Lens - 252 SPATK 252 SPEED Volcarona - Any abi - Modest - 252 SPATK 252 SPEED Ghost Golurk - No Guard - Adamant - 252 ATK 252 HP Gengar - Cursed Body - Modest - 252 SPATK 252 SPEED Mega Banette - Adamant - 252 ATK 252 HP Chandelure - Flash Fire/Infiltrator - Modest - 252 SPATK 252 SPEED Dhelmise - Steelworker - Adamant - 252 ATK 252 HP Dusknoir - any abi - Adamant - 252 ATK 252 HP Marowak Alola - Rock Head - Adamant - 252 ATK 252 SPEED/HP Mimikyu - Adamant - 252 ATK 252 SPEED Rotom (any form) - Modest - 252 SPATK 252 SPEED Trevenant - Adamant - 252 ATK 252 HP Steel Aegislash - Modest/Rash - 252 SPATK 252 SPEED Aegislash - Adamant/Naughty - 252 ATK 252 SPEED Scizor (Mega or not) - Adamant - Technician - 252 ATK 252 SPEED/HP Aggron - Rock Head - Adamant - 252 ATK 252 HP Mega Aggron - Careful - 252 SPDEF 252 HP Excadrill - Mold Breaker - Adamant - 252 ATK 252 HP Steelix Mega - Adamant - 252 ATK 252 HP Lucario (Mega or not) - Adamant - 252 ATK 252 SPEED Lucario (Mega or not) - Modest - 252 SPATK 252 SPEED Metagross (Mega or not) - Clear Body - Adamant - 252 ATK 252 SPEED/HP Bisharp - Defiant - Adamant - 252 ATK 252 SPEED/HP Empoleon - Modest - 252 SPATK 252 HP Magnezone - Modest - Sturdy - 252 SPATK 252 HP Mawile Mega - Adamant - 252 ATK 252 SPEED/HP Heatran - Modest - 252 SPATK 252 SPEED Fire Arcanine - Adamant - 252 ATK 252 SPEED Blaziken mega or not - Speed Boost - Adamant - 252 ATK 252 SPEED Chandelure - Modest - 252 SPATK 252 SPEED Chari X - Adamant - 252 SPEED 252 ATK Chari Y - Modest - 252 SPEED 252 SPATK Darmanitan - Adamant - Sheer Force - 252 ATK 252 SPEED Delphox - Modest - Blaze - 252 SPATK 252 SPEED Emboar - Reckless - Adamant - 252 ATK 252 SPEED/HP Flareon - Guts - Adamant - 252 ATK 252 SPEED Houndoom Mega (or not) - Flash Fire - Modest - 252 SPATK 252 SPEED Infernape - Iron Fist - Adamant - 252 ATK 252 SPEED Infernape - Blaze - Modest - 252 SPATK 252 SPEED Magmortar - Modest - 252 SPATK 252 SPEED Marowak Alola - Rock Head - Adamant - 252 ATK 252 SPEED/HP Ninetales - Drought - Modest - 252 SPATK 252 SPEED Rapidash - Adamant - Flash Fire - 252 ATK 252 SPEED Typhlosion - Modest - 252 SPATK 252 SPEED Volcarona - Modest - 252 SPATK 252 SPEED Water Azumarill - Adamant - Huge Power - 252 ATK 252 SPEED/HP Barbaracle - Adamant - Tough Claws - 252 ATK 252 SPEED/HP Blastoise Mega - Modest - 252 SPATK SPEED/HP Carracosta - Adamant - Sturdy - 252 ATK 252 SPEED/HP Clawitzer - Modest - 252 SPATK 252 SPEED/HP Cloyster - Skill Link - 252 ATK 252 SPEED/HP Crawdaunt - Adamant - Adaptability - 252 ATK 252 SPEED/HP Empoleon - Modest - 252 SPATK 252 HP/SPEED Feraligatr - Adamant - Sheer Force - 252 ATK 252 SPEED Gorebyss - Modest - 252 SPATK 252 SPEED Greninja Protean/Battle Bond - Modest or Rash - 252 SPATK 252 SPEED Gyarados Mega - Adamant - 252 ATK 252 SPEED Kabutops - Adamant - 252 ATK 252 SPEED Keldeo - Modest - 252 SPATK 252 SPEED Kingler - any ability (all 3 are amazing for this dude) - Adamant - 252 ATK 252 SPEED/HP Manaphy - Modest - 252 SPATK 252 SPEED/HP Octillery - Modest - Sniper - 252 SPATK 252 HP/SPEED Omastar - Modest - 252 SPATK 252 SPEED Pelipper - Modest - Drizzle - 252 SPATK 252 SPEED Politoed - Modest - Drizzle - 252 SPATK 252 SPEED Sharpedo (mega or not) - Adamant - Speed Boost - 252 ATK 252 SPEED Starmie - Modest - 252 SPATK 252 SPEED Swampert (mega or not) - Adamant - 252 ATK 252 HP/SPEED Wailord - Modest - 252 SPATK 252 SPEED/HP Grass Breloom - Technician - 252 ATK 252 SPEED Cacturne - Adamant - 252 ATK 252 HP Celebi - Modest - 252 SPATK 252 SPEED Chesnaught - Adamant - Bulletproof - 252 ATK 252 SPEED/HP Dhelmise - Adamant - Steelworker - 252 ATK 252 HP Exeggutor - Modest - 252 SPATK 252 HP Alolan Exegg - Modest - 252 SPATK 252 HP Leafeon - Adamant - 252 ATK 252 SPEED Roserade - Technician - Modest - 252 SPATK 252 SPEED Sceptile Mega - Modest - 252 SPATK 252 SPEED Serperior - Modest - Contrary - 252 SPATK 252 SPEED Shaymin Sky - Modest - 252 SPATK 252 SPEED Sunflora - Modest - 252 SPATK 252 HP Torterra - Adamant - Shell Armor - 252 ATK 252 HP Electric Ampharos (Mega or not but I recommend Mega) - Modest - 252 SPATK 252 SPEED Electivire - Adamant/Naughty - 252 ATK 252 SPEED Golem Alola - Galvanise - Adamant - 252 ATK 252 SPEED Heliolisk - Modest - 252 SPATK 252 SPEED Jolteon - Modest - Volt Absorb - 252 SPATK 252 SPEED Luxray - Adamant - Guts - 252 ATK 252 SPEED Magnezone - Modest - Sturdy - 252 SPATK 252 SPEED Manectric (mega) - Modest - 252 SPATK 252 SPEED Pikachu - Modest - 252 SPATK 252 SPEED Psychic Alakazam (mega or not) - Modest - 252 SPATK 252 SPEED Delphox - Modest - 252 SPATK 252 SPEED Espeon - Modest - 252 SPATK 252 SPEED Exeggutor - Modest - 252 SPATK 252 SPEED Gallade/Mega Gall - Adamant - 252 ATK 252 SPEED Gardevoir / Mega Garde - Modest - 252 SPATK 252 SPEED Jynx - Modest - 252 SPATK 252 SPEED Medicham / Medicham Mega - Pure Power - Adamant - 252 ATK 252 SPEED Metagross / Mega Meta - Clear Body - Adamant - 252 ATK 252 SPEED/HP Reuniclus - Magic Guard - Modest - 252 SPATK 252 HP Starmie - Modest - 252 SPATK 252 SPEED Ice Abomasnow Mega - Adamant 252 ATK 252 HP Aurorus - Modest - Snow Warning - 252 SPATK 252 SPEED Beartic - Adamant - 252 ATK 252 SPEED Cloyster - Adamant - Skill Link - 252 ATK 252 SPEED/HP Glaceon - Modest - 252 SPATK 252 SPEED Glalie Mega - Adamant - 252 ATK 252 SPEED Jynx - Modest - 252 SPATK 252 SPEED Mamoswine - Adamant - 252 ATK 252 SPEED Vanilluxe - Modest - Snow Warning 252 SPATK 252 SPEED Weavile - Adamant - 252 ATK 252 SPEED Dragon Altaria Mega - Adamant - 252 ATK 252 SPEED Ampharos Mega - Modest - 252 SPATK 252 SPEED Sceptile Mega - Modest - 252 SPATK 252 SPEED Charizard X - Adamant - 252 ATK 252 SPEED Dragonite - Adamant - 252 ATK 252 SPEED Druddigon - Sheer Force - 252 ATK 252 HP Exegg Alola - Modest - 252 SPATK 252 HP Garchomp - Adamant - 252 ATK 252 SPEED Haxorus - Mold Breaker - Adamant - 252 ATK 252 SPEED Goodra - Modest - Sap Sipper - 252 SPATK 252 SPEED Hydreigon - Modest - 252 SPATK 252 SPEED Kommo-o - Modest - Bulletproof - 252 SPATK 252 SPEED Kommo-o - Adamant - Bulletproof - 252 ATK 252 SPEED Salamance - Adamant - 252 ATK 252 SPEED Tyrantrum - Adamant - 252 ATK 252 SPEED Dark Absol Super Luck/Absol Mega - Adamant - 252 ATK 252 SPEED Bisharp - Defiant - Adamant - 252 ATK 252 SPEED Cacturne - Adamant - 252 ATK 252 HP Crawdaunt - Adamant - Adaptability - 252 ATK 252 SPEED/HP Drapion - Adamant - Battle Armor/Sniper - 252 ATK 252 SPEED Gyara Mega - Adamant - 252 ATK 252 SPEED Honchckrow - Adamant - Super Luck - 252 ATK 252 SPEED Houndoom Mega or non Mega - Modest - 252 SPATK 252 SPEED Hydreigon - Modest - 252 SPATK 252 SPEED Krookodile - Adamant - 252 ATK 252 SPEED Muk - Alola - Adamant - Poison Touch - 252 ATK 252 HP Pangoro - Adamant - Mold Breaker - 252 ATK 252 SPEED Sharpedo Mega (or non Mega) - Adamant - 252 ATK 252 SPEED Weavile - Adamant - 252 ATK 252 SPEED Fairy Altaria - Mega - Adamant - 252 ATK 252 SPEED Azumarill - Huge Power - Adamant - 252 ATK 252 SPEED Clefable - Magic Guard - Modest - 252 SPATK 252 SPEED Gardevoir/Mega - Modest - 252 SPATK 252 SPEED Granbull - Adamant - 252 ATK 252 HP/SPEED Mawile Mega - Adamant - 252 ATK 252 SPEED/HP Sylveon - Pyxilate - Modest - 252 SPATK 252 SPEED/HP Togekiss - Modest - Super Luck/Serene Grace - 252 SPATK 252 SPEED Boss analysis Does the boss start with a Mega? If: yes > debuff its speed with Cotton Spore or Scary Face or similar and then start debuffing other stats If: no > Switcheroo a lagging tail or debuff its speed then debuff other stats Bosses that begin with a mega: Bruno, Morty, Spectify, Tigerous, Brock, Shamac Does the boss start with a pokemon with a move such as Roar/Whirlwind? If: yes > just don't do the boss. In all seriousnesses, Baton Pass teams completely lose if all your setup is gone if the boss uses Roar or Whirlwind, which bypass substitute, which removes all your stat boosts. The move Haze also removes all your stat boosts but if I am not mistaken there's no boss that uses it currently on their lead pokemon. Ash Westbrook is known for having 2 Roar pokemon in his team and one is in the lead. If: no > free money, do the boss. The only boss that does this is Ash Westbrook Does the boss have an Unaware pokemon? If: yes > use a Mold Breaker sweeper if possible. Mold Breaker ignores Unaware so you will oneshot it. There are 4 Unaware pokemon spread among 4 bosses: The one in Ilex Forest, Raikou Guardian, Toothless and Diepy. They are two Clefable and two Quagsire. If you don't have Mold Breaker, you will be fighting these 4 pokemon 1 v 1 and the game will ignore all of your stat boosts. If: no > completely do the boss, free money! Raikou Guardian - Neroli - Pewdie/Diepy - Toothless Thus, the list of hard bosses to tackle with Baton Pass is: Erika (Ferrothorn has Explosion) - Maribela (Hyper Voice on Sylveon) - Raikou Guardian (Quagsire) - Toothless (Quagsire) - Diepy (Clefable) - Ash Westbrook (Roar Dialga and Reshiram) - Neroli (Clefable). These might give you a bit of trouble but they are all doable. Everything else in the game is absolutely free money no matter how badly you set up as long as you set up your team properly. If you lose, you're genuinely stupid. So far, these are the only counters to Baton Pass teams. You do not need a full on analysis for each boss.
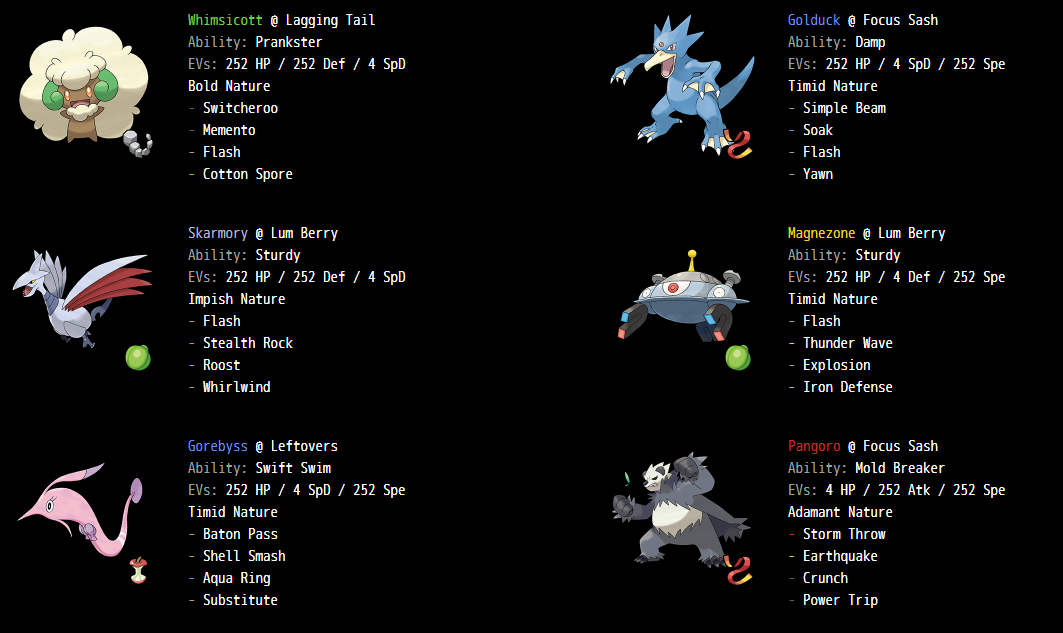
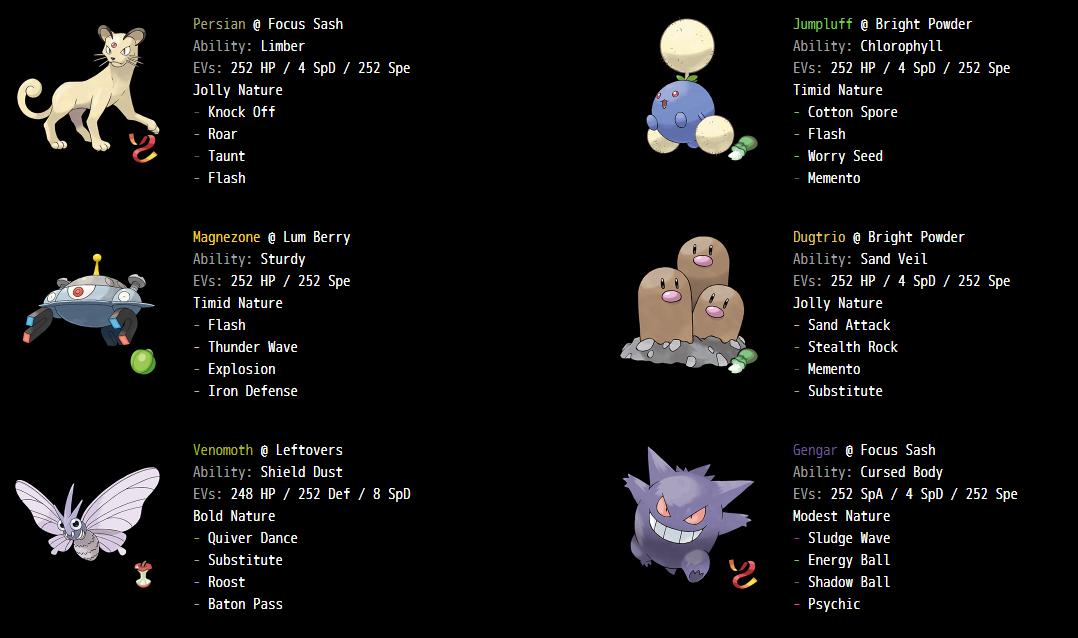

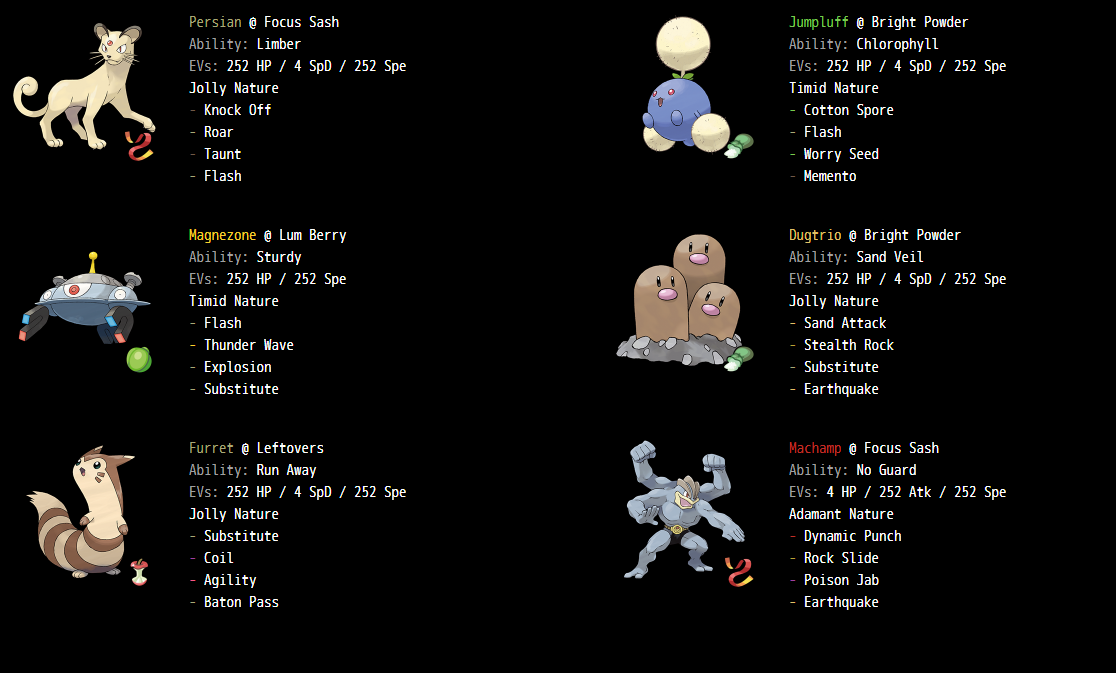
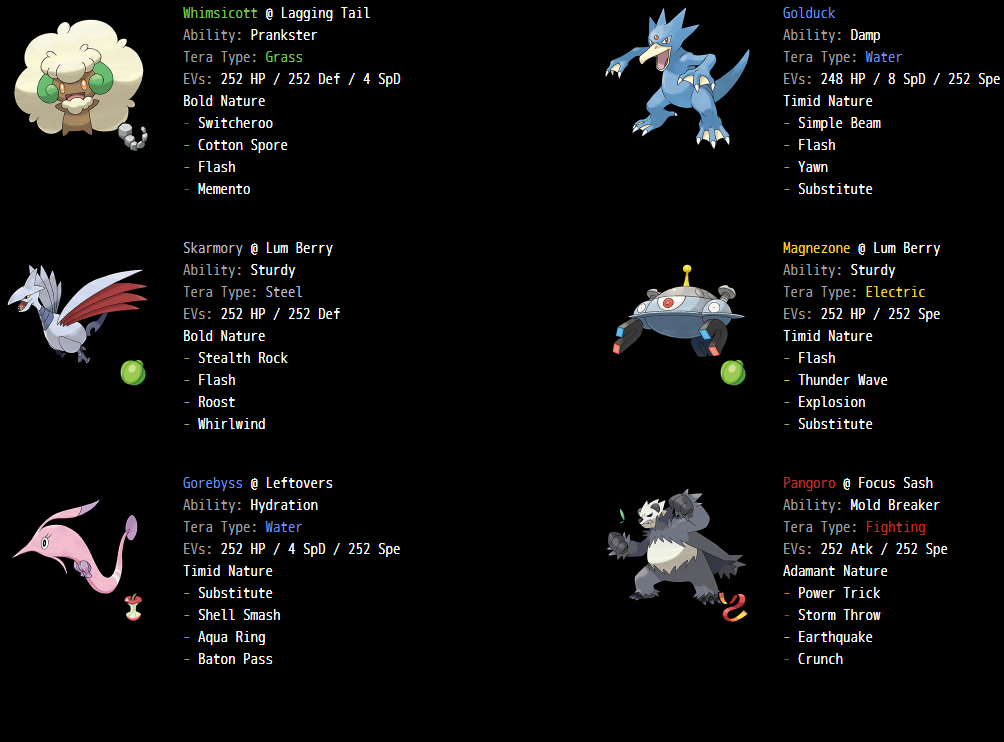

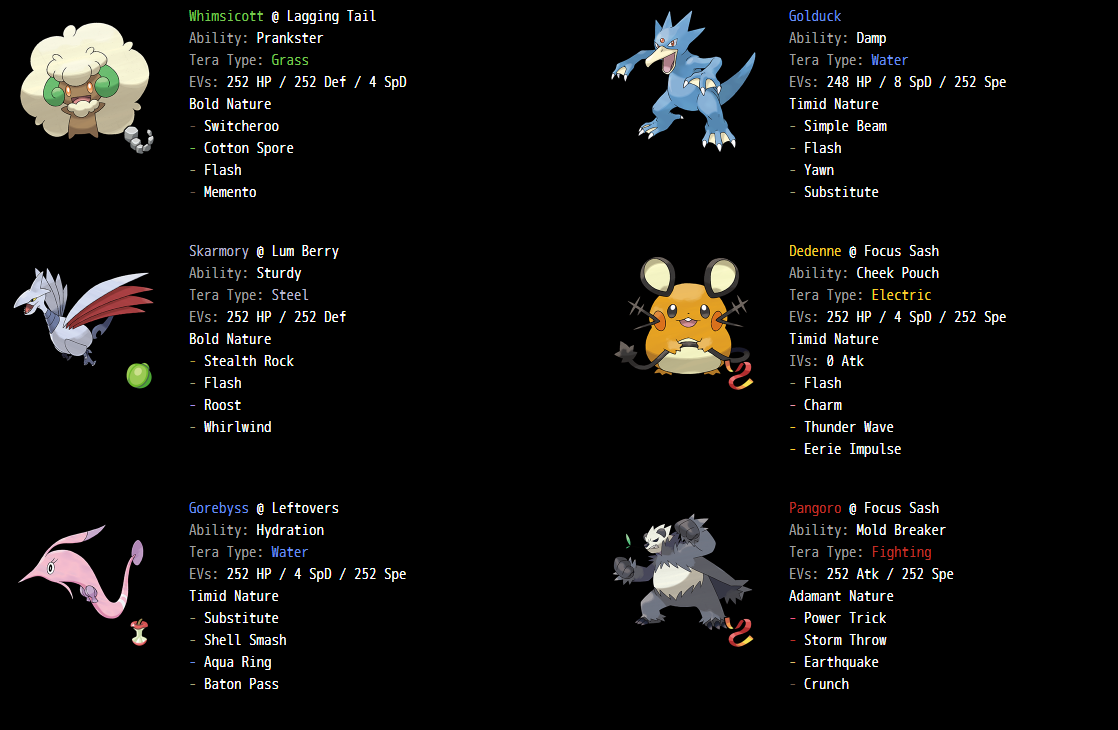
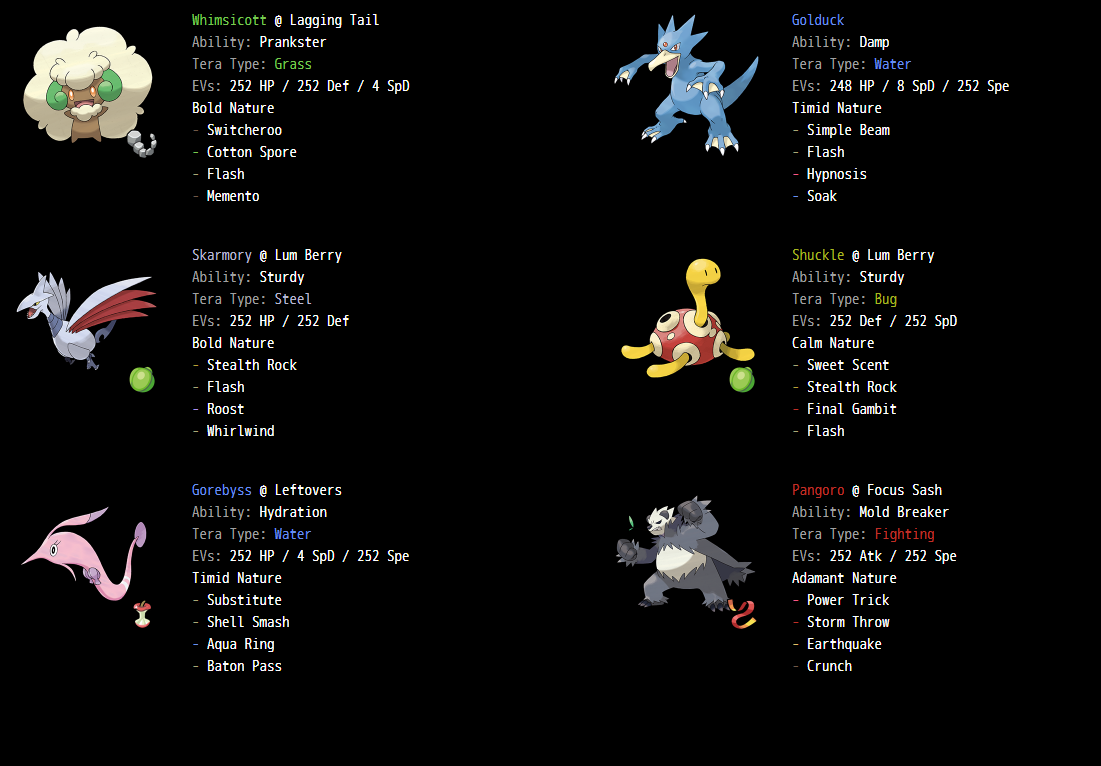 1 point1 pointAn introduction to Bosses in PRO for Newbies: The Guide! Welcome to the basic Boss Guide adapted for Newbies! This guide will aim to explain what Bosses in PRO are, how do they work, what kind of rewards can you expect, and some examples of Boss Pokemon and teams you can use to defeat these Bosses. This guide will also try to keep in mind that most people who will read this guide are newbies and thus, we will try to keep it simple, obtainable by them, but also encompass the entire playerbase as a whole. I will provide budget teams, budget options, and high budget ones too. Special quick thanks to: MoltenM3tal, who helped me with bosses, gave me teamcomps to try, gave some theorycrafting and recorded videos for this guide. Same goes for Jimmicha, who also worked hard to develop this monster of a guide by recording videos and finding possible bugs that interfered with our strategies! (Although I had to write this entire thing myself). Also, special mini thanks to Meruem, always helping me out with ideas regarding guides and on forums 🙂 The aim of this guide is to just teach and help out theorycraft teams, compositions, what each role should fulfill, possible additions, and teach newbies the basics needed for the PvE farm in the lategame. As a disclaimer: I’ve only named a few options for each role in the guide. If we went through all options, considering there’s more than 800 or 900 pokemon, I’d probably die before I finished this guide. I’ve tried to only mention the easiest to farm or the most effective that will work for any boss fight in the game. There are other guides like HustleBank’s which focus more on the practical side. However, the point of this big wall of text is to teach you and learn how to work on Bosses from 0, when you have NO idea of what Bosses are. Imagine you don’t know anything about competitive pokemon, or what team compositions you should use for bosses. We will start from there, as the other boss guides all assume that you already know the basics and the advanced stuff. Thus, I’ll try to guide you around from the beggining! Fun facts: This guide took a month. It is bigger than most thesis as a final project in universities, it took a lot of testing, and I loved doing it. In the future, this guide will be edited with pictures, memes and videos displaying these strategies. For now, I solely want to focus on it as a textbook for you to learn how to do bosses from 0. It’s a monster of a project, but I’m so damn proud of it. Ready? Let’s get into it! Big note here: if you are either an experienced player and want to directly test out teams that are 100% safe in Easy & Medium and 95% safe in Hard, properly tested teams by me and other experienced players, or you are a newbie and want to directly search up the teams I have been using, press the F3 key in your Keyboard and search the words Newbie Section to reach the teambuilding part of this guide. If you are a complete newbie to PRO/Pokemon in general, PLEASE FIRST READ THE INTRODUCTION AND THEORY PART OF THIS GUIDE. Then, you can start teambuilding. If you believe you know the basics or have read enough of this guide, please check the bottom part on how to teambuild. Then, read the sample teams I have on Baton Pass and Mega Slowbro teams for bossing. Click on the two highlighted guides below to check them out! Baton Pass Mega Slowbro Introduction What are bosses? Bosses in PRO are NPCs available to fight once you meet specific requirements to battle them. These NPCs will ask you to fulfill different missions: some will ask you to train a level 100 Pikachu you caught, some will ask you to obtain the dex data of other pokemon, some will ask you to unlock a specific place after having defeated another boss (for example, to battle Naero we need to previously beat Lance), some require you to not use specific pokemon types and so on. They simply ask you for high level pokemon to fight them and each one may have extra requirements. The rewards from bosses vary: some give a lot of berries, some give PVP items, some give Coin Shop stuff such as medallions, mounts, accessories… these are just some of the rewards. We mainly do Bosses due to the money we get from them. The money reward from some of the bosses is incredibly high and will help us sustain through our stay in PRO, as the MMO’s economy demands we engage in C A P I T A L I S M. However, we can also obtain really rare pokemon and shinies from them, too! You can find these NPCs in the overworld, in any region, in different places. Some of them are super easy to find and are placed in really common locations, whereas others will be hidden more secretly than the possible cure for my evolving baldness. They will have a red coloured name over them and will ask you if you’re menacingly approaching them and want to fight them or not. They’ll also ask what difficulty you want to choose. How do Bosses Work? Bosses have 6 pokemon at level 100 divided into three difficulties. In these three difficulties, you may choose to fight the Easy difficulty version of the boss with 6 pokemon at level 100 with no EV investments, no held items and no good movesets (these are basically a joke and can be defeated by any player without too much strategy). They will reward almost nothing after you defeat them and you will have to wait some time before you’re able to refight them. They’re a good difficulty setting to practice bosses with, but… wasting a 12 day cooldown for these is just bad. Just ask a friend to practise on showdown with you using the same team as the boss and simulating a boss encounter under the same circumstances if you want to practice boss teams. The easy difficulty should only be chosen in bosses that unlock other areas or quests so that you can easily beat them. For example, we should only fight Naero in the Easy difficulty so that we gain access to daycare quickly and we don’t have to bother with him anymore. We can also fight Pumpkin Boss in Easy Difficulty to unlock the Goldenrod Berry Shop. The Medium difficulty setting starts making bosses hard to pretty high levels. This is the standard difficulty setting, where you realise things actually are hard. Pretty hard. And they hit hard. And they tank attacks they normally shouldn’t be able to. The pokemon will have 252 EV in each stat (yes, you read that right, 252 in EACH STAT. That means they have a total of 6x252 EV. Which means they are pretty illegal and extremely overpowered). If you mess up here, you might get your butt kicked. Medium is the difficulty I recommend starting bosses in because it introduces you into an unfair disadvantage fight where you still have opportunities to learn and win. Not only that, but the pokemon will also have hold items such as Choice Specs, Band, Scarf, Life Orb, Expert Belt and so on. This also means they hit like trucks, they are tanky, and they’re fast. You can more or less calculate what stats they have by using an online calculator. It’s a good idea since they literally have illegaly high stats. These start giving out good rewards and it’s the recommended difficulty if you’re still afraid of doing hard bosses and you want to practise more against them. And then there’s the Hard difficulty setting. In this mode, you cannot use Revives or any items on your pokemon. Thus, once you sacrifice one pokemon, there’s no going back. You will have to continue with the others and pray that your strategy succeeds. That’s not the only problem though. The issue is that now, their pokemon have 400 EV in each stat. FOUR HUNDRED. If you read that right, you’ll realise that’s 2400 EV total compared to the normal 510 EV total cap you can reach. Nearly five times the pokemon limit, while having no restrictions per stat. They’re nightmares if it falls out of control, you get paralysed in the wrong turn or you get a crit. You might just give up since you won’t be able to regain control. Imagine a Chansey with Eviolite and 400 EV onto every single stat. Following the latest update, in an attempt to fix the multiple AI exploits by users, Bosses now cannot have 2 pokemon be put to sleep at the same time, they will switch whenever their pokemon run out of PP, are Encored into a bad move, and more conditions. However, they are now Choice Locked. You can counter some Boss pokemon by making them Choice Lock on purpose so that they use ineffective moves until they switch out. They will reward you with money, items (they can be a bit bad and just give berries, or give you really rare pokemon, PvP items which can later be sold for some nice money, or just completely troll you), and more stuff. You can check the cooldowns for each region’s bosses in Celadon Office Floor 2 Cooldown Checker, Goldenrod City House 1, Slateport City House 1 and Canalave City House 1. If you disconnect in the middle of a boss battle, it will count as a loss. Same if the server crashes. So press F if you crash. Before you battle each boss, check out their information on the PROWiki to know what teams they have and how to prepare your team, structure, build it and itemize against them. https://prowiki.info/index.php?title=Bosses What Team should I use for Bosses? Well, boy. The simple answer would be to tell you: “Come on, this is Pokemon! There’s millions of possible team combinations! You can use anything you want!” But that would be lying. There’s a massive amount of pokemon that are simply too weak, have no useful movesets, no recovery, no boosting moves, are unevolved, or simply are wrongly trained to function against bosses. You can make a Magikarp sweep bosses by baton passing +6 on every stat onto him, and you could do the same with literally almost pokemon in existence. However, this does not mean they’re viable. It simply means that some pokemon require way too much work to function. They’re not worth training at all. Don’t waste your time on them. (I mean, if you’re willing to sweep bosses with a +6 Caterpie, go for it I guess lol) This guide will constantly be updated with new additions or possible options onto the teams and strategies I want to present. We could add literally every single pokemon in Gens 1 and 2 because they can all learn Curse and we can make cheese strategies with that but… This doesn’t work like that. I will cover a section on gimmick picks that might be fun to use, but only work under specific conditions. Disclaimer: before we start, we have to keep it clear. There’s no single “six pokemon team” that works for EVERY boss and is super godly, super cheap or extremely good, and that will SURELY make you a MULTIMILLONAIRE like that nigerian cousin prince from Africa who e-mails you at 3 in the morning telling you that you’ve earned an inheritance for 15 million dollars and wants to know all your bank details. There's always going to be changes. Teambuilding: The Process Any guide that tells you “helo wiz dis team you wil bit eberi boss team omg dis is the best team eva!!! subscrib to my iutub chanel!!!” is just lying. You have to use your brain and adapt to every situation. You can’t just spam the same six pokemon for all bosses in the game. Most guides that argue “you only need six pokemon” start making exceptions like “ah well yea you need to change one member of your team for this one, and then you have to change these two for the other one...”. You get the point. There’s no definitive six members to your boss team, and if you just wanted to not learn and stupidly get 6 pokemon and immediately start bossing without using strategy, please drop this guide. You’re here to learn, not to spam 6 pokemon nonstop. What if you use a Dragon pokemon to sweep and try your luck against a boss with Fairy types? You’ll miserably fail. If your plan was to simply break through 6 pokemon with brute force: You can already give up. You can’t. You’re fighting illegaly high stat pokemon with absurdly hard to fight builds that can suddenly outspeed you and oneshot you nonstop. You need a way to stop them from literally obliterating you in a single move. You have two options: either you build an entire team based around sweeping as many bosses as possible, or you just run gimmick pokemon that will try to cheese as many bosses as possible. (Rattata pls) We will go over three main strategies in this guide. They’re the most common, cheap and easy to execute strategies for bosses currently in PRO. These are pretty common choices, and I will give you both a walmart low cost version that can be obtained by someone in Kanto with just three or four badges and a more expensive but still obtainable version for newbies that will be explained throughout the guide. I will try to explain the function of each team member, possible substitutions and give example movesets and items and builds that will work for your boss choices. We want to cover setup sweeping, baton passing and gimmick teams to fight them. You will see that there are common team members that repeat throughout all strategies: that’s because they’re needed to break through specific possible problems that most bosses share. I might edit this guild in the future to add new extra strategies, video proof, and new additions to each team. Related/Important guides you can/should read before making a Boss Team. EV, IV, Nature, Ability, Stats: These are extremely common terms you should already be familiar with if you want to get into bossing, since it’s the lategame. If you still don’t understand how they work… what are you doing? Get into reading more guides to understand how do they work! You can’t start from the top of your house if the pillars are not built! It’s like going to the gym and skipping leg day. https://pokemonrevolution.net/forum/topic/152671-natures-abilities-ev-iv-and-stats-for-newbies-the-guide/?tab=comments#comment-840375 This guide explains how do they work, what you need to know and how to know if your pokemon is fit for bosses or not. I’ll try to provide more specific examples later on so you understand if your team is ready to do bosses or not. If you need to learn the basics, check these! https://pokemonrevolution.net/forum/topic/153453-how-to-hunt-specific-abilities-guide-for-newbies/?tab=comments#comment-845477 https://pokemonrevolution.net/forum/topic/157347-how-to-start-hunting-any-pokemon-the-newbie-guide/?tab=comments#comment-871144 If you need to learn how to hunt for specific abilities for specific pokemon in this team that require them, you should check out this one. It explains how to hunt for specific abilities. https://pokemonrevolution.net/forum/topic/153443-how-to-ev-train-your-pokemon-for-newbies-and-safari-ev-wald-guide/?tab=comments#comment-845437 You might have to use this guide when you have to EV train your pokemon for Boss Battles. Common terms we need to learn for this guide Memento and Mementoers Memento is a move that will sharply decrease the opponent’s Attack and Special Attack when used and will then faint the user. For example, Whimsicott will use Memento and Goodra will have its Physical and Special Attack decreased by two stages, then Whimsicott will faint. This move is essential for bossing as it will severely cripple the opponent’s attacking capabilities (and their will to live). Since bosses do not switch pokemon, they have no way to remove the stat drops (unless they use Haze or have abilities like Clear Body). We will exploit this to setup any pokemon we want to. Before you use Memento: keep in mind that some enemies are way too strong and can’t be handled even after a single Memento. Destiny Bond a threat if they’re too annoying (haha Air Slash go brrrr) or if they’re too strong (Mewtwo on steroids). Also, don’t be stupid and Memento a Clear Body Pokemon, for the love of god. Also, keep in mind that if you have the ability Prankster and you are facing a Dark Type opponent, most Status moves will be disabled and have no effect on the opponent. Memento is one of them. Be careful when you use Cottonee and Whimsicott! Accuracy/Precision Debuffing Flash/Sand Attack/Any accuracy decreasing move and Debuffers. Flash will simply lower the opponent’s accuracy by one stage, dropping his chances to hit any move drastically. We will use these moves to lower the opponent’s chance to hit us in any way. This is essential for bosses, since if we get hit and crit, we’re probably dead with no way to recover from disaster. We want bosses to miss as much as possible. Keep in mind we’re running completely on a 100% luck factor here. Other Debuffing Moves Charm/Featherdance, Eerie Impulse, Scary Face, Screech, Metal Sound/Fake Tears: These moves go together with the moves mentioned above. These attacks are needed in bosses to cripple the opponent’s attack so that they do not destroy us, their special attack, their defenses, or their speed. They’re quintessential to avoid being oneshot without any way to react to it. While there are more debuff moves, these are the ones that will help us the most. Calculating Stat Drops Now that you’ve read this, you should take a look at how stat increases and drops work. Each stat drop or increase in Attack, Defense, Special Defense, Special Attack, Speed is a 50%. If your stat is lowered or increased, it’s by one stage. If it says sharply, it’s by two stages (whether down or up) and drastically by three stages. Growl would lower our Attack by one stage (50%), but then we could Swords Dance, which would increase our Attack by two stages. Our Attack would go first to 0% (neutral) and to 50%, since it would’ve gone from -50% to 50% increase. Still confused? Well. let’s explain it better. You start at 0 stage drops or increases. Moves or abilities such as Intimidate can lower or increase your stats in battle (Defiant, Intimidate, Lightninrod, Speed Boost, Weak Armor, etc). The limits are 6 stage drops or 6 stage increases. Thus, you can have your stats lowered or increased up to 6 stages. For example, if I growl an opponent 6 times, his Attack will be decreased by 75%. However, if he uses Swords Dance once, his Attack will go back to having been decreased only 4 stages (50% decrease in Attack, or -4, as we can say it). If he uses it once more, he’ll be at -2 stages, and if he uses it again, he’ll be back at 0 stage drops. It’s quite easy to understand if you just count up and down. They don’t work on real percentages: Stage Drops (and %) are not very real. If your stat is increased by a stage, each stage is a multiplier or a divider by .5. So you can understand it properly: +6 stages = x4 to the stat that has been increased by that amount of stages. +5 stages = x3.5 to the stat that has been increased by that amount of stages. +4 stages = x3 to the stat that has been increased by that amount of stages. +3 stages = x2.5 to the stat that has been increased by that amount of stages. +2 stages = x2 to the stat that has been increased by that amount of stages. +1 stages = x1.5 to the stat that has been increased by that amount of stages. 0 stages = No changes. This is where you start from. -1 stages = x2/3 to the stat that has been decreased by that amount of stages. -2 stages = x2/4 to the stat that has been decreased by that amount of stages. -3 stages = x2/5 to the stat that has been decreased by that amount of stages. -4 stages = x2/6 to the stat that has been decreased by that amount of stages. -5 stages = x2/7 to the stat that has been decreased by that amount of stages. -6 stages = x2/8 to the stat that has been decreased by that amount of stages. Imagine Golem has 100 Speed. He uses Rock Polish once. He goes to 2 Stages, and his Speed goes to 200. (x2 multiplier). Now the enemy uses Mud Shot and drops your Speed by one stage. He goes at 150 Speed (x1.5 multiplier, you went from 2 stages to 1 stage). Now he Rock Polishes again and he jumps to 3 stages (x2.5 multiplier). His Speed is now 250. See? % don’t apply properly. If it was a %, a 100% increase would’ve meant that his Speed would’ve gone from 150 to 300. It works by Stages, so it goes to 250 instead. % only work based on the TOTAL STAT you see in the numbers in your pokemon’s description. The multiplier will always work on that stat, and it will not work as a %. If it worked on percentages, the 100% increase (or x2 in our real world) would’ve made 150 go to 300, instead of 250. Otherwise, we could abuse this repeatedly to grow our stats in battle infinitely. Now comes the stupid part. Stages DON’T HAVE THE SAME EXACT MULTIPLIERS WHEN IT COMES TO Evasion and Accuracy. I put it in caps SO YOU READ IT BETTER. Probably because Evasion and Accuracy are pure RNG based mechanics and they’d be WAY too broken with classic stat changes (we would abuse Fissure lol). Stages in these two stats work like this: +6 stages = x3 to the stat that has been increased by that amount of stages. +5 stages = x2.6 to the stat that has been increased by that amount of stages. +4 stages = x2.3 to the stat that has been increased by that amount of stages. +3 stages = x2 to the stat that has been increased by that amount of stages. +2 stages = x1.6 to the stat that has been increased by that amount of stages. +1 stages = x1.3 to the stat that has been increased by that amount of stages. 0 stages = No changes. This is where you start from. -1 stages = x0.75 to the stat that has been decreased by that amount of stages. -2 stages = x0.6 to the stat that has been decreased by that amount of stages. -3 stages = x0.5 to the stat that has been decreased by that amount of stages. -4 stages = x0.42 to the stat that has been decreased by that amount of stages. -5 stages = x0.375 to the stat that has been decreased by that amount of stages. -6 stages = x0.33 to the stat that has been decreased by that amount of stages. https://bulbapedia.bulbagarden.net/wiki/Statistic I suggest you give the entire thing a read. Setup Moves Dragon Dance, Quiver Dance, Nasty Plot, Agility, Swords Dance, Tail Glow, Iron Defense, Amnesia, Calm Mind, Cosmic Power, Minimize, Double Team, Coil, Curse, Autotomize: These moves are the moves we will use to set up. The issue with these moves is that most pokemon that have access to amazing moves (Butterfree literally learns some of the most overpowered moves for Bosses, legit, EVER) completely SUCK. They increase our stats (each one has a different function) and allow us to defeat bosses easily. We cannot defeat bosses without these moves and a clear strategy. For example, we could use Dragon Dance on an Inner Focus Dragonite, but we would not be able to stall a Boss via Roost and Dragon Dance since we need the extra Multiscale protection to get a few extra dances before we start sweeping. Hazards (no, not the football player) Hazards are moves that will cause effects upon the opponent once they switch in. Most hazards cause damage upon the opponent’s switch, they will deal a % of the opponent’s max HP (for example, Spikes, Stealth Rocks, Toxic Spikes). They’re essential to make bosses easier, as they ignore their defenses and just deal maximum HP % damage. For example, placing three Spikes will make all the opponent’s non-Levitate pokemon or non-Flying pokemon lose 25% of their max HP. Spikes and Toxic Spikes have issues, though. Since they can be avoided by some of the boss pokemon (and, specifically, we NEED to break Multiscale ability in some bosses, as it will allow them to survive hits they should NOT be able to, as it halves all damage dealt by the first hit they receive upon being at full HP), we have to utilise Stealth Rocks to their fullest potential. However, it is also recommended that you carry a Forretress with all three hazards to first set up Stealth Rocks and then try to spread as many Spikes and Toxic Spikes as possible. We want to use Stealth Rocks because nothing is immune to Stealth Rocks unless they have the ability Magic Guard active. This will allow us to lower the bosses incoming max HP, break stuff like Focus Sash and Sturdy (which only work if the user is at full HP) and allow us to score extra kills we normally would not be able to. Sticky Web is also considered a hazard, but we don’t really need that one. For this guide, we will mainly abuse Stealth Rocks. Screens The moves Light Screen and Reflect reduce incoming damage and last for 5 turns (or 8 turns if we hold the item Light Clay). These two halve special damage received (Light Screen) and physical damage received (Reflect). They will protect us from getting oneshot while we setup our sweeper or while we setup our Baton Passer. We will try to use them with a tanky screener so we can also try to stall the Boss if we deem it necessary. Weak Screeners are not recommended, as they could get oneshot by priority moves before we set them up, and that’d be disastrous (Alakazam I’m looking at you.) Status Inducing Moves Status effects are: Burn (deals a % of the opponent max’s HP per turn, also halves their physical attack, enables abilities such as Guts which increases your physical attack and negates the downside of Burn, except for the % damage per turn). Paralysis (slows the opponent by 75% and has a chance of 25% every turn to paralyse the opponent so they won’t do anything, also enables Guts). Sleep (will completely disable the opponent for one to three turns unless they use Sleep Talk or Snore). NOTE: You can only put ONE Boss pokemon to sleep. The Sleep Clause prevents more than one being put to sleep at once. Poison (same as Burn, but does not reduce their attack. There are two types of poison, the normal one deals 1/8th of the opponent’s max HP every turn and the other one (badly poisoned status) escalates from 1/16 per turn to 16/16 per turn as time goes by. It will increase by 1/16th every turn. Thus, the first turn will be 1/16, then 2/16, then 3/16, and so on. There’s also Freeze, which will completely paralyse a pokemon without any way to escape it other than using certain Fire type moves or waiting each turn for a chance to thaw out. (You could use healing items, but not in PvP). You can thaw out by being Scalded or using Flame Wheel. We mainly will only use Paralysis (Thunder Wave, mainly) to cripple a boss pokemon’s to make it be unable to attack sometimes to setup on them or to make them slower so that they always attack last. We could use Burn or Poison, but we don’t want the opponent’s pokemon to faint while we’re setting up. Counter / Mirror Coat Counter/Mirror Coat: These moves will counter the opponent’s attack by dealing twice as much damage as you were dealt in the same turn. Counter will deal double of the physical damage you took and Mirror Coat will deal double of the special damage you took. A few pokemon can exploit certain mechanics in these bosses (Wobbuffet, Golem and Magnezone mainly, but also other pokemon such as Ampharos or Clefable) to oneshot any boss pokemon and take it out instantly without having to resort to strategy. The only thing we have to calculate is the maximum possible HP amount our pokemon can reach, and multiply it by 2 to see how much damage we can deal. If you’re too lazy to do it: Sudowoodo and Magnezone with max HP investment at level 100 with 31 IV in HP and 252 EV in HP will do 343 x 2 damage with Counter and Mirror Coat, which can only be survived by atleast 221 HP Base Stat pokemon with 400 EV in HP (thus, base 221 HP stat, 31 IV in HP and 400 EV in HP, which will give them 100 HP into their Total Stats.) However, with higher max HP pokemon, since we can take more damage (for example, Magnezone can only take up to 343 damage, while Chansey with a Focus Sash using the same strategy can take more than 650 damage, can Counter for over ONE THOUSAND THREE HUNDRED POINTS OF DAMAGE. 1300. Do you realise how monstruous this is? We can abuse this in bosses to literally wipe them out in existence. However, this won’t work on Boss Tanks, as they normally don’t deal enough damage to oneshot them in retaliation. Destiny Bond This move will faint the opponent if the opponent faints you in the same turn you used this move. This move is often used to take out a Boss Pokemon in the same turn as you are fainted, so as to remove something extremely dangerous from the boss team that you cannot tank even after two Memento. Destiny Bond will fail to work if you use it two consecutive turns. However, if you use it in the first turn, don’t take out the opponent, but in the next turn the opponent takes you out BEFORE you can use it in that turn for the second consecutive time, you will faint the opponent. Example: Gengar is faster. He uses Destiny Bond, opponent does not faint you, thus no one faints. Turn 2, he uses Destiny Bond. However, since he went first before your opponent and he managed to use it twice, Destiny Bond will now FAIL and will not work. Wobuffet is slower. He uses Destiny Bond after surviving an enemy hit. Next turn, your opponent hits first and faints you. Since you used Destiny Bond this turn again BUT WERE NOT ABLE TO USE IT TWICE, it WILL work and faint the opponent too. The problem is that, with the AI strategy, pokemon may now switch when they would instead die from Destiny Bond. Be careful! Baton Pass This move will allow you to switch between two pokemon while retaining the stat boosts you got in the pokemon that is using the move. We will use this to carry boosts towards our sweeping pokemon that we obtained from setup moves. This move is essential to clearing Bosses while using Baton Pass or setting up our whole strategy. For example, if our Furret uses three Amnesia, six Coil and three Agility, he will be at +6 Attack, Defense, Speed, Special Defense. We can now use Baton Pass and all the boosts will be placed upon the pokemon we will switch on. We will take a hit in that turn, so we have to hope the opponent does not roll a roulette at -6 accuracy, -6 decreased attacking capabilities and criticals us at +6 in all stats. (It can happen, but it will approximately be one in a few thousand chances). Perish Song Once used, this move will faint all pokemon in the field after 3 turns unless you switch out. This is an optional strategy to use, still added it in. We can use this strategy if we can stall the game long enough. However, I consider it sub-par, because we will need to switch pokemon in the last turn before the opponent faints, and we will run the risk of having a pokemon faint stupidly. We also need to survive atleast three turns per Perish Song usage. We can easily get through this by using a Perish Song Politoed with Protect and Dive with Lagging Tail (… Bhimoso, what are you even writing at 4 in the morning and what are these strategies you’re coming up with. You need to sleep). Sturdy/Focus Sash The ability Sturdy and the item Focus Sash will prevent your pokemon from fainting in a single hit if your pokemon is at full HP. These will be exploited in order to ensure you can setup your strategy. Endeavor + Quick Attack/Sucker Punch: We will combine the move Endeavor and these two moves to cheese some bosses completely without using any strategy. If a pokemon has the move Endeavor and uses it when he’s at 1 HP (after the Focus Sash he holds activates), the opponent’s HP will be reduced to 1. Then, we can Quick Attack to outspeed and get a free kill before the boss pokemon can even react. This can be used 6 times per team to cheese some bosses in PRO completely and beat them in one or two minutes. We will also exploit this on Kangaskhan since he is immune to flinches, Donphan since he has Sturdy + Priority, Golem for the same reasons, Raticate, etc. BIG NOTE: This strategy will not work on pokemon that have Sitrus Berry or Leftovers equipped. After you use Endeavor on them, they will immediately heal a big % of their Max HP. Thus, you won't be able to kill them in one hit. Weathers There are four weathers in pokemon: Sun, Sand, Rain and Hail. These four have different effects, different abilities interact with them. Sun increases fire type damage moves, reduces water damage power moves, increases Morning Sun’s healing power, enables Chlorophyl, Solar Power, and more. Rain does the opposite and enables Rain Dish and Swift Swim. Sand powers up the Special Defense of all Rock Types in battle, enables Sand Veil and Sand Rush. It will also damage all non Rock, Steel or Ground types each turn. Hail only deals damage to non Ice Types each turn and enables abilities like Slush Rush. We can go deeper onto this topic but we will only explore the basics. The reason why we don’t go super deep into Weather teams is because they’re borderline useless in Bosses. Pure Weather teams struggle to set up strategies as more often than not their coverage is kinda limited. We can, however, make a semi weather balanced team + outside components to fix the team. The main issue is that not many weather pokemon are good sweepers for bosses, as they either lack power or the bulk to be able to survive while you set up. Not only that, but 8 turns isn't enough. Item Removing Moves Knock Off, Trick, Switcheroo: Knock Off is used to disable the boosts that the bosses gain fro[m Choice Items so that they hit way softer and we can stall them out easily. We only use this strategy against extremely powerful bosses such as Thor, who hit absurdly hard and have almost no counterplay. Against the less powerful bosses, we can avoid this. Trick and Switcheroo can also work, just exchange an Oran Berry. Oran Berries are obtainable everywhere and they’re worth 1 pokedollar in trade chat, since you’ll easily stock up 999 of them in your inventory. This will leave them with a useless item. We can exploit these moves with really fast attackers to steal the opponent’s Choice item and trade them something useless that will either only harm them or not work at all. I’d suggest Alakazam, since he’s extremely fast and he can Trick anything you want onto the opponent. In some bosses, it is very important to Switcheroo or Trick or remove their Life Orb, because if we don't remove it, it will be impossible for us to set up properly as they will die before we can set up our strategy. Recovery Moves Synthesis, Softboiled, Morning Sun, Roost, Moonlight, Slack Off and other moves like Rest that heal up your pokemon’s HP by different amounts depending on certain conditions. We could also add Leech Seed into the mix, Ingrain, Aqua Ring, and more. These are required for Stallers in order to get through bosses safely. Some of them are heavily unreliable though. Ingrain would keep us stuck in battle without being able to switch, Leech Seed depends on the opponent’s max HP and not on percentages, and we depend on them instead of our own % HP. Some also rely on weather conditions and that can potentialy cripple us. Roost can also be a troll sometimes, making us eat accidental Earthquakes for breakfast. Wonder Guard Wonder Guard is an ability which only Shedinja has which will make him immune to almost all attacks in existence. This ability can be abused against certain bosses since they are limited by the 4 move syndrome and they have no way of bypassing this immunity. The issue is: If Shedinja is hit once, he faints. Any status that damages each turn, hazards, weather conditions, abilities that allow bypassing other abilities (haha Mold Breaker go brrrr) and certain moves will ignore this ability completely. Thus, we have to plan out and check each boss moveset before we go and fight them. We will also look over the names for each role in any possible team. Keep in mind any of these roles can be fulfilled by ANY pokemon in the game that has access to these. Team Roles Debuffer This is the pokemon in your team who will spam stat decreasing moves onto the opponent. He has to either be tanky, or fast. We will normally use a Memento pokemon and a debuffer next to ensure we can cripple the boss pokemon to exploit it. This position can be filled by ANY pokemon with really good stat-lowering moves, specially if they have recovery options and are bulky. We’ll only use budget options in this guide (Pidgeot and Electrode mainly). While there are other options (Ampharos and Clefable), we normally want to focus on the best pokemon for each role, or the cheapest and easiest to farm, as we don’t want to elongate our suffering further. We already have to farm a LOT of pokemon for bosses. Thus, we’ll mainly stick to Pidgeot and Electrode, unless we face Electric-immune pokemon. We will also use Jumpluff, Cottonee, Whimsicott and others. Memento Mentioned above. He just uses Memento. That’s it. The position can be filled by ANY Memento pokemon, but the two main ones are Jumpluff (budget option) and Whimsicott. The third optional one is Dugtrio together with Mismagius. However, Jumpluff and Whimsicott have way more utility options than these two. We can also run Weezing as an optional budget option that can also stall and damage at the same time. However, he’s slower than my brain’s processing time. Hazard Setter The guy that spams Hazards like a madman. This position can be filled by ANY pokemon that has Hazard moves (Spikes, Toxic Spikes, Stealth Rocks and Sticky Web). The most notable is Forretress, who can learn the first three. We will use Golem as a budget option. We NEED to set up Stealth Rocks, ALWAYS (By the way, I’m fully aware it’s spelled Stealth Rock. I’m just lazy to fix it at this point). Then, we’ll set up three Spikes and two Toxic Spikes if possible. We don’t care if our hazarder faints as long as he sets up one Stealth Rocks. Screens The member that just sets up Light Screen or Reflect according to the enemy. We preferably want him to be tanky to avoid being oneshot by a Shadow Sneak or a Sucker Punch, unless we 100% believe in a really fast screen setter that will instantly faint so as to enable the next pokemon to be switched in without receiving a single free hit. (If you get fainted, you can switch without losing a turn). Baton Pass The one that will setup as much as possible and Baton Pass onto the Sweeper/Staller. The Baton Passer should have a reliable recovery, overpowered boosting moves (Swords Dance + Speed Boost, Quiver Dance, Dragon Dance), a reliable bulk to go along with it (Ninjask can’t tank anything even with the opponent at -4 or -6 stats…) and the appropriate moveset for it. We need to boost our sweeper as much as possible. Smeargle can also be used, however, it requires a LOT of skill. Staller An incredibly tanky pokemon with absurd defensive capabilities and recovery options that will slowly wear down the bosses’ pokemons until the boss loses. This is normally an emergency option if everything goes wrong. We will normally use this with Chansey and Clefable, who are extremely disgusting and tanky pokemon, obnoxious to deal with and barely unkillable (unless you get accidentally crit, in that case, you’re screwed). We can also do this with other reliably tanky pokemon with recovery options such as Roost or Softboiled. Sweepers and Setup Sweepers An incredibly strong and hard-hitting pokemon that will hit the opponent as hard as possible to defeat them in a single hit if possible. There’s also the variant of Setup Sweepers who do not depend on Baton Passing because they’re so good that they require barely any assistance. We can also add weather dependant sweepers. We will only use Setup Sweepers that are easy to hunt (mainly, unless needed). Any pokemon with high Attack, Special Attack (one of the two or both) and decent Speed can be used as a Sweeper in Baton Pass teams. Thus, we don’t really have to worry too much in Baton Pass about specific sets or pokemon. Destiny Bond This guy just comes in and takes out an opponent’s pokemon to ensure he can’t sweep you without any way to stop him. They are used to stop anything that is way too strong to stop once it gets going. We will use Gengar 100% of the time, since he’s almost guaranteed to almost always pull it off. However, we can use any Destiny Bond +Speed nature fast pokemon with Choice Scarf to Destiny Bond any threat we see and we don’t want to deal with. We can also use Wobbuffet, but we need to have a functioning brain to properly use him, and spoilers: I don’t have one. BEWARE THAT, after the AI changes, sometimes the AI will switch and your Destiny Bond attempt will fail. Weather Setter Only in weather related teams, there will be a weather setter with an ability such as Drought, Drizzle, Snow Warning or Sand Stream to set up the weather appropriate for the team. These teams are not very good in bosses since they often suffer from type disadvantages against many overpowered boss pokemon. Their strategy is also dependant on the turns the weather will last for. We could use Tyranitar, Hippowdown, Politoed, Pelipper, Ninetales, Torkoal, or Abomansnow. The issue with weather teams is that we run on limited turns where the weather will last, but stat changes will never run out due to turns going by, unlike weather, which ends at 5 turns (or 8 with the correct weather rock item equipped). Thus, we’re running a strategy on a limited time to set up (spoilers: it’s not going to be enough time 99% of the time to fully set up and getting it going) and we can’t even waste a single turn or we’ll have to repeat the whole strategy again. Status Setter While it normally falls onto the responsibility of either the Light Screener, the Hazarder or the Staller, there can be a pokemon that is exclusively dedicated to Yawn to make the opponent sleep, Thunder Wave to paralyse it, and so on. I don’t recommend wasting an slot just for it though. We will use an Electric pokemon like Electrode for this. We can also use a Klefki to do the job, but I’m not a fan of the guy. He’s not the… key… to our success… get it… because he’s a key… ha ha I’m such a comedian please don’t beat me I swear I won’t tell bad jokes again. Counter/Mirror Coat User (Wobbuffet go BRRRR) It forms part of the cheese strategy to just oneshot a pokemon by using Counter or Mirror Coat while holding a Focus Sash or having the ability Sturdy. This strategy can be used to cheese some bosses entirely (used to be used with Hannah, rip Hannah though). We will abuse this with Magnezone and Golem, since they have a free Focus Sash as Sturdy. We can also abuse this with Sudowoodo, as he has an incorporated Sucker Punch (priority to break Focus Sashes and Multiscale). We will use this to cheese some bosses without having to use anything else than pressing a single button. Disabler Very optional, pokemon that will use the move Disable to protect us from a specific move we don’t want the boss to use. Any pokemon that can use the Disable move is useful for this strategy. We would use this if the boss kept spamming a move which would otherwise not allow our strategy to work (Air Slash Togekiss or Shaymin, for example). Since the AI changes, this position is nerfed, as bosses may now change when disabled. Roarer / Whirlwind Also extremely optional, we’d only include a pokemon with the moves Roar or Whirlwind (also Dragon Tail, but this can be blocked by Fairy Types) if the opponent’s boss pokemon has setup moves and starts setting up and removing its worsened stats. The issue with these moves is that you’ll almost always move last since they have negative priority (the opposite of moves like Quick Attack or Extremespeed, basically). You’re taking extra risks here. Wonder Guard This deserver a special mention: we can use Shedinja vs certain bosses if we know he is immune to everything they will use against us and if they do not have Hazards, Weather, Status Moves or Abilities that will go through Wonder Guard. We can use Shedinja with Toxic and certain moves to quickly wear down and solo some bosses like madmen. Now that we’ve covered all of these terms and roles, it is finally time to start building a team! Before you start and fight any boss, check their teams in https://prowiki.info/index.php?title=Bosses Sample Teams! Newbie Section, easy teams for newbies/ideas you can try, fully built and ready to use! In this section I will provide a few Sample Teams that newbies can easily try out, hunt for and experiment with. The cores of the teams are easy to hunt and can be modified according to your budget. I will tell you what positions each member does, what should you try in a team and what you can experiment with. The teams I will provide are RISK FREE, SAFE AND NEWBIE FRIENDLY. We will not play with risks here, we will play it slow, safe and 100% success rate (that's what she said). We do not want something fast but not something super slow either. The aim of these sample teams will be for newbies to build a safe to use team they can replicate against bosses. Self Setup Based Teams In Self Setup Based teams, the point of the team is to make the Boss weak through debuffing it with stat drops, status and other moves we can use to then set up a Sweeper and faint every single one of the Boss pokemon in (if possible) a single hit. A Self Setup sweeper is a sweeper that does not need help from a Baton Passer. It can boost by itself. These are extremely rare to find, as they require either access to very good setup moves or a varied movepool. These pokemon should also have great Base Stats to begin with, as otherwise they will be very weak against Bosses, even when boosting +6 on all stats. Self Setup sweepers are somewhat weak to Status Ailments (burn, poison and paralysis specially, the most common status found in Bosses), to Taunts, Critical Hits (as they ignore stat boosts) and Roar/Whirlwind/Dragon Tail. There are multiple ways we can avoid these. Now, we will try to build a team based on a Self Setup pokemon. I recommend that, for any Self Setup Based Team, use pokemon that can learn the following moves: -Cosmic Power -Quiver Dance -Dragon Dance -Work Up These three moves are some of the best and more accessible Boosting moves. Cosmic Power and Quiver Dance are the best as they will allow you to run over entire Boss Teams without any issue. We will first make up 6 team slots. Team Slot 1 Team Slot 2 Team Slot 3 Team Slot 4 Team Slot 5 Team Slot 6 If we are playing in Easy Difficulty, against just level 100 pokemon with no useful items or EV training, we barely need any help. Thus, the only important core is: Memento user here. Jumpluff/Whimsicott/Cottonee/Dugtrio. Hazard Setter. Golem/Bronzong/Forretress. Setup Sweeper. Team Slot 4, 5 and 6 are available. If we want to ensure our Setup Sweeper can do the job, we can fll in Team Slot 4 with another Debuffer. For example, Team Slot 1 and Team Slot 4 are Whimsicott and Jumpluff. If we feel we need another Setup Sweeper if our Setup Sweeper accidentally dies, we can fill Team Slot 5 with another Setup Sweeper like Clefable. Team Slot 6 is now available. We could for example use a Shedinja if we are sure the opponent's team cannot hit us supereffectively. This Shedinja would be our last resort. I will make a sample team for Easy Difficulty. This sample team will be a low cost team. Sample Team - Easy Difficulty This Sample Team is entirely possible to capture and train in Kanto, without leaving the region. However, for full access to all moves, you will need access to Johto / a friend can give you TMs or help you out. Slot 1 - Jumpluff. Naive/Hasty/Jolly/Timid nature. 252 EV Speed, 252 EV HP. 20+ IV recommended in all stats, SPECIALLY Speed. Brightpowder equipped. Any Ability. Moveset: Memento (obligatory), Flash (optional), Worry Seed (optional), Stun Spore (optional). If the Boss first pokemon is very weak against our Jumpluff, we will spam Flash and Stun Spore until they are paralysed and -6 Precision. We can use Worry Seed to disable their ability if their ability is dangerous (for example, Speed Boost, Huge Power, Adaptability). We will use Memento when we decide it is needed to debuff them. Slot 2 - Golem. Adamant/Brave. 252 EV Atk, 252 HP. 20+ IV HP ATK DEF SPDEF recommended. Brightpowder equipped. Sturdy. Moveset: Stealth Rock (obligatory), Counter (optional but recommended), Explosion (very recommended), the last move is up to you. Golem's only functions are to either set up Stealth Rock to break the Sturdy ability and Sash of the opponent, or to use Counter against the boss first pokemon to take it down in a single hit. Golem allows you to faint any physical attacker for free in an emergency. Slot 3 - Dugtrio. Jolly/Naive/Hasty nature. 252 EV Speed, 252 EV ATK. 20+ IV Speed and ATK recommended. Brightpowder/Focus Sash equipped. Any ability. Moveset: Memento (obligatory), Stealth Rock (optional), any two other attacking moves. If any accidents happen with Jumpluff, we will use Dugtrio to debuff instead. It can also set up Stealth Rock if needed. With this, we have ensured that our next 3 slots can be occupied by anything. The Boss will be VERY debuffed and weak after two Memento + other debuffs. I will give you an example of three Self Setup Sweepers we can fit in a single team. Slot 4 - Slowbro/Slowking (NON MEGA, if you are a newbie with no budget for now to beat the Megaquest Boss.) Slowbro - Calm/Sassy. 252 EV SPDEF, 252 HP. 20+ IV DEF, SPDEF, HP and SPATK recommended. Any ability. Leftovers. Moveset: Slack Off (obligatory)/Rest (optional), Calm Mind (option 1), Amnesia (option 2, if you have no access to Hoenn / nobody can sell you a TM). Iron Defense (obligatory, unless you're a poor newbie, then Withdraw), Surf (if you're poor and have not reached Hoenn). Example: Slack Off - Amnesia - Withdraw - Surf (very newbie friendly moveset) Slack Off - Calm Mind - Iron Defense - Surf (not so newbie friendly). Slowbro sets itself up, boosts its DEF, SPDEF and (if you have Calm Mind) SPATK to +6. It heals with Leftovers + Slack Off. It is almost impossible to faint with this combo. Slowbro is the best Boss Self Setup Sweeper. It is extremely easy to farm, very accessible for newbies, easy to understand too. We need to set up our DEF and SPDEF to +6 stages, then our Spatk, then sweep. Slowking - Bold/Relaxed. 252 EV DEF, 252 HP. 20+ IV DEF, SPDEF, HP and SPATK recommended. Any ability. Leftovers. Copy the entire explanation I mentioned above. The only difference between both is that Slowbro has more DEF, Slowking has more SPDEF, and Slowbro has a Megaevolution but Slowking doesn't (I never understood why). The nature choice is to balance their DEF and SPDEF differences. Note: Slowbro and Slowking ONLY HAVE ONE SLOT TO USE AN ATTACKING MOVE. Some bosses have Water Type immune pokemon (ability Water Absorb, Storm Drain). Before you begin the boss, write down if any pokemon is immune to Surf. Slowbro and Slowking have access to other moves such as Flamethrower, Psychic and once again, Surf. You can train multiple Slowbro/Slowking for bosses and switch around them as you need. You copy the same moveset, but instead of Surf, you replace the attacking move. Beware that Flash Fire grants an immunity to Fire Type attacks and Dark Types are immune to Psychic. Slot 5 - Clefable Bold/Relaxed, 252 EV DEF, 252 HP. 20+ IV DEF, SPDEF, HP and SPATK recommended. Magic Guard. Leftovers. Moveset: Cosmic Power (obligatory), Softboiled (obligatory)/Rest (optional)/Moonlight (optional), Moonblast (obligatory), Calm Mind (optional, if you want SPATK boosts)/Toxic (if you want to take the Boss safe but slow, you can Toxic it and keep attacking while you heal up constantly. Note: Clefable only has one slot for your attacking move as Cosmic Power + Softboiled are normally required. Clefable learns an absurd amount of attacking moves: Shadow Ball, Psychic, Flamethrower, Ice Beam, Thunderbolt, Moonblast and so on. It is a good choice to train multiple Clefable for Bosses as you will be able to switch around them depending on the boss lineup. For example: Softboiled - Cosmic Power - Toxic - Moonblast Softboiled - Calm Mind - Cosmic Power - Moonblast Softboiled - Calm Mind - Cosmic Power - Flamethrower Softboiled - Calm Mind - Cosmic Power - Ice Beam. Softboiled - Calm Mind - Cosmic Power - Psychic Softboiled - Calm Mind - Cosmic Power - Shadow Ball Clefable has the same exact strategy as Slowbro/Slowking. Slot 6 - This slot is completely up to you. However, I will add another low tier Setup Sweeper that is also a good option for bosses. Gyarados Adamant, 252 EV ATK, 252 EV Speed/HP (preferably Speed). 20+ IV ATK, DEF, SPEED, SPDEF, HP recommended. Intimidate. Leftovers. Moveset: Dragon Dance (obligatory), Waterfall (obligatory, however, if you do not have access to the HM, use Aqua Tail, but it has a 10% chance to miss). Earthquake (optional), Crunch (optional but recommended), Ice Fang (optional and not recommended). Gyarados is an emergency sweeper. It is also slightly frail and dangerous to use, but it is an incredible PvE sweeper to farm and use. Dragon Dance - Waterfall/Aqua Tail, Crunch/Ice Fang, Earthquake Sample Team - Medium Difficulty This is now a serious fight. You are now going to fight an AI that cheats and has an illegal EV Spread. Thus, we are not going to use completely low cost options, we are going to give preference to properly built teams. Slots 1, 2 and 3 are going to be dedicated to properly set up our entire team. Slots 4 and 5 are going to be slightly flexible. Slot 6 must be an extremely strong Self Setup Sweeper that can 100% safely set up. Slot 1 - Jumpluff. Naive/Hasty/Jolly/Timid nature. 252 EV Speed, 252 EV HP. 20+ IV recommended in all stats, SPECIALLY Speed. Brightpowder equipped. Any Ability. Moveset: Memento (obligatory), Flash (optional), Worry Seed (optional), Stun Spore (optional). If the Boss first pokemon is very weak against our Jumpluff, we will spam Flash and Stun Spore until they are paralysed and -6 Precision. We can use Worry Seed to disable their ability if their ability is dangerous (for example, Speed Boost, Huge Power, Adaptability). We will use Memento when we decide it is needed to debuff them. Slot 2 - Whimsicott. Bold/Calm (Relaxed/Sassy might also work). If Bold, 252 EV DEF, 252 HP. if Calm, 252 SPDEF, 252 HP. 20+ IV DEF SPDEF HP. Lagging Tail equipped. Prankster. Moveset: Switcheroo (Obligatory), Memento (obligatory), Cotton Spore (obligatory), Charm (preferred most of the time)/Worry Seed/Flash. Whimsicott will Switcheroo the Lagging Tail, which makes the opponent ALWAYS move last. HOWEVER, LAGGING TAIL CANNOT BE PLACED ON POKEMON HOLDING A MEGA EVOLUTION STONE. For these, you will use Cotton Spore instead. Slot 3 - Forretress. Relaxed/Impish, Careful/Sassy. If Relaxed/Impish, 252 EV DEF, 252 HP. If Careful/Sassy, 252 SPDEF, 252 HP. 20+ IV DEF SPDEF HP. Leftovers/Brightpowder equipped (your choice). Sturdy. Moveset: Stealth Rock (obligatory), Toxic Spikes (obligatory), Spikes (obligatory), Explosion (obligatory). Forretress will first set up either Stealth Rock or two Toxic Spikes, then set up the rest. These are needed against most Medium Bosses or they will take too long to defeat. Slot 4 - Pineco. Copy exactly what I said in the section mentioned above with Forretress. Something that you might've not realised by now is that you can carry a PREEVOLUTION together with an EVOLUTION in the same team. The point of bringing a Pineco in your team aside from a Forretress is to be able to set up extra Hazards that Forretress was not able to as it probably fainted while in the process. Slot 5 - Optional free slot. Most of the time, I bring a Cottonee here, copy everything I said on Whimsicott and bring it as an emergency Debuffer. Sometimes I carry a Shedinja (regardless of nature and IVs) with Toxic and any attacking moves as an emergency to finish off some Bosses that cannot hurt Shedinja at all. I recommend using a Naive/Hasty Shedinja with Dig and Protect so that, if needed, you can stall out a few Boss pokemon by spamming Protect, then using Dig, surviving with Focus Sash, then Dig again and to keep stalling. Sometimes I bring a Bold Chansey with all IV at 20+, Seismic Toss, Toxic, Softboiled, Counter. Sometimes a Wobbuffet, Sometimes an Impish/Careful Drapion Battle Armor 20+ with Acupressure, Rest, Cross Poison and Night Slash. This slot is free. Slot 6 - The best Self Setup Pokemon in PRO: Mega Slowbro. There is quite literally NOTHING that compares to it. Mega Slowbro wants a Calm/Sassy Nature, 20+ IV DEF SPDEF HP SPATK, any ability (and obviously the Slowbronite Megastone). 252 EV SPDEF, 252 EV HP, 4 DEF. Mega Slowbro will always have the same 3 moves, then a different attacking move depending on the boss: Slack Off, Iron Defense, Calm Mind + Attacking move: Surf/Flamethrower/Ice Beam/Psychic. Depending on the boss, you need to change the attacking move (if the opponent is immune to it), or stall the opponent out spamming any move until they die from Toxic Spikes (which you should've set up earlier with Pineco + Forretress. Sample Team - Hard Difficulty The real challenge begins here. You now fight Bosses who cheat with 400 EVs around all stats. You now NEED to cheese as much as possible. Your plan changes. This section is a copy and paste from Medium Difficulty, however, there are some changes. The plan here is to Memento THREE CONSECUTIVE TIMES with Whimsicott, Cottonee and Jumpluff on the first pokemon of each boss. Then, Pineco and Forretress must set all possible hazards and then use Explosion. Finally, Slowbro will Megaevolve, set up against the opponent and sweep the 6 pokemon alone. The only possible weaknesses Slowbro has is Taunt (never used by Bosses), Mold Breaker (this bypasses Shell Armor and gives the opponent a chance to crit, has the same effect as Zekrom and Reshiram's abilities) and Toxic Poison. There is NOTHING ELSE that can take Mega Slowbro down. If you play it intelligently, you should win 90% or higher of all your Boss Fights. If preferred, DON'T Memento immediately always but instead Switcheroo Lagging Tail so that Slowbro will be able to go first against the Boss' first pokemon to set up easily. However, against Hard Bosses, 2 out of 3 of your Memento users should always Memento so that Slowbro runs NO risks while setting up. Slot 1 - Whimsicott. Bold/Calm (Relaxed/Sassy might also work). If Bold, 252 EV DEF, 252 HP. if Calm, 252 SPDEF, 252 HP. 20+ IV DEF SPDEF HP. Lagging Tail equipped. Prankster. Moveset: Switcheroo (Obligatory), Memento (obligatory), Cotton Spore (obligatory), Charm (preferred most of the time)/Worry Seed/Flash. Whimsicott will Switcheroo the Lagging Tail, which makes the opponent ALWAYS move last. HOWEVER, LAGGING TAIL CANNOT BE PLACED ON POKEMON HOLDING A MEGA EVOLUTION STONE. For these, you will use Cotton Spore instead. Slot 2 - Cottonee. COPY EVERYTHING MENTIONED IN SLOT 1. Slot 3 - Jumpluff. Naive/Hasty/Jolly/Timid nature. 252 EV Speed, 252 EV HP. 20+ IV recommended in all stats, SPECIALLY Speed. Brightpowder equipped. Any Ability. Moveset: Memento (obligatory), Flash (optional), Worry Seed (optional), Stun Spore (optional). If the Boss first pokemon is very weak against our Jumpluff, we will spam Flash and Stun Spore until they are paralysed and -6 Precision. We can use Worry Seed to disable their ability if their ability is dangerous (for example, Speed Boost, Huge Power, Adaptability). We will use Memento when we decide it is needed to debuff them. Slot 4 - Forretress. Relaxed/Impish, Careful/Sassy. If Relaxed/Impish, 252 EV DEF, 252 HP. If Careful/Sassy, 252 SPDEF, 252 HP. 20+ IV DEF SPDEF HP. Leftovers/Brightpowder equipped (your choice). Sturdy. Moveset: Stealth Rock (obligatory), Toxic Spikes (obligatory), Spikes (obligatory), Explosion (obligatory). Forretress will first set up either Stealth Rock or two Toxic Spikes, then set up the rest. These are needed against most Medium Bosses or they will take too long to defeat. Slot 5 - Pineco. Copy exactly what I said in the section mentioned above with Forretress. Something that you might've not realised by now is that you can carry a PREEVOLUTION together with an EVOLUTION in the same team. The point of bringing a Pineco in your team aside from a Forretress is to be able to set up extra Hazards that Forretress was not able to as it probably fainted while in the process. Slot 6 - The best Self Setup Pokemon in PRO: Mega Slowbro. There is quite literally NOTHING that compares to it. Mega Slowbro wants a Calm/Sassy Nature, 20+ IV DEF SPDEF HP SPATK, any ability (and obviously the Slowbronite Megastone). 252 EV SPDEF, 252 EV HP, 4 DEF. Mega Slowbro will always have the same 3 moves, then a different attacking move depending on the boss: Slack Off, Iron Defense, Calm Mind + Attacking move: Surf/Flamethrower/Ice Beam/Psychic. Depending on the boss, you need to change the attacking move (if the opponent is immune to it), or stall the opponent out spamming any move until they die from Toxic Spikes (which you should've set up earlier with Pineco + Forretress. Baton Pass Setup Teams Baton Pass revolves around the self named move that allows you to Switch onto another pokemon WHILE RETAINING ALL STAT BOOSTS. We will try to debuff the Boss Team, then set up with a single pokemon, then Baton Pass onto another pokemon. The advantage of Baton Pass is that you can use ALMOST ANY POKEMON as the sweeper of the team. The pokemon will receive a +6 in all stats (if possible). Sample Team - Easy Difficulty The Sample Team for Easy Difficulty will try to remain only Kanto / Johto if possible. Thus, the following pokemon will only need these 2 regions. I will provide a list for all possible PRO Baton Passers and best Sweepers at the end of this section. However, I will show you the CORE of each Team and Difficulty. For Easy Difficulty, ANY Sweeper works. For Medium Difficulty, MOST Sweepers will work. For Hard, ONLY USE THE BEST. Slot 1 - Jumpluff. Naive/Hasty/Jolly/Timid nature. 252 EV Speed, 252 EV HP. 20+ IV recommended in all stats, SPECIALLY Speed. Brightpowder equipped. Any Ability. Moveset: Memento (obligatory), Flash (optional), Worry Seed (optional), Stun Spore (optional). If the Boss first pokemon is very weak against our Jumpluff, we will spam Flash and Stun Spore until they are paralysed and -6 Precision. We can use Worry Seed to disable their ability if their ability is dangerous (for example, Speed Boost, Huge Power, Adaptability). We will use Memento when we decide it is needed to debuff them. Slot 2 - Golem. Adamant/Brave. 252 EV Atk, 252 HP. 20+ IV HP ATK DEF SPDEF recommended. Brightpowder equipped. Sturdy. Moveset: Stealth Rock (obligatory), Counter (optional but recommended), Explosion (very recommended), the last move is up to you. Golem's only functions are to either set up Stealth Rock to break the Sturdy ability and Sash of the opponent, or to use Counter against the boss first pokemon to take it down in a single hit. Golem allows you to faint any physical attacker for free in an emergency. Slot 3 - Dugtrio. Jolly/Naive/Hasty nature. 252 EV Speed, 252 EV ATK. 20+ IV Speed and ATK recommended. Brightpowder/Focus Sash equipped. Any ability. Moveset: Memento (obligatory), Stealth Rock (optional), any two other attacking moves. If any accidents happen with Jumpluff, we will use Dugtrio to debuff instead. It can also set up Stealth Rock if needed. Slot 4 - UP TO PERSONAL CHOICE. I generally recommend a Screen Setter if you want such as Electrode so you can Baton Pass easily for a few turns. Electrode - Calm, 252 EV SPDEF, 252 HP. Otherwise, Timid, 252 EV HP, 252 SPEED. Any ability. 20+ IV everything except ATK. Light Clay equipped (afaik this item is obtainable in Kanto). Moveset: Light Screen (obligatory), Reflect (obligatory), Thunder Wave (optional), Debuff move (Flash, Eerie Impulse, etc). Slot 5 - Baton Passer Slot 6 - Sweeper Sample Team - Medium Difficulty Slot 1 - Whimsicott. Bold/Calm (Relaxed/Sassy might also work). If Bold, 252 EV DEF, 252 HP. if Calm, 252 SPDEF, 252 HP. 20+ IV DEF SPDEF HP. Lagging Tail equipped. Prankster. Moveset: Switcheroo (Obligatory), Memento (obligatory), Cotton Spore (obligatory), Charm (preferred most of the time)/Worry Seed/Flash. Whimsicott will Switcheroo the Lagging Tail, which makes the opponent ALWAYS move last. HOWEVER, LAGGING TAIL CANNOT BE PLACED ON POKEMON HOLDING A MEGA EVOLUTION STONE. For these, you will use Cotton Spore instead. Slot 2 - Cottonee. COPY EVERYTHING MENTIONED IN SLOT 1. Slot 3 - Jumpluff. Naive/Hasty/Jolly/Timid nature. 252 EV Speed, 252 EV HP. 20+ IV recommended in all stats, SPECIALLY Speed. Brightpowder equipped. Any Ability. Moveset: Memento (obligatory), Flash (optional), Worry Seed (optional), Stun Spore (optional). If the Boss first pokemon is very weak against our Jumpluff, we will spam Flash and Stun Spore until they are paralysed and -6 Precision. We can use Worry Seed to disable their ability if their ability is dangerous (for example, Speed Boost, Huge Power, Adaptability). We will use Memento when we decide it is needed to debuff them. Slot 4 - Forretress. Relaxed/Impish, Careful/Sassy. If Relaxed/Impish, 252 EV DEF, 252 HP. If Careful/Sassy, 252 SPDEF, 252 HP. 20+ IV DEF SPDEF HP. Leftovers/Brightpowder equipped (your choice). Sturdy. Moveset: Stealth Rock (obligatory), Toxic Spikes (obligatory), Spikes (obligatory), Explosion (obligatory). Forretress will first set up either Stealth Rock or two Toxic Spikes, then set up the rest. These are needed against most Medium Bosses or they will take too long to defeat. Slot 5 - Baton Passer Slot 6 - Sweeper Sample Team - Hard Difficulty Slot 1 - Whimsicott. Bold/Calm (Relaxed/Sassy might also work). If Bold, 252 EV DEF, 252 HP. if Calm, 252 SPDEF, 252 HP. 20+ IV DEF SPDEF HP. Lagging Tail equipped. Prankster. Moveset: Switcheroo (Obligatory), Memento (obligatory), Cotton Spore (obligatory), Charm (preferred most of the time)/Worry Seed/Flash. Whimsicott will Switcheroo the Lagging Tail, which makes the opponent ALWAYS move last. HOWEVER, LAGGING TAIL CANNOT BE PLACED ON POKEMON HOLDING A MEGA EVOLUTION STONE. For these, you will use Cotton Spore instead. Slot 2 - Cottonee. COPY EVERYTHING MENTIONED IN SLOT 1. Slot 3 - Jumpluff. Naive/Hasty/Jolly/Timid nature. 252 EV Speed, 252 EV HP. 20+ IV recommended in all stats, SPECIALLY Speed. Brightpowder equipped. Any Ability. Moveset: Memento (obligatory), Flash (optional), Worry Seed (optional), Stun Spore (optional). If the Boss first pokemon is very weak against our Jumpluff, we will spam Flash and Stun Spore until they are paralysed and -6 Precision. We can use Worry Seed to disable their ability if their ability is dangerous (for example, Speed Boost, Huge Power, Adaptability). We will use Memento when we decide it is needed to debuff them. Slot 4 - Forretress. Relaxed/Impish, Careful/Sassy. If Relaxed/Impish, 252 EV DEF, 252 HP. If Careful/Sassy, 252 SPDEF, 252 HP. 20+ IV DEF SPDEF HP. Leftovers/Brightpowder equipped (your choice). Sturdy. Moveset: Stealth Rock (obligatory), Toxic Spikes (obligatory), Spikes (obligatory), Explosion (obligatory). Forretress will first set up either Stealth Rock or two Toxic Spikes, then set up the rest. These are needed against most Medium Bosses or they will take too long to defeat. Slot 5 - Baton Passer Slot 6 - Sweeper List of Baton Passers (Note: I will be assuming that, from this list onwards, all your Baton Passers have 20+ or higher IV AND your Sweepers also do. BECAUSE IT'S REALLY, REALLY NEEDED AND RECOMMENDED). For Physical Attackers Furret. Careful/Impish. If Careful, 252 HP, 252 SPDEF. If Impish, 252 HP, 252 DEF. Leftovers. Any ability. 20+ IV DEF SPDEF HP Moveset: Coil (obligatory), Agility (obligatory), Baton Pass (obligatory), Amnesia (obligatory) Furret is the first and easiest Baton Passer to obtain in the game. Furret learns all these 4 moves via Level Up. You can literally get a good one in the first route of the game, Route 1. You will spam Coil or Amnesia first, then Agility, then Coil, then Baton Pass onto a physical sweeper. Ninjask/Scolipede/Blaziken. Jolly/Adamant (tbh even Hasty/Naive/Lonely/Naughty work) 252 ATK 252 HP (your speed is already insane). Leftovers. Speed boost. 20+ IV HP ATK SPEED. Moveset: Substitute, Swords Dance, Protect, Baton Pass. These 3 do the same thing: Protect to stack Speed Boosts, Substitute, Set up Swords Dances, then Baton Pass them. All Difficulties Viable For Special Attackers Venomoth. Bold. 252 HP, 252 DEF. Shield Dust. Leftovers. Moveset: Quiver Dance (obligatory), Substitute (obligatory), Roost (obligatory), Baton Pass (obligatory) Similar to Furret, Venomoth is the second and easiest Baton Passer for SPATK users to get in the game. However, there's a very big problem with Venomoth. Venomoth DOES NOT HAVE ACCESS TO DEF RAISING MOVES. Thus, you MIGHT die if hit by a physical move. If you fail to OHKO a pokemon, there is the chance you might accidentally lose due to not having your DEF stat raised. Note: There's actually more Baton Passers that can Baton Pass Quiver Dance (such as Ribombee). However, none is as easy to obtain and hunt as Venomoth is. They all also don't have a DEF raising move. All Difficulties Viable Lunatone & Solrock Lunatone: Bold. 252 HP, 252 DEF. Leftovers. Levitate. Moveset: Cosmic Power, Rock Polish, Calm Mind, Baton Pass. (obligatory, I'll just write it once from now on because my fingers hurt) Lunatone. Yes, surprising as hell. I didn't know it learned these things either. Solrock: Careful, 252 HP, 252 SPDEF, Leftovers, Levitate. Moveset: Cosmic Power, Rock Polish, Calm Mind, Baton Pass. Easy & Medium Viable, Hard is risky. For Both (flexible) Leavanny. Impish/Careful. 252 HP, 252 DEF if Impish. 252 SPDEF instead if Careful. Leftovers. Any ability. Moveset: Calm Mind/Swords Dance (obligatory), Iron Defense (obligatory), Agility (obligatory), Baton Pass (obligatory). This is the most expensive Spatk Baton Passer by far, hardest to find too. Not recommended at all because it's a big headache. But well, if you want to try it... Easy & Medium Viable, not recommended on Hard. Lopunny. Impish/Careful, 252 HP, 252 DEF Impish, 252 SPDEF Careful. Leftovers. HAS TO BE LIMBER OR CUTE CHARM. Moveset: Cosmic Power (obligatory), Work-Up (obligatory), Agility (obligatory), Baton Pass (obligatory) YES, YOU ARE SEEING THIS RIGHT. IT CAN LEARN ALL THESE MOVES. DON'T ASK ME HOW OR WHY. It's actually an amazing baton passer. All Difficulties Viable. Medicham & Dodrio Medicham: Impish/Careful. 252 HP 252 DEF Impish, 252 SPDEF Careful. Leftovers. Pure Power is nice to level up faster. Acupressure, Substitute, Recover, Baton Pass. You basically spam Acupressure untill all your stats are +6 hiding behind a Substitute. Then, you Baton Pass. Dodrio: Same natures, EV spread, item, any ability. Same moveset, however, Roost and not Recover. Same strategy. (Would you ever figure out these two were actually broken Baton Passers?) All Difficulties Viable. Not a joke, they're insane. Mew. Bold/Calm, 252 HP, 252 DEF if Bold, 252 SPDEF if Calm. Leftovers. Any ability: Moveset: Bulk Up/Iron Defense (if the sweeper is a physical attacker, prioritise Bulk Up), Rock Polish, Calm Mind, Baton Pass. If you're somehow up to do an entire Legendary Quest just for this, you can also use Mew lmao. List of Sweepers by Type Below I will provide a list of the Pokemon I would recommend the MOST for each Type. THIS DOES NOT MEAN THEY ARE EACH THE BEST OR THAT THEY ARE THE ONLY OPTIONS. THERE'S MORE POKEMON THAT MIGHT BE VIABLE TOO. However, I will try to keep it for the best options in each case. Note: I will be assuming your pokemon below have 20+ IV in all IMPORTANT stats. Example: Gengar all stats are important but ATK is irrelevant. Snorlax all stats are important but SPATK SPEED are irrelevant. Note 2: Normally, you need 4 VERY strong attacks of different types to cover as many pokemon as possible, on each pokemon. You're trying to use each Sweeper in a Baton Pass team to cover as many bosses as possible. I recommend Focus Sash, Expert Belt, Life Orb, Muscle Band, Wide Glasses, Scope Lens, Lum Berry as held items. If you need to activate specific abilities, use the right item (Scope Lens - Sniper, Guts - Flame Orb, Toxic Boost - Toxic Orb) I will skip the worst options. However, if you wish to use a Magikarp to sweep bosses, do it. Normal Ambipom - Skill Link / Technician - Adamant - 252 ATK 252 SPEED Bouffalant - Reckless - Adamant - 252 ATK 252 SPEED Braviary - Sheer Force - Adamant - 252 ATK 252 SPEED Lopunny (Mega) - Adamant - 252 ATK 252 SPEED Cinccino - Skill Link / Technician - Adamant - 252 ATK 252 SPEED Diggersby - Huge Power - Adamant - 252 ATK 252 SPEED Exploud - Scrappy - Rash/Modest - 252 SPATK 252 SPEED Fearow - Sniper - Adamant - 252 ATK 252 SPEED Kangaskhan (mega or not, I even forgot this gets a mega in gen 6 lol) - Scrappy - Adamant - 252 ATK 252 SPEED Kecleon - Protean - Adamant - 252 ATK 252 HP Miltank - Scrappy - Adamant - 252 ATK 252 HP Noctowl - Tinted Lens - Modest - 252 SPATK 252 SPEED Persian - Technician - Naughty/Rash - 252 ATK/SPATK 252 SPEED Pidgeot (Mega) - Modest - 252 SPATK 252 SPEED Porygon Z - Adaptability - Modest - 252 SPATK 252 SPEED Raticate - Guts - Adamant - 252 ATK 252 SPEED Sawsbuck - Serene Grace - Adamant - 252 ATK 252 SPEED Snorlax - Immunity/Thick Fat - Adamant - 252 ATK 252 HP Staraptor - Reckless - Adamant - 252 ATK 252 SPEED Stoutlant - Scrappy - Adamant - 252 ATK 252 SPEED Swellow - Guts - Adamant - 252 ATK 252 SPEED Swellow - Scrappy - Modest - 252 SPATK 252 SPEED Ursaring - Guts - Adamant - 252 ATK 252 SPEED Zangoose - Toxic Boost - Adamant - 252 ATK 252 SPEED Fighting Blaziken (Mega or not) - Speed Boost - Adamant - 252 ATK 252 SPEED Breloom - Technician/Poison Heal - Adamant - 252 ATK 252 SPEED Chesnaught - Bulletproof (YOU'RE BULLETPROOF, NOTHING TO LOSE, FIRE AWAY FIRE AWAY) - Adamant - 252 ATK 252 HP Conkeldurr - any abi - Adamant - 252 ATK 252 HP Emboar - Reckless - Adamant - 252 ATK 252 HP Gallade (mega or not) - Adamant - 252 ATK 252 SPEED Hariyama - Guts - 252 ATK 252 HP Heracross (mega or not) - Adamant - 252 ATK 252 SPEED Hitmonchan - Iron Fist - Adamant - 252 ATK 252 SPEED Hitmonlee - Reckless - Adamant - 252 ATK 252 SPEED Hitmontop - Technician - Adamant - 252 ATK 252 SPEED/HP Infernape - Iron Fist - Adamant - 252 ATK 252 SPEED Infernape - Blaze - Modest - 252 SPATK 252 SPEED Keldeo - Justified - Modest - 252 SPATK 252 SPEED Kommo-o - Bulletproof - Adamant - 252 ATK 252 SPEED Kommo-o - Bulletproof - Modest - 252 SPATK 252 SPEED Lopunny (Mega) - Adamant - 252 ATK 252 SPEED Lucario (Mega or not) - Adamant - 252 ATK 252 SPEED Lucario (Mega or not) - Modest - 252 SPATK 252 SPEED Machamp - No Guard/Guts - Adamant - 252 ATK 252 SPEED Medicham (Mega or not) - Pure Power - Adamant - 252 ATK 252 SPEED Mienshao - Reckless - Adamant - 252 ATK 252 SPEED Pangoro - Mold Breaker - Adamant - 252 ATK 252 SPEED Sawk - Sturdy/Mold Breaker - Adamant - 252 ATK 252 SPEED Throh - Guts/Mold Breaker - Adamant - 252 ATK 252 HP Flying Aerodactyl (Mega or not) - Rock Head - Adamant - 252 ATK 252 SPEED Altaria (Mega or not, but if possible Mega) - Adamant - 252 ATK 252 SPEED Braviary - Sheer Force - Adamant - 252 ATK 252 SPEED Fearow - Sniper - Adamant - 252 ATK 252 SPEED Noctowl - Tinted Lens - Modest - 252 SPATK 252 SPEED Pidgeot (Mega) - Modest - 252 SPATK 252 SPEED Staraptor - Reckless - Adamant - 252 ATK 252 SPEED Charizard (mega X if possible) - Blaze - Adamant - 252 ATK 252 SPEED Charizard (mega Y if possible) - any abi - Modest - 252 SPATK 252 SPEED Dragonite - Any abi - Adamant - 252 ATK 252 SPEED (I don't recommend the special version) Honchkrow - Super Luck - Adamant - 252 ATK 252 SPEED Landorus - Adamant - 252 ATK 252 SPEED Ledi-HHAHAHAHA JUST KIDDING DON'T, or Iron Fist - Adamant - 252 ATK 252 SPEED. If someone records themselves beating a boss by punching it with a Ledian, I will give them a prize. Moltres - Modest - 252 SPATK 252 SPEED Pelipper - Drizzle - Modest - 252 SPATK 252 SPEED Salamance (mega or not) - Adamant - 252 ATK 252 SPEED Pinsir (mega) - Adamant - 252 ATK 252 SPEED Scyther (if you're a gigachad) - Technician - Adamant - 252 ATK 252 SPEED Shaymin Sky - Modest - 252 SPATK 252 SPEED Sigylph - Magic Guard - Bold - 252 DEF 252 HP Thundurus - Modest - 252 SPATK 252 SPEED Togekiss - Modest Super Luck/Serene Grace- 252 SPATK 252 SPEED Unfezant (why in the f...) - Super Luck - Adamant - 252 ATK 252 SPEED Vespiquen - any abi - Impish/Careful - 252 HP, 252 DEF if Impish, 252 SPDEF if Careful Zapdos - Modest - 252 SPATK 252 SPEED Poison Beedrill Mega - Adamant - 252 ATK 252 SPEED Drapion - Battle Armor/Sniper - Adamant - 252 ATK 252 SPEED Gengar - Cursed Body - Modest - 252 SPATK 252 SPEED Muk/Alo Muk - Poison Touch - Adamant - 252 ATK 252 HP Nidoking/Nidoqueen - Sheer Force - Modest - 252 SPATK 252 SPEED Roserade - Technician - Modest - 252 SPATK 252 SPEED Scolipede - any abi (Speed Boost is better) - Adamant - 252 ATK 252 SPEED Seviper - Infiltrator - Rash/Modest - 252 SPATK 252 SPEED Venomoth - Tinted Lens - Modest - 252 SPATK 252 SPEED Venusaur Mega - Relaxed - 252 DEF 252 HP Vileplume - any abi - Modest - 252 SPATK 252 HP Ground Camerupt Mega (not recommended much) - Modest - 252 SPATK 252 HP Diggersby - Huge Power - Adamant - 252 ATK 252 SPEED Donphan - Sturdy - Adamant - 252 ATK 252 HP Excadrill - Mold Breaker - Adamant - 252 ATK 252 HP Dugtrio - any abi - Adamant - 252 ATK 252 SPEED Garchomp - any abi - Adamant - 252 ATK 252 SPEED Golem - Sturdy - Adamant - 252 ATK 252 HP Golurk - No Guard - Adamant - 252 ATK 252 HP Hippowdown - Sand Stream - Adamant - 252 ATK 252 HP Krookodile - any abi - Adamant - 252 ATK 252 SPEED Mamoswine - any abi - Adamant - 252 ATK 252 SPEED Marowak - Battle Armor - Adamant - 252 ATK 252 HP Nidoking/Queen - Sheer Force - Modest - 252 SPATK 252 SPEED Rhyperior - Reckless/Solid Rock - Adamant - 252 ATK 252 HP Steelix Mega - Adamant - 252 ATK 252 HP Swampert/Mega - Adamant - 252 ATK 252 SPEED/HP Rock Aerodactyl/Mega - Rock Head - Adamant - 252 ATK 252 SPEED Aggron - Rock Head - Adamant - 252 ATK 252 HP Mega Aggron - Careful - 252 SPDEF 252 HP Armaldo - Adamant - Battle Armor - 252 ATK 252 SPEED/HP Aurorus - Snow Warning - Modest - 252 SPATK 252 SPEED Barbaracle - Tough Claws/Sniper - Adamant - 252 ATK 252 SPEED/HP Carracosta - Sturdy - Adamant - 252 ATK 252 SPEED/HP Cradily - Storm Drain - Relaxed - 252 DEF 252 HP Crustle - Shell Armor - Adamant - 252 ATK 252 SPEED/HP Diancie Mega - Rash - 252 SPATK 252 SPEED Gigalith - Sand Stream - Adamant- 252 ATK 252 HP Golem Alolan - Galvanise - Adamant - 252 ATK 252 SPEED/HP Kabutops - any abi - Adamant - 252 ATK 252 SPEED Lycanroc - any abi and form - Adamant - 252 ATK 252 SPEED Omastar - any abi - Modest - 252 SPATK 252 SPEED Rampardos - Mold Breaker - Adamant - 252 ATK 252 SPEED Relicanth - Adamant - Rock Head - 252 ATK 252 SPEED/HP Rhyperior - Reckless/Solid Rock - Adamant- 252 ATK 252 HP Sudowoodo - Rock Head - Adamant - 252 ATK 252 HP Tyranitar (mega or not) - Sand Stream - Adamant - 252 ATK 252 SPEED/HP Tyrantrum - Rock Head/Strong Jaw - Adamant - 252 ATK 252 SPEED Bug Accelgor - any abi - Modest - 252 SPATK 252 SPEED Armaldo - Adamant - Battle Armor - 252 ATK 252 SPEED/HP Crustle - Shell Armor - Adamant - 252 ATK 252 SPEED/HP Ariados (DUDE, WHY) - Sniper - Adamant - 252 ATK 252 SPEED Beedrill Mega - Adamant - 252 ATK 252 SPEED Butterfree - Modest - Tinted Lens - 252 SPATK 252 SPEED Escavalier - Adamant - Shell Armor - 252 ATK 252 HP Heracross (mega or not) - Adamant - 252 ATK 252 SPEED Kricketune (NO, JUST NO) - Technician - Adamant - 252 ATK 252 SPEED Leavanny - any abi - Adamant - 252 ATK 252 SPEED Pinsir - Mold Breaker - Adamant - 252 ATK 252 SPEED Pinsir - Mega - Adamant - 252 ATK 252 SPEED Scizor (Mega or not) - Adamant - Technician - 252 ATK 252 SPEED/HP Scyther (if you're a gigachad) - Technician - Adamant - 252 ATK 252 SPEED Shedinja (DON'T RELY ON THIS THING, BUT IT'S GOOD TO CHEESE) - Adamant - 252 ATK 252 SPEED Venomoth - Modest - Tinted Lens - 252 SPATK 252 SPEED Yanmega - Modest - Tinted Lens - 252 SPATK 252 SPEED Volcarona - Any abi - Modest - 252 SPATK 252 SPEED Ghost Golurk - No Guard - Adamant - 252 ATK 252 HP Gengar - Cursed Body - Modest - 252 SPATK 252 SPEED Aegislash - Rash - 252 SPATK 252 SPEED Mega Banette - Adamant - 252 ATK 252 HP Chandelure - Flash Fire/Infiltrator - Modest - 252 SPATK 252 SPEED Dhelmise - Steelworker - Adamant - 252 ATK 252 HP Dusknoir - any abi - Adamant - 252 ATK 252 HP Froslass - any abi - Modest - 252 SPATK 252 HP Marowak Alola - Rock Head - Adamant - 252 ATK 252 SPEED/HP Mimikyu - Adamant - 252 ATK 252 SPEED Rotom (any form) - Modest - 252 SPATK 252 SPEED Spiritomb - Quiet - 252 SPATK 252 HP Trevenant - Adamant - 252 ATK 252 HP Steel Aegislash - Rash - 252 SPATK 252 SPEED Scizor (Mega or not) - Adamant - Technician - 252 ATK 252 SPEED/HP Aggron - Rock Head - Adamant - 252 ATK 252 HP Mega Aggron - Careful - 252 SPDEF 252 HP Excadrill - Mold Breaker - Adamant - 252 ATK 252 HP Steelix Mega - Adamant - 252 ATK 252 HP Lucario (Mega or not) - Adamant - 252 ATK 252 SPEED Lucario (Mega or not) - Modest - 252 SPATK 252 SPEED Metagross (Mega or not) - Clear Body - Adamant - 252 ATK 252 SPEED/HP Bisharp - Defiant - Adamant - 252 ATK 252 SPEED/HP Empoleon - Modest - 252 SPATK 252 HP Magnezone - Modest - Sturdy - 252 SPATK 252 HP Mawile Mega - Adamant - 252 ATK 252 SPEED/HP Heatran - Modest - 252 SPATK 252 SPEED Fire Arcanine - Adamant - 252 ATK 252 SPEED Blaziken mega or not - Speed Boost - Adamant - 252 ATK 252 SPEED Camerupt Mega - Quiet - 252 SPATK 252 HP Chandelure - Modest - 252 SPATK 252 SPEED Chari X - Adamant - 252 SPEED 252 ATK Chari Y - Modest - 252 SPEED 252 SPATK Darmanitan - Adamant - Sheer Force - 252 ATK 252 SPEED Delphox - Modest - Blaze - 252 SPATK 252 SPEED Emboar - Reckless - Adamant - 252 ATK 252 SPEED/HP Flareon - Guts - Adamant - 252 ATK 252 SPEED Houndoom Mega (or not) - Flash Fire - Modest - 252 SPATK 252 SPEED Infernape - Iron Fist - Adamant - 252 ATK 252 SPEED Infernape - Blaze - Modest - 252 SPATK 252 SPEED Magmortar - Modest - 252 SPATK 252 SPEED Marowak Alola - Rock Head - Adamant - 252 ATK 252 SPEED/HP Ninetales - Drought - Modest - 252 SPATK 252 SPEED Rapidash - Adamant - Flash Fire - 252 ATK 252 SPEED Typhlosion - Modest - 252 SPATK 252 SPEED Volcarona - Modest - 252 SPATK 252 SPEED Water Azumarill - Adamant - Huge Power - 252 ATK 252 SPEED/HP Barbaracle - Adamant - Tough Claws - 252 ATK 252 SPEED/HP Blastoise Mega - Modest - 252 SPATK SPEED/HP Carracosta - Adamant - Sturdy - 252 ATK 252 SPEED/HP Clawitzer - Modest - 252 SPATK 252 SPEED/HP Cloyster - Skill Link - 252 ATK 252 SPEED/HP Crawdaunt - Adamant - Adaptability - 252 ATK 252 SPEED/HP Empoleon - Modest - 252 SPATK 252 HP/SPEED Feraligatr - Adamant - Sheer Force - 252 ATK 252 SPEED Gorebyss - Modest - 252 SPATK 252 SPEED Greninja Protean/Battle Bond - Modest or Rash - 252 SPATK 252 SPEED Gyarados Mega - Adamant - 252 ATK 252 SPEED Kabutops - Adamant - 252 ATK 252 SPEED Keldeo - Modest - 252 SPATK 252 SPEED Kingler - any ability (all 3 are amazing for this dude) - Adamant - 252 ATK 252 SPEED/HP Manaphy - Modest - 252 SPATK 252 SPEED/HP Octillery - Modest - Sniper - 252 SPATK 252 HP/SPEED Omastar - Modest - 252 SPATK 252 SPEED Pelipper - Modest - Drizzle - 252 SPATK 252 SPEED Politoed - Modest - Drizzle - 252 SPATK 252 SPEED Sharpedo (mega or not) - Adamant - Speed Boost - 252 ATK 252 SPEED Slowbro Mega - Calm/Sassy - 252 SPDEF 252 HP Slowking - Bold/Relaxed - 252 DEF 252 HP Starmie - Modest - 252 SPATK 252 SPEED Swampert (mega or not) - Adamant - 252 ATK 252 HP/SPEED Wailord - Modest - 252 SPATK 252 SPEED/HP Grass Abomasnow Mega - 252 SPATK 252 HP - Quiet Abomas Mega 2 - 252 ATK 252 HP - Brave Breloom - Technician - 252 ATK 252 SPEED Cacturne - Brave/Adamant - 252 ATK 252 HP Celebi - Modest - 252 SPATK 252 SPEED Chesnaught - Adamant - Bulletproof - 252 ATK 252 SPEED/HP Dhelmise - Adamant - Steelworker - 252 ATK 252 HP Exeggutor - Modest - 252 SPATK 252 HP Alolan Exegg - Modest - 252 SPATK 252 HP Leafeon - Adamant - 252 ATK 252 SPEED Roserade - Technician - Modest - 252 SPATK 252 SPEED Sceptile Mega - Modest - 252 SPATK 252 SPEED Serperior - Modest - Contrary - 252 SPATK 252 SPEED Shaymin Sky - Modest - 252 SPATK 252 SPEED Sunflora - Modest - 252 SPATK 252 HP Torterra - Adamant - Shell Armor - 252 ATK 252 HP Venusaur Mega - Relaxed - 252 DEF 252 HP Electric Ampharos (Mega or not but I recommend Mega) - Modest - 252 SPATK 252 SPEED Elektross - Modest/Quiet (weird af pokemon) - 252 SPATK 252 HP Electivire - Adamant/Naughty - 252 ATK 252 SPEED Golem Alola - Galvanise - Adamant - 252 ATK 252 SPEED Heliolisk - Modest - 252 SPATK 252 SPEED Jolteon - Modest - Volt Absorb - 252 SPATK 252 SPEED Luxray - Adamant - Guts - 252 ATK 252 SPEED Magnezone - Modest - Sturdy - 252 SPATK 252 SPEED Manectric (mega) - Modest - 252 SPATK 252 SPEED Pikachu - Modest - 252 SPATK 252 SPEED Psychic Alakazam (mega or not) - Modest - 252 SPATK 252 SPEED Delphox - Modest - 252 SPATK 252 SPEED Espeon - Modest - 252 SPATK 252 SPEED Exeggutor - Modest - 252 SPATK 252 SPEED Gallade/Mega Gall - Adamant - 252 ATK 252 SPEED Gardevoir / Mega Garde - Modest - 252 SPATK 252 SPEED Jynx - Modest - 252 SPATK 252 SPEED Medicham / Medicham Mega - Pure Power - Adamant - 252 ATK 252 SPEED Metagross / Mega Meta - Clear Body - Adamant - 252 ATK 252 SPEED/HP Reuniclus - Magic Guard - Modest - 252 SPATK 252 HP Slowbro / Mega - Calm/Sassy - 252 SPDEF 252 HP Slowking - Bold/Relaxed - 252 DEF 252 HP Starmie - Modest - 252 SPATK 252 SPEED Ice Abomasnow Mega - Quiet/Brave. Quiet 252 SPATK, Brave 252 ATK, rest 252 HP Aurorus - Modest - Snow Warning - 252 SPATK 252 SPEED Beartic - Adamant - 252 ATK 252 SPEED Cloyster - Adamant - Skill Link - 252 ATK 252 SPEED/HP Glaceon - Modest - 252 SPATK 252 SPEED Glalie Mega - Adamant/Modest/Naughty/Rash - 252 ATK Ada Naughty, 252 SPATK Modest Rash, 252 SPEED rest Jynx - Modest - 252 SPATK 252 SPEED Mamoswine - Adamant - 252 ATK 252 SPEED Vanilluxe - Modest - Snow Warning 252 SPATK 252 SPEED Weavile - Adamant - 252 ATK 252 SPEED Dragon Altaria Mega - Adamant - 252 ATK 252 SPEED Ampharos Mega - Modest - 252 SPATK 252 SPEED Sceptile Mega - Modest - 252 SPATK 252 SPEED Charizard X - Adamant - 252 ATK 252 SPEED Dragonite - Adamant - 252 ATK 252 SPEED Druddigon - Sheer Force - 252 ATK 252 HP Exegg Alola - Modest - 252 SPATK 252 HP Garchomp - Adamant - 252 ATK 252 SPEED Haxorus - Mold Breaker - Adamant - 252 ATK 252 SPEED Goodra - Modest - Sap Sipper - 252 SPATK 252 SPEED Hydreigon - Modest - 252 SPATK 252 SPEED Kommo-o - Modest - Bulletproof - 252 SPATK 252 SPEED Kommo-o - Adamant - Bulletproof - 252 ATK 252 SPEED Salamance - Adamant - 252 ATK 252 SPEED Tyrantrum - Adamant - 252 ATK 252 SPEED Dark Absol Super Luck/Absol Mega - Adamant - 252 ATK 252 SPEED Bisharp - Defiant - Adamant - 252 ATK 252 SPEED Cacturne - Adamant - 252 ATK 252 HP Crawdaunt - Adamant - Adaptability - 252 ATK 252 SPEED/HP Drapion - Adamant - Battle Armor/Sniper - 252 ATK 252 SPEED Greninja / Ash Greninja - Modest - Protean (Gren) - 252 SPATK 252 SPEED Gyara Mega - Adamant - 252 ATK 252 SPEED Honchckrow - Adamant - Super Luck - 252 ATK 252 SPEED Houndoom Mega - Modest - 252 SPATK 252 SPEED Hydreigon - Modest - 252 SPATK 252 SPEED Krookodile - Adamant - 252 ATK 252 SPEED Muk - Alola - Adamant - Poison Touch - 252 ATK 252 HP Pangoro - Adamant - Mold Breaker - 252 ATK 252 SPEED Sharpedo Mega - Adamant - 252 ATK 252 SPEED Spiritomb - Quiet - 252 SPATK 252 HP Weavile - Adamant - 252 ATK 252 SPEED Fairy Altaria - Mega - Adamant - 252 ATK 252 SPEED Azumarill - Huge Power - Adamant - 252 ATK 252 SPEED Clefable - Magic Guard - Bold - 252 DEF 252 HP Diancie Mega - Rash - 252 SPATK 252 SPEED Gardevoir/Mega - Modest - 252 SPATK 252 SPEED Granbull - Adamant - 252 ATK 252 HP/SPEED Mawile Mega - Adamant - 252 ATK 252 SPEED/HP Mimikyu - Adamant - 252 ATK 252 SPEED Sylveon - Pyxilate - Modest - 252 SPATK 252 SPEED/HP Togekiss - Modest - Super Luck/Serene Grace - 252 SPATK 252 SPEED Mini cheese Team (for PvE Quests, but also Bosses) Endeavour + Priority abuse. Too lazy to even think? Do you want to abuse an absurdly stupid and cheap strategy by just spending a few Focus Sash? Alright. The below strategy is used to cheese specific bosses that are giving you a headache or PvE quests that you otherwise cannot beat. Sometimes, these bosses WILL ALLOW YOU TO USE 6 OF THE SAME POKEMON. Train a Lonely/Naughty Rattata, Raticate, Kangaskhan (Inner Focus if the enemy pokemon has flinching moves, Scrappy if they're a Ghost type), Taillow, Swellow (Scrappy if possible) Buneary, Lopunny and Corphish/Crawdaunt. Teach them Endeavor. Then, to Rattata and Raticate, teach them Sucker Punch and Quick Attack. To Kangaskhan, teach it Sucker Punch. To Buneary and Lopunny, teach them Quick Attack. To Crawdaunt, teach it Aqua Jet. To Taillow/Swellow, Quick Attack. Train them 252 ATK 252 SPEED EV (just to make them level up faster), Lonely nature, with trash IV (to faint in a single hit). Equip them a Focus Sash. Use Endeavor, then use a priority move. Free wins! Weaknesses: Endeavor does not work on Ghost Types unless you have the ability Scrappy. Endeavor makes Contact so be careful with Rough Skin/Rocky Helmet/Iron Barbs. Already Built Sample Teams Mega Slowbro and its guide Baton Pass and its guide1 point1 point300k 300k 200k 3.5m 23/30 Huge power Adamant 400k 100k 200k 600k Timid Under 10 ivs HP ICE 600k 800k Impish Rock Head Usable 150k 200k 400k 300k usable 200k 1.5m Adamant H.A. Nice Shiny 2.5m HP ICE 400k 300k modest 200k Modest 950k 400k 600k 400k Offers only 180k Offers only 800k can be used can tank with sun setter Exclusive offer only Exclusive offer only 400k Huge Power 800k Exclusive 300k 500k shiny false swiper Impish and dry skin 400k 200k offer 8m 3m offer jolly h.a. 300k offer 2.5m 550k ss 1m False swiper dry skin 150k 50k 600k 1.5m 1.8m Sold
.png.01bbccfa822c8c6342ddfd5938949f6b.png)
.png.0636489882a089deae544c7989270b20.png)
.png.aa35c01fed400bb636ddd4991c248298.png)
.png.2121ef79d4e530ea69f2bdf4a12ce905.png)
.png.53c37c80ddcbb10a8a8635b603914910.png)
.png.70b59e30e18da162aa3dd01ad2c5f524.png)
.png.80323cba50f71cb6f93b2cb74f54f4cb.png)
.png.6b7ee809fcd5688b2a54c085a40d4c5f.png)
.png.1e5e07ee98e86dcc882303311bacb6f7.png)
.png.823fcb11c8e6ead98d3efb3ed9a4ea48.png)
.png.fc02decb3b719ee1f1b90e75b4812c03.png)
.png.18cd3252733910ee181ebabfffda5ad3.png)
.png.4ebffcc12775aca7fd45bef00b1729ca.png)
.png.75a0599b9cb8b2bc39c7feaf1de08c44.png)
.png.ae5487383bb7a1c770bc689e6ef4323a.png)
.png.5b2e8becd1f50b326c3a969141769e5f.png)
.png.7f43ac7f49b0282c61ab0bc8812d19dc.png)
.png.613076c260095c1a646be8212430729c.png)
.png.d4dd2d9ba68dfdc3a5f06930d38b805e.png)
.png.9dc894f07d48cc410c1a93faaf6ce5c7.png)
.png.1ac9fecadefbec4612eb9561eecaf322.png)
.png.839727c0803df68a7679f2a219b8f763.png)
.png.73dcf8493d2c92a383163173bba1dd2f.png)
.png.cbcf96b21dc6d3bf6c71ab338fd841b8.png)
.png.82c395a2e4d390f600e5d1cd6f6f2408.png)
.png.e72a5437ba08667edcaab1a7968f9b23.png)
.png.112a9a495f90fc4c3fcf896e60b9b467.png)
.png.e1e669da35cfe26c1d258dc5e870cb5a.png)
.png.6383bfa6854f8a5da356f82b5764c69f.png)
.png.7f8eafe1c2d7a212da0684ea88ff39fd.png)
.png.1c4ba9ef3df2971ee97e2f46e719d221.png)
.png.a45e338e45921a770f9e47708db09535.png)
.png.6d5f1ce8861dab69848e947826b43089.png)
.png.0933ced0ff928011ce70298797806528.png)
.png.11f730fc5bfc3022361e3423ae59cf73.png)
.png.61b9b511856f9f4ef7dce690ff0ab78f.png)
.png.846abc069bc86351defb29ece719e9d6.png)
.png.1256e49b3166cafefb5541f2b842a271.png)
.png.1fb81c921a8490fc0457731b5b7a1fc0.png)
.png.09e34ff832e1361ccd914061bfbaea3a.png)
.png.1658f2d06d649e3718e090d6b4e0826d.png)
.png.472bf37a3d46d8bc072a06b81a5a06c7.png)
.png.1c9b659983bce2a62cd99f8dc82b4932.png)
.png.52d57e5678c6a38e65dec8e343226cb2.png)
.png.0faa1e88c2317e4d0ca81260de10e369.png)
.png.ca580fdef807e84eff45ffbd7fa99757.png)
.png.d6ecff52a32161c65f52e621128634e5.png)
.png.4a788823113afaf3d8657bff965bda48.png)
.png.89d02ae6d765f7bd2730ad5de0396385.png)
.png.217c6c47e8b024bf2fa01a27deae33a4.png)
.png.22a49232e87e02b4b7bfebde8c3796fe.png)
.png.14097192f5cbc2658b2c980ee3a85964.png)
.png.e0e092ee1d7812c3320e42f7c95da9af.png)
.png.95c19d842a9626a8f201ed7c4011b649.png)
.png.b5898b34213508313bdb671e597f69af.png)
.png.02844c4f7097ce72732b649ad65c8a90.png)
.png.ae23c1352448691211d664daab4d2278.png)
.png.a48bb30410618a1950573e2af96ddeef.png)
.png.57c47866c8d67a637ac09121b7487602.png)
.png.8ecdef149960ddeb25dba06d0efdf1f4.png)
.png.69ae090c2d2689dd3461e00bc55f0105.png)
.png.a195ec64a20997f51dc6d7e095bd0eb2.png)
.png.2e1b8c9af31c78cdfccac6387412f7c9.png)
.png.45176eba46d07065d56691e7888d2812.png)
.png.9b6a42d9a82598f51ad3b70d6278ff34.png)
.png.c6d88db7af55bf708c66fc544c0be556.png)
.png.455f011f644e36962e2f7e9cef21e2ce.png)
.png.dfd745b73f13a19cf45ed4d3ab9e7247.png)
.png.36e21961ef0c40f0f04547cc0c7297c4.png)
.png.12304f73fd51f462d027e0de458ab2d5.png)
.png.a70e2dbfcf45ca09f8495d12972bdad5.png) 1 point1 pointStart Price : 12.5m Insta : 20m Min bid : 200k Auction will last 5 days from when the start offer is met. Discord : Mariano504#4284 In Game: Mariano504 Accept rellors: 700k iv / 350k nature.
1 point1 pointStart Price : 12.5m Insta : 20m Min bid : 200k Auction will last 5 days from when the start offer is met. Discord : Mariano504#4284 In Game: Mariano504 Accept rellors: 700k iv / 350k nature.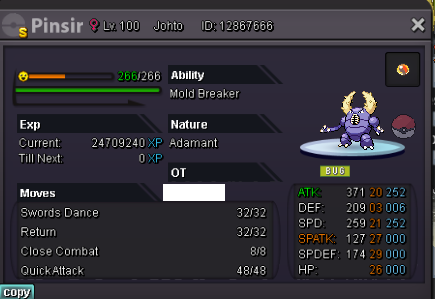
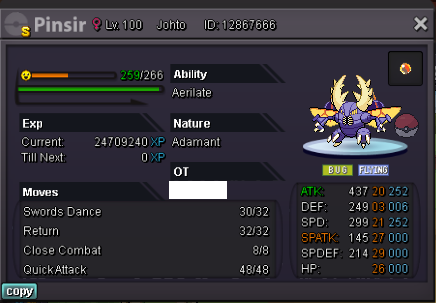 1 point1 point1 pointC.O.-750k by Mechiamoveprego Min bid-50k Insta-1m Ends- 10:13 am 11/06/22 IST Accept CC(400k),Cash,Nature Reroll(350k) & IV RR(700k) Good luck to everyone involved!
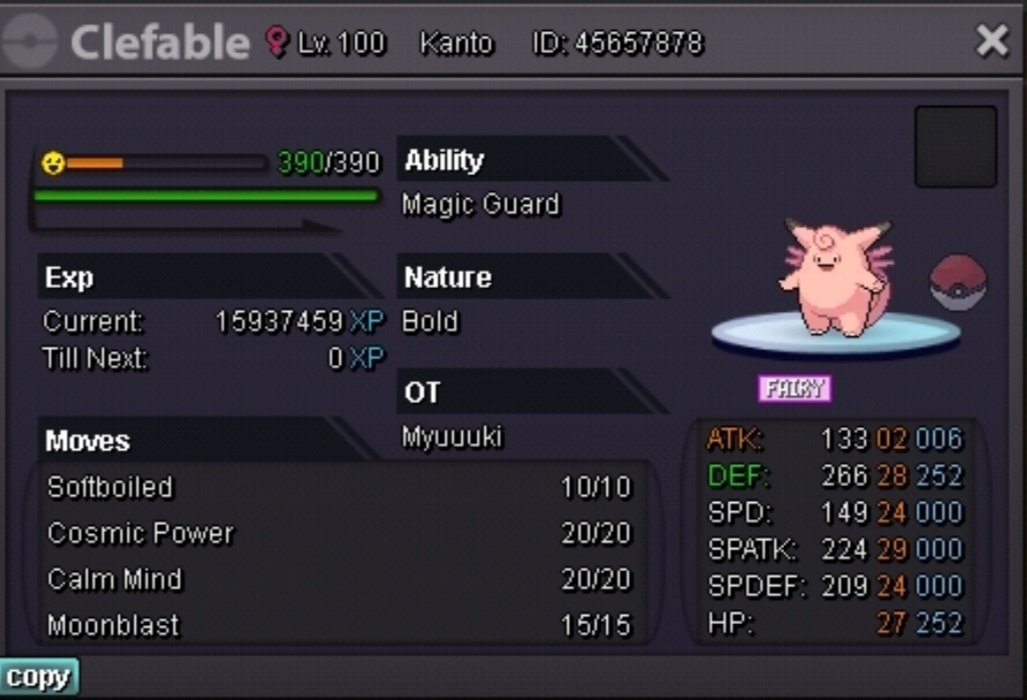 1 point1 point1 pointAs you can see in the image below, everything else aside from Abra and Kadabra spawns between levels 12 and 14, while Abra and Kadabra spawn between levels 15 and 17. So using anything between 15 and 17 will guarantee that every spawn you get will be either Abra or Kadabra. However, keep in mind that using the repel trick does not affect how often you’ll find the Pokémon you’re looking for.
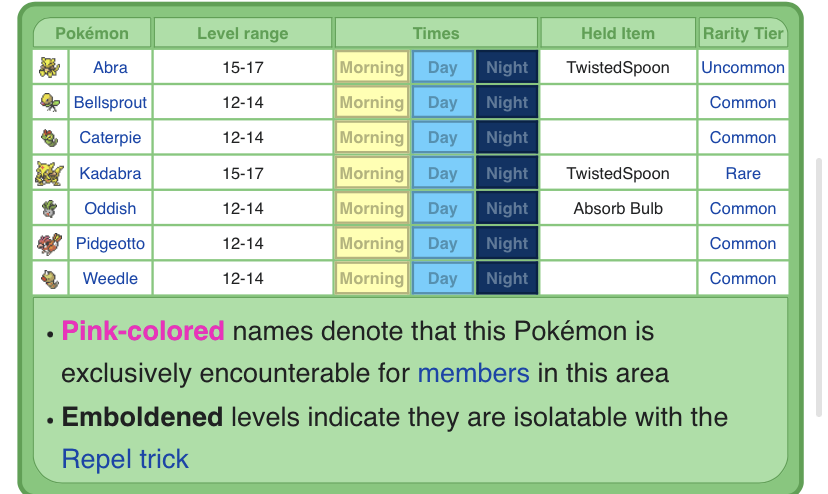 1 point1 pointEyo im selling this rat 2days auction so 1m insta 2.5m min bid 200k accept: cc= 390k rr= 700k
 1 point1 point1 point1 point1 point1 point1 point1 pointIt's the right time now, so, I'd like to invite @Ehkoe/ @MBK / @Manbat or other respective available Trade Mods, pls offer your help on this case at your earliest convenience @Leviousa was clearly not understand the Auction Rules enough to announce the result in such a rush. Please do explain him the reason and more importantly, force the trade to the rightful winner, myself. Best regards, Mingrenpro1 point1 point1 point1 point1 point1 pointHello @Pinkfreud. My apologies for the late response. As mentioned above, spawns were added by our Spawn Editor Kvar in April, 2022. Since it is a relatively recent addition, it is understandable that the wiki was not updated reflectively. However, I have updated the Munchlax Resort page now to include the spawns. If you have any more questions, please let me know.1 point1 point1 point1 point1 point1 point1 point1 point1 pointHello, I have forced this trade due to yall not being able to meet up ingame and do the trade. You will see the Easter Volcarona in your last slot of your pc @Alikhan111 with 1.1m deducted from your account. @alfatrion1980s you will see 1.1m added to your account and the Easter Volcarona gone from your pc. If there are any issues please flag the thread using the Report button. Best Regards, MBK1 pointAs I told you already, if you transfer back to silver, your Zapdos can be restored with no issues. No need to release the Zapdos on Gold.1 pointThe scizor you mentioned (with 3 HP) was lended to the user Clashking1 point1 pointSmall VR changes: Garchomp: A+ → A Breloom: B+ → B Cofagrigus: C- → C The reasons for these changes were mentioned in the #top25-pvp-chat channel of the PRO Discord server on June 8, 2022. I recommend reading them if you are curious about them. There was also some discussion about Landorus-T, Amoonguss, and Starmie. For now, they all remain in their respective tiers (S, B+, and B-). However, while I generally agree with their current placements, I haven't fully made up my mind one way or the other and would like to see them being discussed further. Kyurem-B is still a recent addition and more time is needed before ranking it. Feel free to discuss that one as well. Edit: Kyurem-B has been tentatively added to A- on August 17, 2022.1 point1 point1 point1 point1 point1 point1 pointCeladon City Daily Quest Content 1. About 2. Steps 3. How to calculate IVs easily? 4. Rewards 5. Special Rewards 1. About 2. Steps How to check total IVs easily? Rewards Rewards are random between these items. Some rewards are still unknown ; in case you get a new reward let me know in this thread or my discord ( JustIce#6079). Special Rewards
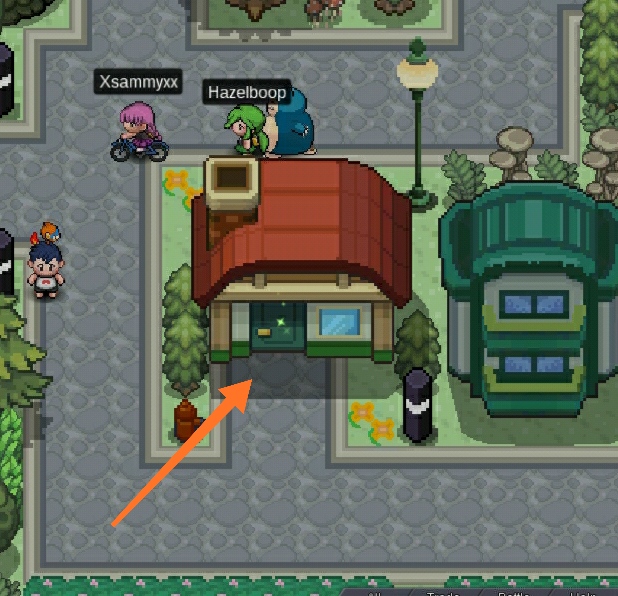
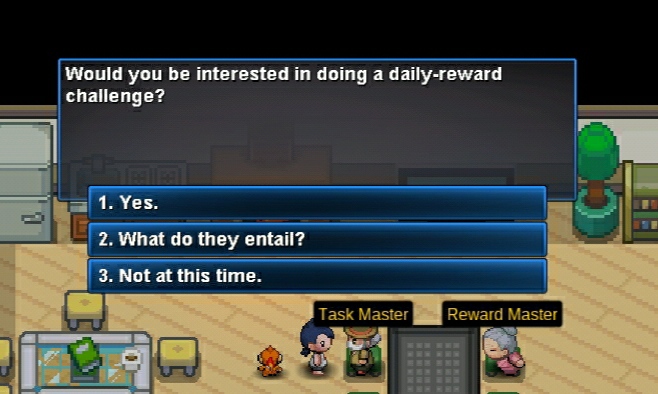
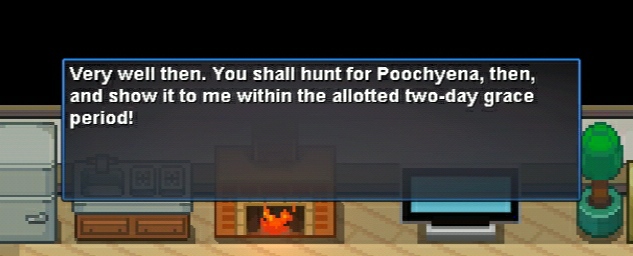

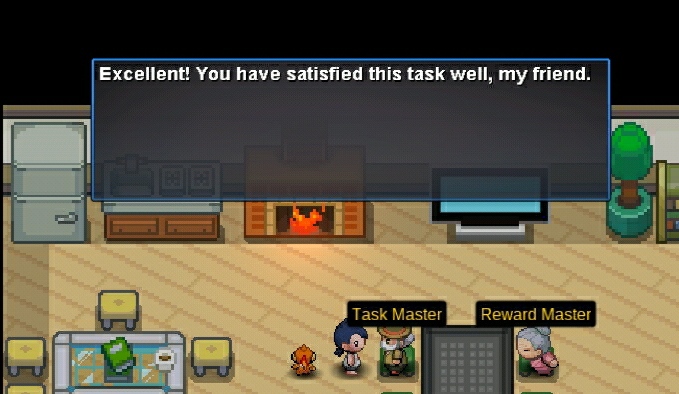


 1 point1 pointHey fellow PvP players, In this thread I will explain how we enforce this rule, what counts towards it and why it is important to cooperate with us here. I made the mistake and not thoroughly wrote down procedures, limitations and explanations for the community which resulted in some unfair bans that will be fixed as soon as possible, so count this thread as an apology for our mess as well. This type of stuff shouldn't happen, will not happen again and I take full responsibility for it. The current rule that forbids any type of boosting. What counts towards this rule?: Playing against any accounts you have access to If Bob has the password of Billy and Bob matches against Billy in ranked PvP, you may risk of being flagged as boosting players. The best advice we can give here is that you do not share accounts to avoid any confusion here. Did Billy actually play or was it Bob controlling both accounts. Those are questions we have to answer. Playing against your own alternate accounts If Tom owns the accounts Tom123 & Tom321 and matches against himself in ranked PvP, he will be banned for boosting. Playing on an account you do not rightfully own Jake gave his account to Bob so he can play ranked PvP on it and Bob starts playing in ranked with Jake's account, you will be banned for boosting. Please avoid at any cost playing on someone elses account in ranked PvP unless you have full control over it (E-Mail is yours, you are the only one having access to the account and the original owner does not return) Disconnecting on purpose and receiving payments for it Bob matches against Tom, Tom messages Bob & asks him if he could disconnect or let him win for 50k$. Bob should report Tom however if he accepts this payment both players will be banned for boosting. Disconnecting repeatedly against the same players Billy always disconnects against Jake because he thinks he is the superior player. This might get you flagged as boosting if done multiple times as you are supposed to play out all matches. We can see the difference between server crashes, a user with bad internet or someone boosting. Disconnecting against Guild members on purpose or due to "Queue/Game" guild rules Bob, Tom and Jake are in the same guild [ExamplePlayers]. Tom matches against Jake in ranked PvP and Jake disconnects during team-preview. If done multiple times you may get flagged as boosters. Jake writes in his guild chat or in a matchmaking chat on their discord that he is in the queue. Jake: queue Bob always forgets to write in that chat and matches against Jake. Jake is annoyed and tells Bob to disconnect because he broke the "queue/game" guild rules. This may get you flagged as boosting as well, as you are supposed to play out all matches. Playing against another player under the same network/connection. Unfortunately staff is unable to verify and confirm if someone is really living with other people, making therefore impossible for us to see if it's one single persone with two different account or two different people. Reason we can't do that is simply that we don't live with you, it's not a problem of our tools. As the last thing always gets broken and causes a lot of confusion we made an announcement regarding it: If you have any further questions please write them down below and I try to answer all of them to the best of my ability. Kind regards. Credits to Qeight
 1 point